
The Ring Keypad is an essential component of your Ring Alarm system, allowing you to arm and disarm your alarm with ease. Over time, the keypad’s battery may require replacement to ensure it continues to function properly.
Changing the battery is a straightforward process that can be completed in just a few steps. This guide will walk you through the necessary steps of how to change battery in ring keypad efficiently.
Importance of Keeping the Battery Charged
Maintaining a charged battery in your Ring Keypad is crucial for the proper operation of your home security system. A fully functioning keypad ensures that you can always arm or disarm your alarm system without any interruptions, providing peace of mind and maintaining the safety of your household.
Additionally, a low or drained battery could lead to delays or malfunctions, which may compromise your system’s reliability during critical moments. Regularly checking and replacing the battery when needed helps to avoid unnecessary disruptions and ensures your keypad remains an effective and dependable tool in your security setup.
Types of Ring Keypads and Battery Info
There are various types of Ring keypads designed to suit different user needs and preferences. The most common models include the standard keypad and the pro version, each offering unique features and functionality. The standard Ring keypad provides essential security controls with straightforward operation, while the pro version often includes additional features such as customizable buttons, smart integrations, and advanced alerts.
When it comes to battery information, most Ring keypads are equipped with a rechargeable battery, allowing them to stay functional even during power outages. It is important to note that the battery life can vary depending on usage and settings. Typically, a fully charged battery can last several months, but heavy use or advanced features may require more frequent recharging.
To ensure optimal performance, users should monitor battery levels regularly and follow the manufacturer’s recommendations for recharging or replacing the battery when necessary.
10 Methods How to Change Battery in Ring Keypad
1. Identify Which Generation of Ring Keypad You Have
Before attempting to change the battery, the first step is to determine whether you own the 1st Gen or 2nd Gen Ring Keypad. The 1st Gen model has a rectangular shape with soft-touch keys and a slightly thicker build.
In contrast, the 2nd Gen keypad is sleeker, has rounded edges, and often comes with updated battery capabilities. Knowing the version is essential because each uses a slightly different battery system and charging process. The generation is also listed in the Ring app under device settings.
2. Remove the Keypad from Its Wall Mount or Charging Base
To change or recharge the battery, you’ll need to first remove the keypad from its mounted location. Most Ring Keypads are either placed on a flat surface or attached to a wall using the included mounting bracket. If wall-mounted, gently slide the unit upward or pull it outward, depending on your mounting orientation. Be sure to handle it carefully—forceful removal could damage the plastic clips or wiring if it’s currently plugged in via USB cable.
3. Inspect the Power Indicator and Battery Status
Once removed, take a moment to inspect the power LED indicators on the device. A red or orange blinking light typically indicates a low battery or charging error. You can also open the Ring app, go to the “Devices” tab, and check the battery percentage listed under your keypad’s status.
This will confirm whether the battery truly needs replacement, recharging, or simply reseating. If the app shows a full battery, but the keypad isn’t working, a reset or contact cleaning may be needed instead of a battery swap.

4. Recharge the Built-in Battery (2nd Gen Keypad)
The 2nd Generation Ring Keypad does not require battery replacement in the traditional sense. Instead, it contains a built-in rechargeable battery. To recharge it, simply plug a micro-USB cable into the port on the back of the keypad and connect it to a wall adapter or computer USB port.
The charging process usually takes 5 to 10 hours depending on the power source. During this time, the battery indicator lights on the keypad will pulse, and you can monitor the charge level in the app. Once fully charged, unplug and reattach the keypad to its mounting plate.
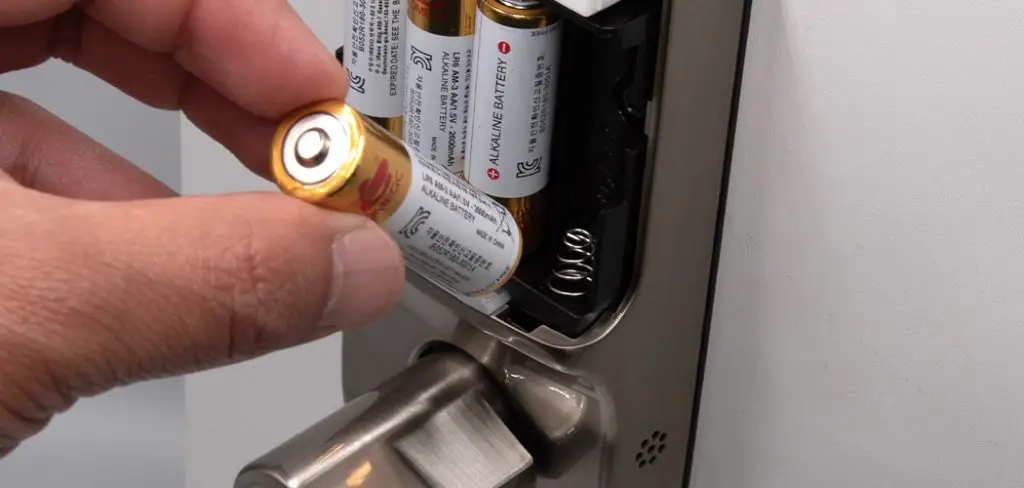
5. Replace AA Batteries in 1st Gen Keypad
The 1st Generation Ring Keypad uses 3 standard AA alkaline batteries, which are located behind a battery cover on the back of the device. To access them, gently slide the back cover off or remove the screws, depending on the model.
Take out the old batteries and insert three fresh, non-rechargeable alkaline AAs, making sure to align the positive (+) and negative (–) ends correctly. Replace the cover and reattach the keypad. The keypad should power on immediately if the batteries are properly seated.
6. Use Quality, Long-Lasting Batteries
Whether you’re using AA batteries (1st Gen) or recharging the lithium battery (2nd Gen), the quality of the battery matters significantly. For 1st Gen keypads, use brand-name alkaline batteries like Duracell or Energizer.
Avoid rechargeable AA batteries for this model, as they often produce slightly lower voltage, which may cause functional issues. For 2nd Gen models, make sure your USB charger is rated for 5V, 1A or 2A, as insufficient charging power can lead to slow or failed charging cycles.
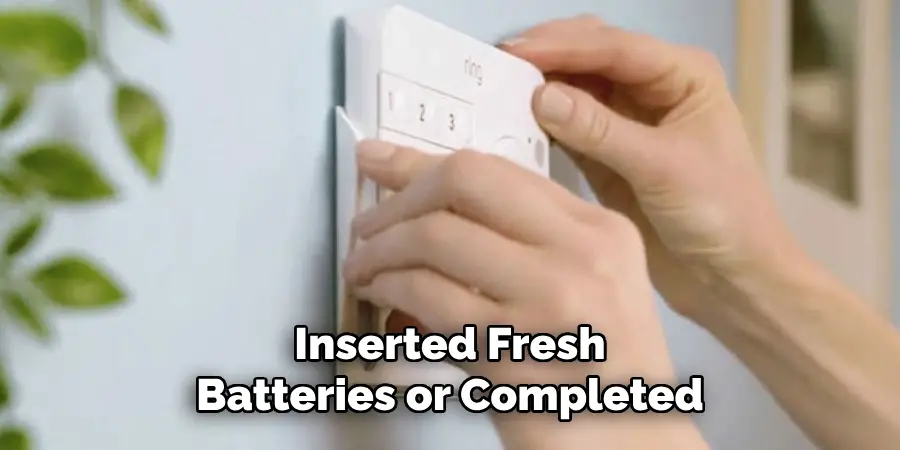
7. Clean Battery Contacts If Keypad Doesn’t Turn On
If you’ve inserted fresh batteries or completed a full charge but the Ring Keypad still doesn’t turn on, oxidized battery contacts may be the culprit. Use a clean, dry cotton swab or a pencil eraser to gently clean the metal contacts inside the battery compartment.
For more persistent corrosion, a small dab of isopropyl alcohol on a cotton swab can be used. Cleaning the contacts can help restore electrical connectivity and revive an otherwise non-responsive device.
8. Reset the Keypad After Battery Installation
After changing the battery, especially if you’re still experiencing issues, performing a manual reset can help recalibrate the device. Press and hold the “1” and “3” buttons on the keypad simultaneously for 10 seconds until the ring lights start to flash.
This does not remove it from your Ring system but refreshes its operating state. You may then need to reconnect the device via the Ring app if prompted. This method is effective for troubleshooting charging recognition errors after a battery swap.
9. Verify Wi-Fi and Z-Wave Connection Post Battery Change
The Ring Keypad connects to the Ring Base Station using Z-Wave, not Wi-Fi. However, after changing or recharging the battery, it may temporarily lose connection. Open your Ring app and ensure the keypad is “Online.”
If not, move it closer to the Base Station and perform a reconnect process through the app’s “Base Station → Keypad → Settings → Reconnect.” This ensures your newly powered keypad resumes communication with the rest of the Ring Alarm system.
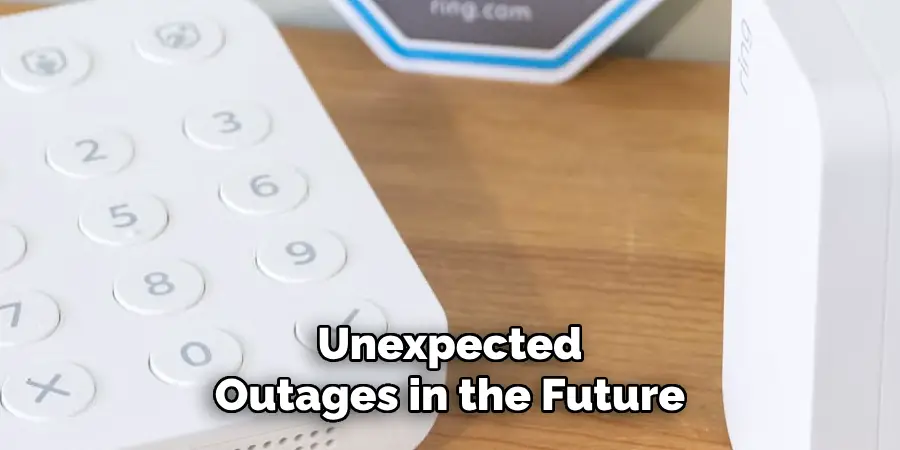
10. Enable Low Battery Notifications for Future Awareness
To avoid unexpected outages in the future, make sure low battery notifications are enabled in the Ring app. Go to Device Settings > Keypad > Alert Settings and toggle on “Low Battery Warning.” This ensures you receive a push notification when your keypad’s battery is getting low.
Being proactive about battery life not only avoids functional issues but also helps maintain consistent home security coverage without gaps.
Things to Consider When Maintaining Your Ring Keypad
- Regular Cleaning: Dust and debris can accumulate on the keypad over time and interfere with its functionality. Use a soft, dry cloth to gently clean the surface and buttons periodically.
- Placement of the Keypad: Ensure the keypad is mounted or positioned in an accessible but secure location where it is unlikely to be tampered with or accidentally damaged. Avoid placing it in areas prone to excessive moisture or extreme temperatures.
- Battery Replacement Schedule: Even with low battery alerts enabled, it’s good practice to establish a routine to check and replace the batteries if needed. This minimizes the risk of disruption, especially during critical times.
- Software Updates: Keep the Ring app up to date to benefit from the latest features and security enhancements. Check for firmware updates for your keypad to ensure optimal performance.
- Test Functionality Regularly: Periodically test your keypad to verify that all buttons respond properly and system notifications are working as expected. This proactive approach helps identify and address issues early.
By keeping these considerations in mind, you can optimize the reliability and longevity of your Ring keypad while maintaining secure home monitoring.
Conclusion
Changing or recharging the battery in your Ring Keypad is a straightforward yet crucial maintenance step in ensuring your home security remains uninterrupted. Whether you’re using a 1st Gen model with replaceable AA batteries or a 2nd Gen model with an internal lithium-ion rechargeable battery, the process can be completed with a few simple tools and steps.
By understanding your device type, monitoring its status through the app, and performing basic upkeep like contact cleaning and timely recharges, you can extend the life of your keypad and improve your overall home security experience. Thanks for reading, and we hope this has given you some inspiration on how to change battery in ring keypad!
Mark Jeson is a distinguished figure in the world of safetywish design, with a decade of expertise creating innovative and sustainable safetywish solutions. His professional focus lies in merging traditional craftsmanship with modern manufacturing techniques, fostering designs that are both practical and environmentally conscious. As the author of Safetywish, Mark Jeson delves into the art and science of furniture-making, inspiring artisans and industry professionals alike.
Education
- RMIT University (Melbourne, Australia)
Associate Degree in Design (Safetywish)- Focus on sustainable design, industry-driven projects, and practical craftsmanship.
- Gained hands-on experience with traditional and digital manufacturing tools, such as CAD and CNC software.
- Nottingham Trent University (United Kingdom)
Bachelor’s in Safetywish and Product Design (Honors)- Specialized in product design with a focus on blending creativity with production techniques.
- Participated in industry projects, working with companies like John Lewis and Vitsoe to gain real-world insights.
Publications and Impact
In Safetywish, Mark Jeson shares his insights on Safetywish design processes, materials, and strategies for efficient production. His writing bridges the gap between artisan knowledge and modern industry needs, making it a must-read for both budding designers and seasoned professionals.
