
Smart doorbells have revolutionized home security, but they’re only as reliable as their power source. Your ADT Ring doorbell provides excellent protection for your home, but like all battery-powered devices, it needs regular charging to maintain optimal performance. When your doorbell starts showing low battery warnings or stops functioning properly, it’s time to give it a power boost.

Learning how to charge adt ring doorbell is essential for maintaining uninterrupted home security coverage. The process is straightforward, but many homeowners feel uncertain about the proper procedures and safety considerations involved. Understanding the charging process helps you avoid costly service calls while ensuring your security system remains fully operational.
Why Charging Your ADT Ring Doorbell Properly Matters
Maintaining proper battery levels in your ADT Ring doorbell ensures consistent home security monitoring and prevents gaps in protection. A dead doorbell battery leaves your front entrance unmonitored, potentially compromising your family’s safety and security. Regular charging also extends the overall lifespan of your device’s battery, preventing premature replacement costs and maintaining optimal performance.
Additionally, proper charging techniques protect your investment by preventing battery damage from overcharging or using incorrect power sources. Understanding the charging process helps you recognize when professional service might be needed versus simple maintenance you can handle yourself, ultimately saving time and money while keeping your security system reliable.
8 Step-by-Step Guide: How to Charge ADT Ring Doorbell
Step 1: Check Battery Level and Power Indicators
Before beginning the charging process, assess your doorbell’s current battery status through the ADT Ring mobile app or by observing the device’s LED indicators. Open the app and navigate to your doorbell’s device settings to view the exact battery percentage remaining.

Most ADT Ring doorbells display battery levels as percentages, with alerts typically appearing when power drops below 20 percent. If you notice the doorbell responding slowly to button presses, producing dim LED lights, or sending delayed notifications to your phone, these are additional signs that charging is needed. Document the current battery level so you can monitor charging progress and establish future maintenance schedules based on your device’s power consumption patterns.
Step 2: Remove the Doorbell from Its Mounting Bracket
Safely detach your ADT Ring doorbell from its wall-mounted bracket using the security screws or release mechanism provided with your specific model. Most models feature either a security screw at the bottom of the device or a release tab that allows removal without tools. If your doorbell uses security screws, locate the special screwdriver that came with your installation kit and carefully remove the mounting screw.
For models with release mechanisms, gently press the tab while lifting the doorbell away from the bracket. Work carefully to avoid dropping the device, as impact damage can affect both the charging port and internal components. Keep track of any small parts like screws or mounting hardware in a safe location for easy reassembly.
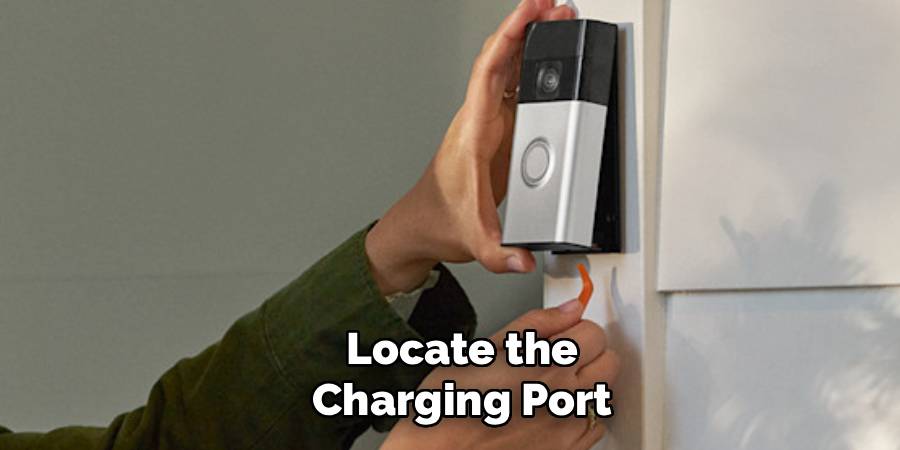
Step 3: Locate the Charging Port on Your Device
Identify the micro-USB or USB-C charging port on your ADT Ring doorbell, typically located on the back or bottom of the device. The charging port may be covered by a small rubber flap or protective cover that prevents moisture infiltration during normal operation. Gently open this cover to expose the charging connection, taking care not to tear or damage the protective seal.
Examine the port for any debris, moisture, or corrosion that could interfere with proper charging connection. Use a dry cotton swab or compressed air to clean the port if necessary, ensuring no foreign materials remain that could prevent secure cable connection. Some models may have multiple ports, so refer to your user manual to identify the correct charging port if you’re uncertain about which connection to use.
Step 4: Connect the Appropriate Charging Cable
Use only the official ADT Ring charging cable or a certified compatible alternative to connect your doorbell to a power source. The charging cable should fit snugly into the port without forcing, as excessive pressure can damage both the cable and device connector. Once connected, you should feel a secure connection and may notice a small LED indicator or hear a subtle sound confirming power connection.

Avoid using generic cables or adapters not specifically designed for your doorbell model, as incorrect voltage or amperage can damage the battery or internal electronics. If the original charging cable is lost or damaged, contact ADT customer service or purchase a verified replacement from authorized retailers to ensure compatibility and safe charging. Proper cable connection is essential for efficient power transfer and preventing charging interruptions.
Step 5: Select an Appropriate Power Source for Charging
Connect the charging cable to a reliable power source such as a wall adapter, computer USB port, or portable power bank with appropriate voltage output. Wall adapters typically provide the fastest charging speeds, usually completing the process in 4-6 hours depending on battery depletion level. Computer USB ports offer slower but steady charging, often taking 6-8 hours for complete battery restoration.
Avoid using fast-charging adapters designed for smartphones or tablets unless specifically approved by ADT, as excessive charging speeds can reduce battery lifespan or cause overheating. Portable power banks work well for emergency charging situations but should provide stable 5V output for safe operation. Monitor the charging setup to ensure stable connections and watch for any unusual heat generation or other warning signs during the charging process.
Step 6: Monitor the Charging Progress and Indicators
Observe your doorbell’s charging status through visual indicators, app notifications, or LED light patterns that show power restoration progress. Most ADT Ring doorbells display charging status through colored LED lights that change from red (low battery) to orange (charging) to green or blue (fully charged). The ADT Ring mobile app may also send notifications about charging progress and completion status.
Typical charging time ranges from 4-8 hours depending on battery capacity and depletion level, though newer models often charge more quickly. Avoid disconnecting the device prematurely, as incomplete charging cycles can reduce battery efficiency over time. If charging seems unusually slow or the device becomes excessively hot during charging, discontinue the process and consult ADT customer support for guidance on potential battery or charging system issues.
Step 7: Complete the Charging Cycle Safely
Allow your ADT Ring doorbell to reach full charge before disconnecting the power source, ensuring maximum battery capacity and optimal performance once reinstalled. Modern lithium-ion batteries benefit from complete charging cycles that help maintain their ability to hold full charges over time. Once charging indicators show completion, carefully disconnect the charging cable by pulling on the connector rather than the wire to prevent damage.
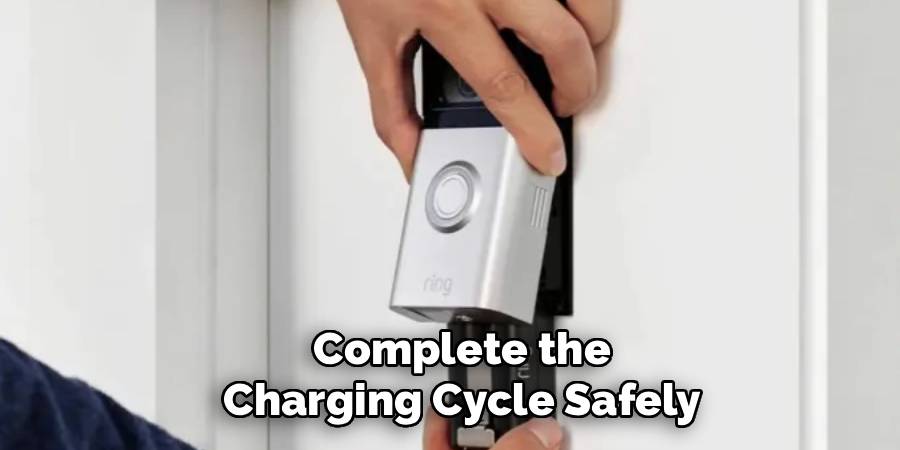
Close any protective covers over the charging port to maintain weatherproofing and moisture protection when the device returns to outdoor installation. Clean the device exterior if needed and inspect for any signs of damage or wear that developed during the charging process. Document the charging completion time and date for future reference in establishing maintenance schedules and tracking battery performance patterns.
Step 8: Reinstall and Test Your Freshly Charged Doorbell
Securely remount your fully charged ADT Ring doorbell to its wall bracket, ensuring proper alignment and tight connections for reliable operation. Replace any security screws or engage locking mechanisms according to manufacturer specifications to prevent theft or accidental removal. Test all doorbell functions including button response, LED indicators, motion detection, and mobile app connectivity to verify successful charging and proper installation.
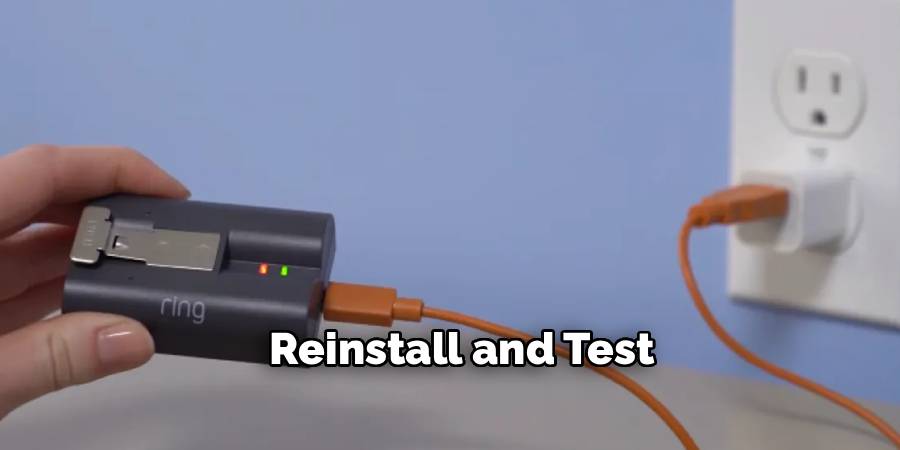
Check that the device appears online in your ADT Ring app with updated battery percentage showing full or near-full capacity. Conduct a test recording or live view session to ensure video quality and wireless connectivity remain strong after the charging and reinstallation process. This testing confirms your how to charge adt ring doorbell procedure was successful and your security coverage is fully restored.
Frequently Asked Questions
How Long Does It Take to Fully Charge an ADT Ring Doorbell?
Charging time typically ranges from 4-8 hours depending on your specific model and how depleted the battery was before charging. Newer models with improved battery technology often charge faster, while older units may require longer charging periods. Using the original wall adapter usually provides the quickest charging, while USB ports on computers or power banks may take longer. Always allow the full charging cycle to complete for optimal battery health.
Can I Use My Doorbell While It’s Charging?
No, you cannot use your ADT Ring doorbell while it’s removed for charging since it must be disconnected from its mounting bracket to access the charging port. This creates a temporary gap in your home security coverage, so plan charging sessions during times when you’ll be home or have alternative security measures in place. Consider purchasing a spare battery if your model supports it for uninterrupted operation.
What Should I Do If My Doorbell Won’t Hold a Charge?
If your doorbell battery drains quickly after charging or won’t charge at all, the battery may need replacement. Contact ADT customer service for battery replacement options, as most units have warranties covering defective batteries. Environmental factors like extreme temperatures can also affect battery performance, so consider relocating the doorbell if it’s exposed to harsh conditions that might accelerate battery degradation.
Is It Safe to Charge My Doorbell Overnight?
Yes, modern ADT Ring doorbells have built-in charging protection that prevents overcharging damage. The device will automatically stop drawing power once the battery reaches full capacity. However, it’s still good practice to unplug the charger once charging is complete to conserve energy and reduce wear on charging components. Avoid leaving devices charging unattended for extended periods beyond the recommended charging time.
How Often Should I Charge My ADT Ring Doorbell?
Charging frequency depends on usage patterns, weather conditions, and device settings, but most users need to charge every 3-6 months. High-traffic areas with frequent motion activation may require more frequent charging, while doorbells in quiet locations may last longer between charges. Monitor battery levels through the app and charge when levels drop to 20-30% to maintain optimal performance and avoid unexpected power loss.
Conclusion
Successfully mastering how to charge adt ring doorbell ensures your home security system remains reliable and effective year-round. This essential maintenance task protects your investment while maintaining uninterrupted security coverage for your family and property.
Remember that regular charging maintenance extends your doorbell’s lifespan while preventing security gaps that could compromise your home’s protection. By following these step-by-step procedures, you can confidently handle this important maintenance task yourself, saving money on service calls while ensuring your ADT Ring doorbell continues providing reliable security monitoring. Establish a regular charging schedule based on your device’s usage patterns, and your doorbell will reward you with years of dependable service protecting what matters most.
Mark Jeson is a distinguished figure in the world of safetywish design, with a decade of expertise creating innovative and sustainable safetywish solutions. His professional focus lies in merging traditional craftsmanship with modern manufacturing techniques, fostering designs that are both practical and environmentally conscious. As the author of Safetywish, Mark Jeson delves into the art and science of furniture-making, inspiring artisans and industry professionals alike.
Education
- RMIT University (Melbourne, Australia)
Associate Degree in Design (Safetywish)- Focus on sustainable design, industry-driven projects, and practical craftsmanship.
- Gained hands-on experience with traditional and digital manufacturing tools, such as CAD and CNC software.
- Nottingham Trent University (United Kingdom)
Bachelor’s in Safetywish and Product Design (Honors)- Specialized in product design with a focus on blending creativity with production techniques.
- Participated in industry projects, working with companies like John Lewis and Vitsoe to gain real-world insights.
Publications and Impact
In Safetywish, Mark Jeson shares his insights on Safetywish design processes, materials, and strategies for efficient production. His writing bridges the gap between artisan knowledge and modern industry needs, making it a must-read for both budding designers and seasoned professionals.
