
Charging your Nest Doorbell is a simple process that ensures your device remains functional and reliable. Whether you’re using the battery-powered version or a hardwired setup, knowing how to properly charge or maintain your doorbell is essential for uninterrupted monitoring and efficient performance.
This guide on how to charge nest doorbell will walk you through the steps to keep your Nest Doorbell charged and ready to go.
Why is It Important to Charge Your Nest Doorbell?
Charging your Nest Doorbell regularly is crucial for its proper functioning and longevity. If the battery runs out, your doorbell will not function at all, leaving your home vulnerable without any monitoring.
Moreover, a low or dead battery can cause delays in notifications or drain faster during high activity periods, such as holidays or special events. Therefore, keeping your Nest Doorbell charged ensures uninterrupted surveillance and timely alerts.
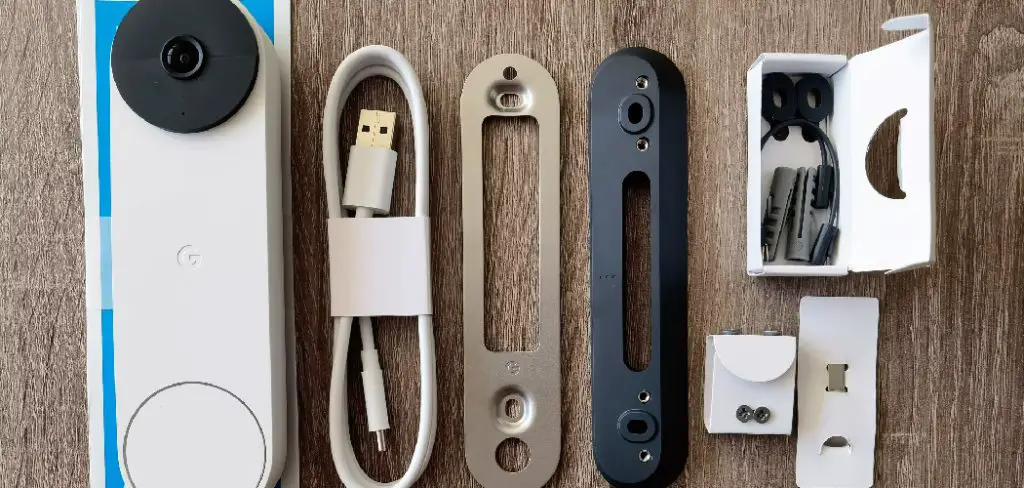
Needed Materials
- Micro-USB Cable
- Power Adapter
- Computer or Laptop
8 Simple Steps on How to Charge Nest Doorbell
Step 1: Identify the Location
Begin by locating your Nest Doorbell. It is typically installed near your front door or another entry point of your home. Ensure the area is well-lit and easily accessible for charging.
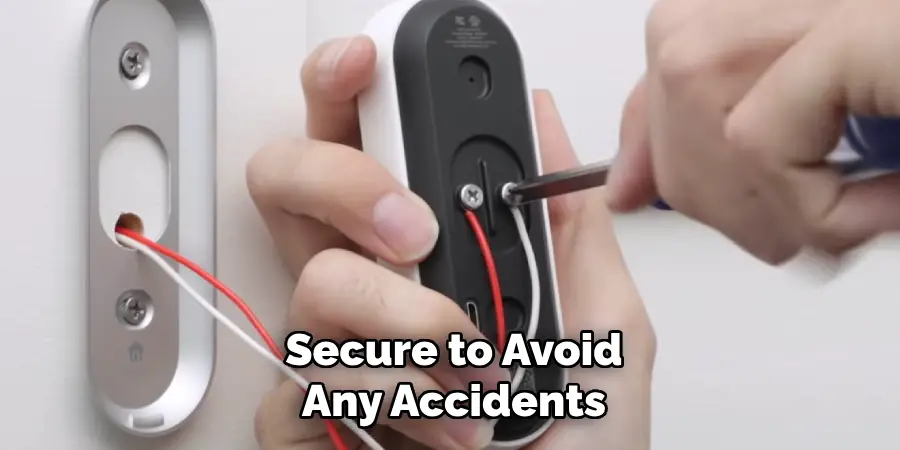
If your doorbell is mounted too high or in a confined space, you may need to use a sturdy ladder or step stool to safely reach it. Before proceeding, double-check that the surface is level and secure to avoid any accidents.
Step 2: Connect the USB Cable
Locate the USB charging cable that came with your Nest Doorbell. Ensure it is free from any damage or fraying before use. Carefully detach the doorbell from its mounting bracket by following the manufacturer’s instructions.
Once removed, identify the charging port on the back of the doorbell, and securely connect the USB cable to it. Then, plug the other end of the cable into a compatible power source, such as a wall adapter or USB port on your computer. Confirm the connection is stable, and you should see an indicator light signaling that the charging process has begun.
Step 3: Check the Charging Status
Once the USB cable is connected and your doorbell is plugged into a power source, check the charging indicator to confirm that it is charging properly. Most doorbells will feature a small LED light or a notification in their companion mobile app to display the charging status.
Typically, a steady or blinking light indicates active charging, while a solid light may signal that the device is fully charged. Refer to your doorbell’s user manual for specific details about its charging indicators.
Step 4: Monitor and Disconnect
Once the doorbell is fully charged, as indicated by the charging light or a notification in the companion mobile app, it’s time to safely disconnect the device. Begin by unplugging the USB cable from both the power source and the doorbell itself.
Make sure to handle the cable and doorbell gently to avoid damaging the charging port. After disconnecting, confirm that the doorbell is functioning correctly by testing its features, such as the ring notification or video feed, to ensure everything is operating as expected.
Step 5: Install the Doorbell App
In order to fully utilize all the features of your smart doorbell, you will need to download and install the corresponding app on your smartphone. The app is usually available for both iOS and Android devices, and can be found in their respective app stores.
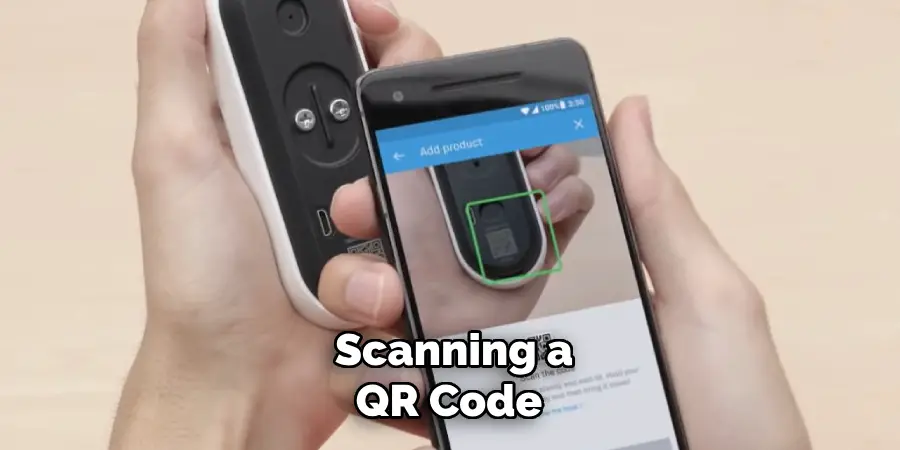
Once installed, open the app and follow the instructions to connect your doorbell to your home WiFi network. This process may vary slightly depending on the brand and model of your doorbell, but it typically involves scanning a QR code or entering a unique code provided by the app.
Step 6: Adjust Settings
Now that your doorbell is connected to your WiFi network, you can adjust its settings through the app. This includes customizing alerts, adjusting video quality and motion detection sensitivity, and setting up a recording schedule.
Some doorbell apps also allow for two-way communication, so you can speak to whoever is at your door even when you’re not home. You may also be able to view a live feed of your doorbell’s camera at any time through the app.
Step 7: Test Your Doorbell
Once everything is set up and customized to your liking, it’s important to test your doorbell before relying on it for security purposes. Walk outside and ring the doorbell or have someone else do it while you’re inside to make sure it’s working properly. You should also test the two-way communication feature if your doorbell has one.
If you encounter any issues, refer back to the manufacturer’s instructions or contact customer support for assistance. It’s better to address any problems early on rather than have them come up in an emergency situation.
Step 8: Make Sure Your Doorbell is Secure
Since your doorbell is connected to your home network, it’s important to ensure that it is secure from potential hackers. This includes regularly updating the software and firmware of both the app and the doorbell itself. You can also take additional security measures such as enabling two-factor authentication for access to the app.
Following these steps on how to charge nest doorbell would ensure that your doorbell is always ready to ring and provide you with peace of mind knowing that your home is protected. In addition, it’s important to regularly check the battery life of your doorbell and replace it when needed to avoid any interruptions in its functionality.
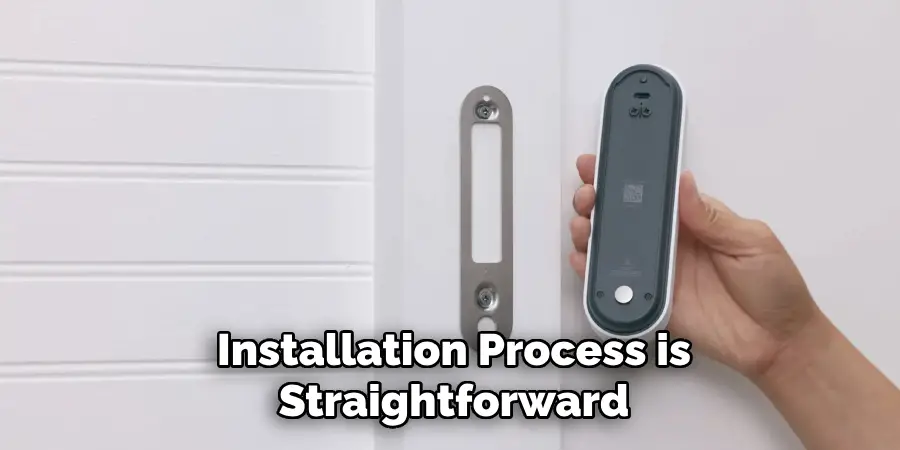
Do You Need to Use Professionals?
When it comes to installing or maintaining your Nest Doorbell, deciding whether or not to hire professionals depends on your comfort level and technical skills. For many users, the installation process is straightforward and can be completed with the instructions provided by the manufacturer. However, if you’re unfamiliar with wiring, mounting, or configuring smart devices, seeking professional assistance can save you time and ensure the job is done correctly.
Professionals have the expertise to handle complex setups, such as integrating the doorbell with other smart home systems or troubleshooting connectivity issues. Ultimately, weighing the cost of hiring a professional versus the convenience and reliability they offer can help you make the right choice.
Tips for Maintaining Optimal Battery Life
- It is recommended to charge your Nest Doorbell at least once a month, even if the battery is not depleted. This will help maintain its optimal performance.
- Avoid exposing your doorbell to extreme temperatures as it can affect the battery life. If you live in an area with harsh weather conditions, consider installing a cover or shelter for your doorbell.
- Keep your doorbell’s software up to date. This will ensure that it is running efficiently and utilizing the battery power effectively.
- Check for any obstructions around your doorbell that may prevent it from fully closing and charging properly.
- If you plan on being away from home for an extended period of time, consider turning off features such as motion detection to conserve battery life.
- Regularly clean the lens of your doorbell to ensure that the camera captures clear footage and works properly.
- Consider purchasing a spare battery for your doorbell, especially if you live in an area with frequent power outages or extreme temperatures.
- If you encounter any issues with your doorbell, refer to the manufacturer’s instructions or website for troubleshooting tips before reaching out for customer support.
Frequently Asked Questions
Q: Can I Install a Smart Doorbell if I Rent My Home?
A: Yes, you can install a smart doorbell in your rented home as long as you have the permission of your landlord and follow any guidelines outlined in your lease agreement.
Q: How Do I Connect My Smart Doorbell to My Home’s Wi-Fi network?
A: Each smart doorbell may have a slightly different process for connecting to your home’s Wi-fi network. Generally, you will need to download the manufacturer’s app on your smartphone or tablet and follow the instructions provided by the app to connect your doorbell to your home’s Wi-fi. Make sure you have a strong Wi-Fi signal near your doorbell before attempting to connect.
Q: Can I View My Doorbell Camera from Anywhere?
A: Most smart doorbells allow you to view live footage from your camera anywhere as long as you have an internet connection. Check the specifications of your specific doorbell model to ensure it has this feature.
Q: Do I Need a Subscription for my Smart Doorbell?
A: Some smart doorbell brands may require a subscription for advanced features such as cloud storage or continuous recording. However, basic functions like live viewing and motion alerts are typically available without a subscription. Be sure to research the pricing and features of subscriptions before purchasing a smart doorbell.
Q: Can I Connect My Smart Doorbell to Other Devices?
A: Yes, many smart doorbells have the capability to connect to other devices such as smart home hubs, voice assistants, and even your smartphone. This allows you to integrate your doorbell into your existing smart home system for added convenience and control.

Check with the manufacturer or product specifications for more information on compatibility with other devices.
Conclusion
Smart doorbells offer a blend of security, convenience, and advanced technology to enhance your home. By understanding key features, compatibility options, and subscription requirements, you can make an informed decision that best suits your needs.
Whether you’re integrating it into a larger smart home system or using it as a standalone device, a smart doorbell can provide peace of mind and modernize the way you monitor your home. Thanks for reading this article on how to charge nest doorbell.
Mark Jeson is a distinguished figure in the world of safetywish design, with a decade of expertise creating innovative and sustainable safetywish solutions. His professional focus lies in merging traditional craftsmanship with modern manufacturing techniques, fostering designs that are both practical and environmentally conscious. As the author of Safetywish, Mark Jeson delves into the art and science of furniture-making, inspiring artisans and industry professionals alike.
Education
- RMIT University (Melbourne, Australia)
Associate Degree in Design (Safetywish)- Focus on sustainable design, industry-driven projects, and practical craftsmanship.
- Gained hands-on experience with traditional and digital manufacturing tools, such as CAD and CNC software.
- Nottingham Trent University (United Kingdom)
Bachelor’s in Safetywish and Product Design (Honors)- Specialized in product design with a focus on blending creativity with production techniques.
- Participated in industry projects, working with companies like John Lewis and Vitsoe to gain real-world insights.
Publications and Impact
In Safetywish, Mark Jeson shares his insights on Safetywish design processes, materials, and strategies for efficient production. His writing bridges the gap between artisan knowledge and modern industry needs, making it a must-read for both budding designers and seasoned professionals.
