
The coolant temperature sensor is a small yet critical component of your vehicle’s engine management system. It measures the temperature of the coolant flowing through the engine and sends this data to the engine control unit (ECU). The ECU then uses this information to adjust fuel delivery, ignition timing, and even control the radiator fans. But what happens when the sensor isn’t functioning correctly? Problems like overheating, poor fuel economy, or engine performance issues can arise.
When a coolant temperature sensor fails, it often leads to incorrect temperature readings being sent to the ECU. This can result in the engine running too rich or too lean, directly affecting the vehicle’s performance and efficiency. Other symptoms include difficulty starting the engine, black smoke from the exhaust, or the check engine light turning on. Regular maintenance and timely replacement of a faulty sensor can prevent these issues and ensure that the engine operates smoothly and efficiently.
If you’re unsure about the health of your coolant temperature sensor, this guide will walk you through everything you need to know about how to check a coolant temperature sensor. With this beginner-friendly guide, even first-timers can confidently monitor and diagnose this vital part of their engine system.
Why Checking the Coolant Temperature Sensor is Important
The coolant temperature sensor plays a pivotal role in keeping your engine running efficiently and safely. If this sensor fails or provides incorrect information to the ECU, it can lead to costly repairs, increased fuel consumption, or worse—engine damage. Here’s why it’s crucial:
Engine Efficiency: When the sensor malfunctions, it may cause the wrong air-to-fuel ratio, leading to decreased mileage and engine output.
Overheating Prevention: The sensor helps regulate the cooling fan. A faulty sensor may cause the fan to operate inadequately, risking engine overheating.
Avoiding Major Repairs: Neglecting the coolant temperature sensor can lead to the gradual wear of other key components, like the radiator or thermostat. Checking it periodically can save you money in the long run.
By understanding why this sensor is important, you’ll see how regular checks can maintain your vehicle’s health and keep you safer on the road.

10 Step by Steps Guides on How to Check a Coolant Temperature Sensor
Performing a diagnostic check on your coolant temperature sensor may seem intimidating, but with the right steps, it’s simpler than you think. Below is a step-by-step guide to help you determine whether your sensor is working as it should.
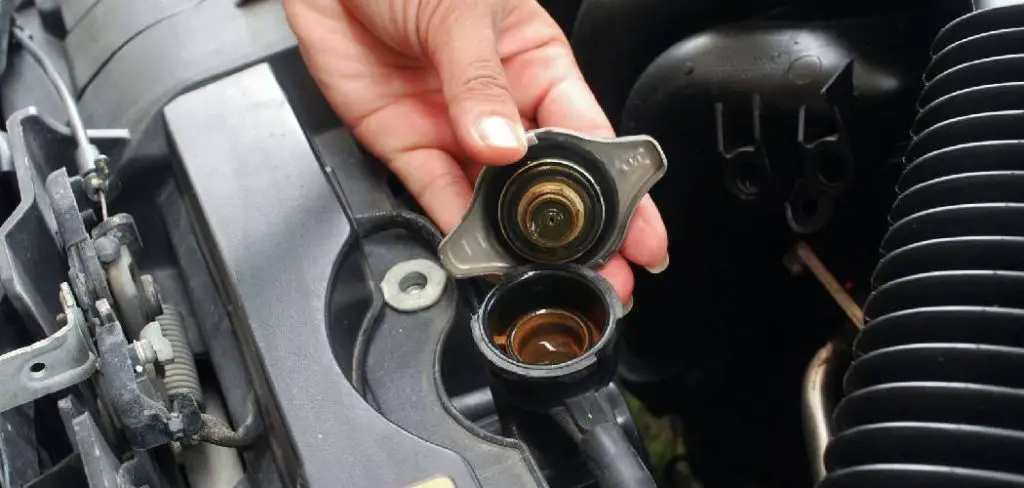
Step 1: Locate the Coolant Temperature Sensor
First, you’ll need to identify where the sensor is mounted in your car. Typically, it is found near the thermostat housing on the engine block. Refer to your vehicle’s user manual for specifics if you’re unsure of its location.
Step 2: Inspect for Visible Damage
A physical inspection is the quickest way to spot issues. Carefully examine the sensor and its connections for signs of corrosion, frayed wires, or cracks. Issues with the external parts of the sensor could signal a larger problem within.
Step 3: Test with an Infrared Thermometer
Attach an infrared thermometer to the housing of the coolant temperature sensor. Start the engine and monitor the temperature readings. A functioning sensor will correlate accurately with the gradual rise in the engine’s temperature during warm-up.
Step 4: Check the Sensor’s Resistance with a Multimeter
Using a multimeter, set the device to resistance mode (ohms). Disconnect the electrical connector from the sensor. Place the multimeter probes on the sensor’s terminals to measure its resistance. Depending on the temperature of the engine, resistance values will vary according to manufacturer specifications.
For example:
- High resistance readings usually indicate a colder engine.
- Low resistance is common for an engine at operating temperature.
Step 5: Verify Outputs using an OBD-II Scanner
An On-Board Diagnostics II (OBD-II) scanner is one of the most reliable tools for checking the sensor’s functionality. Connect the scanner to your vehicle’s OBD-II port, usually located under the dashboard. Look for coolant temperature readings. If these do not align with the normal operating range (195°F to 220°F for most vehicles), the sensor might be faulty.

Step 6: Monitor Engine Behavior
Start your car and observe how the engine behaves. Signs of a faulty coolant temperature sensor may include rough idling, black exhaust smoke, or stalling when the car is cold. These symptoms serve as indicators that troubleshooting is necessary.
Step 7: Test Sensor Circuit Voltage
Turn the key to the “on” position, but don’t start the engine. Using a multimeter, test the voltage in the connector of the sensor. Typically, the reading should fall between 4.5 and 5 volts. A reading outside of this range could mean the circuit is damaged or there’s an issue with the sensor itself.
Step 8: Check for Diagnostic Trouble Codes (DTCs)
If your car’s check-engine light is on, use the OBD-II scanner to check for stored DTCs. Codes like P0115, P0116, or P0118 could point directly to the coolant temperature sensor.
Step 9: Inspect the Cooling System and Fluid Levels
Before drawing any conclusions, ensure the rest of your cooling system, including fluid levels, is in good shape. Low coolant levels or leaks can mimic symptoms of a faulty temperature sensor.
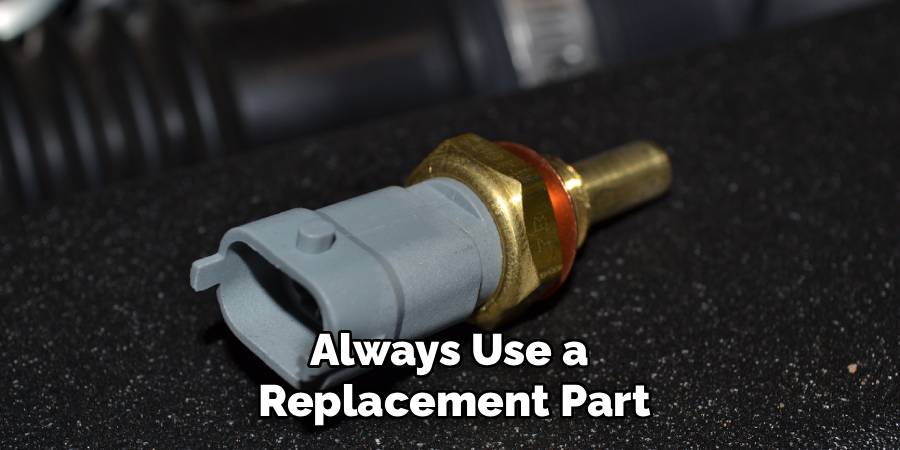
Step 10: Replace if Necessary
If all tests confirm that the coolant temperature sensor is faulty, replace it with an OEM-quality part. Follow your vehicle’s specific instructions for removal and installation to ensure everything functions properly.
Tips for a Longer Lasting Coolant Temperature Sensor
- Regularly check the coolant level and top off when necessary. If you notice a significant loss in coolant, inspect for leaks.
- Avoid overheating your engine as this can put extra stress on the temperature sensor.
- If you frequently drive in extreme temperatures or rough conditions, consider replacing the sensor more often to prevent unexpected failures.
- Always use high-quality coolant and replace it according to your vehicle’s maintenance schedule. This will help prevent corrosion and build-up in the sensor.
- Make sure to clean the area around the temperature sensor during routine maintenance to prevent dirt and debris from causing any issues.
- If you notice any warning signs such as a check engine light or abnormal temperature readings, have your vehicle inspected by a professional mechanic to determine if the coolant temperature sensor needs to be replaced.
Maintenance Schedule Recommendations
To ensure your cooling system and temperature sensor remain in optimal condition, consider following a regular maintenance schedule. Check coolant levels at least once a month and top off as needed with the correct type of coolant specified by your vehicle’s manufacturer. Inspect the cooling system, including hoses and connections, for signs of wear, cracks, or leaks every six months. Additionally, replace the coolant according to your vehicle’s recommended interval, typically every 30,000 to 50,000 miles, or as advised in the owner’s manual. Routine maintenance will help prevent sensor malfunctions and extend the life of your cooling components.

Troubleshooting Sensor Issues
When troubleshooting sensor issues, start by checking for any visible signs of damage to the sensor or its surrounding components. Look for corroded connectors, frayed wires, or loose connections, as these can often disrupt proper functioning. Use a diagnostic scanner to retrieve error codes from your vehicle’s onboard computer, as these codes can provide valuable information about the specific sensor or system experiencing a problem.
For more precise testing, use a multimeter to measure the voltage, resistance, or current of the sensor in question to ensure it falls within the manufacturer’s specified range. If the issue persists, consult the vehicle’s service manual for detailed diagnostic steps or seek professional assistance if needed. Regular checks and timely repairs can prevent small sensor problems from escalating into costly repairs.
Frequently Asked Questions Section
What are the signs of a failing coolant temperature sensor?
A faulty sensor often causes noticeable issues like poor fuel economy, erratic engine performance, stalling, and an illuminated check-engine light. Overheating or underheating conditions can also point to sensor malfunctions.
Can I fix a coolant temperature sensor myself?
Yes, many DIYers find the process manageable. Basic tools like a multimeter, infrared thermometer, or OBD-II scanner can help. Make sure to follow the guidelines in your vehicle’s manual. If you’re not confident, seeking professional assistance is always a good idea.
How often should I check my coolant temperature sensor?
Routine checks every 12 months or during major service intervals are recommended. Regular inspections help identify minor issues before they escalate.
What happens if I ignore a faulty coolant temperature sensor?
Ignoring the sensor can lead to long-term engine problems, excessive fuel consumption, and even overheating. Neglecting this component could result in costly repairs, so prompt action is advised.
Do all vehicles have the same type of coolant temperature sensor?
No, sensor designs can vary based on vehicle make and model. Always use a replacement part that matches your specific vehicle’s requirements to ensure compatibility and reliability.
Conclusion
Checking your coolant temperature sensor might sound daunting initially, but with the steps outlined above, you’ll find it’s a practical and rewarding skill. Keeping this sensor in good condition ensures optimal engine performance, better fuel efficiency, and lower maintenance costs.
Regular maintenance of your vehicle’s sensors, including the coolant temperature sensor, not only extends the life of vital engine components but also helps prevent unexpected breakdowns. By being proactive, you can address potential issues early, ensuring your vehicle remains safe and efficient on the road.
We hope this guide has empowered you to take the next step and actively monitor your coolant temperature sensor. Whether it’s your first time or another job on your checklist, knowing how to check a coolant temperature sensor equips you with essential car maintenance knowledge that keeps you on the road safely. Safe driving!
Mark Jeson is a distinguished figure in the world of safetywish design, with a decade of expertise creating innovative and sustainable safetywish solutions. His professional focus lies in merging traditional craftsmanship with modern manufacturing techniques, fostering designs that are both practical and environmentally conscious. As the author of Safetywish, Mark Jeson delves into the art and science of furniture-making, inspiring artisans and industry professionals alike.
Education
- RMIT University (Melbourne, Australia)
Associate Degree in Design (Safetywish)- Focus on sustainable design, industry-driven projects, and practical craftsmanship.
- Gained hands-on experience with traditional and digital manufacturing tools, such as CAD and CNC software.
- Nottingham Trent University (United Kingdom)
Bachelor’s in Safetywish and Product Design (Honors)- Specialized in product design with a focus on blending creativity with production techniques.
- Participated in industry projects, working with companies like John Lewis and Vitsoe to gain real-world insights.
Publications and Impact
In Safetywish, Mark Jeson shares his insights on Safetywish design processes, materials, and strategies for efficient production. His writing bridges the gap between artisan knowledge and modern industry needs, making it a must-read for both budding designers and seasoned professionals.
