
Knowing how to clean oil pressure sensor effectively can save you from unnecessary repairs and keep your vehicle running smoothly. The oil pressure sensor, a critical component of your car’s engine system, monitors the oil pressure and sends this data to your vehicle’s dashboard. If this sensor becomes clogged or dirty, it may provide inaccurate readings, which could lead to major engine issues if ignored.
Before starting the cleaning process, make sure you have the necessary tools on hand, such as a wrench, a clean cloth, and an appropriate cleaning solution. Begin by locating the oil pressure sensor, which is usually found near the oil filter or on the engine block. Carefully disconnect the sensor from its electrical connector, and use the wrench to unscrew it from its position. Once removed, gently clean the sensor using the cloth and cleaning solution, ensuring you remove any dirt or debris without damaging the component. Allow the sensor to dry completely before reinstalling it and reconnecting the electrical connector. Proper cleaning can restore the sensor’s functionality and improve your engine’s performance.
Cleaning the oil pressure sensor ensures that it functions properly, delivering precise information to prevent potential engine damage. While it may seem intimidating, the process is straightforward and beginner-friendly with proper preparation and tools. This guide will help you understand the importance of cleaning your oil pressure sensor and provide easy-to-follow steps to get the job done with confidence.
Why Is Cleaning the Oil Pressure Sensor Important?
The oil pressure sensor is vital for maintaining your car’s engine health. It alerts you to changes in oil pressure, preventing costly repairs and avoiding engine failure. A dirty or clogged sensor often provides false readings, such as low oil pressure warnings when the oil level and pressure are fine. Over time, contaminants like oil sludge, dirt, and debris can accumulate on the sensor, affecting its performance.
Neglecting a dirty oil pressure sensor can lead to more severe problems, such as damage to vital engine components due to improper lubrication. Cleaning your sensor ensures accurate readings, allowing the engine control unit (ECU) to regulate oil flow effectively. Maintaining a clean oil pressure sensor not only extends its lifespan but also enhances your vehicle’s overall performance, making this a crucial task for every car owner.

8 Step-by-Step Guide: How to Clean Oil Pressure Sensor
Step 1: Locate the Oil Pressure Sensor
The first step in learning how to clean oil pressure sensor is identifying its location in your vehicle. Typically, the sensor is mounted on the engine block near the oil filter, though its placement may vary based on your car’s make and model. Consult your vehicle’s manual or a repair guide to pinpoint the exact location.
Once you’ve located the sensor, clean the surrounding area with a rag to remove dirt and grease, ensuring no debris contaminates the sensor during removal. Gaining easy access to the sensor might require moving nearby components or protective shrouds. Taking your time with this step sets a foundation for a smooth cleaning process and ensures you don’t accidentally damage adjacent parts.
Step 2: Gather the Necessary Tools
Before you start cleaning, gather all the tools and materials required. You’ll need a wrench or socket set to remove the sensor, a cleaning solution suitable for electronics, and a soft-bristled brush for scrubbing. Additionally, keep a lint-free cloth or paper towel handy for drying the sensor.
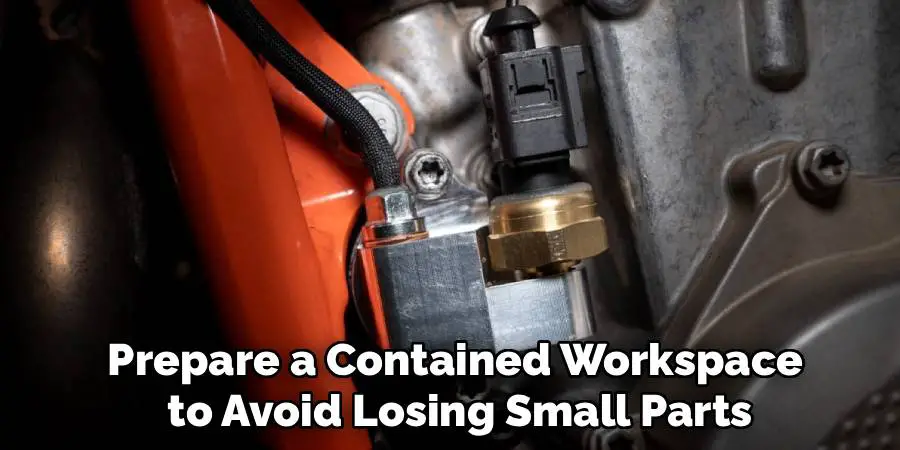
Prepare a contained workspace to avoid losing small parts like screws or clips during disassembly. By organizing your tools beforehand, you save time and eliminate interruptions, allowing you to focus on cleaning the sensor properly. The right preparation ensures a safer, more efficient job and reduces the risk of mishandling components.
Step 3: Disconnect the Sensor
To begin the cleaning process, ensure your car engine is cool. Disconnect the negative terminal of the battery to avoid electrical shorts while handling the sensor. Use a wrench or socket to carefully loosen and remove the sensor from the engine.
Detach any wiring harnesses or connectors linked to the sensor, taking care not to yank or twist them too forcefully. Place the removed sensor on a clean surface to prevent dirt or oil from mixing with cleaning materials. Disconnecting and removing the sensor safely is essential for protecting both the sensor and surrounding components from unintended damage.
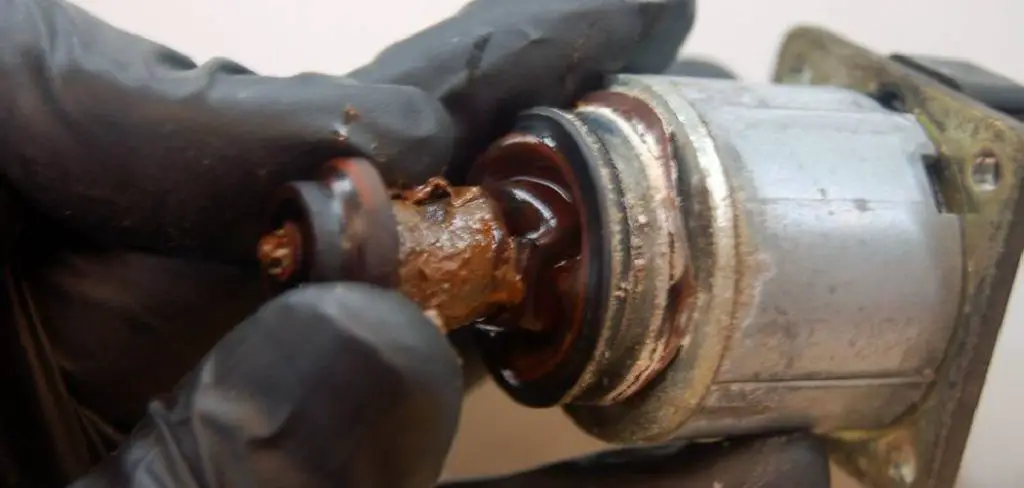
Step 4: Inspect the Sensor
Once removed, visually inspect the oil pressure sensor for signs of dirt, sludge, or corrosion. Check the connector pins to ensure they’re free of debris, as these are critical for transmitting accurate signals to the ECU.
Pay attention to the overall condition of the sensor. If it appears severely damaged or corroded, cleaning may not restore its functionality, and a replacement may be a better option. Examining the sensor thoroughly helps you identify any issues before proceeding with cleaning, ensuring optimal results when reinstalled.
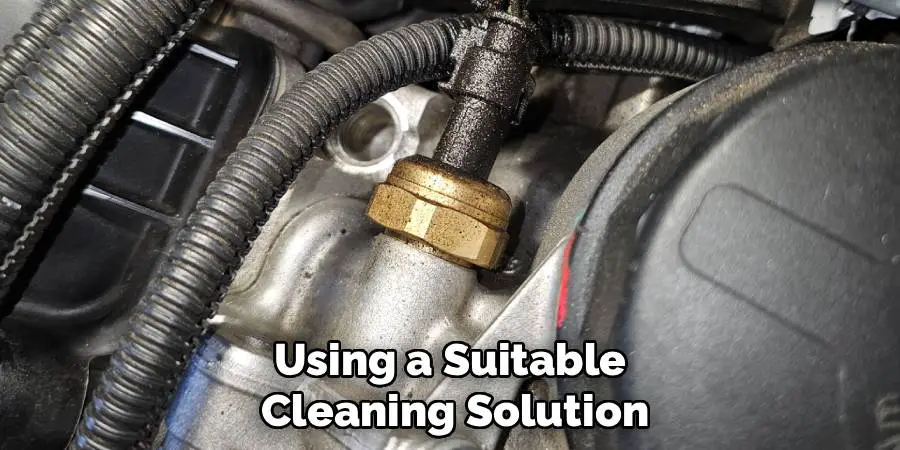
Step 5: Apply the Cleaning Solution
Spray an appropriate electronics-safe cleaning solution onto the oil pressure sensor, targeting areas with accumulated grime or oil deposits. Avoid using excessive amounts of liquid to prevent saturation. Gently scrub the exterior and connector pins with a soft-bristled brush, breaking up stubborn buildup and allowing the cleaning solution to dissolve contaminants.
Keep the sensor angled slightly downward while cleaning to allow dirt and liquid to drip away rather than re-entering crevices. Repeat the process if necessary until the sensor appears clean. Using a suitable cleaning solution ensures that sensitive internal components remain undamaged while removing obstruction-causing debris effectively.
Step 6: Dry the Sensor Thoroughly
After cleaning, use a lint-free cloth or paper towel to blot and wipe away any residual cleaning solution. Allow the oil pressure sensor to air dry completely before reinstalling it. This step is crucial to prevent electrical shorts caused by moisture during operation.
Inspect the sensor once more to ensure no dirt or grime remains and verify that all electrical contacts are clean and dry. Proper drying not only ensures functionality but also enhances the durability of the sensor after cleaning, helping it perform reliably over time.
Step 7: Reinstall the Sensor
Reconnect the cleaned and dried oil pressure sensor to its original position on the engine. Align it carefully and tighten it securely using the wrench or socket, taking care not to overtighten and risk damaging the threads.
Reattach any wiring harnesses and clip them firmly into place, ensuring all connections are tight and secure. Reinstall any components or covers removed earlier, ensuring everything is back in place. Proper reassembly ensures the sensor operates as intended while preventing loose connections that could cause errors.
Step 8: Test for Proper Functioning
Reconnect the car battery’s negative terminal and start the engine to test the cleaned sensor. Observe the dashboard for oil pressure readings or warning lights, ensuring they display correctly without interruptions. If error codes persist, use a diagnostics tool to confirm proper ECU communication with the sensor.
During this step, listen for any unusual engine sounds, as these may indicate incorrect sensor installation or lingering oil pressure issues. Testing immediately after cleaning reassures you that the oil pressure sensor is functioning optimally.
Sensor Replacement Process
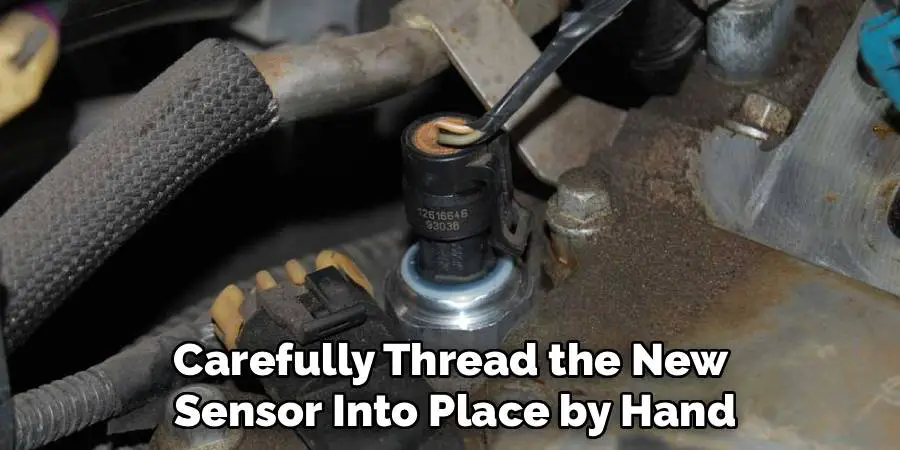
Replacing an oil pressure sensor is a straightforward process when done carefully. Begin by ensuring the engine is off and cooled to prevent burns or accidental injury. Locate the sensor, which is typically found near the oil filter or on the engine block. Use a suitable wrench to disconnect the sensor, being cautious not to damage surrounding components. Before installing the new sensor, verify that its specifications match the old one and apply a small amount of thread sealant if required.
Carefully thread the new sensor into place by hand, then tighten it with a wrench, avoiding over-tightening to prevent damage. Reconnect any electrical connectors and ensure they are secure. Finally, start the engine and check for proper functionality by monitoring the dashboard for accurate oil pressure readings and verifying no leaks around the new sensor.
Frequently Asked Question
How do I know if my oil pressure sensor needs cleaning?
Warning signs include inaccurate oil pressure readings, such as unexplained low oil warnings, or inconsistent gauge behavior. Additionally, visible dirt or grime around the sensor could signal it’s time for cleaning.
Can I use any cleaning solution for the sensor?
No, it’s important to use an electronics-safe cleaner designed for sensitive components. Harsh or abrasive solutions can damage the sensor, leading to malfunctions. Check the product label before use.
What happens if I don’t clean the oil pressure sensor?
Neglecting a dirty sensor can lead to inaccurate oil pressure readings, higher risks of engine damage, and potentially costly repairs. Regular cleaning ensures reliable performance and prevents these issues.
Should I always replace the sensor if it’s dirty?
Not necessarily. Simple cleaning often restores functionality, provided the sensor isn’t damaged or corroded. A replacement should only be considered if cleaning doesn’t resolve the issue or if the sensor is worn out.
How often should I clean the oil pressure sensor?
Cleaning intervals vary depending on driving habits and conditions. For vehicles operating in dusty, oily, or gritty environments, inspect the sensor during routine maintenance and clean it as needed.
Conclusion
Understanding how to clean oil pressure sensor is an essential skill for maintaining your car’s engine health. Regular cleaning ensures accurate readings and prevents potential engine damage caused by oil pressure miscommunication.
Regular vehicle maintenance goes a long way in extending the lifespan of your car and ensuring optimal performance. Paying attention to smaller components, like the oil pressure sensor, can help avoid costly repairs down the line. Proactive care and timely inspections not only enhance reliability but also contribute to safer driving experiences.
By following the steps outlined above, you can confidently clean your sensor, extending its lifespan and optimizing performance. Don’t wait for malfunction warnings—start caring for your oil pressure sensor today and keep your engine running smoothly for miles to come!
Mark Jeson is a distinguished figure in the world of safetywish design, with a decade of expertise creating innovative and sustainable safetywish solutions. His professional focus lies in merging traditional craftsmanship with modern manufacturing techniques, fostering designs that are both practical and environmentally conscious. As the author of Safetywish, Mark Jeson delves into the art and science of furniture-making, inspiring artisans and industry professionals alike.
Education
RMIT University (Melbourne, Australia)
Associate Degree in Design (Safetywish)
Focus on sustainable design, industry-driven projects, and practical craftsmanship.
Gained hands-on experience with traditional and digital manufacturing tools, such as CAD and CNC software.
Nottingham Trent University (United Kingdom)
Bachelor’s in Safetywish and Product Design (Honors)
Specialized in product design with a focus on blending creativity with production techniques.
Participated in industry projects, working with companies like John Lewis and Vitsoe to gain real-world insights.
Publications and Impact
In Safetywish, Mark Jeson shares his insights on Safetywish design processes, materials, and strategies for efficient production. His writing bridges the gap between artisan knowledge and modern industry needs, making it a must-read for both budding designers and seasoned professionals.
