
Are you tired of always having to be around when someone needs a copy of your key? Do you want an easy way to make copies without having to go to the hardware store every time? If so, then you should consider using clay to create a duplicate key.
How to copy a key with clay is a simple and fascinating technique that can come in handy in various situations. Whether you’ve lost a spare key, need a quick solution, or are simply curious about the process, this method provides an accessible way to create a key mold without specialized equipment. By using easily available materials and following a few straightforward steps, you can replicate the unique shape of a key with surprising accuracy.
This guide will walk you through the process, ensuring safety and effectiveness throughout.
What Are the Benefits of Making a Key Mold?
There are several benefits to making a key mold. Some of the most notable ones include:
- Convenience: If you’ve lost your spare key or need an extra one in a hurry, creating a key mold is a simple and convenient solution.
- Cost-effective: Buying new keys can be expensive, especially for specialized or high-security locks. Making a key mold is a more cost-effective option.
- Versatility: A key mold can be used to create multiple copies of the same key, making it useful if you have family members or roommates who need access to the same lock.
What Will You Need?
To create a key mold, you will need the following materials:
- A blank key or an existing key that you want to duplicate
- A two-part silicone putty or molding material (available at most hardware stores)
- A container or mixing tray for the molding material
- A small knife or sharp tool for shaping and cutting the mold
- Optional: release agent spray (such as WD-40) to prevent sticking
It is important to note that the type of silicone putty used can vary depending on the type of key you want to copy. For example, if you are copying a standard house key, regular silicone putty will work.
10 Easy Steps on How to Copy a Key With Clay
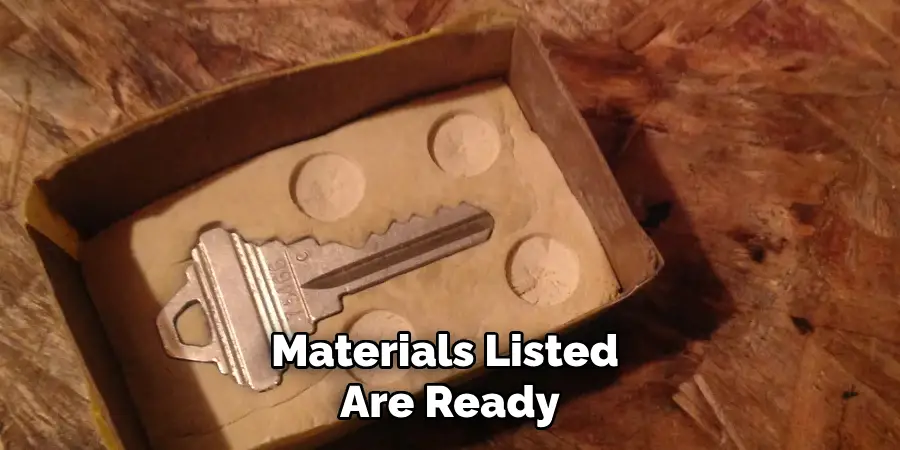
Step 1. Prepare Your Materials
Before you begin, ensure that all the materials listed are ready and within reach. Having everything organized will make the process easier and more efficient. Check that the silicone putty is fresh and pliable, and the container or mixing tray is clean and free from debris.
If you plan to use a release agent spray, test it on a small surface to confirm it works effectively without causing damage or leaving residue. Make sure the key you wish to copy is clean and free of grime or dust, as these can interfere with creating a precise mold. Taking a little time to prepare thoroughly will ensure better results and a smoother process as you move through the steps.
Step 2. Mix the Molding Material
Measure the appropriate amounts of the molding material components as instructed by the manufacturer. Typically, this involves combining a base and a curing agent in a specific ratio. Pour the components into the mixing tray and use a stir stick to mix them thoroughly. Make sure to scrape the sides and bottom of the tray to achieve a uniform consistency. Mix until the material is smooth and free of lumps, as uneven mixing can result in flaws in the final mold. Work efficiently, as some molding materials begin to set quickly.
Step 3. Create the Mold Impression
Once the molding material is thoroughly mixed, pour it carefully over the object you wish to replicate. Ensure that the material fully covers the object and reaches all intricate details. Gently tapping or shaking the mold can help release any trapped air bubbles, which might otherwise compromise the quality of the impression. Allow the mold to set according to the curing time provided by the manufacturer. During this time, avoid moving or disturbing the mold to prevent imperfections. Once the material has fully hardened, you are ready to proceed to the next step.
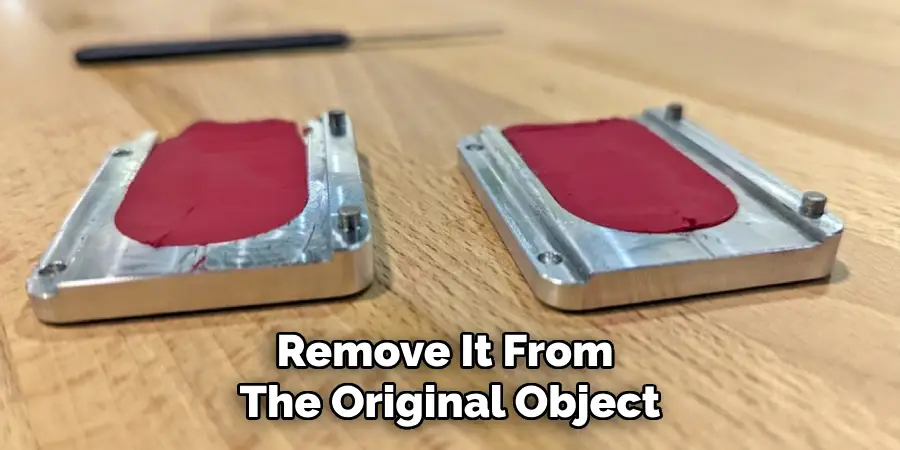
Step 4. Allow the Mold to Set
Once the mold has fully cured, carefully remove it from the original object. Gently flex the mold to release the object without causing damage to the impression. Inspect the mold for any imperfections or air pockets that may require correction. A well-set mold will exhibit a smooth, detailed surface that accurately captures the original design. Ensure the mold is completely dry and hardened before proceeding with its use in casting or other applications. Taking these precautions will ensure a successful and high-quality outcome.
Step 5. Remove the Key
Carefully remove the key from the mold to preserve the integrity of the impression. Gently wiggle the key if necessary, ensuring it comes out smoothly without damaging the mold’s detailed design. Check the mold for any leftover residue or imperfections once the key is removed. Cleaning the key area of the mold will prepare it for subsequent use and ensure a flawless final product. Take your time during this step to maintain precision and avoid jeopardizing the mold’s quality.
Step 6. Prepare the Duplicate Material
Gather the material you will use to create the duplicate, such as resin, metal, or another appropriate substance, depending on your needs. Follow the manufacturer’s instructions to mix or prepare the material accurately, ensuring the correct ratios for optimal consistency and results. Pour the prepared material into the mold carefully, filling all the intricate details without overfilling. Gently tap the mold to release any air bubbles, allowing the material to settle evenly. This step is crucial for creating a precise and high-quality duplicate.
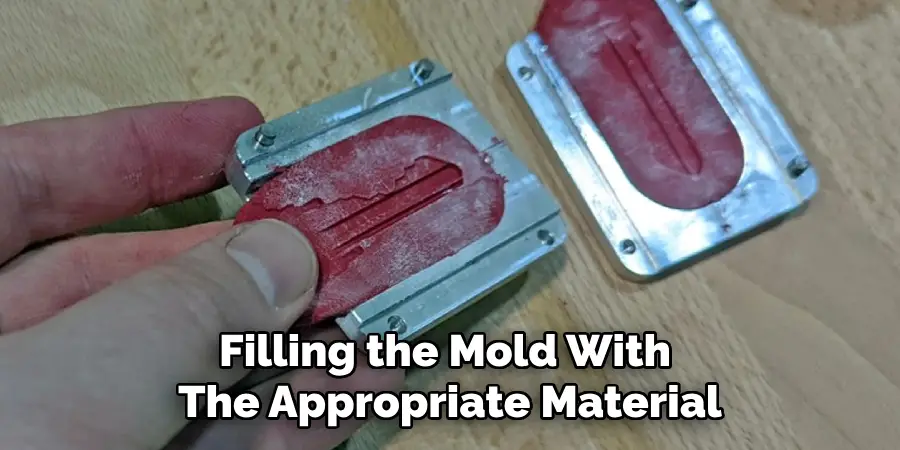
Step 7. Curing the mold
After filling the mold with the appropriate material, it is time to cure it. Curing refers to the process of hardening or setting the material in the mold, giving it enough time to form into a solid shape. Depending on the type of material used, curing methods will vary. For example, some materials require exposure to heat, while others may simply need time to air dry. It is essential to follow the manufacturer’s instructions precisely and be patient during this step.
Step 8. Allow the Material to Cure
After filling the mold with the duplicate material, allow it to cure as per the manufacturer’s recommended time. Place the mold in a stable, clean, and level area to ensure that the material sets uniformly. Avoid disturbing or moving the mold during this period, as any movement could affect the final outcome. Depending on the material used, curing times can vary, so patience is essential to ensure the best results.
Step 9. Remove the Key Copy
Once the curing process is complete, carefully remove the duplicate key from the mold. Gently separate the mold halves, if applicable, to avoid damaging the key copy or the mold itself. Inspect the key for any imperfections or excess material, which can be trimmed or sanded down for a smoother finish. Handle the key with care, ensuring it maintains its shape and functionality.
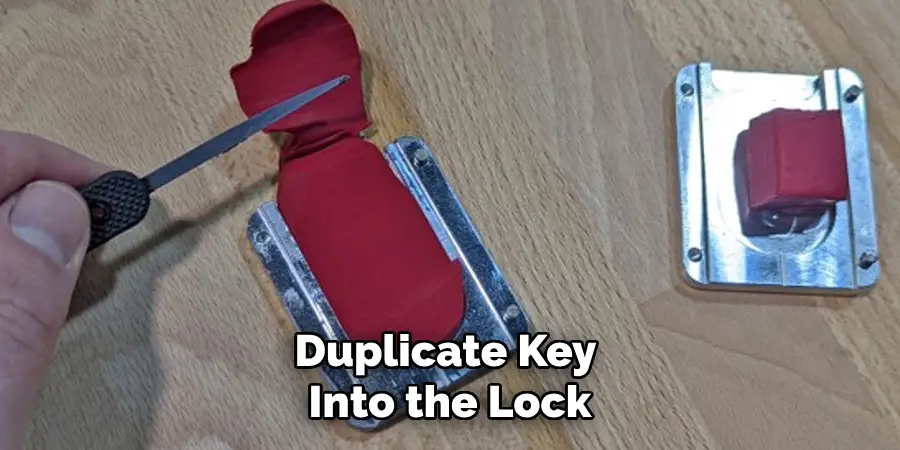
Step 10. Test the Copy
Insert the duplicate key into the lock it is intended for and gently turn it to ensure it works smoothly. Test both locking and unlocking functions to verify the key’s effectiveness. If the key does not fit properly or fails to operate the lock as expected, inspect it for irregularities and make adjustments, such as filing or sanding, to improve its performance. Repeat the testing process as needed until the key functions are reliable.
By following these steps, you can effectively create a key copy using clay and silicone molding techniques. Remember, this process should only be used for keys you own or have full permission to duplicate.
5 Things You Should Avoid
1. Using Unauthorized Keys
It is essential to only duplicate keys that you own or have explicit permission to copy. Attempting to replicate keys you do not own can be illegal and unethical.
2. Using Poor-Quality Materials
Low-quality clay or silicone can lead to inaccurate molds, resulting in a poorly fitting or ineffective key. Ensure you use high-quality materials designed for precision molding.
- Rushing Through the Process
Duplicate keys require precision and attention to detail. Taking your time will result in better quality keys that function correctly, saving you time and effort in the long run.
- Not Following Instructions
Different key types may have different requirements during the duplication process. It is crucial to follow instructions carefully to ensure a successful outcome.
- Duplicating Keys without Permission
Duplicating someone else’s keys without their consent is not only unethical but also illegal in some cases. Always make sure to obtain permission before creating a duplicate key for someone else.
Conclusion
How to copy a key with clay requires precision, attention to detail, and responsible practices.
By ensuring you have the right materials, following all necessary steps, and obtaining proper permission, you can successfully create a clay mold and duplicate a key. Always prioritize safety and ethical considerations throughout the process to respect others’ property and the law.
With patience and care, key duplication using clay can be an effective solution in specific situations.
Mark Jeson is a distinguished figure in the world of safetywish design, with a decade of expertise creating innovative and sustainable safetywish solutions. His professional focus lies in merging traditional craftsmanship with modern manufacturing techniques, fostering designs that are both practical and environmentally conscious. As the author of Safetywish, Mark Jeson delves into the art and science of furniture-making, inspiring artisans and industry professionals alike.
Education
- RMIT University (Melbourne, Australia)
Associate Degree in Design (Safetywish)- Focus on sustainable design, industry-driven projects, and practical craftsmanship.
- Gained hands-on experience with traditional and digital manufacturing tools, such as CAD and CNC software.
- Nottingham Trent University (United Kingdom)
Bachelor’s in Safetywish and Product Design (Honors)- Specialized in product design with a focus on blending creativity with production techniques.
- Participated in industry projects, working with companies like John Lewis and Vitsoe to gain real-world insights.
Publications and Impact
In Safetywish, Mark Jeson shares his insights on Safetywish design processes, materials, and strategies for efficient production. His writing bridges the gap between artisan knowledge and modern industry needs, making it a must-read for both budding designers and seasoned professionals.
