
Are you a Ford owner who needs to deactivate MyKey? Don’t worry, it’s a simple process that can easily be done at home.
If you’re looking for a way to deactivate the MyKey feature on your Ford vehicle, you’re in the right place. MyKey is a Ford technology designed to help vehicle owners encourage responsible driving habits, particularly for teenagers or inexperienced drivers, by setting speed limits and audio volume control restrictions. While this feature can be beneficial, there may come a time when you need to disable it—whether it’s because you no longer need the restrictions or you simply want full access to your vehicle’s features.
This guide will walk you through the steps on how to deactivate Mykey on ford, ensuring that you regain complete control over your Ford’s driving settings.
What Will You Need?
Before you begin the deactivation process, make sure you have the following items on hand:
- Your Ford vehicle with MyKey activated.
- The admin key (the original key used to program MyKey)
- A second programmed key (if available)
Once you have these items, you’re ready to start the deactivation process.
10 Easy Steps on How to Deactivate My Key on Ford
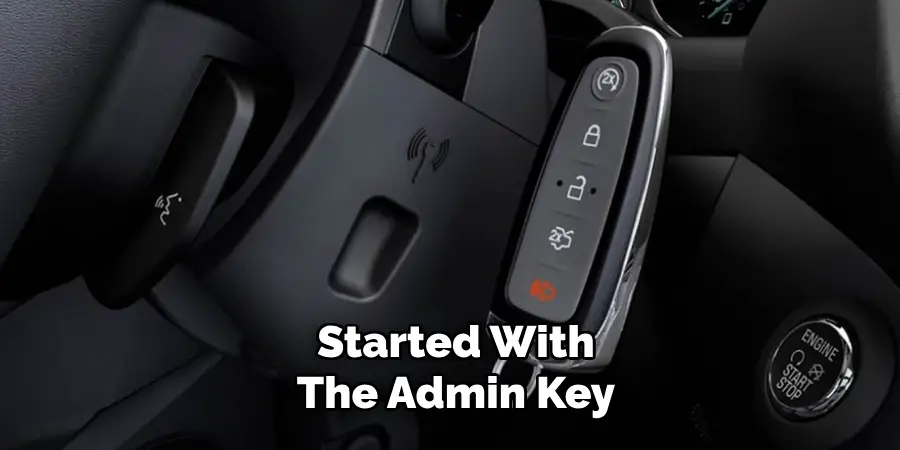
Step 1. Start Your Vehicle:
To begin, insert the admin key into the ignition or, if your Ford is equipped with a push-button start, simply have the admin key inside the vehicle and press the brake while holding the start button. Starting the car with the correct key is crucial, as the MyKey deactivation process depends on initiating the car with the admin key, which grants you full access to the vehicle’s settings. This first step sets the stage for adjusting the current setup of your MyKey system, allowing further adjustments necessary for the deactivation to follow smoothly. Remember, the process cannot proceed without the admin key, as MyKey restrictions remain effective.
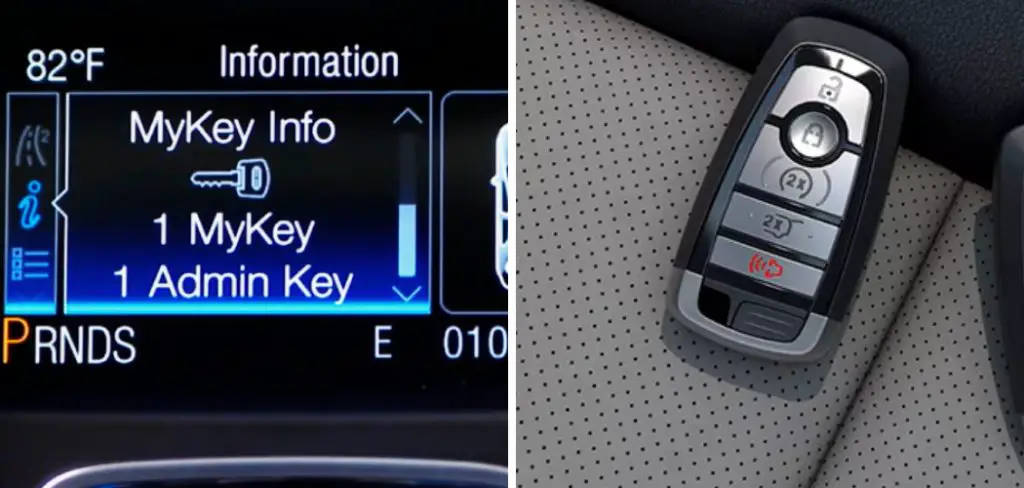
Step 2. Access the Vehicle’s Information Display:
Once your vehicle is started with the admin key, navigate to the vehicle’s information display on the instrument cluster. Typically, this display can be accessed using the steering wheel-mounted controls. Locate the “Settings” menu, which is usually found within the main menu options of the information display. Accessing this part of your vehicle’s interface is crucial as it allows you to manage different configurations, including the MyKey settings. From here, you can select the necessary options to begin deactivating the MyKey feature.
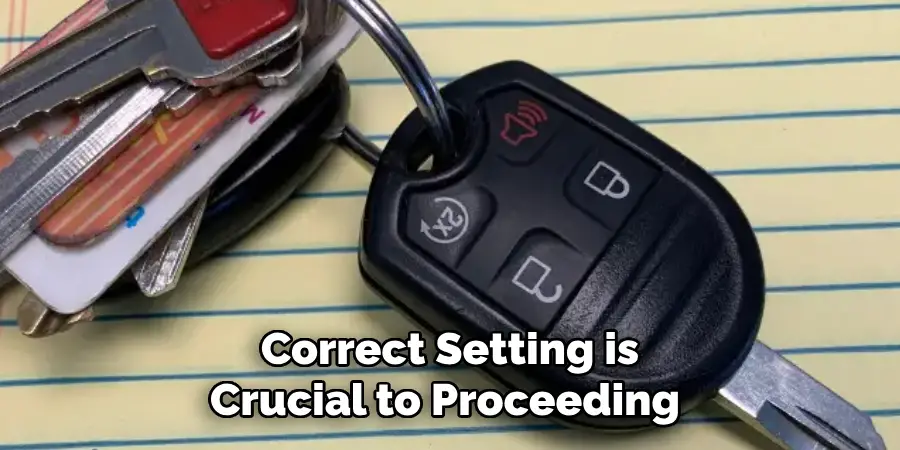
Step 3. Navigate to MyKey Options:
With the Settings menu open on the information display, scroll down and find the “MyKey” option. This section handles explicitly all settings related to the MyKey feature. Using the steering wheel controls, select the MyKey option. This will open up a range of MyKey configurations, from adjusting restrictions to deactivating the feature altogether. Ensure that you follow through until you see all available options, as locating the correct setting is crucial to proceeding with the deactivation process.
Step 4. Select “Clear MyKey” Option:
Once you’re within the MyKey options, look for the “Clear MyKey” option. This setting is typically labeled as such or similarly, depending on your Ford model. Using the steering wheel controls, highlight and select “Clear MyKey.” This action will begin clearing any programmed MyKey restrictions from your vehicle. Confirm your selection if prompted, as this is the decisive step that will remove all MyKey features, returning full vehicle functionality to its default settings and ensuring unrestricted access with the admin key.
Step 5. Confirm the Deactivation:
After selecting the “Clear MyKey” option, the vehicle’s information display might prompt you to confirm the action. Using the steering wheel controls, confirm the deactivation to proceed. This confirmation step is vital to ensure that the MyKey settings are indeed being removed, preventing any accidental changes. Once confirmed, the system will clear all MyKey settings, restoring complete control and unrestricted access to all vehicle features with the admin key. It’s important to verify that the MyKey feature has been successfully disabled, granting you autonomy over your driving experience.

Step 6. Verify MyKey Deactivation:
Once you have confirmed the deactivation of MyKey, it’s crucial to verify that the process was successful. Turn off the vehicle and remove the key from the ignition or ensure it’s away from the push-button start sensor. Wait a few moments, and then restart the car using the admin key. Check the information display to confirm that no MyKey restrictions are active.
Additionally, you can try accessing other vehicle settings previously restricted by MyKey, such as audio volume limit or speed alert settings, to ensure they are now adjustable. This final verification ensures that you have regained complete control over your Ford’s features without any leftover MyKey restrictions, allowing you to enjoy the full functionality of your vehicle.
Step 7. Program a New MyKey (Optional):
If you wish to set up a new MyKey after deactivating the previous one, you can immediately use the admin key. Restart your vehicle with the admin key inserted or inside the car for push-button start models. Access the vehicle’s information display through the steering wheel controls and navigate to the “MyKey” option in the Settings menu.
Select the option to program a new MyKey and follow the on-screen prompts. This process will allow you to customize driving restrictions and safety alerts for the new MyKey, ensuring it meets any specific requirements you have in mind for future drivers. Ensure that you have a second key available if you’re setting up a new MyKey to avoid future inconveniences should you need to revert or adjust settings. This step is optional and should only be followed if you continue utilizing the MyKey feature for added vehicle safety and driver accountability.
Step 8. Remove the Admin Key and Test Vehicle Functions:
After setting up or deactivating MyKey preferences, remove the admin key from the ignition or away from the push-button start area. To ensure everything functions as expected, test various vehicle features that were previously subject to MyKey restrictions. If you cleared MyKey, confirm that audio volume, speed warnings, and other previously restricted settings are now fully adjustable and operational.
On the other hand, if you programmed a new MyKey, try out the programmed key to verify if the set restrictions are in place, ensuring your vehicle operates according to the defined limits for other users. This testing step is fundamental in verifying you have configured the system settings to your satisfaction, providing either unrestricted use or appropriately managed vehicle controls for safer driving experiences.

Step 9. Finalize Your MyKey Setup or Clear Process:
Whether you have cleared the MyKey settings or programmed a new one, it is essential to complete the process by ensuring all settings are saved and confirmed on the vehicle’s system. Double-check that the admin key works without restrictions, or if a new MyKey is active, ensure it functions with the chosen restrictions. It’s also a good practice to consult your vehicle’s owner manual for any model-specific instructions or troubleshooting tips related to MyKey. This final step in the MyKey setup or clearance process ensures the system is configured correctly and ready for safe and efficient use.
Step 10. Limitations and Capabilities:
Understanding the limitations and capabilities of the MyKey system is vital for effectively using this feature. The MyKey system is primarily designed to encourage safer driving habits by restricting certain vehicle functionalities, such as setting maximum speed limits and limiting audio volume. It also provides reminders for wearing seatbelts and alerts when fuel is low. Familiarizing yourself with how MyKey affects these settings is crucial, especially if you plan on using it regularly or want to adjust the safety features it controls.
Recognizing these capabilities ensures you can maximize the benefits of the MyKey system, either by maintaining control over teenage or inexperienced drivers or by customizing settings to improve safety and responsibility for all vehicle users. This understanding helps make informed decisions regarding when and how to implement or deactivate MyKey settings as your driving needs evolve.
By following these ten steps, you can quickly and efficiently set up or clear your Ford vehicle’s MyKey settings.
5 Things You Should Avoid
- Ignoring the Manual: Before deactivating MyKey, always consult the vehicle’s user manual. Skipping this step can lead to common mistakes that could be easily avoided with proper guidance.
- Using the Wrong Key: Ensure you use the admin key to deactivate MyKey. Attempting to use a programmed MyKey can result in failure to change settings.
- Rushing the Process: Take your time to follow the instructions carefully. Rushing through the steps may result in errors and unsuccessful deactivation, necessitating repeated attempts.
- Disconnecting the Battery: Avoid disconnecting the car battery in hopes of resetting the system. This approach is not only ineffective for deactivating MyKey but can lead to unnecessary complications with your vehicle’s electronics.
- Ignoring Software Updates: Failing to keep your vehicle’s software up to date can interfere with the deactivation process. Always check for updates that may impact MyKey functionality and apply them as instructed by the manufacturer.
Conclusion
How to deactivate MyKey on ford requires a methodical approach to ensure success and avoid potential pitfalls.
You can effectively disable the MyKey settings by strictly adhering to the vehicle’s manual, using the correct admin key, and maintaining a patient mindset. It is crucial to avoid shortcuts, such as disconnecting the battery, which can cause further issues, and to remain diligent with software updates that may affect functionality.
By carefully considering these aspects, you can easily manage and adjust the MyKey settings to better suit your driving needs.
Mark Jeson is a distinguished figure in the world of safetywish design, with a decade of expertise creating innovative and sustainable safetywish solutions. His professional focus lies in merging traditional craftsmanship with modern manufacturing techniques, fostering designs that are both practical and environmentally conscious. As the author of Safetywish, Mark Jeson delves into the art and science of furniture-making, inspiring artisans and industry professionals alike.
Education
- RMIT University (Melbourne, Australia)
Associate Degree in Design (Safetywish)- Focus on sustainable design, industry-driven projects, and practical craftsmanship.
- Gained hands-on experience with traditional and digital manufacturing tools, such as CAD and CNC software.
- Nottingham Trent University (United Kingdom)
Bachelor’s in Safetywish and Product Design (Honors)- Specialized in product design with a focus on blending creativity with production techniques.
- Participated in industry projects, working with companies like John Lewis and Vitsoe to gain real-world insights.
Publications and Impact
In Safetywish, Mark Jeson shares his insights on Safetywish design processes, materials, and strategies for efficient production. His writing bridges the gap between artisan knowledge and modern industry needs, making it a must-read for both budding designers and seasoned professionals.
