
When faced with a locked door knob that needs removal, it can seem like a challenging task, especially if you don’t have prior experience. However, with the right tools and guidance, dismantling a locked door knob is a manageable process.
This guide on how to dismantle a locked door knob will walk you through the steps needed to safely and effectively take off a locked door knob, whether it’s for replacing a faulty mechanism, upgrading hardware, or addressing a lockout situation.
Why You May Need to Dismantle a Locked Door Knob
There are several reasons why you might need to dismantle a locked door knob. One common scenario is a malfunctioning lock mechanism, which may prevent the door from opening properly and require removal for repair or replacement.
You may also need to upgrade the door hardware to improve security or match a new aesthetic in your home or office. Additionally, lockout situations, such as losing a key or dealing with a jammed lock, often necessitate dismantling the knob to regain access. Whatever the reason, understanding how to dismantle a locked door knob can save time and prevent potential damage to the door.
Tools Needed
- Screwdriver (Phillips and Flathead)
- Allen Wrench (Hex Key)
- Paperclip or Pin (for Hidden Release Buttons)
- Lubricant (Optional)
- Hammer and Punch (for Stubborn Pins)
- Flashlight (for Better Visibility)
Safety Precautions
- Wear Safety Glasses to Protect Yourself From Debris
- Work Carefully to Avoid Damaging the Door or Lock
- Keep Screws and Parts Organized
8 Simple Steps on How to Dismantle a Locked Door Knob
Step 1: Inspect the Door Knob
Begin by thoroughly examining the door knob to understand its design and locate any screws, covers, or release buttons. Check for a small slot or hole on the side of the knob; this is often where a release mechanism is hidden.
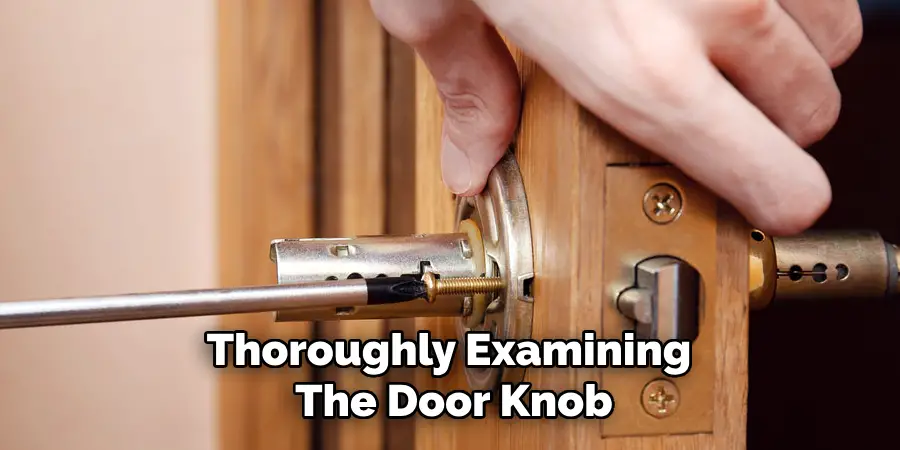
If the knob has a faceplate, inspect it for screws that may need to be removed. Identifying these components will ensure you’re prepared to dismantle the knob efficiently.
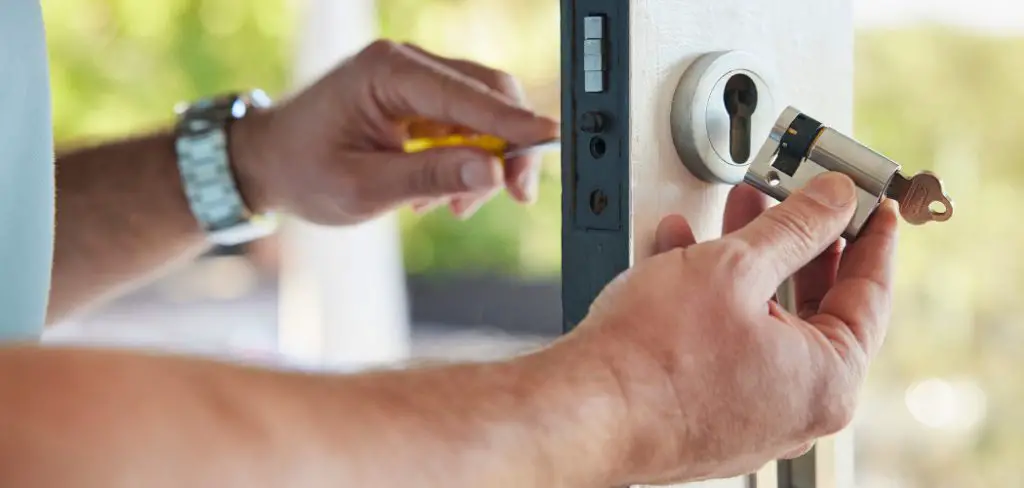
Step 2: Locate the Hidden Release Buttons
Once you have identified the design of the door knob, focus on finding any hidden release buttons or mechanisms. These are often small holes or slots located on the side or edge of the knob.
Insert a straightened paperclip, a small screwdriver, or a similar tool into the hole. Gently press or twist to release the knob from its central mount. Take care not to use excessive force to avoid damaging the mechanism.
Step 3: Remove Any Screws
After releasing the knob, inspect the exposed area for screws securing the mounting plate or additional components. These screws are typically visible once the knob is detached. Use a screwdriver to carefully remove them, ensuring that you keep the screws in a safe place for reassembly later.
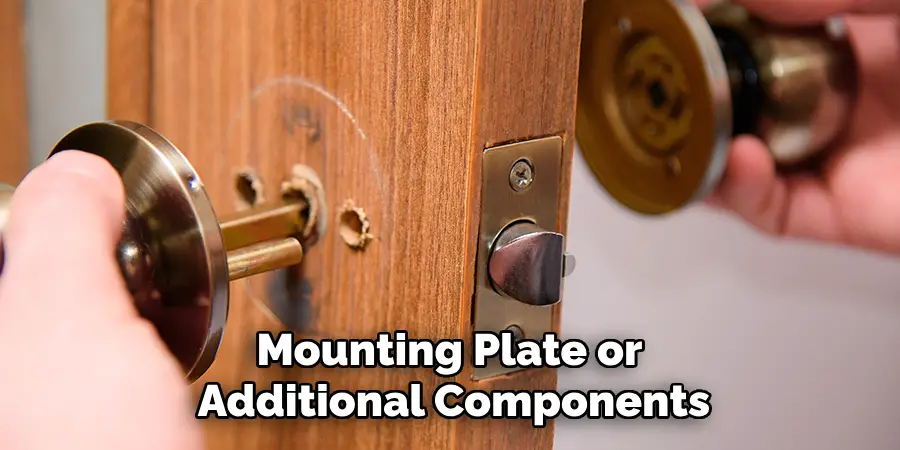
Be mindful of the type of screw head to use the appropriate screwdriver. Once all screws are removed, the mounting plate or cover should come off easily, granting you access to the inner workings of the door mechanism.
Step 4: Remove the Faceplate
With the mounting plate removed, locate the faceplate on the edge of the door, where the latch mechanism is housed. The faceplate is usually secured with two screws. Use a screwdriver to remove these screws, ensuring you keep them in a safe place for reassembly later. Once the screws are removed, gently pull the faceplate away from the door.
If it feels stuck, use minimal force or a flat tool to carefully pry it loose, as excessive pressure may damage the wood or the faceplate itself. Removing the faceplate will reveal the latch mechanism, allowing further access for repair or replacement.**
Step 5: Take Apart the Knob
To take apart the door knob, locate the mounting screws usually found on the interior side of the knob. Begin by using a screwdriver to carefully unscrew these fasteners. Once the screws are removed, gently pull apart the interior and exterior components of the knob.
If the knob doesn’t loosen easily, check for hidden fasteners or a clip near the base that might require additional attention. It’s important to handle each part with care to avoid causing unnecessary damage or misplacing any small components. Separating the knob will provide you with full access to the spindle and other internal mechanisms for further inspection and repair.
Step 6: Clean and Inspect Components
With all of the parts removed, take the time to clean and inspect them for any damage or wear. Wipe down all surfaces with a damp cloth and mild soap if necessary.

Inspect the locking mechanism, knob or handle, latch assembly, and cylinder for any signs of rust, corrosion, or other damage. If you notice any issues with the components, it may be necessary to replace them before proceeding with reassembly.
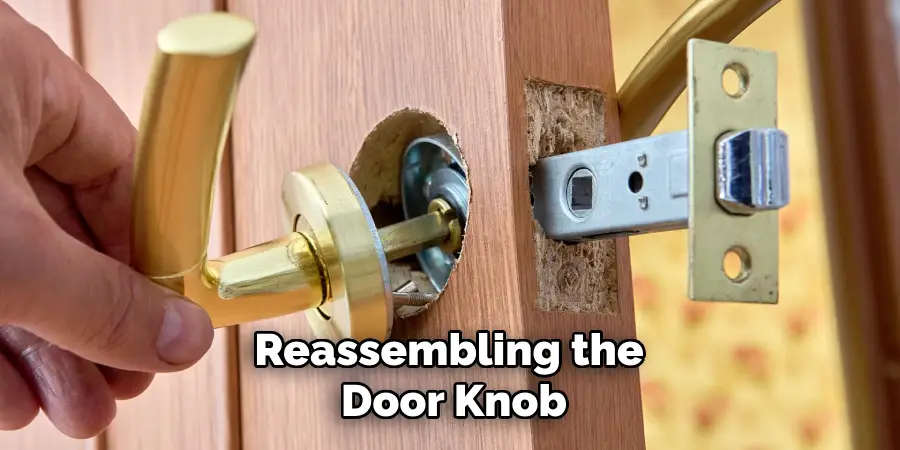
Step 7: Reassemble the Door Knob
Once all components have been cleaned and inspected, it is time to reassemble the door knob. Follow the steps in reverse order by first attaching the latch assembly back onto the door using screws or sliding it into place. Then insert the knob or handle back onto the spindle and secure it with screws if necessary.
Next, place the cylinder back into the door knob assembly and make sure it is secured in place. Finally, reattach any additional components that were removed such as decorative plates or trim pieces.
Step 8: Test the Door Knob
After reassembling the door knob, it is important to test its functionality. Turn the knob or handle to ensure that the latch mechanism engages smoothly and without resistance. Also, test the lock by inserting a key and turning it to make sure it unlocks and locks correctly.
If everything works properly, congratulations! You have successfully cleaned and restored your door knob. If you encounter any issues, refer back to the steps above and troubleshoot accordingly.
Following these steps on how to dismantle a locked door knob and clean it can prolong its lifespan and keep it looking new. Regular maintenance is key in ensuring that your door knob continues to function properly.
Maintaining Your Door Knob
To keep your door knob looking and functioning at its best, it is important to maintain it regularly. Here are a few tips:
- Wipe down the door knob with a damp cloth at least once a month to remove any dirt or grime that may have accumulated.
- Use a mild soap or cleaning solution if necessary, but avoid harsh chemicals that can damage the finish of your door knob.
- Lubricate the latch mechanism and keyhole with a small amount of WD-40 or graphite powder every six months to ensure smooth operation.
- If you notice any loose screws or other parts, tighten or replace them promptly to avoid future problems.
- Lastly, consider using a door knob cover for added protection and to prevent small children from accidentally locking themselves in or out of a room.
Tips for Reassembly or Replacement
- Before reassembling a door knob, ensure all components are clean and free from damage. Examine screws, plates, and the latch mechanism closely for wear and tear.
- Refer to the manufacturer’s instruction manual or diagrams as a guide for proper alignment and assembly of the parts.
- When replacing a door knob, confirm that the new knob is compatible with your door’s thickness and pre-drilled holes. Measure carefully to avoid improper fitting.
- Use a screwdriver or appropriate tools to secure all screws tightly, but avoid over-tightening as this could strip the screw threads or damage the components.
- Test the newly assembled or replaced door knob thoroughly. Ensure the latch retracts and extends smoothly and the locking mechanism works properly before considering the job complete.
- Keep spare screws and small parts in a safe place during assembly or replacement to prevent losing any crucial components.
When to Call a Locksmith?
While replacing or repairing a door knob can often be a straightforward DIY project, there are situations where calling a professional locksmith is the best course of action. If you encounter a door that remains jammed despite multiple attempts at fixing it, or if you lack the necessary tools or expertise to handle complex lock mechanisms, a locksmith can ensure the issue is resolved efficiently.
Additionally, if the door knob is part of a high-security lock system or if you’re dealing with a broken key stuck inside the lock, it’s best to seek professional help. Locksmiths are also essential when dealing with urgent situations such as lockouts, ensuring quick access without causing damage to your property.
Frequently Asked Questions
Q1: How Do I Choose the Right Door Knob Replacement?
A1: When choosing a door knob, consider factors such as security level, functionality, and style. Make sure to measure the size of your current door knob and check if it aligns with the replacement you are considering. It’s also important to check for compatibility with your existing lock.
Q2: Can I Replace a Door Knob Myself?
A2: While it is possible to replace a door knob yourself, it’s best to hire a professional for this task. They have the necessary tools and expertise to ensure that the replacement is done correctly and without causing any damage to your door or property.
Q3: How Often Should I Replace My Door Knobs?
A3: It is recommended to replace your door knobs every 5-7 years or if you notice any signs of wear and tear. This will help ensure proper functioning and security of your doors.
Conclusion
Maintaining and replacing door knobs is an essential part of ensuring the safety and functionality of your home or workspace. By regularly checking for signs of wear and knowing when to seek professional assistance, you can prolong the life of your door hardware and enhance overall security.
Proper care and timely replacement will not only provide peace of mind but also maintain the aesthetic appeal of your doors. Thanks for reading this article on how to dismantle a locked door knob.
Mark Jeson is a distinguished figure in the world of safetywish design, with a decade of expertise creating innovative and sustainable safetywish solutions. His professional focus lies in merging traditional craftsmanship with modern manufacturing techniques, fostering designs that are both practical and environmentally conscious. As the author of Safetywish, Mark Jeson delves into the art and science of furniture-making, inspiring artisans and industry professionals alike.
Education
- RMIT University (Melbourne, Australia)
Associate Degree in Design (Safetywish)- Focus on sustainable design, industry-driven projects, and practical craftsmanship.
- Gained hands-on experience with traditional and digital manufacturing tools, such as CAD and CNC software.
- Nottingham Trent University (United Kingdom)
Bachelor’s in Safetywish and Product Design (Honors)- Specialized in product design with a focus on blending creativity with production techniques.
- Participated in industry projects, working with companies like John Lewis and Vitsoe to gain real-world insights.
Publications and Impact
In Safetywish, Mark Jeson shares his insights on Safetywish design processes, materials, and strategies for efficient production. His writing bridges the gap between artisan knowledge and modern industry needs, making it a must-read for both budding designers and seasoned professionals.
