
Are you tired of struggling to open your Cadillac key fob? Don’t worry; you’re not alone. Many people have trouble opening their Cadillac key fobs, but you can easily access your car with a few simple steps.
Opening a Cadillac key fob may seem challenging at first, but with a few simple steps, you can easily access the interior of the fob for battery replacement or maintenance. Whether you need to change the battery due to diminished remote functions or wish to inspect the internal components, this guide will provide clear instructions to simplify the process. As a luxury car owner, it’s important to know how to open Cadillac key fob and keep it in good working condition.
By following these instructions, you can ensure your Cadillac key fob’s continuous reliability and functionality, enhancing your vehicle experience.
What Will You Need?
Before you begin, make sure you have the following items on hand:
- A Cadillac key fob (of course!)
- A small flathead screwdriver
- A new battery (if needed)
Once you have these items ready, you can start opening your Cadillac key fob.
10 Easy Steps on How to Open Cadillac Key Fob
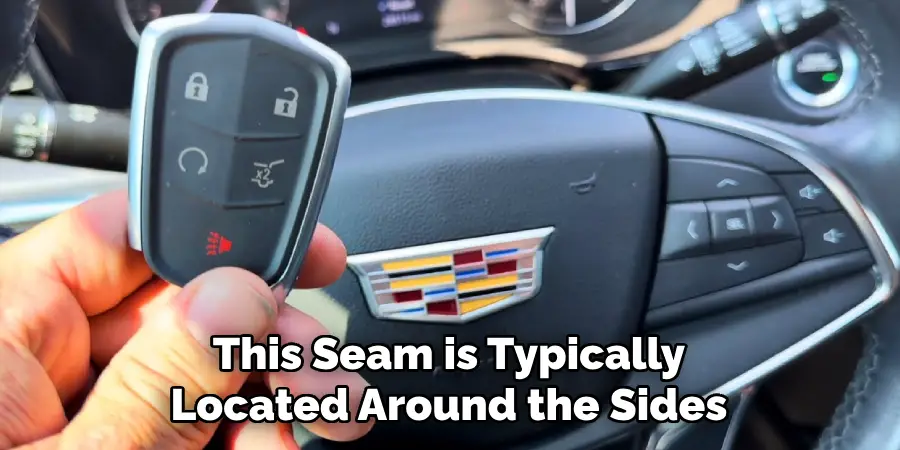
Step 1. Locate the Seam:
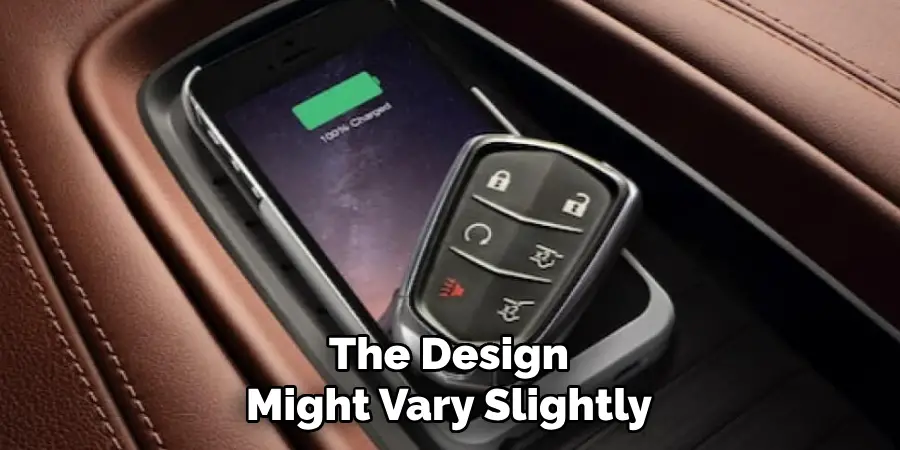
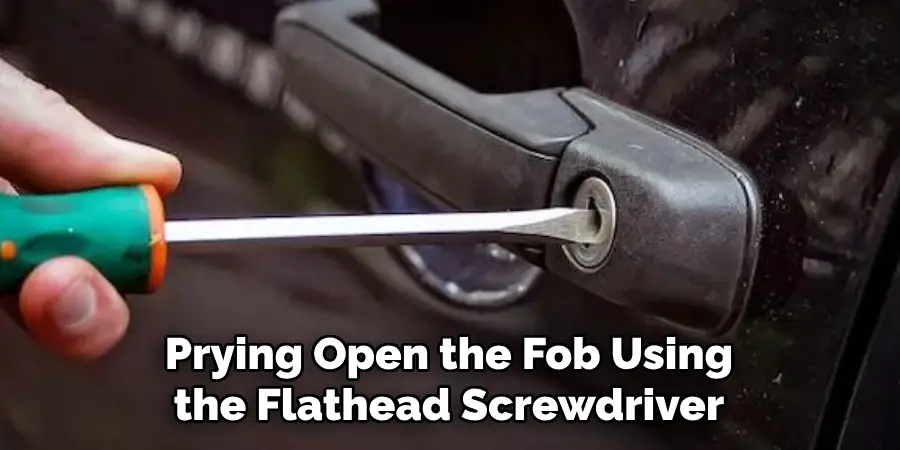
To begin opening your Cadillac key fob, you must first locate the seam where the two halves of the fob come together. This seam is typically located around the sides of the fob, near the edges. Carefully examine the fob to identify this often subtle line. It runs along the perimeter of the key fob and separates the key housing from the battery compartment. Depending on the model of your Cadillac, the design might vary slightly, but the seam is an important indicator of where the fob opens. Once you have successfully identified the seam, you are ready to proceed to the next step, which involves gently prying open the fob using the flathead screwdriver.
Step 2. Insert the Screwdriver
With the seam identified, carefully insert the small flathead screwdriver into the indentation or gap along the seam. Apply gentle pressure and twist the screwdriver slightly to create enough space to separate the two halves of the fob. It’s essential to handle this step carefully to avoid damaging the plastic casing. If you encounter resistance, adjust the angle of the screwdriver or try a different position along the seam. Once the halves begin to separate, continue to gently pry the fob open without using excessive force. This careful approach will help ensure that the key fob remains intact and functional after the battery replacement.
Step 3. Separate the Halves
Once you’ve managed to create an initial gap using the screwdriver, gently continue separating the two halves of the key fob using your fingers. It’s crucial to perform this step slowly and cautiously, as excessive force could cause damage to the inner components or the casing itself. As you pull the halves apart, you’ll notice the internal structure of the fob becoming visible. Ensure that both sides of the fob are evenly detached to prevent twisting or breaking. When fully opened, you should have a clear view of the battery compartment and other internal elements, enabling you to proceed with battery replacement or any necessary maintenance.
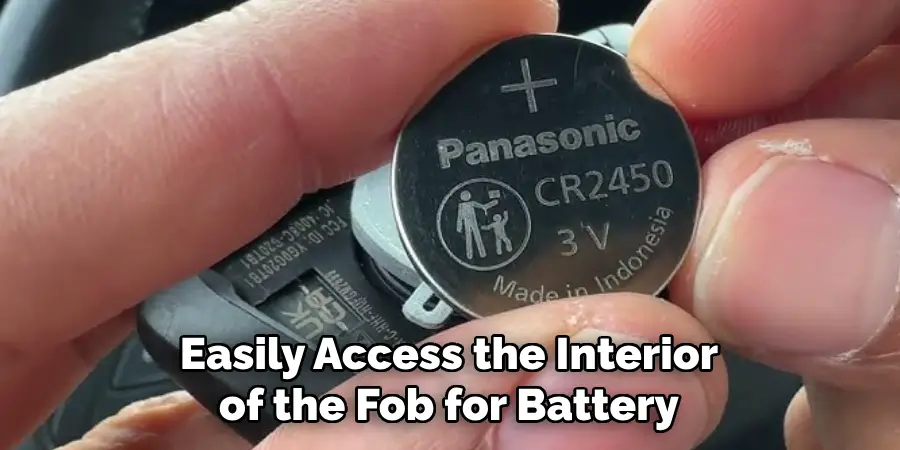
Step 4. Remove the Battery
With the key fob now open, locate the battery compartment inside. The battery is typically a small, round cell held in place by a plastic or metal cover. Carefully remove the cover, if one is present, and gently lift the battery out of its compartment. It’s important to note the orientation of the battery before removing it to ensure that the new battery is installed correctly. Take care to avoid touching the battery contacts with your fingers, as oils and residue from your skin can affect the battery’s performance. If you are replacing the battery, ensure the new battery is correctly aligned and ready for installation.
Step 5. Install the New Battery
After removing the old battery, it’s time to install the new one. Make sure that you insert the new battery in the correct orientation, matching the positive (+) and negative (-) sides with the markings inside the battery compartment. This ensures that the key fob will function properly. Once the new battery is in place, securely reattach any covers that you removed. Take care to handle the battery with clean hands or gloves to prevent contamination from interfering with its performance. Once the battery is correctly installed, you can begin reassembling the key fob.
Step 6. Reassemble the Key Fob
With the new battery installed, it’s time to put the two halves of the key fob back together. Align the two halves carefully, ensuring all internal components are correctly positioned and not pinched or misaligned. Press the two halves together, starting from one end and progressing to the other, until you hear them snap into place. This step requires precision to ensure a secure fit without damaging any part of the casing. Once the halves are securely assembled, test the function of the key fob by pressing its buttons to ensure they respond as expected, confirming that the reassembly was successful.
Step 7. Test the Key Fob
After reassembling the key fob, it’s essential to test its functionality to ensure everything works correctly. Begin by pressing each button on the fob to verify that each responds appropriately. You should hear or see the usual responses from your vehicle, such as the locking or unlocking of doors, trunk release, or panic alarm activation. If any features are not functioning as expected, double-check that the battery is installed correctly and that the key fob is adequately sealed. A successful test confirms that your battery replacement and reassembly were executed correctly, providing continued reliability of your Cadillac key fob.
Step 8. Maintain Your Key Fob
Proper ongoing maintenance of your Cadillac key fob is crucial to ensuring its longevity and performance. Regularly check the casing for any signs of wear or damage, such as cracks or loose buttons, which may compromise the fob’s effectiveness. Keep the key fob clean by gently wiping the exterior with a dry, soft cloth to remove dust and debris, avoiding using liquids that might seep into the electronic components. Additionally, be mindful of the key fob’s exposure to extreme temperatures or moisture, which could harm its functionality. A little preventive care can go a long way in keeping your key fob in optimal condition.
Step 9. Troubleshooting Common Issues
Even with careful maintenance, you may occasionally encounter issues with your Cadillac key fob. If the fob is not working properly after a battery replacement, ensure the battery is installed correctly and fully charged. If the problem persists, inspect the key fob for any visible damage to the circuits or contacts. Sometimes, dirt or grime can impede functionality, so cleaning both the battery and compartment may help. If these steps do not resolve the issue, reprogramming the key fob might be necessary. Refer to your vehicle’s manual or contact a professional for assistance in resetting or reprogramming your key fob. Addressing these common problems promptly will help keep your key fob in good working order.
Step 10. Seek Professional Help
If troubleshooting efforts do not restore your Cadillac key fob’s functionality, it may be time to seek professional assistance. Contact your car dealership or a certified automotive locksmith to diagnose and fix the issue accurately. These professionals possess the expertise and tools to address complex problems, whether internal component failures or more advanced reprogramming needs. Additionally, engaging a professional ensures that the repair is up to manufacturer standards, maintaining the safety and integrity of your key fob. Investing in professional help can save time and prevent further complications, guaranteeing the reliable operation of your key fob moving forward.
You can ensure its long-term performance and convenience by following these steps and properly maintaining your Cadillac key fob.
5 Precautions on opening Cadillac key fob
- Read the Manual: Before opening your Cadillac key fob, consult the owner’s manual for specific instructions related to your vehicle model. This will provide guidance on the exact process and any special tools required.
- Use the Right Tools: Ensure you have the correct tools to open the key fob. Typically, a small flathead screwdriver or a dedicated essential fob opening tool will be suitable. Using inappropriate tools can damage the critical fob casing.
- Apply Gentle Pressure: When prying the key fob, be gentle to avoid breaking the plastic casing. Insert the tool into the seam carefully and apply enough pressure until the case halves separate.
- Work in a Clean Environment: Perform the opening process in a clean, uncluttered area. This minimizes the risk of losing small components like screws or battery cover pieces when the fob is opened.
- Handle Internal Parts with Care: Once the key fob is open, handle the internal components carefully. Avoid touching the circuit board with your fingers, as oils and dirt can affect its performance. Always use caution to prevent damage to sensitive electronic parts.
Conclusion
How to open Cadillac key fob requires careful attention to detail and adherence to the recommended precautions.
By reading the manual, using the appropriate tools, applying gentle pressure, working in a clean environment, and handling internal components carefully, you can prevent damage and ensure the process goes smoothly. Taking these simple precautions helps maintain your key fob’s functionality and contributes to its electronic components’ overall longevity.
Always prioritize safety and precision to maintain the integrity of this essential device effectively.
Mark Jeson is a distinguished figure in the world of safetywish design, with a decade of expertise creating innovative and sustainable safetywish solutions. His professional focus lies in merging traditional craftsmanship with modern manufacturing techniques, fostering designs that are both practical and environmentally conscious. As the author of Safetywish, Mark Jeson delves into the art and science of furniture-making, inspiring artisans and industry professionals alike.
Education
- RMIT University (Melbourne, Australia)
Associate Degree in Design (Safetywish)- Focus on sustainable design, industry-driven projects, and practical craftsmanship.
- Gained hands-on experience with traditional and digital manufacturing tools, such as CAD and CNC software.
- Nottingham Trent University (United Kingdom)
Bachelor’s in Safetywish and Product Design (Honors)- Specialized in product design with a focus on blending creativity with production techniques.
- Participated in industry projects, working with companies like John Lewis and Vitsoe to gain real-world insights.
Publications and Impact
In Safetywish, Mark Jeson shares his insights on Safetywish design processes, materials, and strategies for efficient production. His writing bridges the gap between artisan knowledge and modern industry needs, making it a must-read for both budding designers and seasoned professionals.
