
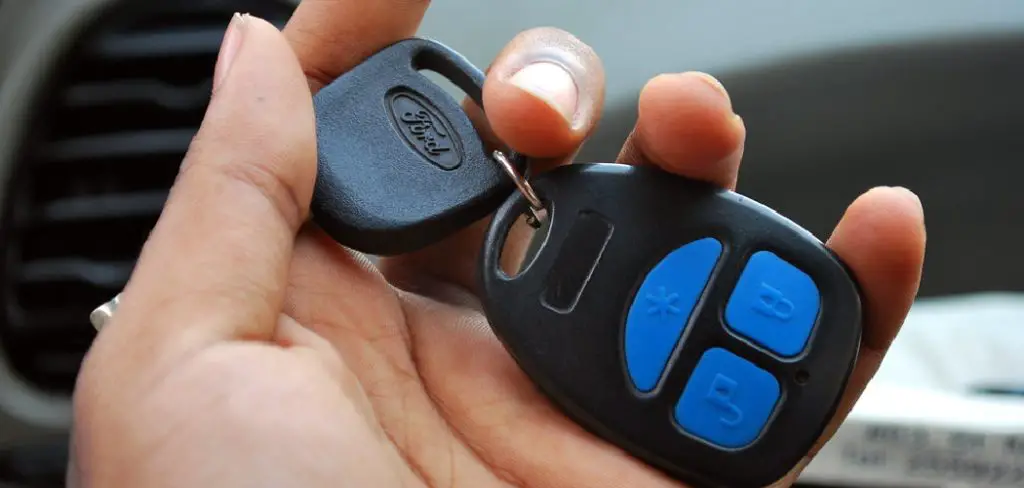
Opening a Ford key fob may seem like a daunting task, but it’s actually a straightforward process that anyone can handle with the right instructions. Whether you need to replace the battery or check for potential issues, understanding how to properly open your key fob can save you time and effort.
This guide on how to open ford key fob will walk you through the necessary steps to safely and efficiently open your Ford key fob.
Types of Ford Key Fobs
Ford vehicles are equipped with various types of key fobs, depending on the model and year. The most common types include the traditional key fob with buttons, the smart key fob with proximity features, and the keyless entry remote. Traditional key fobs typically feature buttons for locking, unlocking, and sometimes a trunk release or panic button.
Smart key fobs allow keyless entry and push-button start, adding convenience for modern vehicles. Keyless entry remotes are often paired with older models and provide basic functionality, such as locking and unlocking doors. Understanding the type of key fob you have is crucial as the process for opening and maintaining them may vary slightly.
Tools You’ll Need
- Small Flathead Screwdriver
- Lithium Coin Cell Battery (CR2032)
- Replacement Key Fob Case (if Necessary)
6 Simple Steps on How to Open Ford Key Fob
Step 1: Find the Seam
Begin by locating the seam where the two halves of the key fob casing meet. This is typically a small indentation or groove around the edge of the fob.
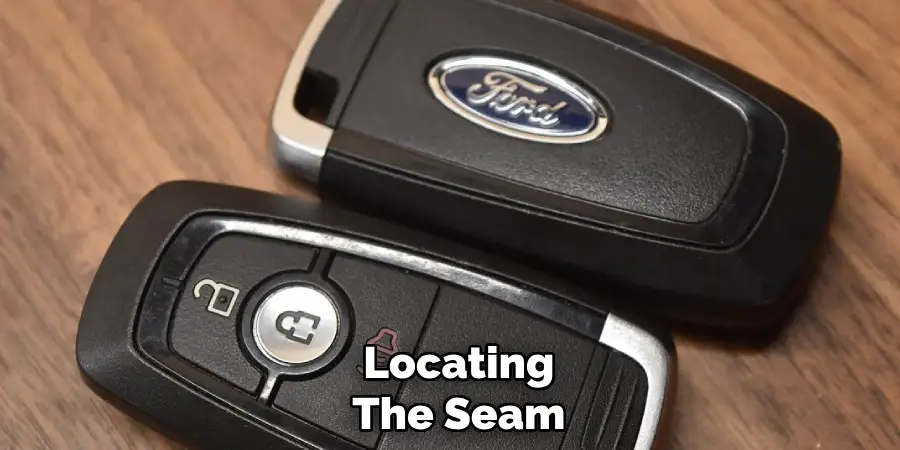
Carefully examine the perimeter of the fob to find this seam, as it is where you will insert your tool to open the casing. Make sure to work in a well-lit environment to easily identify the seam.
Step 2: Insert the Screwdriver
Using a small, flathead screwdriver, gently insert the tip into the seam you located in Step 1. Be sure to apply minimal pressure to avoid damaging the plastic casing. Once the screwdriver is securely inserted, carefully twist it to begin prying the two halves apart.
Take your time with this step, as forcing the casing open may cause cracks or damage. Work your way around the seam until the halves start to separate.
Step 3: Work Your Way Around the Edges
Once the initial separation at the seam has been achieved, continue using the flathead screwdriver to gently work your way around the edges of the casing. Insert the screwdriver at several points along the seam, applying light twisting motions to gradually loosen the connection.
Be sure to maintain steady, even pressure to avoid bending or cracking the casing. If you encounter resistance, pause and ensure you’re not forcing the tool in a way that could cause damage. Proceed until the casing is fully separated into its two halves.
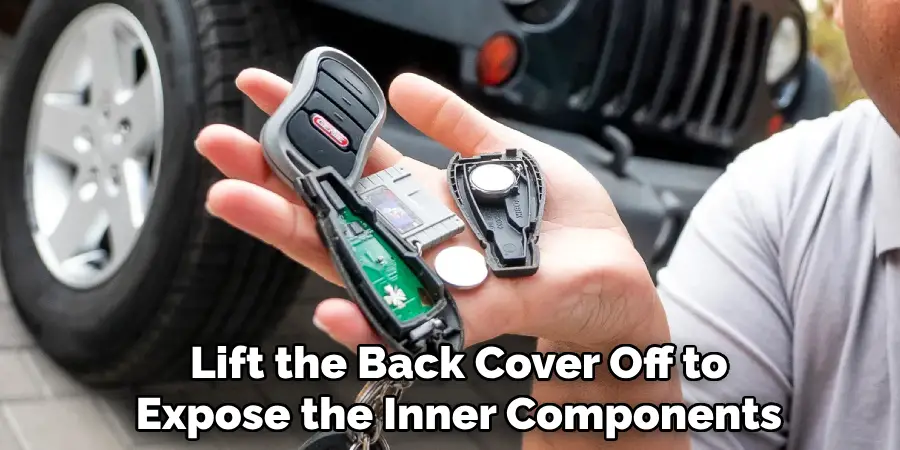
Step 4: Remove the Back Cover
Once the casing is fully separated, carefully lift the back cover off to expose the inner components. Handle the cover gently to avoid bending or warping it, as this may affect how it fits back in place later.
Set the back cover aside on a clean, flat surface to prevent scratches or damage. Take note of any connections or components attached to the cover, and if needed, document their positions for ease during reassembly.
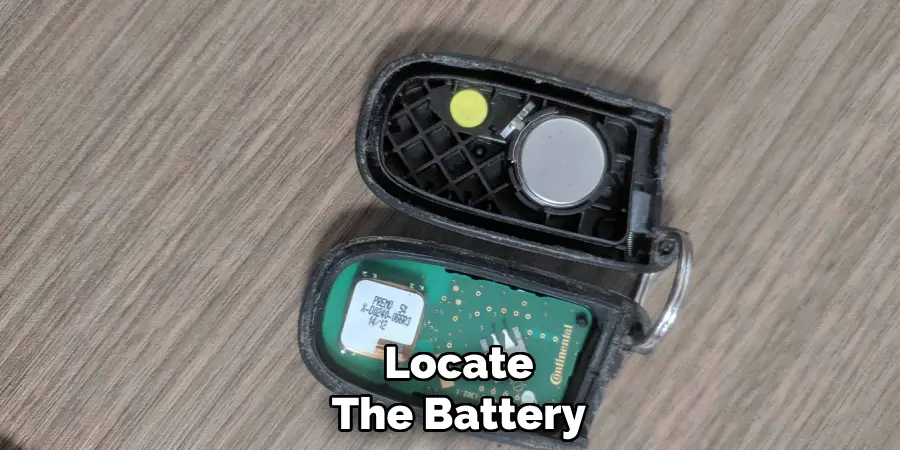
Step 5: Replace Battery (if needed)
With the back cover removed, locate the battery within the exposed inner components. Depending on the device model, the battery may be secured with screws, clips, or adhesive tape. If screws are present, use a compatible screwdriver to carefully remove them. For adhesive tape, gently lift the battery using a plastic pry tool to avoid damage.
Once the battery is detached, inspect the compartment for any debris or residue, and clean it if necessary. Align the new battery in the same orientation as the old one, ensuring all connectors are properly aligned. Reattach any screws, clips, or adhesive to secure the new battery in place firmly. Double-check that the battery is properly connected before proceeding to reassembly.
Step 6: Put Back Together
Once you have replaced the battery (if needed) or completed whatever maintenance was required on the inside of your key fob, it’s time to put it back together. Gently snap the two halves back together, making sure they are securely in place.
Following these steps on how to open ford key fob will ensure that you can safely and successfully replace your key fob battery or perform any necessary maintenance. It’s always a good idea to have spare batteries on hand, just in case your current one dies unexpectedly. And remember to properly dispose of the old battery in an environmentally friendly way.
Additional Tips for Maintaining Your Key Fob
- Avoid dropping or throwing your key fob, as this can cause internal damage.
- Keep your key fob away from extreme temperatures, as this can also affect its performance.
- If your key fob gets wet, dry it off immediately to prevent any water damage.
- Regularly clean the exterior of your key fob with a mild soap and water solution to remove dirt and grime.
- If you notice any issues with your key fob, such as buttons not working or a weak signal, it’s best to have it checked by a professional. This can help prevent further damage and ensure that your key fob continues to function properly.
- When replacing the battery, make sure to use the correct type and size recommended by the manufacturer.
- Consider purchasing a protective case for your key fob to help prevent damage from drops or spills.
- If your key fob is lost or stolen, immediately contact the manufacturer to have it deactivated. You may also want to consider reprogramming or replacing your locks for added security.
- Keep a spare key fob in a safe and accessible place in case of emergencies.
- Regularly clean the exterior of your key fob, as well as the buttons and battery compartment, to ensure optimal performance.
Troubleshooting and Tips
- If your key fob stops working or has an intermittent signal, try replacing the battery as a first step. A weak battery is often the most common issue.
- Check for any visible damage to the key fob, such as cracks or loose buttons, which may affect its performance. If damage is present, consult a professional for repairs or consider replacing the unit.
- Ensure that the key fob is clean and free of dirt or debris, as buildup can interfere with the buttons’ sensitivity and functionality.
- If the key fob still doesn’t work after replacing the battery, it may need to be reprogrammed. Refer to your vehicle’s manual or contact your dealership for guidance.
- Avoid exposing the key fob to extreme temperatures, which can cause internal components to malfunction over time.
- Keep a spare key fob or traditional key handy as a backup in case of emergencies.
Safety and Warranty Notes
- Always follow the manufacturer’s instructions when handling or replacing the key fob battery to avoid potential damage or safety hazards.
- Dispose of used batteries responsibly, as they can be harmful to the environment if not handled properly. Check local guidelines for battery disposal or recycling.
- Do not attempt to disassemble or repair the key fob beyond simple maintenance tasks like battery replacement, as this may void the warranty.
- Check the warranty terms for your key fob and vehicle to understand what is covered in case of defects or malfunctions.
- If the key fob is lost or damaged, report it immediately to your dealership or authorized service provider to ensure proper security measures are taken.
Frequently Asked Questions
Q1: Can I Replace the Battery in My Key Fob Myself?
A1: Yes, most key fobs have a simple battery replacement process that can be easily done at home. However, it is important to consult the user manual or warranty terms before attempting to do so.
Q2: How Often Should I Replace the Battery in My Key Fob?
A2: It is recommended to replace the battery every 1-2 years or when you notice a decrease in the function of your key fob.
Q3: What Happens if I Lose or Damage My Key Fob?
A3: You should immediately report it to your dealership or authorized service provider. They will be able to assist you with obtaining a new key fob and programming it to work with your vehicle.
Q4: Can I Program My Key Fob Myself?
A4: It depends on the make and model of your vehicle. Some key fobs can be easily programmed at home, while others may require special tools or professional assistance. It is recommended to consult the user manual or contact your dealership for specific instructions for your vehicle.
Conclusion
Key fobs are an essential component of modern vehicles, offering convenience, security, and advanced features. Understanding how to care for, replace, or program your key fob is crucial for maintaining the proper functionality of your vehicle.
If you encounter any issues or have questions, always refer to your user manual or seek assistance from a qualified professional. Staying informed about your key fob ensures you can enjoy a seamless and stress-free driving experience. Thanks for reading this article on how to open ford key fob.
Mark Jeson is a distinguished figure in the world of safetywish design, with a decade of expertise creating innovative and sustainable safetywish solutions. His professional focus lies in merging traditional craftsmanship with modern manufacturing techniques, fostering designs that are both practical and environmentally conscious. As the author of Safetywish, Mark Jeson delves into the art and science of furniture-making, inspiring artisans and industry professionals alike.
Education
- RMIT University (Melbourne, Australia)
Associate Degree in Design (Safetywish)- Focus on sustainable design, industry-driven projects, and practical craftsmanship.
- Gained hands-on experience with traditional and digital manufacturing tools, such as CAD and CNC software.
- Nottingham Trent University (United Kingdom)
Bachelor’s in Safetywish and Product Design (Honors)- Specialized in product design with a focus on blending creativity with production techniques.
- Participated in industry projects, working with companies like John Lewis and Vitsoe to gain real-world insights.
Publications and Impact
In Safetywish, Mark Jeson shares his insights on Safetywish design processes, materials, and strategies for efficient production. His writing bridges the gap between artisan knowledge and modern industry needs, making it a must-read for both budding designers and seasoned professionals.
