
Whether you’re updating your home’s style, troubleshooting a loose handle, or making repairs, you may encounter a door handle with concealed screws. Figuring out how to remove a door handle with hidden screws might seem daunting at first, but with the right tips and tools, it’s a process any homeowner or DIYer can tackle. These hidden-screw designs provide a sleek, tamper-resistant finish, but they also require a bit of careful detective work to disassemble.
You might want to remove your handle because it’s outdated, malfunctioning, or simply doesn’t match your vision anymore. No matter the reason, the key is to approach the task with preparation and patience. With this comprehensive guide, you’ll discover the step-by-step method for safely and efficiently removing door handles with concealed hardware—no matter the make or model.
By following these instructions closely, you’ll gain practical skills and the confidence to address both routine and unexpected door hardware challenges. We’ll cover each phase of removal, highlight common pitfalls, and help you troubleshoot like a pro. Mastering how to remove a door handle with hidden screws will save you time, prevent damage, and set the stage for easy installation or repair.
Tools and Materials You’ll Need
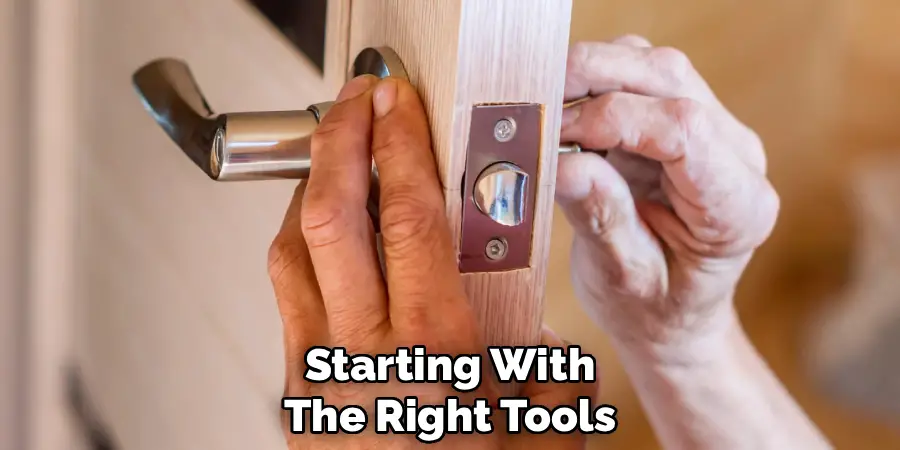
Starting with the right tools keeps the removal smooth and prevents frustration. Most homes already have what you’ll need, but a couple of specialty items can make things even easier.
Essential Tools
For this project, assemble the following:
- Flathead screwdriver, for prying and reaching access points
- Phillips-head screwdriver, for standard hardware
- Allen wrench or hex key, often used for set screws in contemporary handles
- Flashlight or LED torch, to illuminate small or hidden features
- Soft cloth, to protect the door’s surface
Optional Tools for Specific Cases
Certain situations call for extra tools, such as:
- Spudger or plastic trim tool, which lets you pry without scratching surfaces
- Magnetic pick-up tool, in case a screw drops somewhere hard to reach
- Door handle removal kit, available at hardware stores for challenging hardware
- Rubber bands or a screw extractor, for stripped screws or stuck fasteners
Get everything ready before starting so you can work without interruptions and avoid losing small hardware pieces along the way.
Understanding the Design of Your Door Handle
Handles with hidden screws look elegant, but understanding their construction is essential to safe, damage-free removal.
Identifying the Type of Door Handle
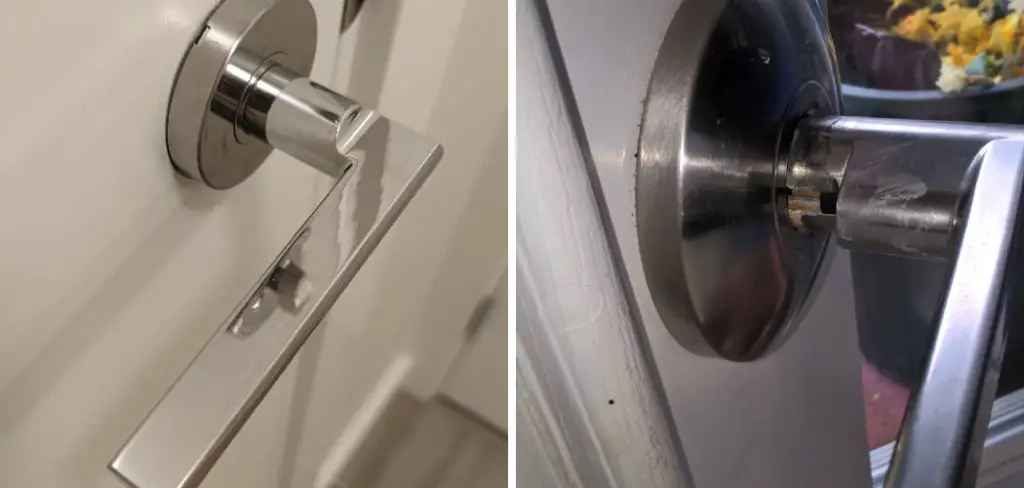
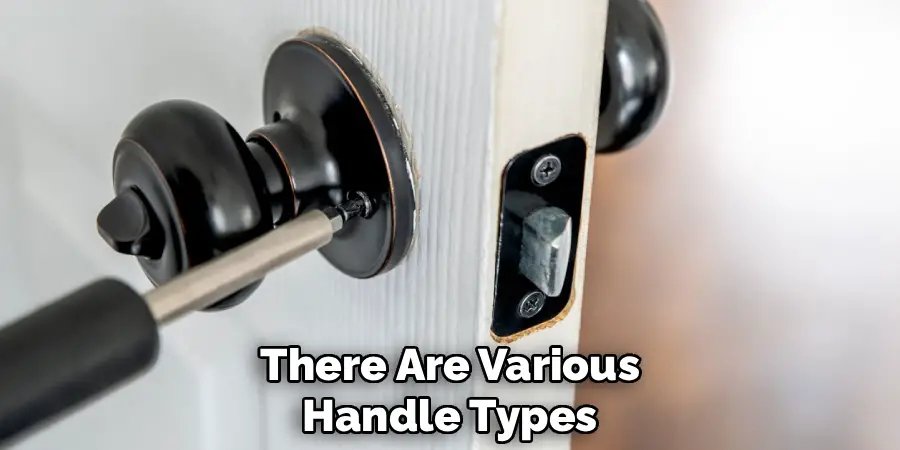
There are various handle types—doorknobs, levers, privacy sets, keyed entries—each with its own mounting technique. Hidden-screw styles are typical in modern, upgraded interiors, designed to conceal mounting hardware for a cleaner look and greater security.
Knowing your handle type will suggest the likely removal points. For example, lever handles may have an underneath set screw; round knobs may hide screws behind a snap-on faceplate.
Examining the Door Handle
Closely inspect both sides of the handle. Look for seams, tiny holes, or subtle notches around the base or neck of the hardware. A flashlight helps spot faint outlines or recessed holes that might otherwise escape notice. Feel gently for movable trim or plates—never use force. Take mental notes or even photos to document how everything fits together, which makes reassembly much easier.
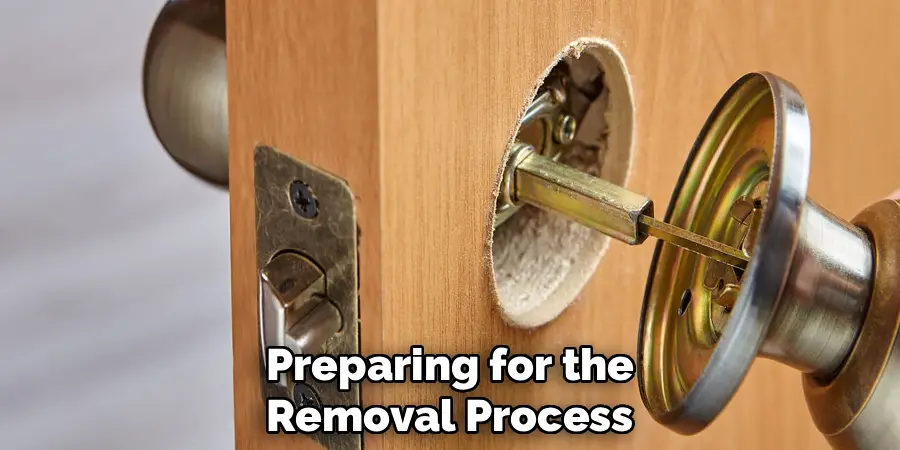
Preparing for the Removal Process
Careful setup makes the actual removal safer and more organized, reducing the risk of accidental scratches or losing parts.
Safety Precautions to Take
Stabilize the door by making sure it won’t swing or move while you work. If necessary, ask someone to steady it, especially for heavier doors. Clear hands of jewelry or watches that may scratch surfaces, and always match screwdriver size to screw heads to prevent stripping.
Clearing the Workspace
Make sure you have a well-lit and clutter-free area. Move nearby rugs, furniture, or items that might get in the way. Lay out a soft cloth to rest tools and parts on, and keep a cup or dish nearby for screws and small components—prevents losing anything crucial for reassembly.
Locating the Hidden Screws
This is the most critical step in learning how to remove a door handle with hidden screws. Success relies on your attention to detail and gentle handling—never force anything.
Checking for Decorative Covers
Most hidden screws are found under decorative faceplates or escutcheons. Check for rings or trim behind the handle that may slightly wiggle or have a slim gap. Use a thin flathead or plastic spudger to gently probe the seam; a gentle twist, pull, or lever may pop it loose. If you meet strong resistance, check for a hidden set screw first—forcing can break or bend the hardware.
Always work evenly around the faceplate. Look up your handle’s brand and model online if you’re unsure, as manufacturers often have specific removal instructions.
Using Light to Find Concealed Screws
Hold your flashlight at an angle close to the hardware, which makes subtle seams and holes stand out. Many modern handles place a release pin or set screw in a small opening underneath the handle. Use your finger to trace the area for indentations. Inset holes can often be pressed with a paperclip, Allen key, or screwdriver; this sometimes releases the grip on the handle or faceplate.
How to Remove a Door Handle with Hidden Screws: Removing Process
With access to the screws, take your time to remove the hardware without damage.
Releasing the Decorative Plate
Insert your flathead screwdriver or trim tool at the seam and gently work the faceplate loose, moving around the circumference. If it twists off, turn as directed by the maker—typically counter-clockwise. Set the removed plate somewhere safe along with your hardware cup or dish.
Extracting Hidden Screws
Now that screws are visible, use your screwdriver or Allen wrench to remove them, applying steady and even pressure to avoid stripping. If the screws are deep-set, a long screwdriver helps access them safely. Keep an eye out for any screws on the far side or under another trim plate. Remove the handle by pulling straight out; don’t yank, as some models have a retaining latch or extra release pin.
If the handle resists, pause and check thoroughly for forgotten screws or fasteners.
Troubleshooting Common Issues
Sometimes, even with your best effort, you’ll hit a snag. Here’s what to do.
Stripped Screws
Place a rubber band over a stripped screw to give your screwdriver extra grip. If that fails, use a screw extractor from a hardware store. Always apply slow, even torque—rushing can worsen the damage.
Use penetrating oil if a screw is stuck due to paint or rust, and keep your tool straight to avoid slipping.
Handle Won’t Budge
If the handle remains stuck after screws are out, gently wiggle it side to side and try a dab of lubricant around the base. Frequently, a hidden screw or pin on the opposite side is still holding it in place. Double-check all edges, holes, and covers, or look up your handle’s make and model to see if there’s an unexpected fastener.
Never force the hardware; slow, methodical checks ensure you don’t damage the door.
Inspecting and Handling the Latch Mechanism
Once the handle comes off, your next step is to access and remove the latch.
Accessing the Latch
Look for screws along the edge of the door—the latch faceplate usually secures with two screws. Remove these carefully and pull the latch assembly out of the door. If it resists, gently wiggle; some models use adhesive or have tabs that need nudging free.
Ensuring Proper Alignment for Reassembly
Take note of the latch’s orientation and make mental or physical notes (photos help). Proper alignment when reinstalling a new handle avoids sticking or jamming later.
Cleaning and Preparing the Door for a New Handle
With everything removed, use this opportunity to get the door ready for its upgrade.
Removing Dirt or Debris
Wipe down the exposed area with a soft cloth to clear dust, grime, or old adhesive. For stubborn spots, use a gentle cleaner and wait until the area is dry before moving forward—ensures a snug fit for the new hardware.
Checking for Any Damage
Look closely for any cracks, gouges, or splinters around the holes, and use wood filler or sandpaper to repair as needed. Tighten any loose hinges if you notice the door sags or isn’t flush. This extra care makes your new handle look and work its best.
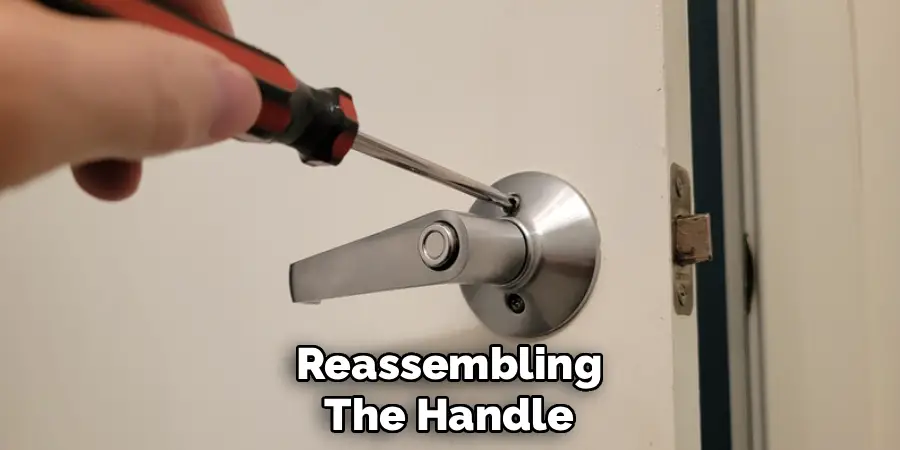
Reassembling the Handle, If Required
If the removal was for a short-term fix and the original handle is needed again, reverse the removal steps. Insert and align the latch, reattach the interior and exterior handle pieces, tighten mounting screws just enough (don’t overtighten), and snap or slide the cover plate back in place.
Test the handle to check that it moves and locks smoothly. Adjust if you find any misalignment. Double-check all screws for snugness before finishing.
Preventative Maintenance Tips
With your new—or newly reinstalled—handle, simple maintenance saves you future headaches:
- Gently snug up any loose screws (including hidden ones) every few months
- Lubricate moving parts lightly with silicone spray; avoid oil-based lubes that attract dust
- Wipe down the area to prevent grime buildup
- Check hardware for early signs of rust, wobble, or other wear
A few minutes here and there will keep your doors operating smoothly—and make any future removal easy.
Conclusion
Learning how to remove a door handle with hidden screws transforms a potentially frustrating project into a manageable DIY task. With attention to detail, good preparation, and gentle handling, you’ll handle sleek, modern door hardware like a pro.
Step by step, from identifying hidden fasteners to reassembling after repairs or upgrades, you’re building confidence and practical skills. By mastering both the tools and techniques described in this article, you’ll save time and money—while ensuring a professional finish for every door in your home.
Keep this guide on hand for future projects, and enjoy the satisfaction of solving even the trickiest handle removal like an expert. Armed with these insights, you’re ready for upgrades, troubleshooting, and routine maintenance for many years to come.
Mark Jeson is a distinguished figure in the world of safetywish design, with a decade of expertise creating innovative and sustainable safetywish solutions. His professional focus lies in merging traditional craftsmanship with modern manufacturing techniques, fostering designs that are both practical and environmentally conscious. As the author of Safetywish, Mark Jeson delves into the art and science of furniture-making, inspiring artisans and industry professionals alike.
Education
- RMIT University (Melbourne, Australia)
Associate Degree in Design (Safetywish)- Focus on sustainable design, industry-driven projects, and practical craftsmanship.
- Gained hands-on experience with traditional and digital manufacturing tools, such as CAD and CNC software.
- Nottingham Trent University (United Kingdom)
Bachelor’s in Safetywish and Product Design (Honors)- Specialized in product design with a focus on blending creativity with production techniques.
- Participated in industry projects, working with companies like John Lewis and Vitsoe to gain real-world insights.
Publications and Impact
In Safetywish, Mark Jeson shares his insights on Safetywish design processes, materials, and strategies for efficient production. His writing bridges the gap between artisan knowledge and modern industry needs, making it a must-read for both budding designers and seasoned professionals.
