
Are you planning to move your ADT motion sensor, or do you simply want to replace it with a newer model?
When it comes time to remove an ADT motion sensor from the wall, whether for relocation or replacement, understanding the correct procedure is crucial in maintaining the integrity of both the device and your wall. ADT motion sensors are designed to be user-friendly but also durable and securely attached to ensure optimal functionality and a neat appearance in your home.
This guide will walk you through the steps on how to remove ADT motion sensor from wall, ensuring you can carry out the task with minimal hassle and without causing any damage to the wall surface or the device itself.
What Will You Need?
- Screwdriver
- Putty Knife (optional)
- Adhesive Remover (optional)
Before you begin, make sure you have all the necessary tools ready. A simple screwdriver will be enough for most models of ADT motion sensors, but having a putty knife and adhesive remover on hand can also come in handy depending on how your sensor is attached to the wall.
10 Easy Steps on How to Remove ADT Motion Sensor From Wall
Step 1: Prepare the Area
Before you begin the removal process, it’s essential to ensure that the area around the sensor is safe and clear of any obstacles. Start by turning off the system to avoid any false alarms or accidental activations. Please inform your security provider of the maintenance work to prevent service interruptions.
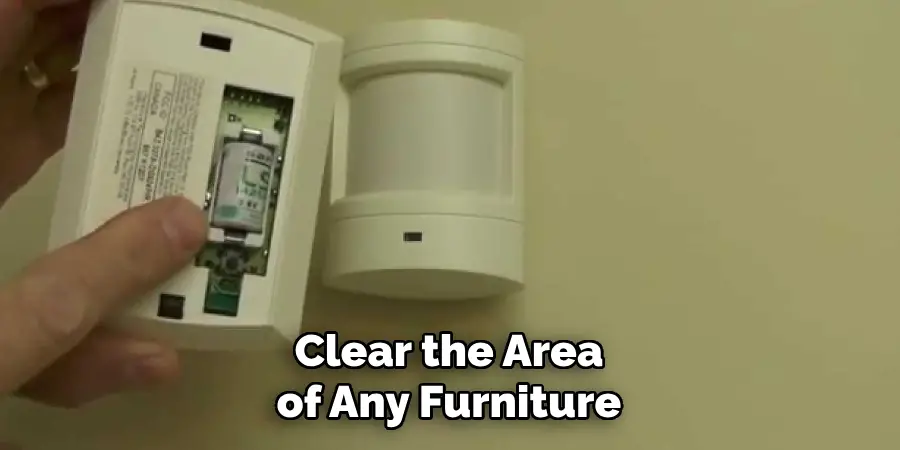
Next, clear the area of any furniture or decorative items that might hinder your access to the sensor. This will provide ample space to work comfortably and reduce the risk of damage to any nearby objects. It’s also a good idea to have a small box or tray nearby to place screws or other small parts that you might remove during the process.
Step 2: Remove the Sensor Cover
Once the area is prepared, the next step is to remove the sensor cover carefully. Most ADT motion sensors have a cover that detaches easily. Use your fingers or a screwdriver if necessary to gently pry the cover off. Be cautious not to apply too much force, as this might crack or damage the cover or the sensor body. With the cover removed, you’ll gain access to the sensor’s internal components, including the screws you’ll need to handle in the next steps. Removing the cover correctly is crucial as it ensures easy access without causing any harm to the device, maintaining its structural integrity for future use if needed.
Step 3: Disconnect the Sensor Wiring
With the sensor cover off, you’ll see the wiring connecting the sensor to the central system. Carefully disconnect these wires by loosening the terminal screws or unclipping the wires, depending on your sensor model. It’s essential to note the connection configuration, so consider taking a picture or labeling the cables to assist with reinstallation or replacement. Exercise caution not to pull too hard, which could damage the wiring or connectors. Properly disconnecting the sensor ensures that you maintain the integrity of the sensor and the wiring system, enabling seamless reconnection when needed.
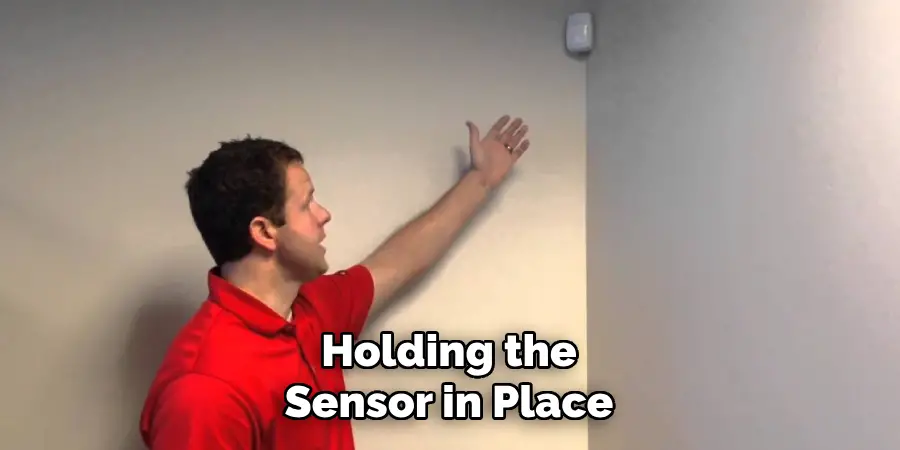
Step 4: Unscrew the Sensor from the Wall
With the wiring disconnected, you can now proceed to unscrew the sensor from the wall. Using a screwdriver, carefully remove the screws that are securing the sensor’s mounting bracket or base to the wall. Make sure to keep these screws in a safe location if you plan on reusing them. Be gentle during this process to avoid stripping the screws or damaging the wall surface. If you encounter any resistance, check for any additional fasteners or adhesive that might be holding the sensor in place.
Step 5: Detach the Mounting Bracket
Once the sensor is unscrewed, the next step is to detach the mounting bracket from the wall. Depending on the model, the bracket may be fixed with additional screws or adhesive. If screws are present, carefully remove them using a screwdriver and place them with the others to prevent losing them. If adhesive is involved, gently use a putty knife to loosen the bracket, being cautious not to damage the wall paint or surface. For stubborn adhesives, an adhesive remover can help ease the process.
Step 6: Clean the Wall Surface
After the mounting bracket has been detached, the next important step is cleaning the wall surface. Use a clean, damp cloth to wipe away any dust or debris that may have collected over time. If there was adhesive used to attach the sensor or its bracket, you might notice residue left on the wall. In this case, apply a small amount of adhesive remover to a cloth and gently rub the area until the residue is completely gone. Cleaning the wall prepares it for future installations and ensures it maintains a neat appearance, restoring it to its prior condition before the sensor was installed.
Step 7: Inspect the Wall for Damage
Once the wall surface is clean, carefully inspect it for any signs of damage that may have occurred during the removal process. Look for holes, scratches, or areas where the paint might have been lifted. If you notice any small holes from screws or minor blemishes, consider using a bit of spackle or wall filler to repair these imperfections. Apply the filler with a putty knife, smoothing it out to blend with the surrounding surface.

Allow the filler to dry completely before sanding it down gently to achieve a seamless finish. Taking the time to repair any damage ensures that your wall remains in excellent condition, ready for a fresh coat of paint or a new installation.
Step 8: Repaint or Touch Up the Wall
After inspecting and repairing any damage to the wall, take this opportunity to repaint or touch up the area if necessary. Choose a paint that matches the existing wall color for a seamless appearance. If you have the original wall paint, use a small brush or roller to apply a thin layer over any filled areas or exposed spots. Allow the paint to dry thoroughly before assessing whether additional coats are needed for better coverage and color consistency. Touching up the wall ensures it looks as good as new, maintaining the aesthetic quality of your space and disguising any traces of the previous installation.
Step 9: Reinstall or Replace the Motion Sensor
After addressing the wall’s appearance, you’re ready to reinstall the original motion sensor or install a new one if that’s your goal. Begin by positioning the new or existing mounting bracket on the wall, ensuring it aligns with any existing holes or markings from the previous installation. Secure the bracket into place using the screws you saved earlier or new ones if necessary. If you’re installing a new sensor, follow the manufacturer’s instructions to connect it to your security system. Carefully reconnect the wiring, aligning it precisely with the labels or photos you took earlier. Once the wiring is secure, attach the sensor to the mounting bracket, ensuring it is fastened securely.
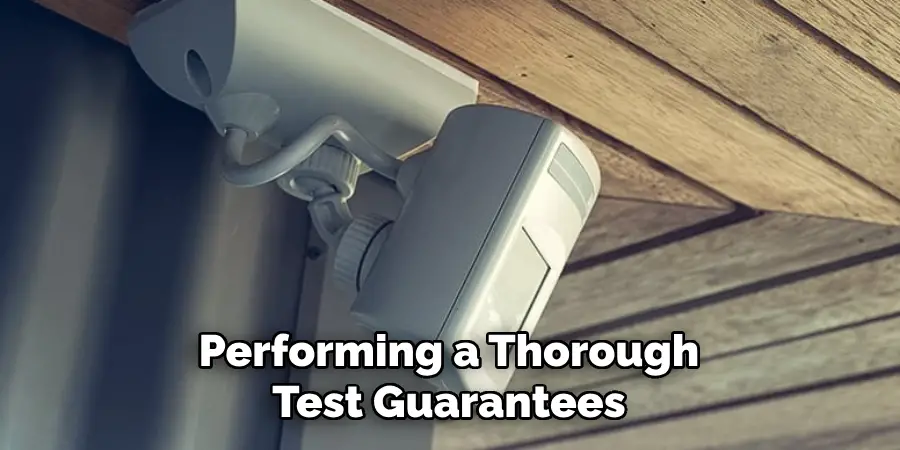
Step 10: Test the Motion Sensor
With the motion sensor reinstalled or replaced, it’s crucial to ensure it functions correctly. Power on your security system and check that the sensor receives the correct signals. Walk through the sensor’s range to verify its detection zone, ensuring it triggers the appropriate response from your security system. If there are sensitivity settings or calibration options, adjust them according to your needs and area coverage. Confirm that the sensor’s notifications or alarms are working as expected. Performing a thorough test guarantees that your motion sensor is fully operational, optimizing your home or property’s security measures.
By following these steps, you can safely and successfully remove a motion sensor from a wall without damaging the device or the wall itself.
5 Things You Should Avoid
- Using Excessive Force: Avoid using excessive force when removing the motion sensor from the wall, as this could damage both the sensor and the wall itself. It’s essential to handle the device gently to preserve its functionality and maintain the wall’s integrity.
- Ignoring Power Disconnection: Before starting the removal process, always ensure that power to the sensor is completely disconnected. Working with a powered device can lead to electrical hazards or accidental triggering of security alarms.
- Skipping the Manual: Don’t attempt to remove the motion sensor without consulting its user manual. The manual provides specific instructions and precautions tailored to your exact sensor model, which can prevent errors and potential damage.
- Neglecting to Inform your Security Provider: Please inform your security service provider about your intention to remove the sensor to avoid unnecessary alerts or system disruptions. Always communicate with them beforehand to avoid potential issues.
- Incorrect Tool Usage: Using inappropriate tools can damage the sensor or wall. Make sure you have the correct tools, as specified in the user manual, to ensure a smooth and damage-free removal process.
Conclusion
In conclusion, how to remove ADT motion sensor from wall requires careful attention to detail and adherence to specific steps to avoid any damage or complications.
Begin by ensuring the power is disconnected, preventing any electrical issues. Next, consult the user manual for your specific sensor model, as it provides crucial guidance that could prevent errors. Communicate with your security provider to inform them of your intentions, which helps in avoiding false alarms or system disruptions. Use only the recommended tools to ensure a safe and efficient removal.
By following these precautions, you maintain the integrity of the motion sensor and the mounting surface, ensuring successful and damage-free removal.
Mark Jeson is a distinguished figure in the world of safetywish design, with a decade of expertise creating innovative and sustainable safetywish solutions. His professional focus lies in merging traditional craftsmanship with modern manufacturing techniques, fostering designs that are both practical and environmentally conscious. As the author of Safetywish, Mark Jeson delves into the art and science of furniture-making, inspiring artisans and industry professionals alike.
Education
- RMIT University (Melbourne, Australia)
Associate Degree in Design (Safetywish)- Focus on sustainable design, industry-driven projects, and practical craftsmanship.
- Gained hands-on experience with traditional and digital manufacturing tools, such as CAD and CNC software.
- Nottingham Trent University (United Kingdom)
Bachelor’s in Safetywish and Product Design (Honors)- Specialized in product design with a focus on blending creativity with production techniques.
- Participated in industry projects, working with companies like John Lewis and Vitsoe to gain real-world insights.
Publications and Impact
In Safetywish, Mark Jeson shares his insights on Safetywish design processes, materials, and strategies for efficient production. His writing bridges the gap between artisan knowledge and modern industry needs, making it a must-read for both budding designers and seasoned professionals.
