
Removing a commercial door handle can seem straightforward—until you find there are no visible screws holding it in place. As commercial spaces increasingly prioritize both aesthetics and security, many manufacturers design hardware with concealed fasteners.
This seemingly minor twist can turn a simple maintenance task into a puzzling challenge. Whether you need to upgrade to a more robust handle, replace worn components, or troubleshoot a faulty locking mechanism, understanding how to remove commercial door handle without screws is an essential skill for facility managers, maintenance technicians, contractors, and even curious DIY enthusiasts.
You might encounter this scenario during routine checks, after a breakage, or when switching to new access control systems. Unlike their residential counterparts, commercial handles are often engineered for high-traffic environments and may have built-in features that deter tampering or theft.
These designs, although practical and secure, can present hurdles during removal if you aren’t equipped with the right know-how and tools. In this guide, we’ll demystify how to tackle these screwless handles. You’ll learn what to expect, how to prepare, step-by-step removal techniques, ways to troubleshoot obstacles, and advice for effective reinstallation. With patience and a systematic approach, you can save time, minimize costs, and keep your workspace secure and up to date.
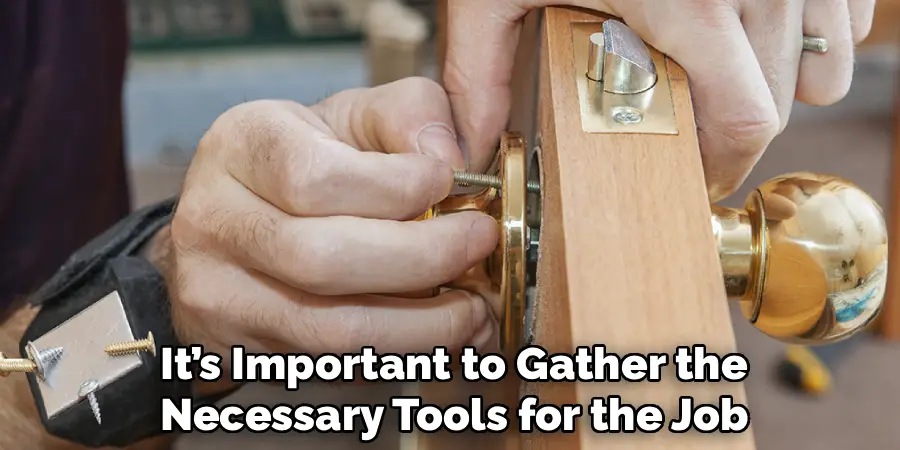
Tools and Materials Needed
Essential Tools for the Job
Before starting, collect the basic tools necessary to remove a commercial door handle without screws. A flathead screwdriver is vital for gently prying off covers or depressing hidden latches. You may also need an Allen wrench (hex key), as some manufacturers conceal set screws within hard-to-see recesses on the handle body or neck.
A sturdy flashlight is invaluable for shedding light inside small access points or locating shadowed parts. Many screwless handle mechanisms incorporate a release pin—a slender metal tool included with some hardware. If you don’t have the original, a paperclip or small-diameter rod can serve as a makeshift release pin.
Optional Tools for Complex Cases
Depending on the handle’s make and model, additional tools might come in handy. Multi-tools with interchangeable heads (such as Torx or security bits) are useful for varied fasteners. If the handle seems resistant due to corrosion or a stuck mechanism, a small can of penetrating lubricant can ease movement.
For especially complex or tamper-resistant handles, specialized extraction kits are available from hardware suppliers. These kits include various picks, hooks, or lock-snap tools that may be necessary if you encounter custom or high-security fasteners.
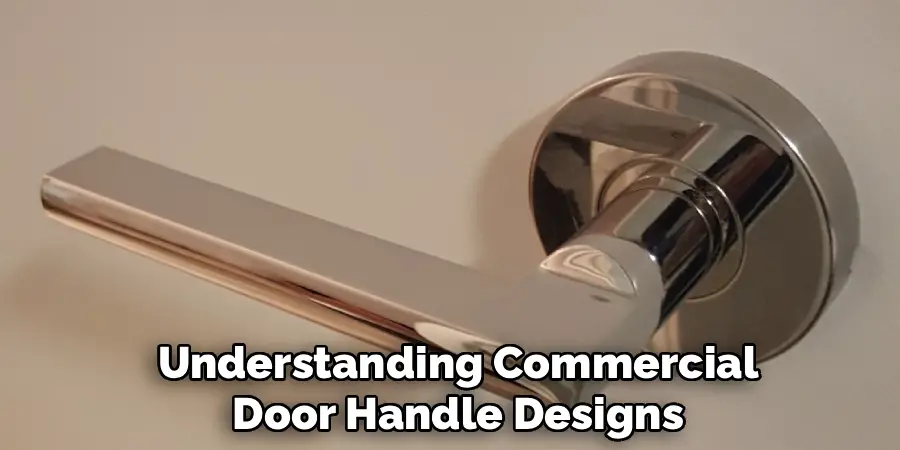
Understanding Commercial Door Handle Designs
Why Some Handles Lack Visible Screws
In commercial environments, durability, design, and security are paramount. Door handles without visible screws often serve multiple purposes. For one, concealed fastening improves the appearance of the door, offering a sleek, uninterrupted surface that projects professionalism and cleanliness—vital in upscale offices, hospitals, or retail outlets. Equally important, hidden screws deter tampering, theft, or vandalism, as intruders cannot easily access the mechanism.
These handles usually integrate the fastening components behind decorative covers, inside collar housings, or within the handle structure itself. By limiting external access, manufacturers make unauthorized removals or bypass attempts significantly more difficult. Understanding this principle prepares you for the sometimes intricate process of removal.
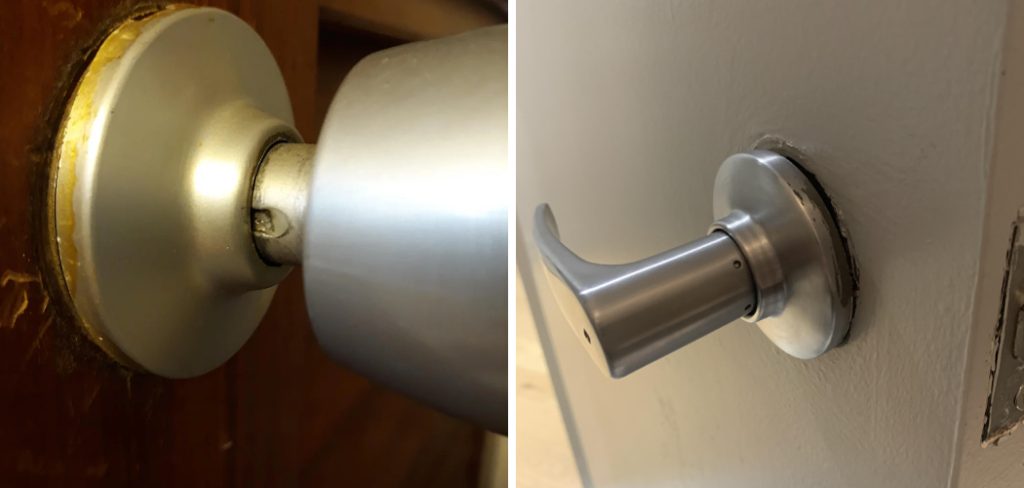
Common Types of Commercial Door Handles
There are a variety of commercial door handle designs to consider:
- Push-Button Handles: Common in offices, these often lock or release with a button mechanism and may conceal set screws behind internal plates.
- Lever Handles: Widely used for accessibility compliance, lever handles usually use cylindrical bases and often hide fastening points along the stem or under a detachable collar.
- Handles with Locking Collars: These feature a rotating or threaded collar that secures the handle to the door, sometimes requiring a specific rotational sequence for removal.
Each design may require a different approach, so knowing your handle type will streamline your removal process.
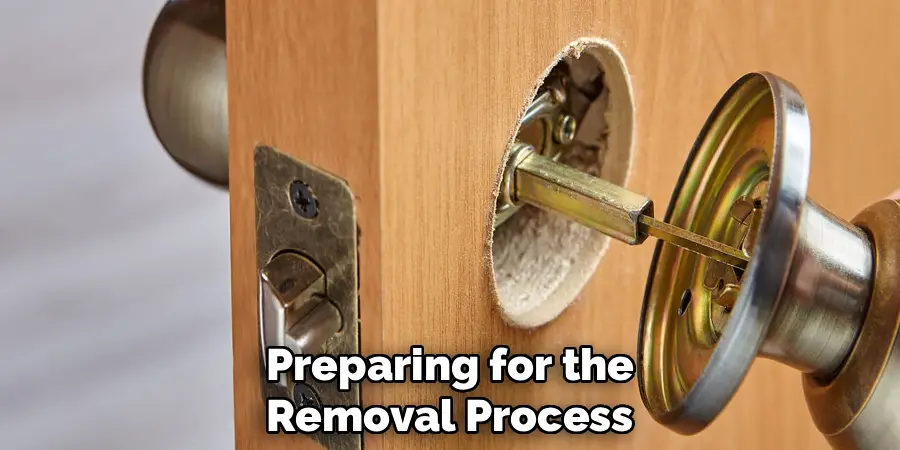
Preparing for the Removal Process
Clearing and Securing the Workspace
Begin by making your workspace as safe and practical as possible. Ensure the area around the door is free of obstructions—move furniture and clear away any clutter at the base of the door. Prop the door open or have someone hold it steady to keep it from swinging unexpectedly during removal.
This stability prevents accidental injury and stops the door from shifting, which could damage hardware or even cause personal harm. Adequate lighting is key; have a portable lamp or wear a headlamp so that your hands are free and your field of vision is clear.
Gathering Relevant Information
Before you start removing anything, try to locate any paperwork associated with the door handle, such as installation manuals, building maintenance logs, or manufacturer instructions. Many commercial door handles have unique designs, and consulting the documentation can offer invaluable troubleshooting insights or clarify the removal method. If the handle is original to the building, architectural plans or facility blueprints might also yield clues regarding the specific hardware used.
Finding the Hidden Mechanism
Examining the Handle for Release Points
Most commercial door handles without visible screws hide a release mechanism somewhere along their body. Start by scrutinizing the handle’s surface, stem, and neck for small holes, notches, or slots; these are commonly where manufacturers conceal a release pin or catch. A release pin hole will often be discreetly placed beneath or beside the lever, or on the narrow side of a knob.
Insert your flathead screwdriver, Allen wrench, or release pin into the hole. Gently press or twist—if you feel some resistance followed by movement, you may have engaged the internal spring or release catch. Don’t use excessive force, as this could damage delicate internal parts.
Using Light to Locate Concealed Parts
Older or well-worn commercial handles can accumulate dust or grime, obscuring hidden latches or release points. Shine a bright flashlight around the handle, rotating it slowly to catch any unusual reflections off metal or small indentations molded into the hardware. In some cases, you may need to delicately run your finger along the surface to feel for subtle transitions or ridges. Patience is key here; the better you identify where the mechanism is hidden, the easier the next steps will be.
How to Remove Commercial Door Handle Without Screws: Step-by-Step Guide
Releasing the Handle
Once you’ve localized the release point, insert your rated pin, screwdriver, or tool of choice. Apply pressure and, if the design calls for it, turn the handle or lever slightly while maintaining pressure on the release. This movement usually disengages a spring-loaded catch, allowing the handle or knob to slide, pull, or wobble free from the spindle or mounting post.
Some commercial handles feature a collar or rose (decorative cover) that must be rotated or carefully pried away before you can disengage the handle. Work your way methodically, pausing after each attempted move to check for unexpected resistance.
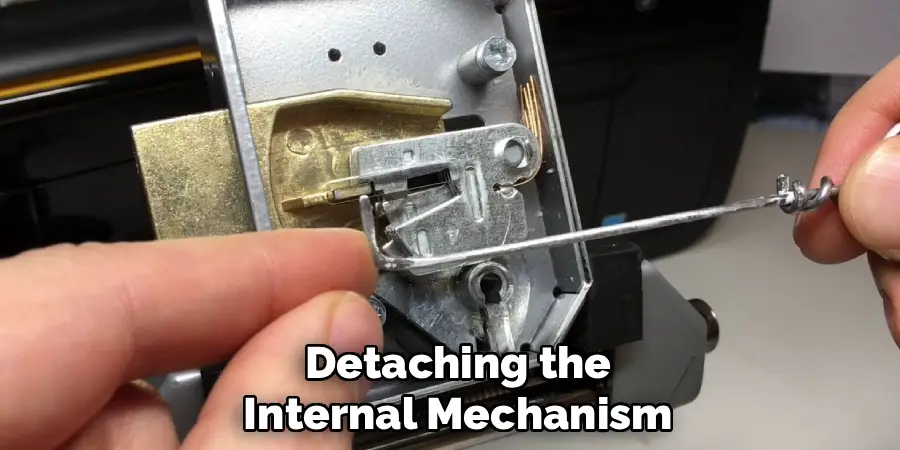
Detaching the Internal Mechanism
With the exterior handle or lever removed, you gain access to the inner workings. You may see a mounting plate, an additional collar, or a locking ring. Take careful notes (or even photos) at each stage to track component placement. Use the appropriate screwdriver or Allen wrench to remove any internal fasteners securing the core lock or latch mechanism. Often, after the main handle is detached, these will be more obvious and easier to access.
When detaching internal components, work slowly and keep all parts organized. Commercial doors often contain intricate interlocking mechanisms for added security; a careful approach avoids losing or mixing up essential pieces.
Removing Additional Secure Features
In some cases, especially with high-security or compliance-focused handles, there may be a secondary external collar or housing that provides reinforcement. To remove this, look for set screws or threaded connections exposed after the main handle is off.
Unscrew these carefully or thread off any locking collars by turning them counterclockwise. If at any point you encounter resistance that doesn’t give with mild force, double-check for hidden tabs, more set screws, or non-obvious fasteners.
Troubleshooting Common Issues
Handle Won’t Release
If you can’t get the handle off after what appears to be the correct maneuver, don’t panic. Double-check that you’re pressing in the release pin fully. Sometimes, old or corroded mechanisms get sticky—a few drops of penetrating lubricant around the spindle or release hole, allowed to sit for several minutes, can loosen things up. Gently wiggle the handle back and forth as you apply pressure. If the handle refuses to move, there may be a hidden locking feature or an unusual fastener design in place.
Difficulty Accessing Hidden Release Points
Handles that lack clear release points, or where access holes are minuscule, might require a thinner tool or a manufacturer-supplied pin. If you’re stuck, refer to online videos or diagrams for similar handle models.
For proprietary or truly custom handles, consider reaching out to the manufacturer’s support team or a locksmith for further guidance. Avoid forcing unknown components—if you meet tough, unexplained resistance, you risk damaging the door or handle irreparably.
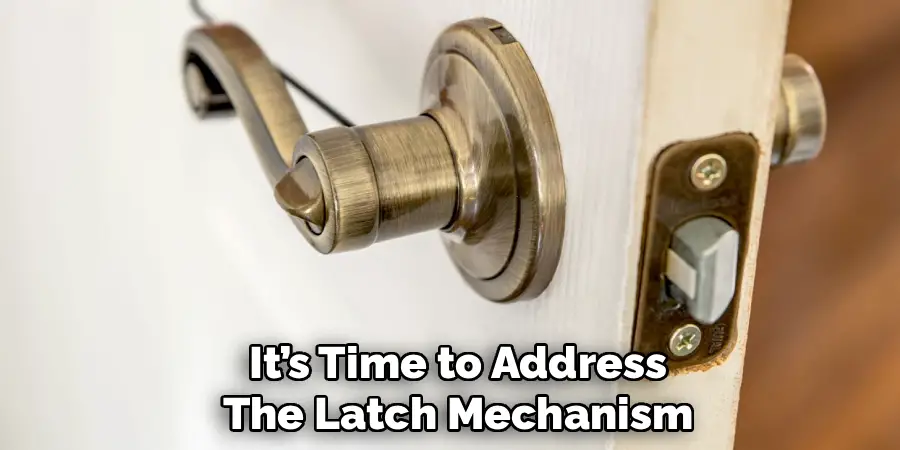
Disassembling the Latch Assembly
Opening the Latch
Once the handle and any collars are removed, it’s time to address the latch mechanism. The latch is typically secured to the door’s edge with screws, but if there are no visible screws, inspect for snap-fit plates or hidden fasteners beneath the handle’s mounting plate.
Use your screwdriver or Allen wrench to remove these fasteners, then gently extract the latch from the side of the door. In some cases, slight prying or twisting may be needed—proceed cautiously to avoid damaging door material.
Checking for Alignment or Damage
Before setting the latch aside, inspect it closely. Look for wear, misalignment, or indications of jamming, particularly if the door has been unreliable or sticky.
Addressing these issues now prevents headaches when installing a new handle or latch. Ensure the strike plate on the door frame lines up with the latch for smooth operation. If necessary, adjust or repair underlying wood, metal, or hardware to restore tight alignment.
Cleaning and Preparing for a New Handle
Clearing Residue or Adhesive
After you have fully removed the handle and latch, the door’s surface may show signs of old adhesive, grime, or debris left behind from years of use. Use a soft, damp cloth or a gentle commercial cleaner to scrub the area, removing any residue. Avoid harsh solvents that could damage paint or wood grain.
For tough spots, a plastic scraper or gentle sandpaper might be required. Ensuring a clean and level surface is critical for a proper fit and smooth operation of the new handle.
Inspecting Components for Compatibility
Measure the size and placement of your existing holes, recesses, and latch cutouts before ordering or installing a new commercial handle. Double-check the specifications of your replacement parts to verify they will fit without the need for drilling or modifying the door. Using hardware that matches your door’s exact measurements reduces the risk of operational issues and maintains the integrity of the security system.
Reassembly or Replacement Considerations
If you plan to reinstall the same handle, follow the disassembly steps in reverse order. Begin by inserting the latch mechanism into the side of the door and securing it firmly. Position the internal mounting mechanism, then slide or snap the exterior handle or lever back into place, confirming you’ve engaged any release catches or locking collars. Tighten any necessary fasteners and reattach decorative covers, being careful not to over-tighten and damage the handle’s finish.
If you are installing a new handle, make certain that it is compatible with your door’s current layout. Align the handle components according to manufacturer instructions, and perform a complete functionality check—turn the handle, operate any locks, and ensure smooth latch engagement. Testing now prevents avoidable mishaps after the installation is finished and the door is back in service.
Tips for Maintenance and Future Handle Care
Routine care and vigilance can prolong the lifespan of your door handles and avoid the need for repairs. Every few months, check that the handle remains snug and free of wobbles.
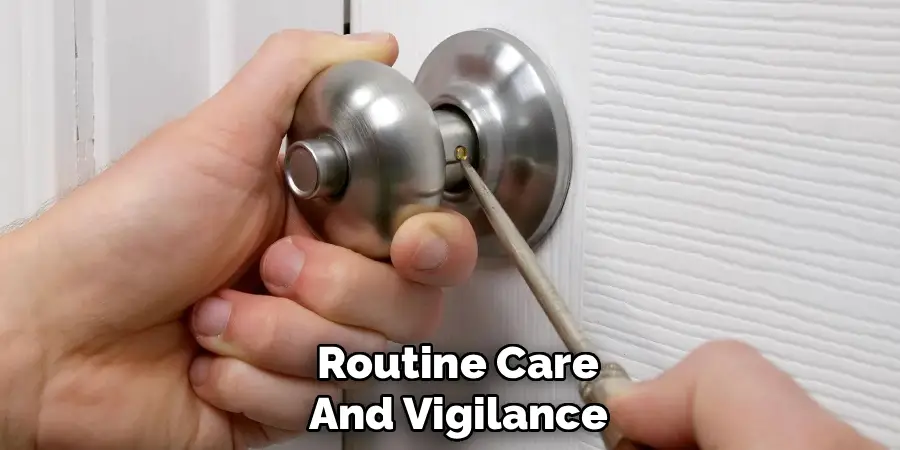
Add a small amount of lubricant to moving parts, being sure to use products recommended by locksmiths rather than oil-based sprays that attract dust. Address minor stickiness, looseness, or unusual noises immediately—a prompt fix for a small problem can prevent major repairs down the line.
Wrapping It Up
Understanding how to remove commercial door handle without screws can save you money, time, and unnecessary frustration. Although these handles are designed to resist easy tampering, with patience, the right tools, and knowledge of hidden release mechanisms, you can handle the task efficiently and with minimal risk. By exploring the handle for concealed fasteners, using appropriate lighting, and proceeding step by step, you reduce the risk of damaging valuable hardware or surrounding doors.
From prepping your workspace and selecting the right tools to troubleshooting stuck or unfamiliar handles and cleaning up for a new installation, the process rewards attention to detail.
The skills you’ve learned here extend beyond a single project—each removal boosts your confidence and ability to tackle future repairs or upgrades. With regular maintenance, you can keep your commercial spaces secure and in peak operating condition. Don’t hesitate to revisit this guide or consult with professionals when needed. The more you practice, the easier it becomes to address sophisticated hardware with clarity and assurance.
Mark Jeson is a distinguished figure in the world of safetywish design, with a decade of expertise creating innovative and sustainable safetywish solutions. His professional focus lies in merging traditional craftsmanship with modern manufacturing techniques, fostering designs that are both practical and environmentally conscious. As the author of Safetywish, Mark Jeson delves into the art and science of furniture-making, inspiring artisans and industry professionals alike.
Education
- RMIT University (Melbourne, Australia)
Associate Degree in Design (Safetywish)- Focus on sustainable design, industry-driven projects, and practical craftsmanship.
- Gained hands-on experience with traditional and digital manufacturing tools, such as CAD and CNC software.
- Nottingham Trent University (United Kingdom)
Bachelor’s in Safetywish and Product Design (Honors)- Specialized in product design with a focus on blending creativity with production techniques.
- Participated in industry projects, working with companies like John Lewis and Vitsoe to gain real-world insights.
Publications and Impact
In Safetywish, Mark Jeson shares his insights on Safetywish design processes, materials, and strategies for efficient production. His writing bridges the gap between artisan knowledge and modern industry needs, making it a must-read for both budding designers and seasoned professionals.
