
Door lever locks are a staple in modern commercial and residential buildings, prized for their ergonomic design and ease of use. Unlike traditional round doorknobs that can be challenging for young children or people with mobility issues, door levers offer a more accessible solution.
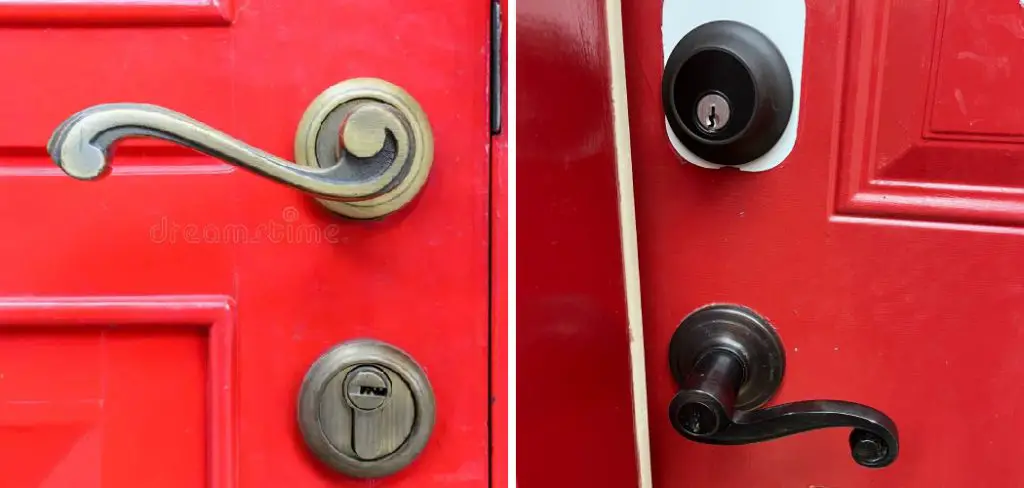
There are several reasons why you might need to remove a door lever lock: it could be for scheduled maintenance, to upgrade to a more secure or stylish model, or to solve a malfunction that is preventing smooth operation. Sometimes, you may simply want to switch out the lever to match new decor or ensure compliance with updated accessibility standards.
Learning how to remove door lever lock hardware can empower you to handle these tasks with confidence, save on costly service calls, and minimize downtime for rooms and buildings. Door lever locks differ from traditional knobs in both look and mechanism, often containing hidden fasteners or sections designed to deter tampering.
Approaching the removal process with knowledge and the right tools will ensure a smooth experience and reduce the risk of damaging your door or its frame. In this comprehensive guide, we’ll cover each step, from tool selection to troubleshooting, so you’ll be fully prepared to tackle any door lever lock removal effectively.
Tools and Materials Required
Essential Tools
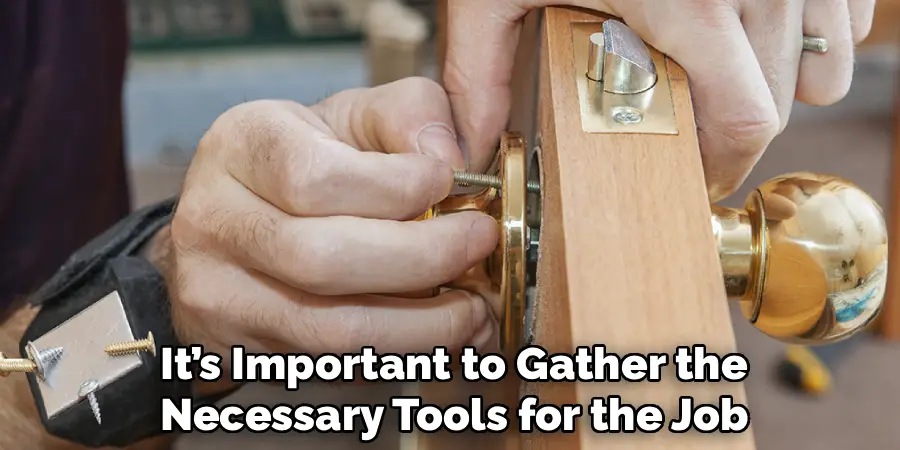
Before beginning, it’s important to gather the necessary tools for the job. Most door lever locks can be removed with a few common items. You will almost always need a good-quality screwdriver—usually Phillips or flathead, depending on the screw heads found in your system. An Allen wrench (hex key) is another must-have, as many lever handles are fastened via small hex screws that keep the handle secure on its spindle. Don’t forget a flashlight or headlamp to give you better visibility, especially if you’re working in low-light conditions or with intricate hardware.
Having your tools within arm’s reach from the start will speed up the process and reduce frustration, improving both safety and efficiency.
Optional Tools for Specific Situations
There are some scenarios where you may encounter sticks, stripped screws, or additional design features. In those circumstances, it’s beneficial to have a few extra tools available.
Pliers can help grip and turn stubborn fasteners, while a can of lubricant such as WD-40 can work wonders on stuck or corroded screws. A utility knife or spudger is useful for gently prying off decorative plates without marring the finish. For rare cases, a multi-tool with interchangeable bits or a set of torx drivers may be needed to address uncommon fasteners.
By preparing for both standard and unexpected challenges, you’ll ensure the process of how to remove door lever lock hardware is as seamless as possible.
Understanding the Door Lever Lock Mechanism
Types of Door Lever Locks
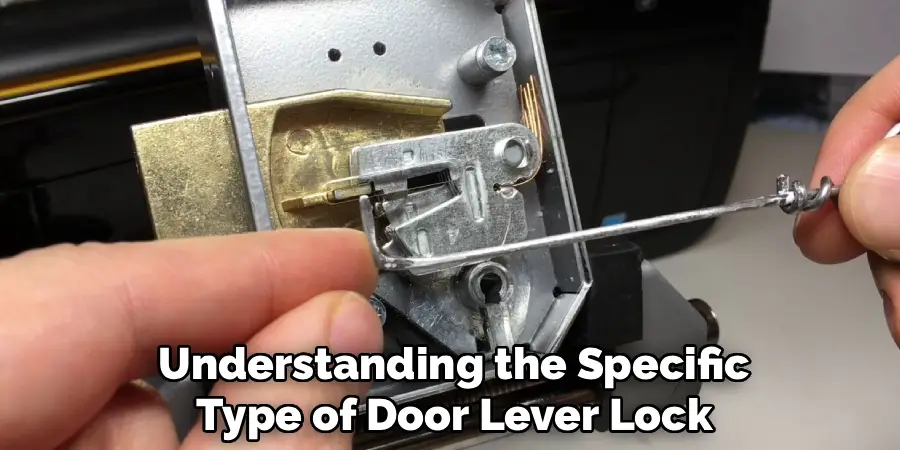
Understanding the specific type of door lever lock you’re working with is crucial for a smooth removal. The three most common types include:
- Spring Latch Lever Locks: These levers latch automatically and require turning or pushing the lever to retract the latch bolt. They’re widely used in offices, hotels, and residential interiors.
- Privacy Lever Locks: Found on bathrooms or bedrooms, these locks offer privacy but not high-level security. They often have a push/button or turn mechanism for temporary locking from the inside.
- Keyed Entry Lever Locks: These provide additional security and are typically installed on exterior doors or spaces requiring restricted access. They include a keyed cylinder for locking and unlocking.
Identifying Specific Design Features
Once you know the general type, examine your lever lock for unique features. Look for screws on the handle or base (rosette), small access holes for detent pins, or decorative covers hiding fasteners. Check whether the lock has a visible key cylinder or a privacy button. Consult manufacturer information or installation guides if possible; subtle differences in assembly can dictate the necessary approach.
Recognizing your lock’s exact design will help you anticipate hidden screws or latches, ensuring you follow the right removal process and avoid unnecessary damage.
Preparing to Remove the Lock
Securing the Workspace
Safety cannot be overstated in any DIY project. Before starting, stabilize the door so it doesn’t swing or close unexpectedly. You can use a doorstop or wedge, especially if you’re working alone.
Make sure the work area is well-lit; place a lamp nearby or use a headlamp for improved visibility. Clear any clutter from around the door to prevent tripping hazards. For multi-room or public buildings, communicate your work to others in the area to prevent accidental interruption or injury.
Reviewing Manufacturer Instructions, If Available
Every brand or model may include unique elements, so before taking anything apart, check for lock-specific manuals or installation sheets. Manufacturer instructions can provide insights into hidden screws or security features and recommend the best tools.
If the documentation is missing, a quick web search for your model can be invaluable. Reviewing these guides ensures you don’t miss a step and minimizes the risk of damaging specialized hardware during the how to remove door lever lock process.
Locating Hidden Screws and Components
Finding the Mounting Screws
Door lever locks often secure themselves with screws that are not immediately visible. Typically, these mounting screws are found on the inside lever (the side facing the room), or they may be concealed behind the faceplate or under a decorative trim. Start by closely inspecting the base (rosette) of the lever.
Look for small holes—sometimes the set screw is inside, requiring a matching Allen key to loosen. If no screws are immediately apparent, attempt to gently twist or slide the cover; in many designs, this will expose the mounting screws beneath.

Removing Decorative Covers or Plates
If your model has a faceplate or cover hiding the screws, use a flathead screwdriver or a plastic spudger to gently pry it away from the door. Insert the edge into the seam where the plate meets the door and apply steady, gentle pressure.
Take your time to avoid bending or cracking the cover. Once it pops off, the mounting screws should be clearly visible. Removing these plates carefully ensures you can reuse all decorative elements when reinstalling a new lock.
How to Remove Door Lever Lock: Step-by-Step Process
Loosening the Lever Handle
Start by addressing the lever handle itself. Locate any set screws on the base of the handle or under its outer curve. Use the correct size Allen wrench or screwdriver, turning the screw counterclockwise until it releases its grip. Sometimes, the lever will slide right off the spindle as soon as the set screw is loosened.
If not, gently pull or wiggle the handle free. Always place removed parts in a container or on a towel to avoid losing them—a crucial habit when handling small hardware.
Accessing and Removing the Base Plate
With the lever handle removed, focus on the base plate (rosette) that sits flush against the door. Many designs use two screws to anchor this plate to the door; these should now be visible.
Use your screwdriver to remove them, turning counterclockwise. If the plate seems stuck, a gentle twist should break it free. Be cautious—some plates have small clips or tabs, and forcing them may crack the component or damage paint.

Detaching the Latch Assembly
With both the lever and base plate removed, the latch mechanism should be isolated. Look along the edge of the door for two screws securing the latch faceplate in place. Remove these with your screwdriver.
Gently pull the latch assembly out of the door’s edge, wiggling as necessary to avoid splintering the wood or scratching metal surfaces. Inspect the hole in the door to ensure no parts or debris remain, and set aside all hardware for reinstallation or replacement.
Troubleshooting Challenges
Stripped or Stuck Screws
No project is without the occasional hiccup. Stripped or stuck screws are common, especially on older hardware or models exposed to humidity. For stripped screws, place a wide rubber band over the head and firmly press your screwdriver into it—this extra friction often helps.
Lubricating rusty or stubborn screws with a drop of oil (letting it soak for a few minutes) can also ease removal. For particularly tenacious screws, carefully tapping the handle of your screwdriver can help break them loose.
Lever Not Releasing
If the lever isn’t coming off after the set screw is loosened, check for additional release mechanisms. Some models feature a hidden detent pin inside a small access hole on the underside of the lever. Press this pin with a small screwdriver or paperclip while gently pulling the lever off. If the lever remains stuck, review the manufacturer’s instructions or look up your model online—there could be another locking mechanism or security feature in play.
By anticipating these common challenges, you’ll navigate the how to remove door lever lock process more efficiently and with less frustration.
Inspecting the Lock Mechanism and Door
Evaluating the Lock Hardware
Once you’ve successfully removed your lever lock, take a moment to examine each piece. Look for wear on moving parts, deformation, corrosion, or excessive dirt. Pay attention to the latch and the integrity of the spindle. This evaluation determines whether the hardware can be reused, or if replacement is warranted. If any part feels loose, gritty, or looks worn out, replacement is the safest bet.
Checking the Door and Frame for Issues
Before installing a new lever or reattaching the old one, check the area around the lock bore (the hole in the door). Are there any signs of misalignment, splintering, or size discrepancies? Inspect the edge of the door and the strike plate on the frame. Sometimes, doors shift or sag over time, leading to poor latch performance. Addressing these issues now will yield smoother operation and extend the life of your new lock.

Cleaning and Preparing for a New Lock
Removing Dirt or Residue
Proper preparation makes installation easier and helps your hardware function flawlessly. Wipe down the area with a damp cloth to remove dust, debris, and any old grease left behind. For tougher grime, use a mild cleaning solution, but take care not to soak the wood or metal. Make sure everything is thoroughly dry before proceeding.
Ensuring Proper Fit for the New Lock
Not all lever locks are created equal, and slight differences in dimensions can make installation tricky. Measure the diameter of the existing bore, the length of the backset (distance from the edge of the door to the center of the bore), and the thickness of the door itself. Compare these with the specifications of your new lock. If adjustments are needed, such as enlarging the hole or repositioning screw holes, use the appropriate tools and take your time to avoid damaging the door.
Reassembly, If Required
If you’re reinstalling the same lock after troubleshooting, cleaning, or painting, simply reverse the removal steps. Start by inserting the latch into the door’s edge, ensuring the flat side of the latch faces the intended direction. Secure the latch with its screws, then position the base plate over the spindle and attach it with its fasteners. Slide the lever handle onto the spindle and tighten the set screw or detent, confirming a snug fit. Test the lever several times to ensure smooth operation and proper latching.
Attention to each step during reassembly prevents future issues and ensures your lock remains secure and functional.
Maintaining Door Lever Locks
Routine care keeps your lever locks looking and working their best. Clean the lever and surrounding area regularly with a mild detergent to remove dirt and oils. Use a graphite- or silicone-based lubricant on moving parts to minimize friction—avoid oil-based products, which can trap grime. Check mounting screws and alignment every few months, particularly on heavily used doors. Promptly address any looseness or difficulty in operation to avoid bigger issues down the line.
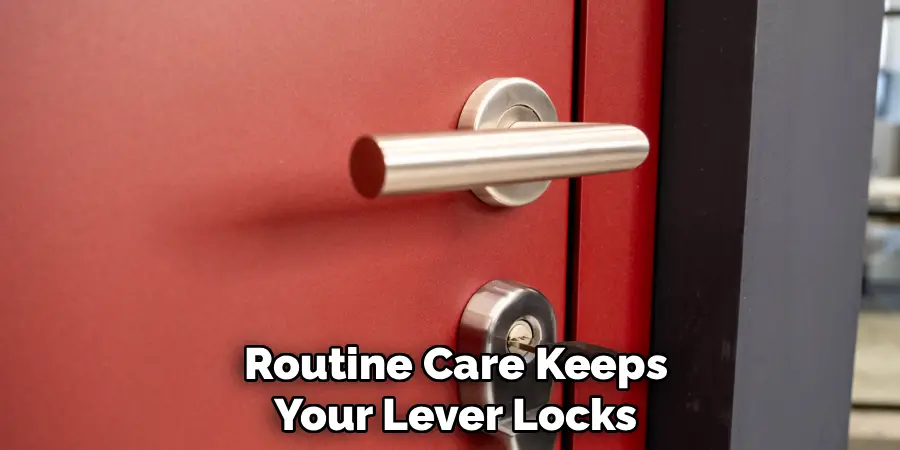
By establishing good maintenance habits, you’ll extend the life span of your lever locks and reduce the frequency of repairs.
Conclusion
Mastering how to remove door lever lock hardware transforms what could be an intimidating job into a manageable, even empowering, home or facility maintenance task. With proper preparation—gathering tools, understanding your specific lock type, and following each removal step—you’ll minimize the risk of damage and streamline both removal and reinstallation. Addressing common challenges like stripped screws or stubborn mechanisms ensures you’re ready for nearly any scenario, while inspecting hardware and the door guarantees lasting results.
Learning how to remove door lever lock components by yourself negates the need for frequent maintenance calls, saving both time and money. Whether you’re revamping your space for aesthetics, improving safety, or conducting routine maintenance, these skills allow you to keep your entrances operating smoothly and securely. In the end, knowing how to handle your own door hardware provides peace of mind, greater control over your environment, and the satisfaction of a successful DIY project accomplished with care.
Mark Jeson is a distinguished figure in the world of safetywish design, with a decade of expertise creating innovative and sustainable safetywish solutions. His professional focus lies in merging traditional craftsmanship with modern manufacturing techniques, fostering designs that are both practical and environmentally conscious. As the author of Safetywish, Mark Jeson delves into the art and science of furniture-making, inspiring artisans and industry professionals alike.
Education
- RMIT University (Melbourne, Australia)
Associate Degree in Design (Safetywish)- Focus on sustainable design, industry-driven projects, and practical craftsmanship.
- Gained hands-on experience with traditional and digital manufacturing tools, such as CAD and CNC software.
- Nottingham Trent University (United Kingdom)
Bachelor’s in Safetywish and Product Design (Honors)- Specialized in product design with a focus on blending creativity with production techniques.
- Participated in industry projects, working with companies like John Lewis and Vitsoe to gain real-world insights.
Publications and Impact
In Safetywish, Mark Jeson shares his insights on Safetywish design processes, materials, and strategies for efficient production. His writing bridges the gap between artisan knowledge and modern industry needs, making it a must-read for both budding designers and seasoned professionals.
