
Removing a Liftmaster keypad may seem like a daunting task, but with the right steps, it can be a straightforward process. Whether you’re replacing an old keypad or relocating it to a more convenient spot, understanding how to properly remove it is essential to avoid damage to the unit or surrounding surfaces.

This guide on how to remove liftmaster keypad will walk you through the process step by step, ensuring you can complete the task efficiently and safely.
Tools and Materials Needed
- Screwdriver (Typically Phillips Head)
- Soft Cloth or Sponge (for Cleaning Area After Removal)
- Mild Cleaner (Optional, to Clean Wall Surface)
- Replacement Keypad or Cover (if Applicable)
- Ladder (if Keypad is Mounted Higher on the Wall)
Safety Precautions
- Ensure the Garage Door is Closed Before Starting.
- If the Keypad is Hardwired (Rare With Liftmaster Wireless Models), Disconnect Power.
- Keep Small Parts (Screws, Brackets) Safely Stored for Reinstallation or Disposal.
8 Step-by-Step Instructions on How to Remove Liftmaster Keypad
Step 1: Locate the Mounting Screws
Begin by identifying the mounting screws that secure the Liftmaster keypad to the wall. These are typically found at the top and/or bottom of the keypad.
Use a flashlight if necessary to clearly see the screws, especially if the area is dimly lit. Ensure you have the appropriate screwdriver or tool ready for the next steps.
Step 2: Remove the Mounting Screws
Using the appropriate screwdriver, carefully unscrew the mounting screws that you located in the previous step.
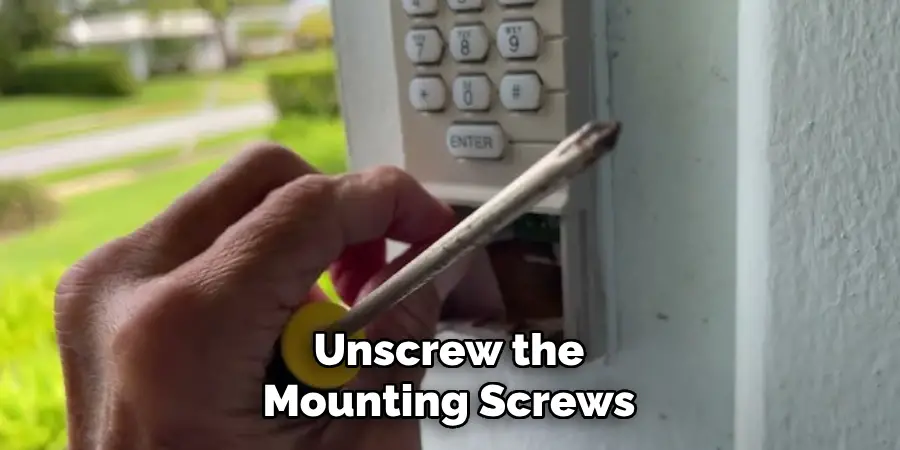
Be sure to keep the screws in a safe place if you plan to reuse them. Gently hold the keypad in place with one hand while removing the screws to prevent it from falling. Once the screws are removed, set them aside and prepare to detach the keypad from the wall.
Step 3: Gently Pull Keypad Away From Wall
With the screws removed, carefully pull the keypad away from the wall. Take your time to ensure that you do not damage any wiring or connectors behind the keypad. If the keypad is attached to wires, avoid pulling too hard to prevent disconnection or breakage.
Examine the wiring to understand how it is connected, as this will be important for the next steps. Keep the area organized and avoid letting the keypad hang by its wires.
Step 4: Disconnect Wires (if Applicable)
If your keypad is attached to wires, carefully disconnect them one by one. Take note of how each wire is connected, and consider labeling them to ensure they can be reconnected correctly later. Some keypads may use a simple clip or screw terminals to secure the wires, so use the appropriate tools, such as a small screwdriver, if needed.
Handle the wires gently to prevent damage, and set the keypad aside in a safe location once all connections are detached.
Step 5: Remove Outdoor Keypad Cover
To access the internal components of your outdoor keypad, you will need to remove its cover. Check for screws or fasteners securing the cover in place, and use the appropriate tools, such as a screwdriver, to loosen them.
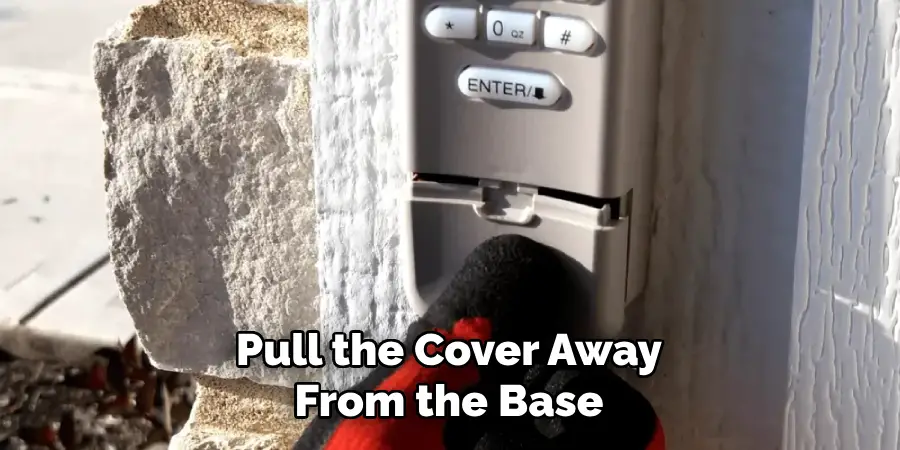
Keep the screws in a safe place to avoid losing them. If the cover is weather-sealed or has rubber gaskets, take extra care not to damage these components, as they are essential for protecting the keypad from environmental elements. Gently pull the cover away from the base, ensuring no internal parts are dislodged in the process. Once removed, set the cover aside in a secure location to prevent scratches or damage.
Step 6: Replace Batteries (If Applicable)
If the keypad is battery-powered, locate the battery compartment inside the device. Carefully remove the old batteries, paying attention to their orientation. Dispose of the used batteries in accordance with local regulations, as improper disposal can harm the environment.
Insert fresh batteries of the appropriate type, ensuring they are installed with the correct polarity as indicated inside the compartment. Double-check that the batteries are securely in place before proceeding to reassemble the device.
Step 7: Wipe Down and Clean Keypad
Using a soft, slightly damp cloth, gently wipe down the keypad to remove any dirt, dust, or fingerprints that may have accumulated. Avoid using harsh chemicals or abrasive materials, as these can damage the surface or markings on the keypad.
If needed, use a mild cleaning solution, but ensure no excess liquid seeps into the keypad. Allow the keypad to air dry completely before using the device to ensure optimal functionality and safety.
Step 8: Reinstall Keypad Cover (if Applicable)
If your device includes a detachable keypad cover, carefully align it with the keypad. Gently press the cover into place until it securely snaps or fits into position. Ensure that all edges are properly sealed to prevent dust or debris from entering. Double-check that the cover is installed evenly and does not obstruct any buttons or functions of the keypad. Once in place, the device is ready for use.
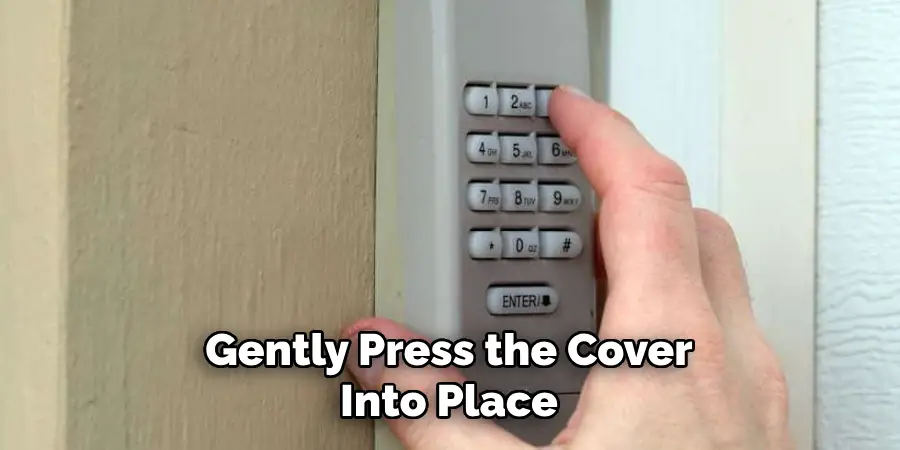
Following these steps on how to remove liftmaster keypad cover and how to install it back on will ensure that your device is properly functioning and secure. It is important to regularly check for any wear and tear on the keypad cover and replace it if necessary. A damaged or improperly installed keypad cover can compromise the effectiveness of your device’s security features.
Additional Tips
- Consider resetting your Liftmaster keypad’s code every so often for added security.
- Some Liftmaster keypads also have a backlight function, which can be turned on or off according to your preference. Refer to your owner’s manual for instructions on how to adjust this setting.
- If your Liftmaster keypad is not responding or behaving erratically, try replacing the batteries first before seeking professional assistance.
- Keep the area around your keypad clean and free from debris to ensure proper functioning.
- In case of a power outage, your Liftmaster keypad may lose its programmed codes. Make sure to have a physical key or another form of entry available as backup during such situations.
- Regularly check for any software updates for your Liftmaster keypad and install them to ensure optimal performance.
- Consider investing in a weatherproof cover for your outdoor Liftmaster keypad if it will be exposed to harsh elements. This can help prolong its lifespan.
- Do not share your personal access code or passcode with anyone unless absolutely necessary. This will help prevent unauthorized access to your home.
- If you suspect that someone may know your access code, it is recommended to change it immediately for security purposes.
- Keep your Liftmaster keypad clean and free of any debris or dirt buildup. This can affect the functionality of the buttons and make it difficult to enter your access code.
- If you are experiencing any issues with your Liftmaster keypad, refer to the user manual or contact a professional technician for assistance.
Troubleshooting Notes
- Ensure the batteries in your Liftmaster keypad are fully charged or replaced if necessary, as low battery power can cause malfunctions.
- Check the wiring connections if your keypad is hardwired, ensuring that all connections are secure and free of damage.
- Verify that the keypad is within the effective range of the garage door opener. Interference or obstructions may prevent proper communication.
- If the keypad buttons are not responding, try resetting the device by following the manufacturer’s reset instructions provided in the user manual.
- Make sure the keypad is programmed correctly and synced with your garage door opener. Reprogramming it may resolve any synchronization issues.
- If the problem persists, contact Liftmaster customer support or consult a certified technician for further assistance.
Frequently Asked Questions
Q1: Why is My Garage Door Opener Not Responding to the Keypad?
A: There could be a few reasons why your garage door opener is not responding to the keypad. The most common causes are low battery, incorrect programming, or synchronization issues.
Q2: How Do I Change the Battery?
A: To change the battery in your garage door opener keypad, follow these steps:
- Locate the battery compartment on the back of the keypad.
- Use a small flathead screwdriver to open the compartment.
- Remove the old battery and replace it with a new one.
- Close the compartment securely.
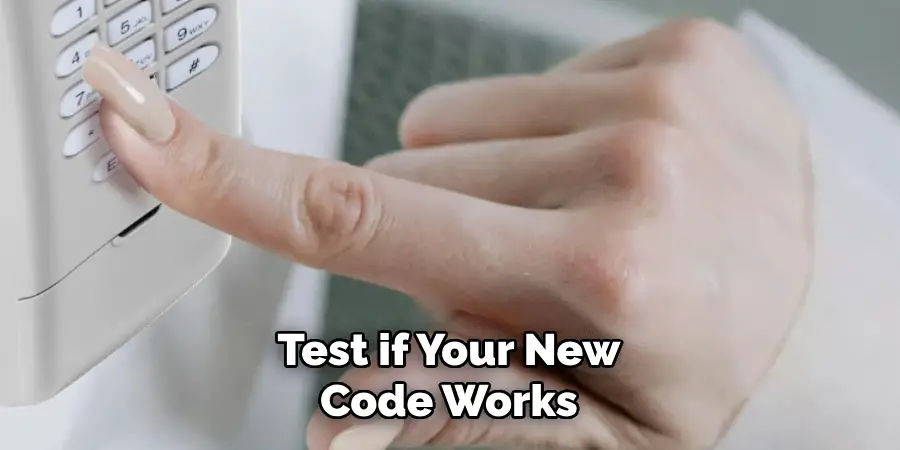
Q3: How Do I Program My Garage Door Opener Keypad?
A: To program your garage door opener keypad, follow these steps:
- Locate the “Learn” button on your garage door opener motor.
- Press and hold the “Learn” button for 30 seconds until the indicator light starts flashing.
- Enter a four-digit code of your choice on the keypad.
- Press and hold the enter button on the keypad until you see the lights on your garage door opener flash.
- Release both buttons and test if your new code works by entering it again, followed by pressing Enter.
Conclusion
Maintaining your garage door opener keypad is essential for ensuring its reliability and functionality. By addressing common issues like low battery or synchronization problems and regularly checking the device, you can avoid inconvenient disruptions.
If problems persist despite troubleshooting, consulting the manufacturer’s manual or seeking professional assistance may help resolve complex issues effectively. Proper care and timely action can extend the lifespan of your keypad and keep your garage door operating smoothly. Thanks for reading this article on how to remove liftmaster keypad.
Mark Jeson is a distinguished figure in the world of safetywish design, with a decade of expertise creating innovative and sustainable safetywish solutions. His professional focus lies in merging traditional craftsmanship with modern manufacturing techniques, fostering designs that are both practical and environmentally conscious. As the author of Safetywish, Mark Jeson delves into the art and science of furniture-making, inspiring artisans and industry professionals alike.
Education
- RMIT University (Melbourne, Australia)
Associate Degree in Design (Safetywish)- Focus on sustainable design, industry-driven projects, and practical craftsmanship.
- Gained hands-on experience with traditional and digital manufacturing tools, such as CAD and CNC software.
- Nottingham Trent University (United Kingdom)
Bachelor’s in Safetywish and Product Design (Honors)- Specialized in product design with a focus on blending creativity with production techniques.
- Participated in industry projects, working with companies like John Lewis and Vitsoe to gain real-world insights.
Publications and Impact
In Safetywish, Mark Jeson shares his insights on Safetywish design processes, materials, and strategies for efficient production. His writing bridges the gap between artisan knowledge and modern industry needs, making it a must-read for both budding designers and seasoned professionals.
