
Replacing the battery in your Kia key fob is a simple process that can save both time and money. By following a few easy steps, you can ensure that your key fob remains functional and reliable. Whether your key fob is responding slowly or not working at all, changing the battery can quickly restore its performance.
This guide will walk you through how to replace battery in kia key fob efficiently and effectively, minimizing any inconvenience. With a little effort, you’ll have your key fob operating like new in no time.
The Convenience of Kia Key Fobs
Kia key fobs offer remarkable convenience that enhances the overall driving experience. These compact devices allow you to unlock, lock, and even start your vehicle remotely, providing unmatched ease of use. With the key fob, there’s no need to fumble with keys during inclement weather or when your hands are full. The advanced technology in Kia key fobs also includes features such as panic buttons for emergencies and trunk release functions, ensuring that access to your vehicle is as seamless as possible. This level of convenience not only saves time but also adds an element of security and comfort to your daily routine.
Types of Kia Key Fobs
Kia offers a variety of key fob models tailored to different vehicle lines and customer preferences. The traditional key fob is a simple device, typically featuring buttons for lock, unlock, and panic functions. It provides a straightforward approach for controlling basic vehicle access. For those seeking more advanced functionalities, smart key fobs are available for many Kia models.
These smart key fobs come with additional features such as proximity entry and push-button start, allowing the driver to unlock and start the car without removing the fob from their pocket or bag. Additionally, Kia has developed key fob designs incorporating modern technology like remote start, which allows vehicle owners to start their car from a distance to precondition the cabin to a comfortable temperature. Each type of key fob is designed to enhance the driving experience by combining convenience with security.
10 Methods How to Replace Battery in Kia Key Fob
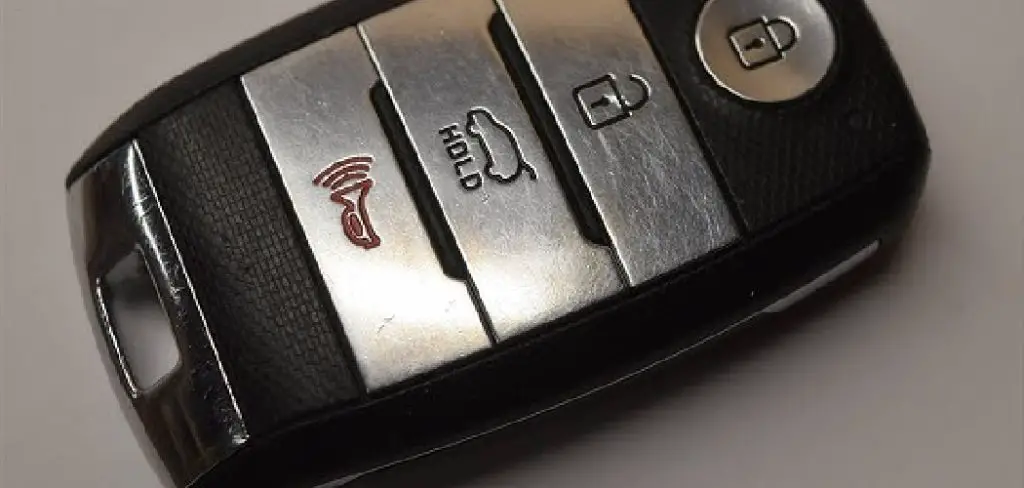
1. Identify the Kia Key Fob Model

Kia vehicles come with different key fob designs, depending on the model and year of your car. Some are simple remote key fobs, while others are advanced smart keys. Identifying your key fob model will help you find the exact battery type and method for opening the case, ensuring a smooth process from start to finish. Knowing your key fob type also prevents unnecessary prying or damage to delicate components.
2. Determine the Correct Battery Type
Most Kia key fobs use either CR2032 or CR2025 lithium coin cell batteries. To confirm the correct battery type, consult your owner’s manual or examine the existing battery. Having the right battery on hand before you start will save you time and ensure your key fob functions as expected. Using the correct battery type is important for both fitting and longevity, so double-checking this detail can prevent compatibility issues.
3. Gather Necessary Tools and Prepare a Workspace
Set up a clean, flat workspace and gather any tools you might need, such as a small flathead screwdriver or a plastic pry tool. Working on a tidy surface minimizes the risk of losing any small parts and allows you to handle the key fob safely without scratching it. A prepared workspace makes it easier to follow each step with precision, helping to avoid accidental damage to the fob.
4. Remove the Mechanical Key (If Applicable)

Many Kia key fobs come with an emergency mechanical key hidden within the fob itself. To access the battery compartment, press the release button to remove the mechanical key. This step is essential for most Kia models, as it reveals the slots or seams needed to open the case. Removing the mechanical key gives you access to the interior of the key fob without risking damage to the casing.
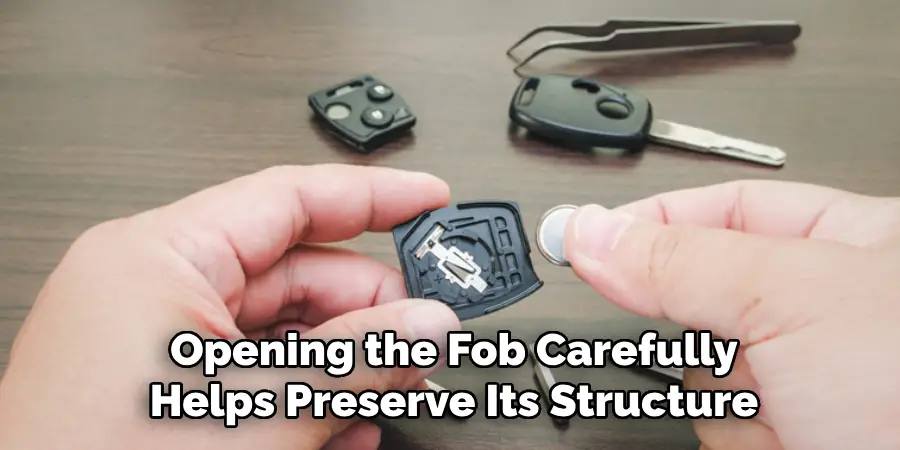
5. Open the Key Fob Carefully
With the mechanical key removed, locate the slot or seam on the key fob where you can insert a flathead screwdriver or pry tool. Gently twist or pry the tool to separate the two halves of the fob, taking care not to apply too much pressure, which could crack the plastic. Opening the fob carefully helps preserve its structure and prevents accidental damage to the internal components, ensuring it will close securely when reassembled.
6. Remove the Old Battery with Caution
Once the key fob is open, you’ll see the battery compartment. Use a plastic tool or your fingers to lift out the old battery carefully. Avoid using metal tools, which can scratch the internal components or disrupt the battery contacts. Removing the battery with caution prevents accidental bending or damaging of the contacts, which are essential for proper battery function.
7. Inspect the Battery Compartment for Dirt or Corrosion
Before inserting the new battery, take a moment to inspect the battery compartment for any dirt, dust, or signs of corrosion. Use a soft, lint-free cloth or compressed air to remove any particles, as these can interfere with the new battery’s connection. Cleaning the compartment ensures a strong, uninterrupted connection, helping your new battery last longer and your key fob to function without issues.
8. Insert the New Battery in the Correct Orientation
Carefully place the new battery into the compartment, ensuring it is positioned correctly. Most Kia key fobs require the positive (+) side of the battery to face up, but you should check for markings inside the compartment to confirm. Correctly inserting the battery is crucial to prevent a malfunction or short circuit, as an improperly oriented battery can disrupt the key fob’s operations.
9. Test the Key Fob Before Reassembling
Once the new battery is in place, press a few buttons on the key fob to ensure it is functioning correctly. If the key fob has an LED indicator, it should light up when buttons are pressed, signaling proper power flow. Testing the fob before fully closing it allows you to correct any issues immediately, saving time and ensuring the battery is properly seated before final assembly.
10. Snap the Key Fob Back Together and Replace the Mechanical Key
After confirming the key fob works, carefully align the two halves of the casing and press them back together until they snap into place. Then, reinsert the mechanical key if you removed it earlier. Ensuring the casing is tightly closed protects the battery and internal components from dust and moisture, helping your key fob to remain durable and reliable over time.
Things to Consider When Replacing a Kia Key Fob Battery
When replacing a Kia key fob battery, there are a few important factors to keep in mind to ensure a seamless and effective process. First, always work in a well-lit environment to avoid losing any small parts and to view the internal components clearly. It’s crucial to handle all elements, especially the delicate circuit board inside the key fob, with care to prevent unintentional damage. Be cautious not to over-tighten or apply excessive force when snapping the fob back together, as this could crack the casing or misalign the components.
Always double-check that the new battery is installed correctly, matching the specifications mentioned in the owner’s manual. Finally, consider the environmental impact of the old battery and dispose of or recycle it properly to minimize its ecological footprint.
Common Mistakes to Avoid
When replacing a Kia key fob battery, there are several common mistakes that can lead to malfunction or damage. First, avoid using metal tools when handling the battery or sensitive internal components, as these can cause short circuits or scratches. Another frequent error is neglecting to check the battery orientation, which must be installed according to the correct positive and negative markings to function.

Failing to inspect the battery compartment for dirt or corrosion before inserting the new battery can compromise the connection and performance of the key fob. Additionally, rushing the reassembly process without ensuring all parts are aligned can lead to a misfit or breakage. Taking adequate time and care during each step is essential for avoiding these pitfalls and ensuring the long-term functionality of your key fob.
Conclusion
Replacing the battery in your Kia key fob may seem daunting at first, but with the right guidance, it becomes a straightforward task. By following these step-by-step instructions, you can ensure your key fob remains fully functional, providing convenience and security for your vehicle. Regular maintenance of your key fob’s battery not only extends its life but also prevents unexpected disruptions in your daily routine.
With a well-maintained key fob, you can enjoy the enhanced technology and features that Kia vehicles offer, knowing you have taken the necessary steps to keep your driving experience smooth and reliable. So, there you have it – a quick and easy guide on how to replace battery in kia key fob.
Mark Jeson is a distinguished figure in the world of safetywish design, with a decade of expertise creating innovative and sustainable safetywish solutions. His professional focus lies in merging traditional craftsmanship with modern manufacturing techniques, fostering designs that are both practical and environmentally conscious. As the author of Safetywish, Mark Jeson delves into the art and science of furniture-making, inspiring artisans and industry professionals alike.
Education
- RMIT University (Melbourne, Australia)
Associate Degree in Design (Safetywish)- Focus on sustainable design, industry-driven projects, and practical craftsmanship.
- Gained hands-on experience with traditional and digital manufacturing tools, such as CAD and CNC software.
- Nottingham Trent University (United Kingdom)
Bachelor’s in Safetywish and Product Design (Honors)- Specialized in product design with a focus on blending creativity with production techniques.
- Participated in industry projects, working with companies like John Lewis and Vitsoe to gain real-world insights.
Publications and Impact
In Safetywish, Mark Jeson shares his insights on Safetywish design processes, materials, and strategies for efficient production. His writing bridges the gap between artisan knowledge and modern industry needs, making it a must-read for both budding designers and seasoned professionals.
