
The crankshaft position sensor (CPS) is a small but critical component of a vehicle’s engine system. Learning how to replace crankshaft position sensor is a practical skill that can save you time and money while increasing your knowledge of car maintenance. This sensor monitors the position and rotational speed of the crankshaft and sends this data to the engine control unit (ECU). The ECU uses this information to manage key functions like fuel injection and engine timing.
Identifying a faulty crankshaft position sensor can be crucial for maintaining your vehicle’s performance. Common signs of a failing sensor include difficulty starting the engine, frequent stalling, reduced fuel efficiency, and the illumination of the check engine light. If left unaddressed, a malfunctioning sensor can lead to more severe engine issues over time. Regular diagnostics and prompt replacement of a faulty sensor are essential to ensure the smooth operation of the vehicle and prevent costly repairs.
Symptoms of a failing crankshaft position sensor include difficulty starting the engine, poor acceleration, and inconsistent idling. Ignoring these issues can lead to costly damage over time. Fortunately, replacing this sensor is a relatively straightforward process, even for beginners. With basic tools and attention to detail, you can restore your car’s performance and eliminate the headaches caused by a faulty CPS.
Why Is Replacing a Crankshaft Position Sensor Important?
A properly functioning crankshaft position sensor is essential for the efficient operation of your vehicle’s engine. It ensures that the ECU receives accurate data about the crankshaft’s position and speed, which is vital for coordinating engine timing, spark delivery, and fuel injection.
When the sensor fails, the ECU cannot accurately determine the crankshaft’s rotation, leading to symptoms such as engine misfires, stalling, or even a no-start condition. These problems not only decrease the performance and reliability of your vehicle but can also strain other components in the engine system.
Replacing a defective crankshaft position sensor promptly prevents these issues and protects your car against long-term damage. It also restores smooth acceleration, improved engine performance, and optimized fuel efficiency. Addressing the problem head-on eliminates frustration and ensures your vehicle continues to run reliably for years to come.

9 Step-by-Step Guide: How to Replace Crankshaft Position Sensor
Step 1: Gather Your Tools and Safety Gear
Before starting, gather the tools and supplies you’ll need to replace the crankshaft position sensor. These typically include a socket set, ratchet, screwdriver, multimeter (for testing connections), and safety gloves. Some vehicles may also require a jack and jack stands to access the sensor.
Ensure you have the replacement crankshaft position sensor that matches your vehicle model. Refer to your vehicle’s service manual for specific part numbers and compatibility. A clean work area and the right tools will make the process more efficient and safe, helping you avoid unnecessary complications or delays.
Step 2: Disconnect the Battery
Safety should always come first when working on a vehicle. Start by disconnecting the negative terminal of your car battery to prevent electrical shocks or shorts. Use a wrench to loosen the terminal connector, then carefully remove the cable and place it away from the battery.
Take a moment to ensure the disconnected cable won’t accidentally touch any metal surfaces, as this could create a spark. Disconnecting the battery not only protects you but also ensures the electronic components, including the ECU, aren’t damaged during the repair process.
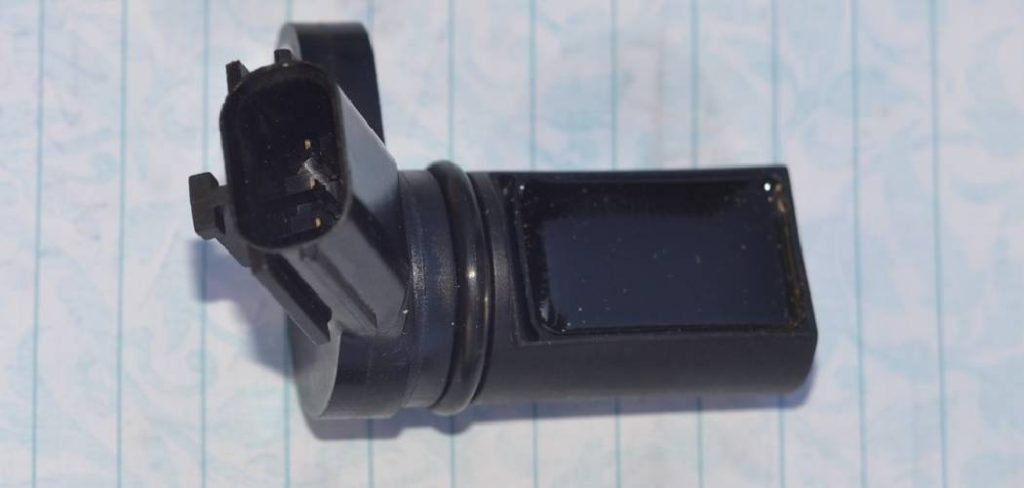
Step 3: Locate the Crankshaft Position Sensor
The crankshaft position sensor is typically mounted near the engine’s crankshaft, often at the bottom end of the motor. Common locations include the side of the engine block, the front of the timing cover, or near the flywheel. To locate it precisely, consult your vehicle’s manual or search the engine bay for a small component with an electrical connector and mounting bolts.

Some vehicles may require removal of ancillary components, such as an engine cover or splash guard, to gain access to the sensor. Take your time to identify the exact location to avoid unnecessary disassembly. Recognizing the sensor’s placement ensures you can work efficiently and minimizes mistakes.
Step 4: Disconnect the Electrical Connector
With the sensor in view, the next step is to disconnect the attached electrical connector. This connector sends data from the sensor to the ECU, so it is important to handle it carefully. Press the release tab or clip on the connector and gently pull it free.
Check for signs of corrosion, dirt, or damage on the connector. Clean any buildup using a contact cleaner to ensure a proper connection with the new sensor later. Disconnecting the electrical connector is a simple but vital step that ensures no strain or damage occurs during the following stages.
Step 5: Remove the Old Sensor
Using an appropriate socket or wrench, loosen and remove the bolts or screws securing the crankshaft position sensor to its mounting bracket. Once the fasteners are removed, gently pull the sensor out of its position. It may require some wiggling, especially if it’s been in place for a long time.
Inspect the old sensor and its mounting location for signs of oil leakage or debris. Clean the mounting area with a lint-free cloth to remove any residual contaminants. Removing the sensor this way ensures the new one will fit securely and function properly, avoiding potential alignment issues or installation challenges.
Step 6: Compare the Old and New Sensors
Before installing the replacement sensor, compare it side-by-side with the old one to ensure they match in size, shape, and connector type. This step ensures compatibility and prevents installation of the wrong part, which could lead to malfunctions or damage to the engine.

Focus on verifying the sensor’s mounting holes and connector pins for consistency. Being thorough here avoids surprises later in the process and confirms that the new sensor will integrate seamlessly with your vehicle’s system.
Step 7: Install the New Sensor
Carefully position the new crankshaft position sensor into the mounting bracket and align it with the bolt holes. Insert the fasteners and tighten them securely using a socket wrench or hand tool. Follow the manufacturer’s torque specifications, if provided, to avoid over-tightening.
Ensure the sensor is seated evenly and firmly in place, as this is critical for accurate readings and proper operation. A correctly installed sensor helps maintain engine timing and optimizes overall vehicle performance.
Step 8: Reconnect the Electrical Connector
Reattach the wiring harness to the new crankshaft position sensor. Ensure the connector clicks into place or feels secure to establish a reliable connection. Without a properly attached harness, the sensor cannot communicate effectively with the ECU.
Once connected, inspect the wiring for any fraying or loose insulation that might cause signal interference. Testing the connection with a multimeter at this stage can confirm proper voltage delivery, enhancing your confidence in the quality of the installation.
Step 9: Reconnect the Battery and Test
The final step is to reconnect the negative terminal of the car battery and test the new sensor’s performance. Tighten the terminal clamp securely and start the engine. Observe for smooth idling, stable acceleration, and absence of warning lights on the dashboard.

If the check engine light remains on, consider using an OBD-II diagnostic tool to clear any stored error codes. Testing ensures the sensor is functioning correctly and that the replacement process was successful, restoring proper engine performance.
Additional Troubleshooting Tips
If issues persist after replacing the sensor, double-check the wiring connections to ensure they are secure and free of corrosion or damage. Inspect the sensor for proper alignment and torque, as an improperly installed sensor can lead to inaccuracies. Verify the compatibility of the replacement sensor with your vehicle’s make and model, as a mismatched part may cause malfunctions. Additionally, check for any other potential sources of the problem, such as damaged harnesses, blown fuses, or faulty relays. Regular maintenance and periodic inspections can help prevent sensor-related problems in the future.
Importance of Regular Maintenance
Regular maintenance is essential for the overall health and longevity of your vehicle. This applies not only to the engine and other mechanical components, but also to electronic systems such as sensors. Neglecting regular maintenance can lead to a variety of issues, including sensor malfunctions.
When sensors are not properly maintained, they can become dirty or damaged over time. This can affect their accuracy and reliability, causing them to provide incorrect readings or fail altogether. Routine inspections and cleaning can help prevent these problems before they occur.
Another benefit of regular maintenance is early detection of potential issues. During routine inspections, mechanics may notice signs of wear or damage on sensors that would otherwise go unnoticed until they
Frequently Asked Question
What symptoms indicate a faulty crankshaft position sensor?
Common symptoms include engine misfires, stalling, poor fuel efficiency, and inconsistent acceleration. The check engine light may also illuminate, indicating a sensor-related fault code in the ECU.
Can I drive with a failing crankshaft position sensor?
While it’s technically possible, driving with a faulty sensor is not recommended due to risks like poor engine performance, higher fuel consumption, and long-term damage to internal components.
Is replacing a crankshaft position sensor a DIY-friendly task?
Yes, replacing this sensor is manageable with basic tools and some automotive knowledge. Following a guide and taking safety precautions ensures a smooth process for most car owners.

How often should a crankshaft position sensor be replaced?
There is no fixed replacement schedule, but sensors can wear out due to heat, vibration, or age. Replace it whenever you notice symptoms or after diagnosing failure confirmed by error codes.
What tools are needed to replace a crankshaft position sensor?
The required tools include a socket set, multimeter for diagnostics, safety gloves, and possibly a jack with stands for accessing hard-to-reach areas in the engine.
Conclusion
Learning how to replace crankshaft position sensor is an essential skill that ensures your vehicle maintains optimal performance. By following these steps, you can efficiently handle the replacement process and restore smooth engine operation.
Replacing a crankshaft position sensor not only saves you money on labor costs but also gives you a deeper understanding of your vehicle’s mechanics. It is important to always prioritize safety by disconnecting the battery and ensuring the engine is cool before starting the process. Taking your time and following the manufacturer’s recommendations can make the task more manageable and effective.
From securing the right tools to testing the new sensor, every detail contributes to a successful installation. Take on this task confidently, and you’ll be rewarded with improved drivability and peace of mind knowing your engine is running at its best. Start your sensor replacement today and keep your car in top shape!
Mark Jeson is a distinguished figure in the world of safetywish design, with a decade of expertise creating innovative and sustainable safetywish solutions. His professional focus lies in merging traditional craftsmanship with modern manufacturing techniques, fostering designs that are both practical and environmentally conscious. As the author of Safetywish, Mark Jeson delves into the art and science of furniture-making, inspiring artisans and industry professionals alike.
Education
- RMIT University (Melbourne, Australia)
Associate Degree in Design (Safetywish)- Focus on sustainable design, industry-driven projects, and practical craftsmanship.
- Gained hands-on experience with traditional and digital manufacturing tools, such as CAD and CNC software.
- Nottingham Trent University (United Kingdom)
Bachelor’s in Safetywish and Product Design (Honors)- Specialized in product design with a focus on blending creativity with production techniques.
- Participated in industry projects, working with companies like John Lewis and Vitsoe to gain real-world insights.
Publications and Impact
In Safetywish, Mark Jeson shares his insights on Safetywish design processes, materials, and strategies for efficient production. His writing bridges the gap between artisan knowledge and modern industry needs, making it a must-read for both budding designers and seasoned professionals.
