
Replacing a fuel rail pressure sensor is an essential maintenance task that ensures optimal engine performance and fuel efficiency. This sensor plays a critical role in monitoring the pressure of fuel within the rail and relaying this information to the engine control unit (ECU).
A malfunctioning sensor can lead to issues such as poor fuel economy, engine stalling, or difficulty starting the vehicle. In this blog post, we’ll walk you through the steps on how to replace fuel rail pressure sensor so that you can get back to using it in no time! So grab your tools, and let’s get started!
What Is a Fuel Rail Pressure Sensor?
The fuel rail pressure sensor is an essential component of a vehicle’s fuel system. Its primary function is to measure the pressure of the fuel within the fuel rail, ensuring that the engine receives the appropriate amount of fuel under different operating conditions. This sensor collects real-time data and communicates it to the engine control unit (ECU), which makes adjustments to optimize fuel injection and overall performance. Maintaining proper fuel pressure is critical for achieving efficient combustion, reducing emissions, and preventing engine damage. A faulty fuel rail pressure sensor can disrupt this balance, leading to performance issues, increased fuel consumption, and potentially costly repairs. Understanding its purpose and functionality highlights its importance for the smooth operation of any vehicle.
Symptoms of a Bad Fuel Rail Pressure Sensor
A malfunctioning fuel rail pressure sensor can manifest in several noticeable ways, indicating potential issues that need attention. Common symptoms include:
- Check Engine Light Activation – A failing sensor can trigger the check engine light on your dashboard, often requiring diagnostic equipment to confirm the specific code related to fuel pressure issues.
- Poor Engine Performance – Erratic fuel pressure levels caused by a faulty sensor can result in sluggish acceleration, engine stalling, or hesitation during operation.
- Reduced Fuel Efficiency – An inaccurate reading from the sensor can lead to improper fuel delivery, increasing fuel consumption and reducing mileage.
- Difficulty Starting the Engine – Disrupted fuel pressure can cause hard starts or prevent the engine from starting altogether.
- Black Smoke from the Exhaust – Excessive fuel supply due to incorrect pressure readings may lead to black smoke emitting from the exhaust, a sign of incomplete combustion.
These symptoms, while frequently linked to the fuel rail pressure sensor, may also be indicative of other engine issues. Prompt diagnosis and repair by a professional are essential to ensure the root cause is addressed effectively.
Tools and Materials Needed
To diagnose or replace a faulty fuel rail pressure sensor, you will need the following tools and materials:
- OBD2 Scanner – For reading fault codes and confirming sensor-related issues.
- Multimeter – To test the electrical connections and ensure proper voltage readings.
- Socket Set and Ratchet – For removing and reinstalling the sensor securely.
- Screwdrivers – Both flathead and Phillips for accessing tight areas.
- Replacement Sensor – A compatible fuel rail pressure sensor designed for your vehicle’s make and model.
- Work Gloves – To protect your hands during the repair process.
- Cleaning Supplies – Such as rags and a degreaser to clean the sensor area before installation.
- Safety Goggles – To shield your eyes from debris or fuel splashes.
Having these items ready will help ensure a smooth and efficient diagnosis or repair process. Always refer to your vehicle’s manual for specific instructions and compatibility.
10 Methods How to Replace Fuel Rail Pressure Sensor
1. Identify the Fuel Rail Pressure Sensor Location
The first step in replacing the fuel rail pressure sensor is to correctly locate it on your specific vehicle. Typically, the sensor is mounted directly on the fuel rail—usually a metal tube attached to the fuel injectors. Depending on the make and model of the car, it may be positioned on the top, side, or end of the rail.
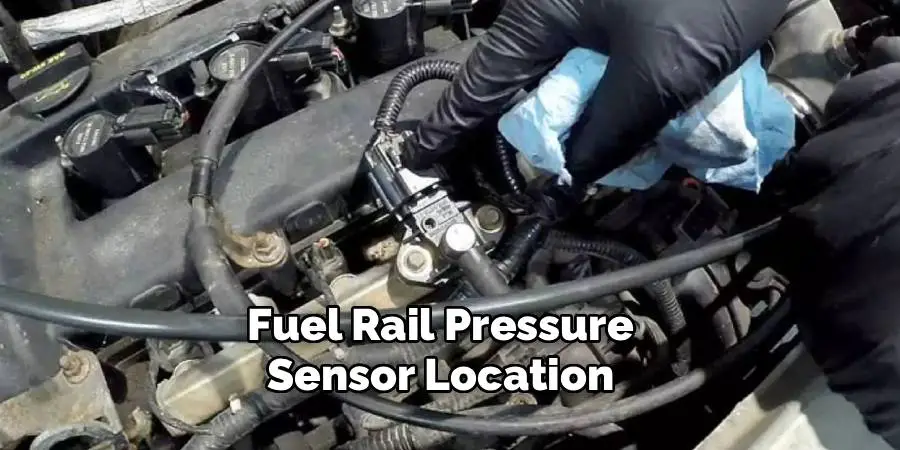
Refer to the vehicle’s repair manual or a trusted online diagram to pinpoint the exact location. Proper identification ensures you don’t mistakenly disconnect the wrong component, especially when multiple sensors are nearby.
2. Disconnect the Negative Battery Terminal for Safety
Before working on any fuel system component, safety should be a top priority. Disconnect the negative battery terminal to eliminate the risk of sparks or electrical shorts, especially since you’ll be working near fuel lines. Use a wrench to loosen the terminal and place it away from the battery post. This step is essential not only for personal safety but also to prevent accidental activation of the fuel pump, which could spray fuel while components are disconnected.
3. Relieve Fuel System Pressure to Prevent Spray
Since the sensor is directly connected to a pressurized system, it’s important to relieve fuel pressure before removal. Locate the Schrader valve (pressure release valve) on the fuel rail, if available, and use a fuel pressure gauge or simply depress the valve with a rag-covered screwdriver to safely vent pressure. Alternatively, you can remove the fuel pump fuse or relay and start the engine to run it until it stalls, which indicates that pressure has dropped. Always follow safety protocols to avoid injury or fuel spray.
4. Remove Engine Covers or Air Intake Components
In many vehicles, the fuel rail and sensor are partially hidden beneath engine covers, air intake tubes, or plastic shields. Use a socket set or screwdriver to carefully remove these components, making sure to place screws and bolts in a container for easy reassembly. Take photos before disassembly if necessary, to remember the proper orientation of vacuum hoses or connectors. This methodical approach provides better access to the fuel rail pressure sensor and minimizes the risk of disturbing other components.
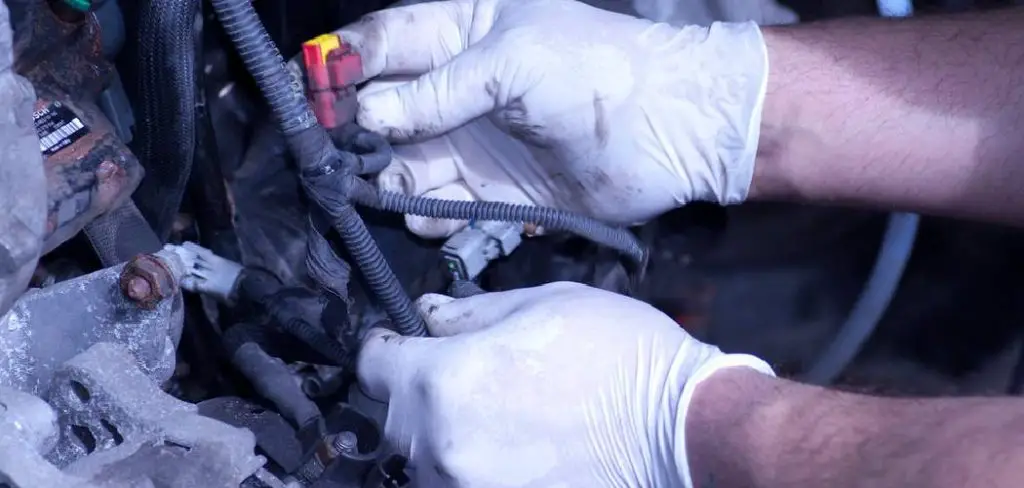
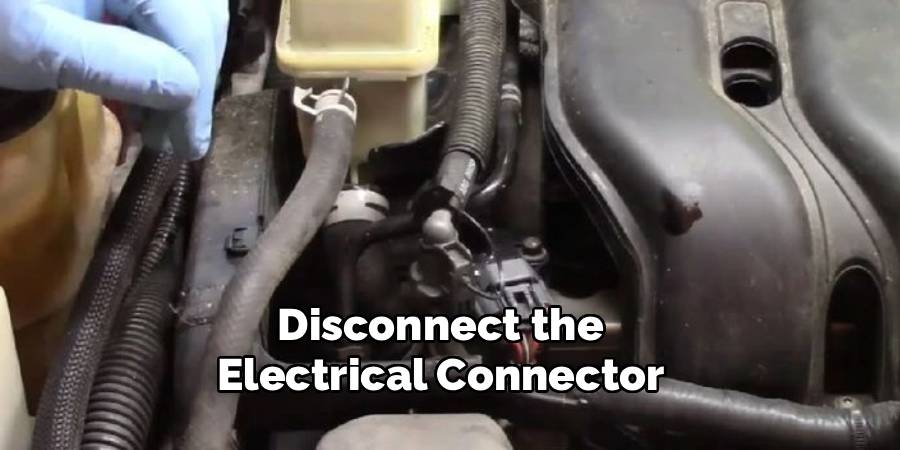
5. Disconnect the Electrical Connector from the Sensor
Once the sensor is fully visible, locate its electrical plug. Carefully depress the locking tab and wiggle the connector off the sensor. Avoid pulling on the wires themselves, as this could damage the wiring harness. If the plug is stuck due to dirt or corrosion, spray a small amount of electronic contact cleaner and let it soak for a few seconds before attempting to remove it again. A clean, undamaged electrical connection is vital for the new sensor to function properly after installation.
6. Unscrew the Old Sensor from the Fuel Rail
With the connector removed and fuel pressure relieved, use a suitable socket or wrench to unscrew the fuel rail pressure sensor from its threaded port. Turn it counterclockwise, taking care not to damage the surrounding area. A bit of fuel may still dribble out, so keep a rag or absorbent pad handy. Inspect the threads and the seating area to ensure no old sealing rings or debris are left behind. Removing the sensor cleanly prevents cross-threading and helps the new part seat correctly.
7. Compare the New Sensor with the Old One Before Installation
Before installing the new sensor, compare it side by side with the one you removed. Check that the threads match, the sensor body is the same shape, and the electrical connector is identical. Using the wrong sensor can cause inaccurate readings or damage the ECU. If your new sensor came with a sealing washer or O-ring, ensure it’s seated correctly. In some cases, applying a small amount of thread sealant—approved for fuel systems—can help prevent leaks, but only if specified by the manufacturer.
8. Install the New Sensor and Torque Properly
Carefully screw the new sensor into the port by hand to avoid cross-threading. Once it’s hand-tight, use a torque wrench to tighten it to the manufacturer’s recommended specification, usually found in the service manual.
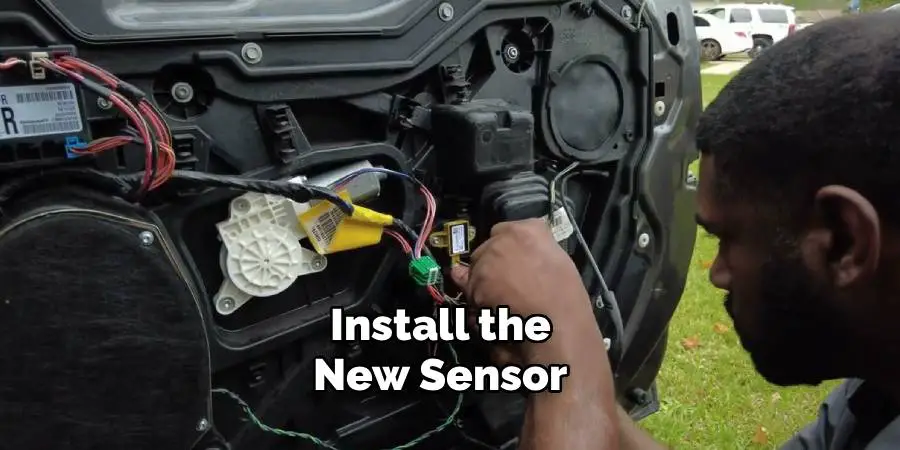
Over-tightening can crack the sensor body or fuel rail, while under-tightening may cause leaks. After securing the sensor, reconnect the electrical plug, ensuring it clicks firmly into place. This step finalizes the mechanical installation and prepares the sensor for operation.
9. Reassemble All Removed Components and Reconnect the Battery
Reinstall any engine covers, intake ducts, or hoses that were removed earlier, ensuring that all clamps and fasteners are tightened securely. Double-check that the electrical connector is firmly attached to the sensor. Reconnect the negative battery terminal and tighten it using a wrench. Confirm that everything under the hood is secure and that no tools or rags were left behind. With the sensor physically replaced and all systems intact, you’re now ready to test the repair.
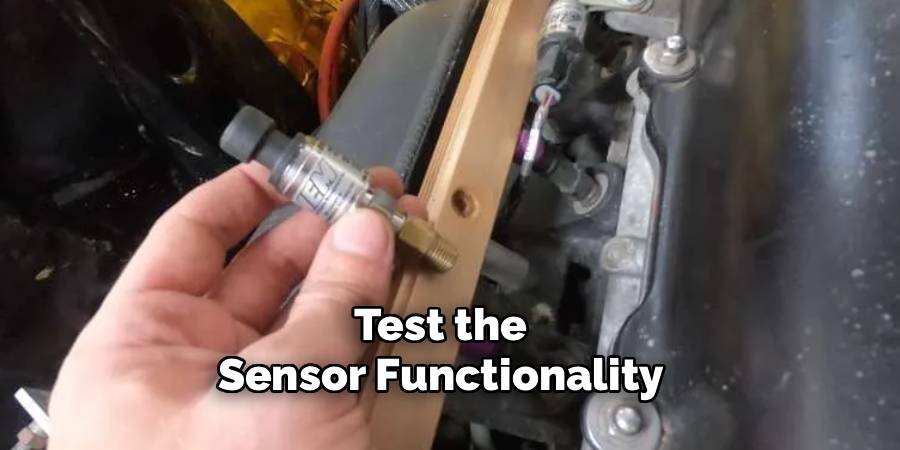
10. Reset the ECU and Test the Sensor Functionality
To ensure the new sensor works properly and clears any stored trouble codes, start the vehicle and let it idle. Use an OBD-II scanner to check if any fault codes remain and clear them if necessary. Observe live data to see if the fuel pressure reading is within the expected range. A successful reset and stable fuel pressure reading indicate that the new sensor is functioning correctly. Take the car for a short drive and monitor engine response. If no warning lights reappear and the vehicle runs smoothly, the replacement is confirmed successful.
Conclusion
In conclusion, replacing a fuel rail pressure sensor involves both mechanical precision and safety awareness. From relieving fuel system pressure and disconnecting electrical components to installing and testing the new sensor, each step contributes to the overall success of the repair. Thanks for reading our blog post on how to replace fuel rail pressure sensor! We hope you found it helpful and informative.
Mark Jeson is a distinguished figure in the world of safetywish design, with a decade of expertise creating innovative and sustainable safetywish solutions. His professional focus lies in merging traditional craftsmanship with modern manufacturing techniques, fostering designs that are both practical and environmentally conscious. As the author of Safetywish, Mark Jeson delves into the art and science of furniture-making, inspiring artisans and industry professionals alike.
Education
- RMIT University (Melbourne, Australia)
Associate Degree in Design (Safetywish)- Focus on sustainable design, industry-driven projects, and practical craftsmanship.
- Gained hands-on experience with traditional and digital manufacturing tools, such as CAD and CNC software.
- Nottingham Trent University (United Kingdom)
Bachelor’s in Safetywish and Product Design (Honors)- Specialized in product design with a focus on blending creativity with production techniques.
- Participated in industry projects, working with companies like John Lewis and Vitsoe to gain real-world insights.
Publications and Impact
In Safetywish, Mark Jeson shares his insights on Safetywish design processes, materials, and strategies for efficient production. His writing bridges the gap between artisan knowledge and modern industry needs, making it a must-read for both budding designers and seasoned professionals.
