
A malfunctioning wheel speed sensor can lead to inaccurate readings in your ABS (anti-lock braking system) and traction control system. This vital component helps maintain stability and safety by transmitting wheel speed data to your vehicle’s onboard systems. If it goes bad, you may face erratic braking, warning lights on your dashboard, or compromised performance under slippery conditions.

Before beginning the replacement process, ensure your vehicle is parked on a flat surface with the parking brake engaged. Gather the necessary tools, including a jack, jack stands, a lug wrench, and a socket set. Start by loosening the lug nuts on the wheel corresponding to the faulty sensor but do not remove them entirely. Using the jack, lift the vehicle and secure it with jack stands for safety. Fully remove the lug nuts and take off the wheel to access the sensor.
Locate the wheel speed sensor, which is typically attached near the brake assembly, and disconnect its wiring harness. Carefully remove the bolts or clips securing the sensor, and replace it with the new one. Reattach the wiring, ensure it’s secure, and reinstall the wheel. Once everything is back in place, lower the vehicle and tighten the lug nuts to the proper torque specifications. Finally, test the vehicle to confirm the issue is resolved.
If you’re a beginner feeling daunted by the idea of fixing this yourself, don’t worry! Replacing a wheel speed sensor at home can be straightforward with the right tools and instructions. This guide offers an easy-to-follow, step-by-step approach so you can tackle this essential repair confidently.
Why You Need to Understand How to Replace Wheel Speed Sensor
A wheel speed sensor might be small, but its role in vehicle safety and performance is huge. It continuously monitors the rotational speed of your wheels, feeding critical data to your car’s ABS, traction control, and stability systems. When it malfunctions, you could encounter severe driving hazards such as reduced control during sudden braking or wheel slippage in challenging road conditions.
Understanding how to replace this part on your own not only saves you money but also ensures you’re equipped to maintain optimal vehicle safety. Learning this skill can prevent costly visits to a mechanic for what is, in many cases, a straightforward DIY task. Additionally, a functioning sensor improves fuel efficiency and helps extend the life of your vehicle’s braking system, making it an essential repair to prioritize.
10 Step-by-Step Guide on How to Replace Wheel Speed Sensor
Replacing a wheel speed sensor requires basic tools, patience, and attention to detail. Below, we break the process into manageable steps so you can complete the task safely and effectively.
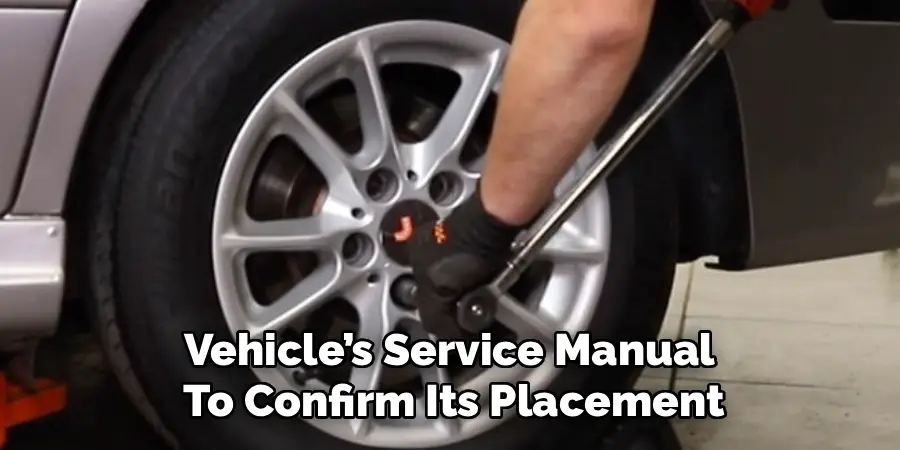
Step 1: Locate the Faulty Sensor
The first step in replacing your wheel speed sensor is identifying its location. You’ll find the sensor near the wheel hub, where it monitors wheel rotations. Check your vehicle’s service manual to confirm its placement, as it can vary depending on the make and model of your car.
Once located, inspect the sensor to ensure it’s the root of the problem. Look for physical damage, dirt accumulation, or frayed wiring. Sometimes, sensor issues stem from a wiring problem rather than the sensor itself.
Step 2: Gather the Necessary Tools
Before you begin, assemble the tools required for the replacement. Essentials include a jack stand, lug wrench, socket set, and possibly a Torx bit depending on your car’s design. Make sure you also have the replacement wheel speed sensor that matches your vehicle’s specifications.
Having everything ready beforehand helps ensure a smooth workflow and reduces the risk of missing parts midway through the repair.
Step 3: Elevate the Vehicle Safely
Place the car on a flat, stable surface and engage the parking brake for added safety. Use a jack to lift the vehicle and secure it with jack stands. Never rely solely on a jack to hold the car up, as it may give way. Removing the wheel should now be safe and straightforward.
Always follow safety protocols during this step to avoid accidents. If you’re a beginner, double-check that the vehicle is stable before proceeding.
Step 4: Remove the Wheel
With the vehicle secure, use a lug wrench to remove the lug nuts and take off the wheel. Keep the lug nuts in a safe place to avoid misplacing them. Removing the wheel provides direct access to the sensor and its components, making it easier to perform the repair.
For stubborn lug nuts, apply penetrating oil, wait a few minutes, and try again.
Step 5: Disconnect the Faulty Sensor
The next step is detaching the malfunctioning sensor. Follow the sensor’s wiring to find its connector and carefully unplug it. Unscrew the sensor mounting bolts using the appropriate socket or tool and pull the sensor out from the wheel hub. Take note of its positioning to ensure you install the new sensor correctly.
If the sensor is stuck, gently wiggle it or use a plastic pry tool. Avoid using excessive force, which could damage the wheel hub.
Step 6: Clean the Sensor Area
Before installing the new sensor, clean the mounting area thoroughly. Dirt, debris, or corrosion in this spot can interfere with the sensor’s function. Use a soft cloth or cleaning solution to ensure the surface is smooth and ready for the new part.
A clean, stable base will help your new sensor operate efficiently and extend its lifespan.
Step 7: Install the New Sensor
Take your new wheel speed sensor and position it in the same slot where the old one was removed. Screw it in tightly but avoid over-torquing, which could lead to damage. Reconnect the sensor wiring to its connector, ensuring a secure fit to prevent future disconnections.
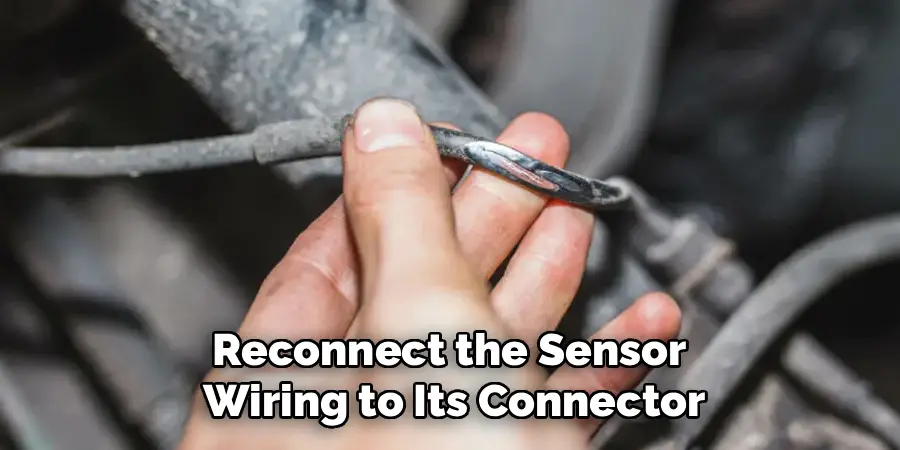
Confirm that the new sensor sits flush with the mounting area before proceeding.
Step 8: Reattach the Wheel
Once the new sensor is securely in place, it’s time to reassemble your vehicle. Place the wheel back onto the hub and screw in the lug nuts. Use your lug wrench to tighten them, but don’t overdo it, as the final tightening should occur when the vehicle is on the ground.
Double-check that the wheel is properly secured before lowering the car.
Step 9: Lower the Vehicle and Test the Sensor
Use the jack to carefully lower the vehicle until the wheels touch the ground. Finish tightening the lug nuts to the appropriate torque specifications as outlined in your vehicle’s manual. Finally, start your car and drive a short distance to ensure the new sensor is working.
Look for dashboard warning lights to confirm the system is functioning normally. If problems persist, double-check your installation or consult a professional mechanic.
Step 10: Dispose of the Old Sensor Responsibly
Don’t forget to properly discard the old sensor. Check local waste disposal guidelines, as some parts may require special recycling procedures. This ensures environmental safety and keeps your workspace organized.
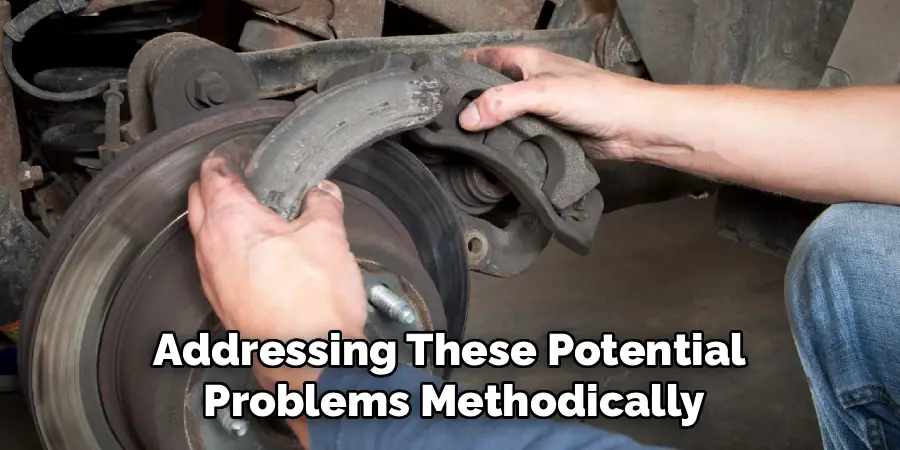
Troubleshooting Common Issues
Despite following the installation steps carefully, you may encounter some common issues when replacing a sensor. Here are a few and how to address them:
- Dashboard Warning Lights Remain On: If warning lights persist after installation, recheck the sensor’s connection to ensure it’s properly secured. Inspect the wiring for any damage or loose fittings. If the issue continues, the new sensor might be faulty and could require replacement.
- Irregular System Performance: If you notice inconsistent behavior from the system, verify that the correct sensor model was installed for your vehicle. Consult your owner’s manual or a professional if necessary.
- Error Codes Appear: Use an OBD-II scanner to read error codes. This tool can provide valuable insights into the exact nature of the issue, helping you narrow down whether the problem lies with the sensor, wiring, or elsewhere.
By addressing these potential problems methodically, you can ensure the sensor is functioning properly and your vehicle remains in top condition.
Frequently Asked Question
How can I tell if my wheel speed sensor is faulty?
Common symptoms of a bad wheel speed sensor include ABS warning lights on the dashboard, erratic braking, or loss of traction control. You might also notice unusual behavior in the speedometer. To confirm, use an OBD-II scanner, which can detect sensor-specific error codes.
Can I drive with a malfunctioning wheel speed sensor?
While it’s technically possible, driving with a defective sensor is unsafe. A malfunctioning sensor compromises your ABS, traction control, and stability systems, making your vehicle harder to control. Replace the faulty sensor as soon as possible to maintain road safety.
Is replacing a wheel speed sensor expensive?
The cost depends on your car’s make and model, but on average, a replacement sensor ranges from $20 to $150. Labor costs can add another $100–$200 if done professionally. Doing it yourself can significantly lower these expenses.
Are all wheel speed sensors the same?
No, wheel speed sensors vary based on your vehicle’s brand and model. Always match the replacement sensor to your car’s exact specifications to ensure compatibility. Using the wrong sensor may lead to installation issues or system malfunction.
How long does it take to replace a wheel speed sensor?
For beginners, replacing a wheel speed sensor typically takes 1–2 hours. Experienced DIYers might finish the task more quickly, especially with the proper tools and preparation. Take your time to avoid mistakes.

Conclusion
Replacing a wheel speed sensor is an essential skill that saves you time and money while helping you maintain your vehicle’s safety. By following the steps outlined in this guide, you’ll tackle the task with ease, even as a beginner. With your sensor replaced, you’ll enjoy improved control, better braking, and enhanced vehicle performance.
Regular maintenance and timely repairs are crucial for keeping your vehicle in top condition. Neglecting issues like a faulty wheel speed sensor can lead to more significant problems down the road, including compromised safety and higher repair costs. By addressing these concerns promptly, you not only protect your investment but also ensure a smoother and safer driving experience for you and your passengers.
Take charge of your car maintenance today and confidently learn how to replace wheel speed sensor on your own. The payoff in safety and peace of mind is well worth the effort!
Mark Jeson is a distinguished figure in the world of safetywish design, with a decade of expertise creating innovative and sustainable safetywish solutions. His professional focus lies in merging traditional craftsmanship with modern manufacturing techniques, fostering designs that are both practical and environmentally conscious. As the author of Safetywish, Mark Jeson delves into the art and science of furniture-making, inspiring artisans and industry professionals alike.
Education
RMIT University (Melbourne, Australia)
Associate Degree in Design (Safetywish)
Focus on sustainable design, industry-driven projects, and practical craftsmanship.
Gained hands-on experience with traditional and digital manufacturing tools, such as CAD and CNC software.
Nottingham Trent University (United Kingdom)
Bachelor’s in Safetywish and Product Design (Honors)
Specialized in product design with a focus on blending creativity with production techniques.
Participated in industry projects, working with companies like John Lewis and Vitsoe to gain real-world insights.
Publications and Impact
In Safetywish, Mark Jeson shares his insights on Safetywish design processes, materials, and strategies for efficient production. His writing bridges the gap between artisan knowledge and modern industry needs, making it a must-read for both budding designers and seasoned professionals.
