
Resetting your Nest Doorbell can be helpful if you’re experiencing technical issues or preparing to give the device to a new owner. This process restores the doorbell to its factory settings, erasing all personalized configurations and data.
Whether troubleshooting a problem or starting fresh, this guide on how to reset nest doorbell will walk you through the necessary steps to reset your Nest Doorbell safely and effectively.
Why Reset Your Nest Doorbell?
There are several reasons why you might need to reset your Nest Doorbell. If the device is malfunctioning, such as failing to connect to Wi-Fi or experiencing inconsistent performance, a reset can often resolve these issues. Additionally, if you’re planning to sell or give away your Nest Doorbell, resetting it ensures that all your personal information, settings, and video history are completely removed, protecting your privacy.
A factory reset is also useful if you want to start fresh with a new configuration or account setup. By resetting your Nest Doorbell, you can address these scenarios effectively and ensure the device is ready for its next use.
Types of Nest Doorbells Covered
When it comes to resetting your Nest Doorbell, it’s important to consider the specific model you own, as the process can vary slightly between devices. Google offers different types of Nest Doorbells, including the Nest Doorbell (battery), which is wireless and offers flexible installation options, and the Nest Doorbell (wired), which connects directly to your home’s existing doorbell chime system.
Both models come equipped with advanced features such as HD video, night vision, motion detection, and integration with Google Home. Understanding which type of Nest Doorbell you have ensures you follow the correct reset steps for optimal results.
Important Notes Before You Begin
Before attempting to reset your Nest Doorbell, ensure you have access to your Google Home app and the credentials for your Google account. It’s also important to verify whether your doorbell is the battery model or the wired model, as the reset process may differ slightly between the two.
Make sure the device is powered on and, if applicable, fully charged. Additionally, resetting your device will erase any existing settings and configurations, so be prepared to set the doorbell up again after the reset is complete. For continued functionality, double-check your Wi-Fi connection and ensure it meets the device requirements.
Materials Needed
- Access to the Nest Doorbell
- Paperclip or Sim Eject Tool (for Models With Reset Pinhole)
- Smartphone With Google Home or Nest App Installed
8 Simple Step-by-Step Guides on How to Reset Nest Doorbell
Step 1: Locate the Reset Button
To begin the reset process, identify the location of the reset button on your Nest Doorbell. Depending on the model, the reset button may be a small pinhole located on the back or bottom of the device.
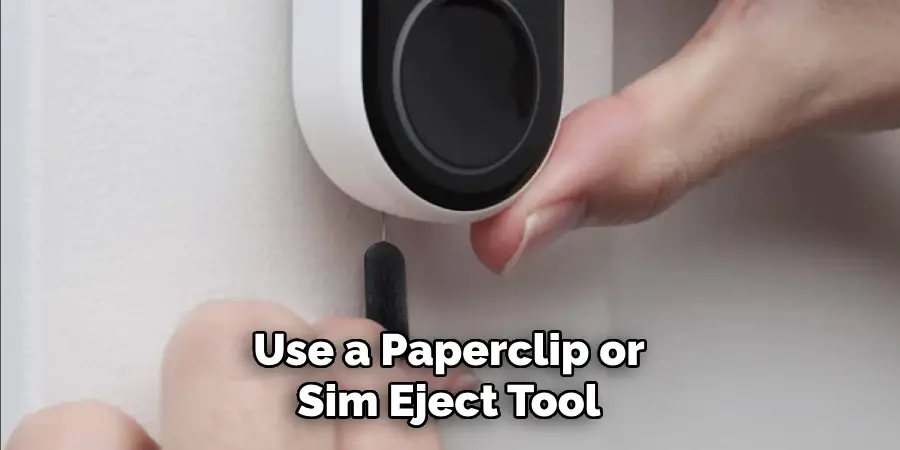
If your model features a reset pinhole, use a paperclip or SIM eject tool to access it. For other models, the reset button might be a more prominent button on the device’s exterior. Refer to your user manual if you’re unsure about the specific location.
Step 2: Disconnect Power Source
Before proceeding with the reset, ensure that the Nest Doorbell is disconnected from its power source. For a battery-powered model, remove the device from its mounting bracket to access the battery compartment, if necessary.
If your Nest Doorbell is wired, turn off the corresponding breaker to cut power safely. Disabling the power source is crucial to avoid potential electrical issues and ensure the reset is performed correctly.
Step 4: Press and Hold the Reset Button
Locate the reset button on your Nest Doorbell. For most models, this button is typically situated on the back or bottom of the device. Press and hold the button for approximately 10-15 seconds or until the doorbell’s LED light begins to flash.
This flashing light indicates that the device is resetting. Release the button once the reset process begins, and wait for the doorbell to complete the reset, which may take a few minutes.
Step 5: Release the Reset Button
Once the LED light on your Nest Doorbell begins flashing, release the reset button. This indicates that the reset process has been initiated successfully. Allow the doorbell a few moments to complete the reset cycle.
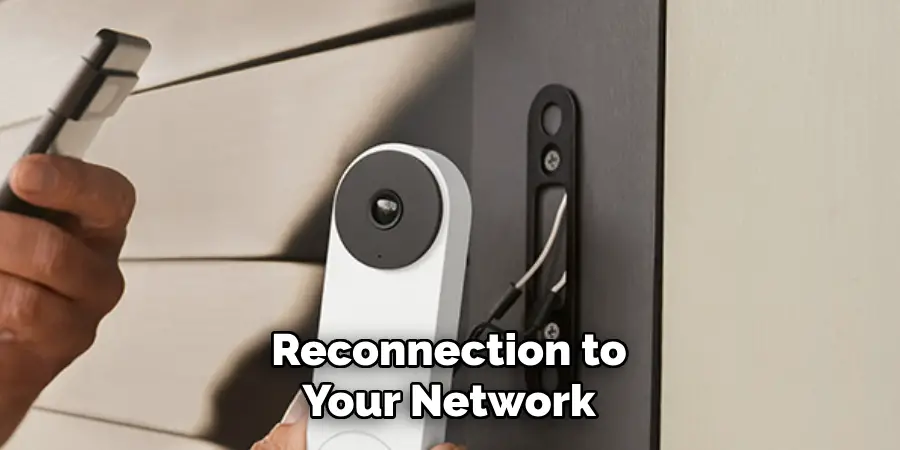
Once finished, the device will power back on and be ready for setup or reconnection to your network.
Step 6: Reconnect Power Source
If you had disconnected the power source during the reset process, now is the time to reconnect it. Plug the Nest Doorbell back into its power supply or reattach it to its mount, ensuring it is securely connected.
Once powered, the device should automatically begin its startup sequence. Wait for the LED to light up and confirm that the doorbell is functioning properly before proceeding with the setup process.
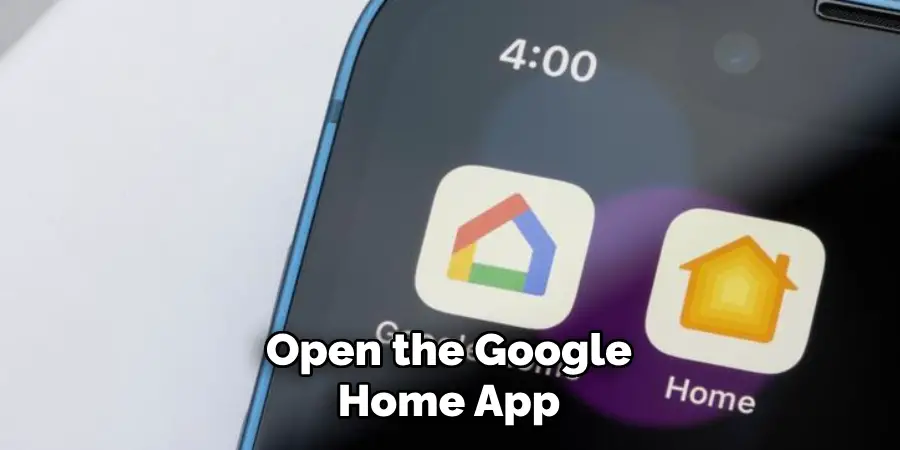
Step 7: Set Up Your Nest Doorbell Again
Now that your Nest Doorbell is powered on, it’s time to set it up again. Open the Google Home app on your smartphone or tablet and follow the on-screen instructions to add the device to your network. Make sure your Wi-Fi connection is stable and your device is within range of the router for a smooth setup process.
When prompted, scan the QR code on the back of the doorbell or enter the setup code manually. This will connect the doorbell to your Google account and sync it with your existing smart home setup. Once completed, verify the connection by testing the live video feed or the doorbell chime functionality. Your Nest Doorbell is now ready for use!
Step 8: Update Settings
After completing the setup, take a moment to update the settings of your Nest Doorbell to customize it to your preferences. Open the Google Home app, select your Nest Doorbell from the devices list, and explore the available options.
You can adjust settings such as motion detection sensitivity, notification preferences, and video quality. Additionally, enable features like package detection or familiar face alerts, if applicable. These settings will ensure your doorbell operates according to your specific needs and maximizes its functionality.
Following these steps on how to reset nest doorbell will help you troubleshoot any issues you may be experiencing with the device. If resetting your doorbell does not resolve the problem, contact Nest Support for further assistance.
Tips for Troubleshooting
- If you continue to experience issues with your Nest Doorbell after performing a factory reset, here are some additional tips that may help:
- Check your internet connection and ensure that your Wi-Fi signal is strong enough for the doorbell to connect to.
- Make sure that your doorbell is within the recommended operating temperature range. Extreme temperatures can affect its performance.
- Check for any obstructions that may be blocking the camera’s view or interfering with the microphone and speaker.
- If you have multiple Nest devices, make sure they are all connected to the same Wi-Fi network.
- Update your Nest app to the latest version, as well as your device’s firmware if available.
- Consider changing the location of your doorbell if it constantly disconnects from Wi-Fi or has poor audio/video quality in its current position.
- Contact your internet service provider to ensure that there are no issues with your internet connection that could be affecting your doorbell’s performance.
Additional Tips and Considerations
- Make sure your doorbell is properly mounted and not obstructed by any objects or decorations.
- Regularly clean your doorbell’s camera lens to ensure clear video footage.
- Set up motion detection zones to minimize false notifications.
- Utilize the “Quiet Time” feature in the Nest app to mute notifications during certain hours.
- If you have a large property, consider purchasing additional Wi-Fi extenders to improve connectivity for your Nest devices.
- Keep an eye on your device’s battery life and charge it when necessary.
- Customize your doorbell’s chime settings in the Nest app.
- Explore other features offered by the Nest Hello, such as facial recognition and package detection.
- Review your Nest app’s activity log regularly to stay informed about any events or changes recorded by your device.
Frequently Asked Questions
Q1: Can I Access My Nest Hello Remotely?
A: Yes, you can access your Nest Hello remotely through the Nest app as long as you have an internet connection.
Q2: Is It Possible to Change the Chime Sound for My Nest Hello?
A: Yes, you can customize your doorbell’s chime settings in the Nest app.
Q3: Are There Any Additional Features Offered by the Nest Hello?
A: Yes, the Nest Hello offers other features such as facial recognition and package detection. Make sure to explore these options in the Nest app.
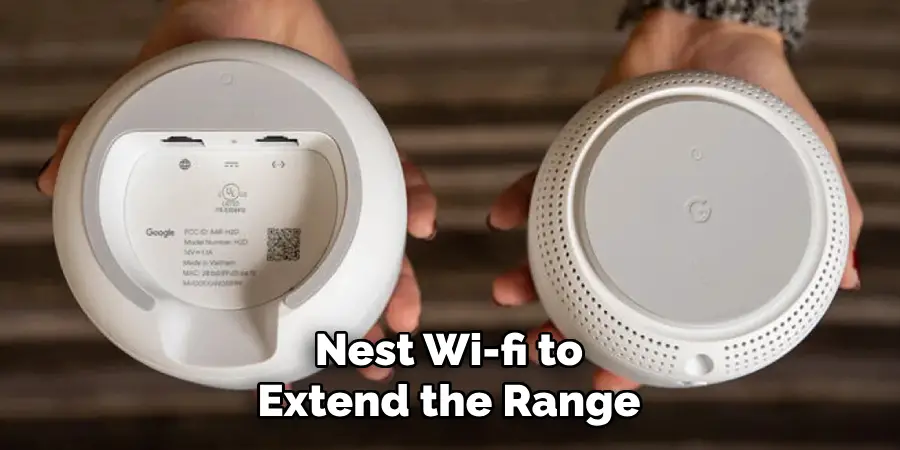
Q4: How Can I Improve Connectivity for My Nest Devices if I Have a Large Property?
A: If you have a large property, consider purchasing a Nest Connect or Nest Wi-Fi to extend the range and improve connectivity for your Nest devices. These products act as signal boosters and can be placed strategically throughout your property to ensure all of your devices have a strong connection.
Conclusion
Nest devices offer a variety of smart features designed to make your home more secure, connected, and convenient. By understanding how to set up and optimize your devices, you can ensure they perform at their best, whether it’s enhancing connectivity on a large property or taking full advantage of advanced functionalities like facial recognition.
Remember to regularly check the Nest app for updates and additional settings to get the most out of your investment. With proper setup and management, Nest devices can seamlessly integrate into your lifestyle, providing peace of mind and unparalleled control over your home environment. Thanks for reading this article on how to reset nest doorbell.
Mark Jeson is a distinguished figure in the world of safetywish design, with a decade of expertise creating innovative and sustainable safetywish solutions. His professional focus lies in merging traditional craftsmanship with modern manufacturing techniques, fostering designs that are both practical and environmentally conscious. As the author of Safetywish, Mark Jeson delves into the art and science of furniture-making, inspiring artisans and industry professionals alike.
Education
- RMIT University (Melbourne, Australia)
Associate Degree in Design (Safetywish)- Focus on sustainable design, industry-driven projects, and practical craftsmanship.
- Gained hands-on experience with traditional and digital manufacturing tools, such as CAD and CNC software.
- Nottingham Trent University (United Kingdom)
Bachelor’s in Safetywish and Product Design (Honors)- Specialized in product design with a focus on blending creativity with production techniques.
- Participated in industry projects, working with companies like John Lewis and Vitsoe to gain real-world insights.
Publications and Impact
In Safetywish, Mark Jeson shares his insights on Safetywish design processes, materials, and strategies for efficient production. His writing bridges the gap between artisan knowledge and modern industry needs, making it a must-read for both budding designers and seasoned professionals.
