
Parking sensors are a game-changing feature in modern vehicles, making parking smoother, safer, and less stressful. However, like any technology, these sensors are not immune to wear and tear, occasional malfunctions, or misalignments. For anyone wondering how to test parking sensors, understanding the process is crucial to ensure these devices continue to operate effectively and reliably.

To test parking sensors, start by ensuring the vehicle is on a flat surface and the sensors are clean and free from dirt or debris. Next, turn on the ignition and place the car in reverse gear (if the sensors are rear-facing) without moving the vehicle. Carefully approach the sensors with an object like a piece of cardboard or your hand to check for audible or visual feedback, such as beeping sounds or indicator lights on the dashboard. If the sensors don’t respond as expected, it may be necessary to inspect the wiring, check the sensor alignment, or consult a professional technician for further evaluation.
By testing your parking sensors, you can quickly identify any issues, such as inaccurate detection or complete failure, and address them before they lead to costly repairs or potential accidents. This guide simplifies the process, breaking it down into easy steps so drivers of all experience levels can confidently check their parking sensors.
Why Testing Parking Sensors is Important
Parking sensors are designed to prevent collisions and enhance your awareness of nearby obstacles. They are particularly useful in tight spaces or low-visibility conditions, helping drivers avoid damaging their vehicles—or worse, harming pedestrians or other cars. This makes them indispensable for modern driving.
However, faulty parking sensors can do more harm than good. A sensor that fails to detect an obstacle or gives off false alarms can lead to errors in judgment. Testing your parking sensors regularly ensures they work as intended, saving you from unnecessary stress and potential mishaps. If you’ve never tested these sensors before or are unsure about their reliability, now is the perfect time to learn how to test parking sensors effectively.
To test your parking sensors, start by cleaning them thoroughly. Dirt or debris can interfere with their functionality, so use a soft cloth and mild cleaning solution to remove any buildup. Next, turn on your car and engage the parking assist feature. Slowly approach an obstacle or have someone walk by the sensors to check if they detect the presence accurately. Pay attention to the beeping sound or visual indicators, as these should respond appropriately based on the proximity of the object. If the sensors fail to respond or give off inconsistent signals, it may be time to recalibrate or replace them.
10 Effective Steps on How to Test Parking Sensors
Testing parking sensors involves a series of evaluations to ensure they detect obstacles accurately and function without glitches. Below, you’ll find a detailed step-by-step guide to help you carry out this process efficiently.
Step 1: Understand How Parking Sensors Work
Before jumping into the test, familiarize yourself with how parking sensors operate. Most systems use ultrasonic or electromagnetic technology to detect objects. Ultrasonic sensors emit sound waves and measure the time it takes for the waves to bounce back, while electromagnetic sensors create a magnetic field around the vehicle to sense nearby objects. Knowing this will help you better evaluate their performance.
Step 2: Locate the Sensors on Your Vehicle
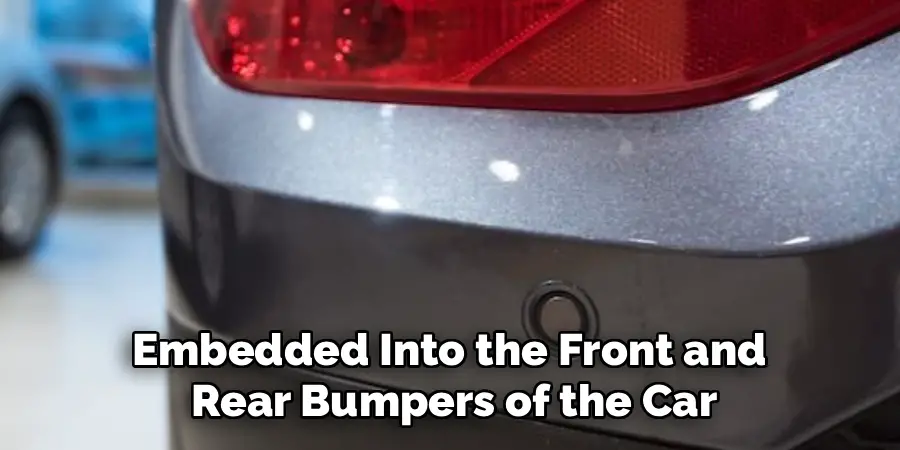
To begin testing, identify where the parking sensors are installed. Typically, they are embedded into the front and rear bumpers of the car. Take the time to visually inspect each sensor for visible damage, like cracks or dirt buildup, which could interfere with its operation.
Step 3: Clean the Sensors
Dirty sensors are a common reason for malfunctions. Use a clean, damp cloth to wipe the sensors and remove any dirt, mud, or debris that may block their signals. Allow them to dry before proceeding with the test. Ensuring a clean surface will eliminate false positives caused by obstructions and help you accurately determine their functionality.
Step 4: Activate the Parking Sensor System
Start the vehicle’s engine and enable the parking sensor system. For most cars, activating reverse gear automatically triggers the sensors, but some models may have a dedicated button or controls. Make sure the system is fully operational before testing.
Step 5: Conduct a Listening Test
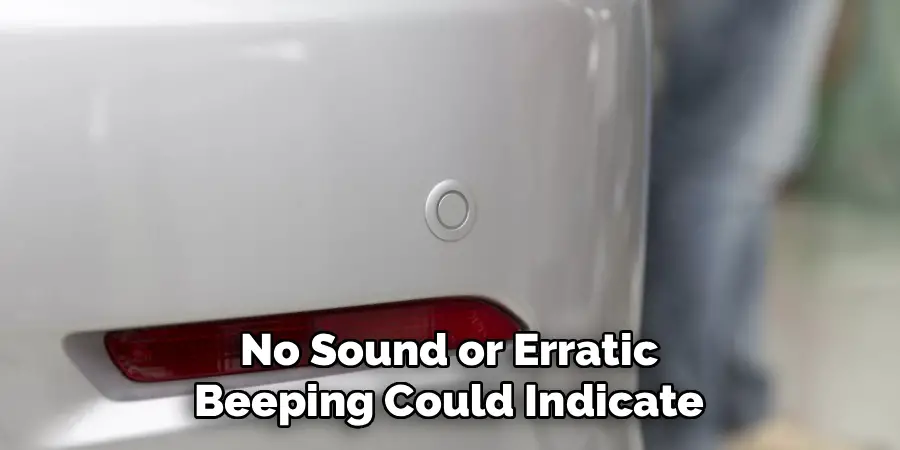
Stand near the vehicle and have another person slowly drive it near a stationary object, such as a wall. Active parking sensors produce a clear clicking or beeping sound when they detect an obstacle. Listen closely to ensure the sound is consistent and corresponds to varying distances. No sound or erratic beeping could indicate a malfunction.
Step 6: Use a Non-Damaging Object for Testing
Select a test object, like a soft foam block or cardboard box, to avoid damaging the car. Place the object a few feet from the bumper and determine if the sensors pick it up. Gradually move the object closer to the vehicle, noting how the system reacts. Functioning sensors should detect the object at increasing proximity.
Step 7: Test Both Front and Rear Sensors
Don’t forget to repeat this process for all sensors, both front and rear. Pay attention to any discrepancies in performance. A sensor that does not react to obstacles requires further investigation and possibly professional repair or replacement.
Step 8: Simulate Real-World Conditions
Since parking sensors are used in diverse conditions, simulate real-world scenarios. Test the sensors at different times of the day, under varying lighting conditions, and in wet or dry weather. This helps identify any quirks or inconsistencies in sensor performance caused by environmental factors.
Step 9: Use Diagnostic Tools (If Available)
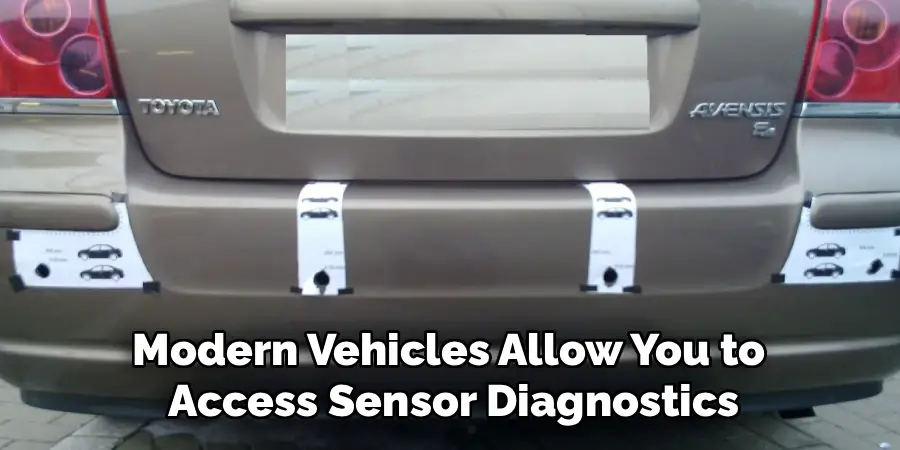
Many modern vehicles allow you to access sensor diagnostics via the onboard system. Refer to your vehicle’s user manual to find out how. These tools often provide error codes or show real-time sensor data, offering valuable insights into performance issues.
Step 10: Seek Professional Assistance if Needed
If your parking sensors are unresponsive or continue to malfunction despite testing, it’s best to consult a professional mechanic. Experienced technicians can diagnose electrical or hardware problems that may not be apparent during manual testing.
Future Sensor Technologies
The evolution of sensor technology is expected to bring significant advancements in vehicle systems. Future parking sensors will likely leverage artificial intelligence (AI) and machine learning to provide even greater accuracy and adaptability. These technologies could enable sensors to analyze complex environments in real time, distinguishing between static and moving objects with enhanced precision. Additionally, the integration of wireless communication technologies, such as vehicle-to-everything (V2X), may allow parking sensors to interact with other smart devices and infrastructure, further improving safety and efficiency. Developments in miniaturization and energy efficiency will also make sensors more effective and less intrusive. As automotive technology continues to advance, parking sensors will undoubtedly play an integral role in the broader vision of autonomous and connected vehicles.
Frequently Asked Questions About How to Test Parking Sensors
1. How do I know if my parking sensors need testing?
If your parking sensor system is producing unusual noises, inaccurate distance warnings, or completely failing to activate, it likely needs testing. Regular tests are also recommended after washing the car, driving in extreme weather, or any minor collisions.
2. Can I test parking sensors without a test object?
Yes, but a test object provides more precise results. Without an object, you can still evaluate the sensors by listening for their response when the vehicle approaches stationary obstacles like walls. However, this may not reveal all performance details.
3. What should I do if one sensor isn’t working?
First, clean the faulty sensor to rule out dirt causing the issue. If cleaning doesn’t work, check for visible damage or disconnect and reconnect the sensor if possible. Persistent issues may require a replacement, which should be handled by a professional.
4. How often should parking sensors be tested?
Testing your parking sensors every three to six months is a good practice, especially before long road trips. You should also test them immediately if you notice any malfunctions or inconsistencies.
5. Are all parking sensors the same?
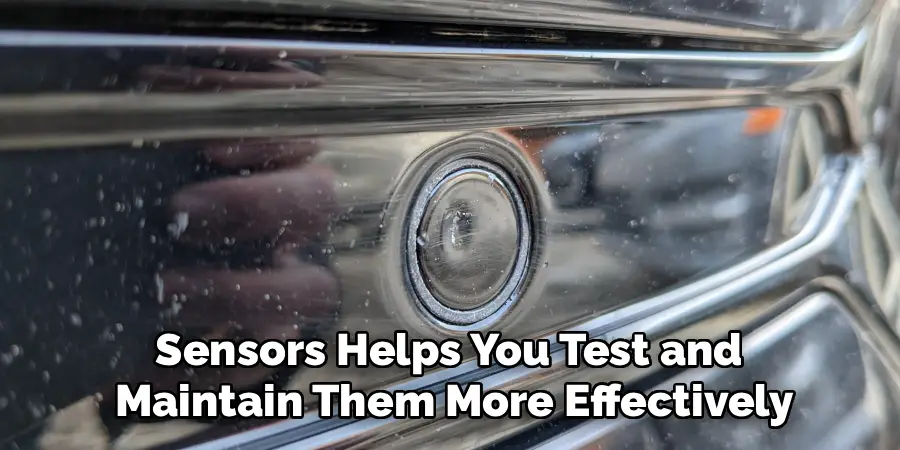
No, parking sensors vary depending on their technology (ultrasonic vs. electromagnetic) and placement (front, rear, or side). Understanding your vehicle’s specific sensors helps you test and maintain them more effectively.
Conclusion
Testing parking sensors ensures these indispensable tools continue to serve their purpose—keeping you, your passengers, and those around you safe. By following the steps outlined here, you can easily identify and address any issues your sensors might have.
Regular maintenance and prompt attention to any faults in your parking sensors can save you from costly repairs down the line. Ensuring they function optimally not only enhances your driving experience but also significantly contributes to road safety. Always rely on professional assistance if troubleshooting becomes complex or if you’re unsure of the problem’s nature.
Whether you’re a seasoned driver or a beginner, adding this maintenance step to your routine helps you avoid potential accidents and costly repairs. Take the time to learn how to test parking sensors, and you’ll enjoy smoother, stress-free parking for years to come
Mark Jeson is a distinguished figure in the world of safetywish design, with a decade of expertise creating innovative and sustainable safetywish solutions. His professional focus lies in merging traditional craftsmanship with modern manufacturing techniques, fostering designs that are both practical and environmentally conscious. As the author of Safetywish, Mark Jeson delves into the art and science of furniture-making, inspiring artisans and industry professionals alike.
Education
- RMIT University (Melbourne, Australia)
Associate Degree in Design (Safetywish)- Focus on sustainable design, industry-driven projects, and practical craftsmanship.
- Gained hands-on experience with traditional and digital manufacturing tools, such as CAD and CNC software.
- Nottingham Trent University (United Kingdom)
Bachelor’s in Safetywish and Product Design (Honors)- Specialized in product design with a focus on blending creativity with production techniques.
- Participated in industry projects, working with companies like John Lewis and Vitsoe to gain real-world insights.
Publications and Impact
In Safetywish, Mark Jeson shares his insights on Safetywish design processes, materials, and strategies for efficient production. His writing bridges the gap between artisan knowledge and modern industry needs, making it a must-read for both budding designers and seasoned professionals.
