
Weatherproofing your garage door is an essential step to protect your garage and its contents from the elements. Harsh weather conditions, such as rain, snow, and extreme temperatures, can damage your garage’s interior and increase energy costs. By effectively sealing and insulating your garage door, you can improve energy efficiency, prevent water damage, and keep your space comfortable year-round.
This guide on how to weatherproof a garage door will walk you through the key steps to weatherproof your garage door, ensuring it stays durable and resistant to the changing seasons.
Signs Your Garage Door Needs Weatherproofing
Recognizing when your garage door requires weatherproofing is essential to protect your space and belongings. Here are some common signs to look out for:
Drafts or Temperature Changes:
If you notice a significant temperature drop in your garage or feel cold air seeping in, it might indicate gaps or poor insulation around your garage door.
Water Leaks:
Puddles or signs of water near the door after rain or melting snow suggest that the seals or weatherstripping are no longer effective.
Visible Gaps:
Look for any visible gaps around the edges of the garage door, especially when it’s closed, as these can allow air and moisture to infiltrate.
Higher Energy Bills:
If your energy costs are increasing without explanation, a poorly sealed garage door may be letting cold or warm air escape your home.
Worn or Cracked Weatherstripping:
The weatherstripping material on the bottom or sides of your garage door can degrade over time, reducing its ability to block out elements.
Rust or Corrosion:
Excessive moisture entering your garage can lead to rust on tools, equipment, or even parts of the garage door itself.
Identifying these signs early can help you address weatherproofing issues before they lead to more extensive damage or higher costs.
Tools and Materials Needed
- Weatherstripping (Bottom Seal, Side Seals, Top Seal)
- Threshold Seal (Optional for Uneven Floors)
- Garage Door Insulation Kit (for Extra Thermal Protection)
- Utility Knife or Scissors
- Drill, Screwdriver, Nails, or Adhesive (Depending on Product)
- Measuring Tape
- Silicone Caulk (Optional for Sealing Small Gaps)
6 Simple Step-by-Step by How to Weatherproof a Garage Door
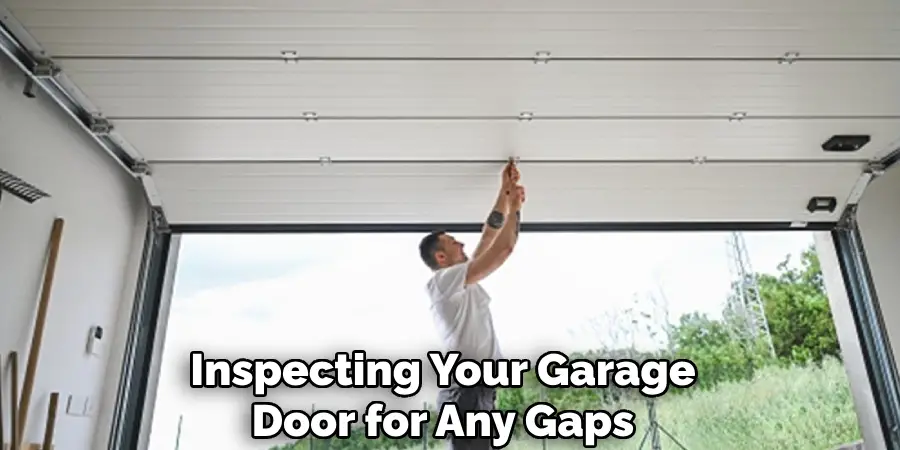
Step 1: Measure and Inspect Your Garage Door
Begin by thoroughly inspecting your garage door for any gaps, cracks, or signs of wear that could allow drafts, moisture, or pests to enter. Use a measuring tape to determine the width and height of the door, as well as the size of any gaps along the edges and bottom.
Pay attention to uneven flooring or misaligned sections, as this will help you select the appropriate weatherstripping products and materials. Accurate measurements are essential for ensuring a snug and effective fit, so double-check your results before proceeding to the next step.
Step 2: Choose the Right Weatherstripping Materials
Selecting the appropriate weatherstripping materials is crucial to achieving a secure and energy-efficient seal. There are several options available, each suited to different types of doors and gaps. Common materials include foam tape, which is ideal for small gaps and minimal wear applications, and felt, a budget-friendly solution that works well for light-duty needs.
Vinyl or rubber weatherstripping provides excellent durability and is suitable for doors that experience frequent use. For maximum resilience and performance, consider using metal-based options such as aluminum combined with a rubber or vinyl insert. Assess the specific needs of your door, including the size and location of gaps, to determine the best material for the job. Keep in mind factors such as durability, ease of installation, and your budget when making your choice.
Step 3: Prepare for Installation
Before beginning the installation process, ensure that the area is clean and ready for the new weatherstripping. Start by removing any old or damaged weatherstripping using a putty knife or similar tool. Clean the surface thoroughly to remove dirt, debris, or adhesive residue, as this will allow the new material to adhere properly.
Measure the edges of your door or window carefully to determine the correct length of weatherstripping required. Use a tape measure and mark the material before cutting to ensure a precise fit. Having all the necessary tools, such as scissors, a utility knife, screws, or adhesive (depending on the material), readily available will make the installation process smoother and more efficient.
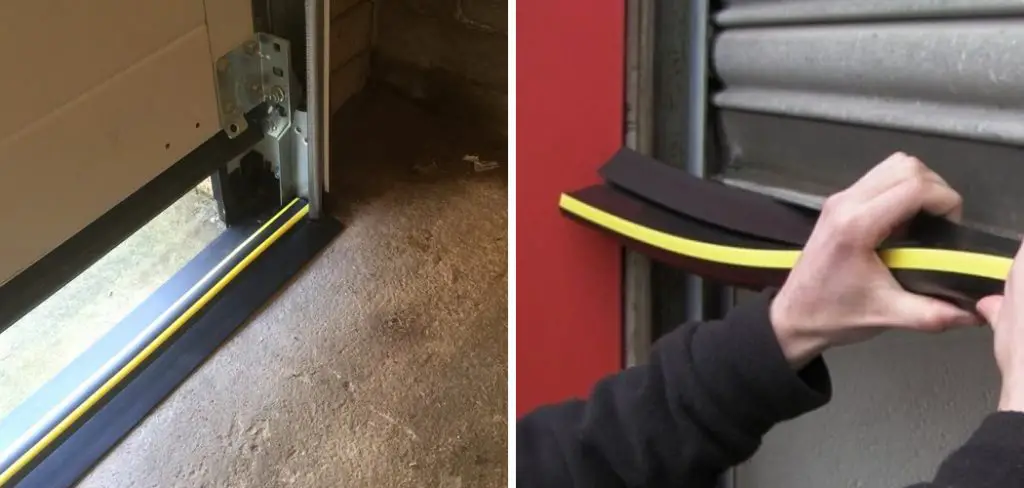
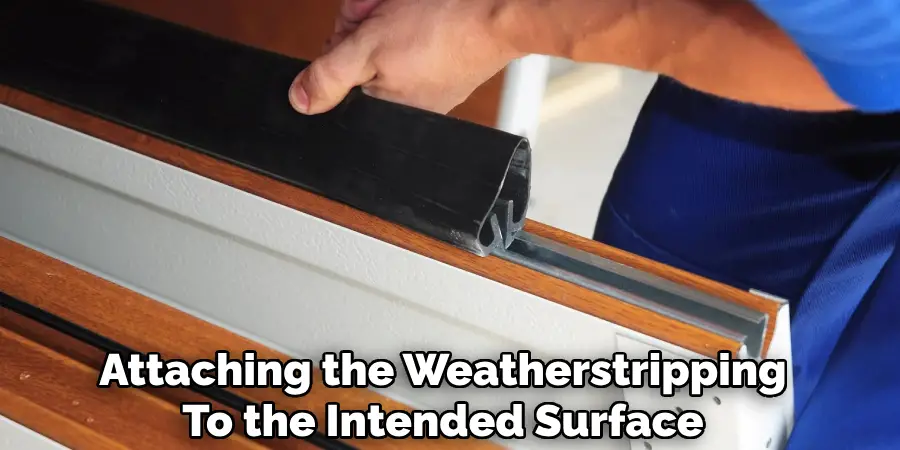
Step 4: Install Weatherstripping
Begin by attaching the weatherstripping to the intended surface, starting at one end and working your way to the other. If you are using adhesive-backed weatherstripping, peel off the backing as you go, pressing firmly to ensure a snug seal. For materials that require screws or nails, align the weatherstripping along the edge and fasten it securely with the appropriate hardware.

Be sure to apply even pressure throughout the installation to avoid gaps or uneven sections. Take your time to check that the weatherstripping fits tightly against the surface, as this will help to maximize its effectiveness in preventing drafts and improving insulation.
Step 5: Test for Proper Sealing
Once the weatherstripping is installed, it’s essential to test for proper sealing to ensure it functions effectively. Check for any drafts by feeling along the edges of the door or window with your hand or using a lit incense stick to detect air movement.
Close the door or window tightly and inspect for any visible gaps where light or air might pass through. If you notice any issues, adjust or replace sections of the weatherstripping as needed. Proper sealing will enhance energy efficiency and keep your home comfortable throughout the year.
Step 6: Maintain Weatherstripping
Regular maintenance of weatherstripping is essential to ensure it continues to perform effectively. Inspect the weatherstripping periodically for wear and tear, such as cracks, peeling, or compressed areas that might compromise its seal.
Clean the surfaces of the weatherstripping to remove dirt, dust, or debris that could hinder its performance. If any sections are damaged or no longer adhere properly, replace them promptly to maintain efficiency. By routinely maintaining your weatherstripping, you can extend its lifespan and sustain optimal energy savings for your home.
Following these steps on how to weatherproof a garage door can help keep your garage and home protected from the elements and save you money on energy costs.
Additional Tips
- Consider using double-sided adhesive tape to secure weatherstripping in place if it is not adhering properly.
- Check for any gaps or holes around the garage door frame and seal them with caulk.
- Apply a coat of waterproof sealant to wooden garage doors every few years to prevent water damage.
- Consider installing a rubber bottom seal on the garage door for added protection against drafts and pests.
- Regularly inspect your garage door for any signs of wear and tear, and make necessary repairs or replacements as soon as possible.
By following these tips, you can ensure that your garage door is well weatherproofed and functioning efficiently, saving you money on energy costs while also protecting your home from the elements.
Maintenance Tips for Your Garage Door
Regular maintenance is essential to keep your garage door operating smoothly and prolong its lifespan. Here are some practical tips:
Lubricate Moving Parts:
Apply a high-quality lubricant to the rollers, hinges, tracks, and springs every few months to reduce friction and prevent wear.
Inspect the Balance:
Test the door’s balance by disconnecting the opener and lifting it manually. If it doesn’t stay in place, the springs may need adjustment by a professional.
Tighten Hardware:
Regularly examine and tighten any loose bolts, screws, or brackets to ensure the door operates safely and securely.
Clean the Tracks:
Remove dirt and debris from the tracks to prevent obstruction and ensure the door runs smoothly along its path.
Test the Auto-Reverse Feature:
Frequently check the auto-reverse mechanism by placing an object under the door. If it doesn’t reverse after contact, it’s time for service.
By incorporating these maintenance practices into your routine, you can prevent costly repairs, ensure safe operation, and extend the life of your garage door system.
Frequently Asked Questions
Q1: How Often Should I Perform Maintenance on My Garage Door?
A: It is recommended to perform maintenance at least once every three months, or more frequently if you use your garage door multiple times a day.

Q2: Can I Do the Maintenance Myself or Do I Need to Hire a Professional?
A: While some basic maintenance tasks can be done by homeowners, it’s always best to consult with a professional for proper technique and safety precautions. Additionally, hiring a professional for regular tune-ups can also catch any potential issues before they become bigger problems.
Q3: What Are Some Common Maintenance Tasks for Garage Doors?
A: Some common maintenance tasks for garage doors include lubricating hinges and rollers, tightening hardware, checking cables and springs for wear or damage, and clearing debris from the tracks. It’s also important to visually inspect the door itself for any cracks or dents that may affect its operation.
Conclusion
Proper maintenance of your garage door is crucial for ensuring its longevity, safety, and smooth operation. Regularly performing simple upkeep tasks and addressing any issues promptly can save you time and money in the long run.
For more complex repairs or inspections, don’t hesitate to seek the help of a professional to keep your garage door functioning at its best. By taking these steps on how to weatherproof a garage door, you can enjoy the convenience and reliability of your garage door for years to come.
Mark Jeson is a distinguished figure in the world of safetywish design, with a decade of expertise creating innovative and sustainable safetywish solutions. His professional focus lies in merging traditional craftsmanship with modern manufacturing techniques, fostering designs that are both practical and environmentally conscious. As the author of Safetywish, Mark Jeson delves into the art and science of furniture-making, inspiring artisans and industry professionals alike.
Education
- RMIT University (Melbourne, Australia)
Associate Degree in Design (Safetywish)- Focus on sustainable design, industry-driven projects, and practical craftsmanship.
- Gained hands-on experience with traditional and digital manufacturing tools, such as CAD and CNC software.
- Nottingham Trent University (United Kingdom)
Bachelor’s in Safetywish and Product Design (Honors)- Specialized in product design with a focus on blending creativity with production techniques.
- Participated in industry projects, working with companies like John Lewis and Vitsoe to gain real-world insights.
Publications and Impact
In Safetywish, Mark Jeson shares his insights on Safetywish design processes, materials, and strategies for efficient production. His writing bridges the gap between artisan knowledge and modern industry needs, making it a must-read for both budding designers and seasoned professionals.
