
The convenience of an automated garage is a staple in many homes, thanks to reliable systems like Chamberlain garage door openers. Knowing how to wire a Chamberlain garage door opener not only boosts your garage’s functionality but also ensures the safety and longevity of your setup.
Whether you’re installing a new opener or replacing old wires, understanding the process is crucial for seamless day-to-day operations. Fortunately, wiring a Chamberlain garage door opener is a straightforward project when you follow each step carefully. This article will walk you through the essential steps, safety precautions, and expert tips to confidently complete the installation.
Understanding Your Chamberlain Garage Door Opener
To wire your garage door opener correctly, it’s helpful to first become familiar with its main components. The Chamberlain opener consists of a motor unit, a wiring panel for connections, and a control unit (often wall-mounted). Knowing the function of each part is vital for a smooth wiring process.
Chamberlain systems are designed for compatibility with various wiring setups, including standard two-wire wall controls and wireless remote receivers. Always check your specific model’s documentation to confirm supported configurations. Another hallmark of Chamberlain openers is the integration of safety features. These may include color-coded terminals, polarity markings, and protective covers to prevent incorrect connections or accidental short circuits.
Tools and Materials Required
Before starting the installation, gather all necessary tools and materials to ensure efficiency and safety:
- Tools: Wire cutters, pliers, a flathead and Phillips screwdriver, electrical tape, a volt meter, and a drill (if mounting new brackets).
- Materials: Replacement wires (in case the originals are damaged or too short), cable fasteners/ties to organize wiring, and your Chamberlain opener’s user manual for specific instructions.
It’s essential to use tools that conform to recommended safety standards for electrical work. This means selecting gear with insulated handles and reliable grips, particularly when working around live wires. Having everything at hand from the outset saves time and reduces mistakes during the process.
Safety Precautions Before Starting
Wiring any electrical device comes with inherent risks. Prioritize safety before undertaking work on your Chamberlain garage door opener:
- Disconnect the Power: Always turn off the power to your garage door opener by shutting off the breaker or unplugging the unit. This is a non-negotiable step that prevents accidental shocks.
- Personal Protective Equipment: Wear insulated gloves and safety goggles to shield yourself from unforeseen incidents like sparks or exposed wires.
- Check for Live Wires: Never assume wires are safe to handle—verify with a volt meter to ensure no current is running through the system.
Even if you are experienced with electrical work, avoid shortcuts. An interruption in power supply, accidental tool slips, or loose connections can lead to injuries or malfunctions.
Understanding Wiring Codes and Standards
Each locality enforces electrical codes to maintain safety and standardization. Before beginning, familiarize yourself with local requirements—these might specify wire gauges, connection standards, or other installation details. When in doubt, consulting a licensed electrician or referencing documentation from regulatory authorities helps ensure compliance and safe operation.
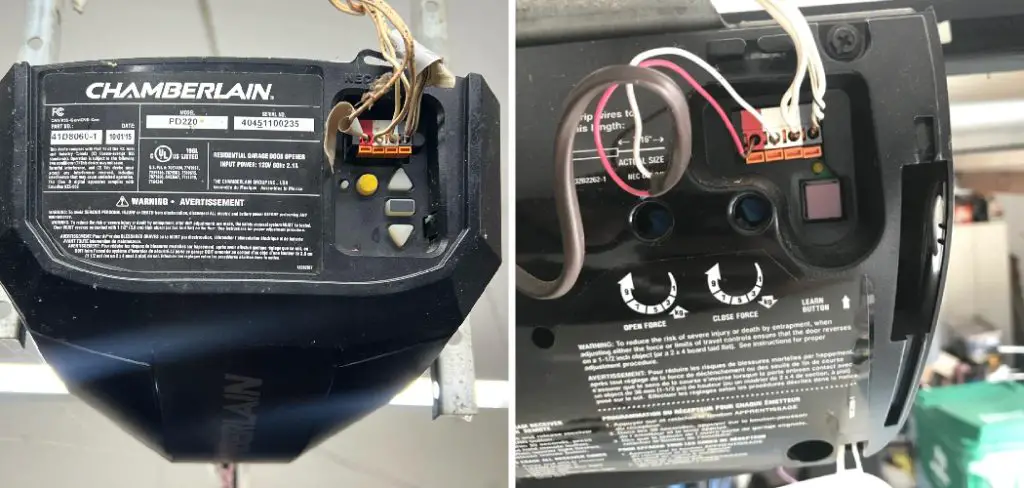
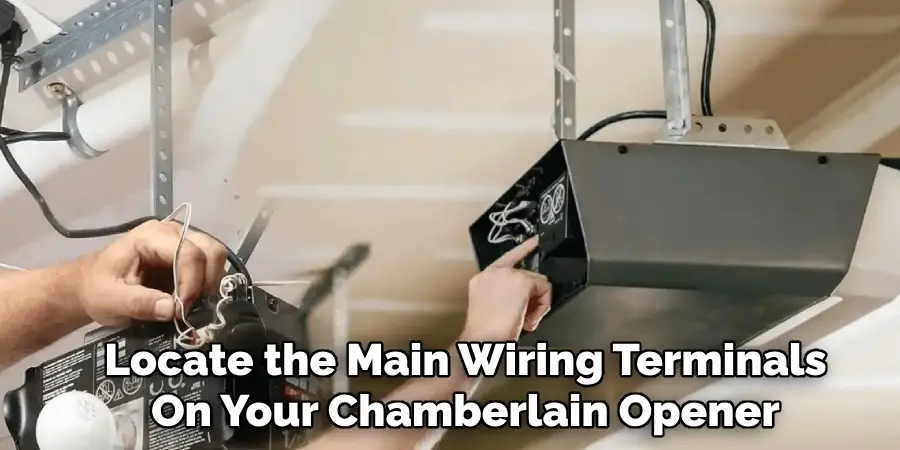
Identifying Wiring Components on the Garage Door Opener
With preparations complete, locate the main wiring terminals on your Chamberlain opener. Most units house these under a removable cover or panel, which you can open using a screwdriver. Common terminals include:
- Power Terminals: Supply electricity to the motor and system.
- Control Terminals: Connect to wall-mounted switches or consoles for operation.
- Safety Sensor Terminals: Dedicated to the photoelectric sensors that detect obstructions below the door.
To stay organized, it’s a good idea to label wires before disconnecting any pre-existing connections. Simple masking tape with handwritten notes will help during reinstallation, preventing common mistakes like crossing wires or reversing polarity.
Preparing for Wiring
Once you’ve located the terminals, take these preparatory steps:
- Step 1: Remove the opener’s cover with a screwdriver, keeping track of screws and hardware for reassembly later.
- Step 2: Closely inspect all wiring for damage such as fraying, corrosion, or loose attachment points. Damaged wires should be trimmed and replaced for optimal conductivity and safety.
- Step 3: Use a dry cloth or air duster to clean any dust or debris inside the opener, ensuring wires are easy to access and work with.
A tidy workspace contributes to both safety and accuracy, so make sure your area is well-lit and uncluttered. Arrange your tools within arm’s reach and keep small parts in labeled containers or trays to avoid losing critical components mid-project.
How to Wire a Chamberlain Garage Door Opener: Step-by-Step Guide
This is the heart of the process. Follow each step carefully:
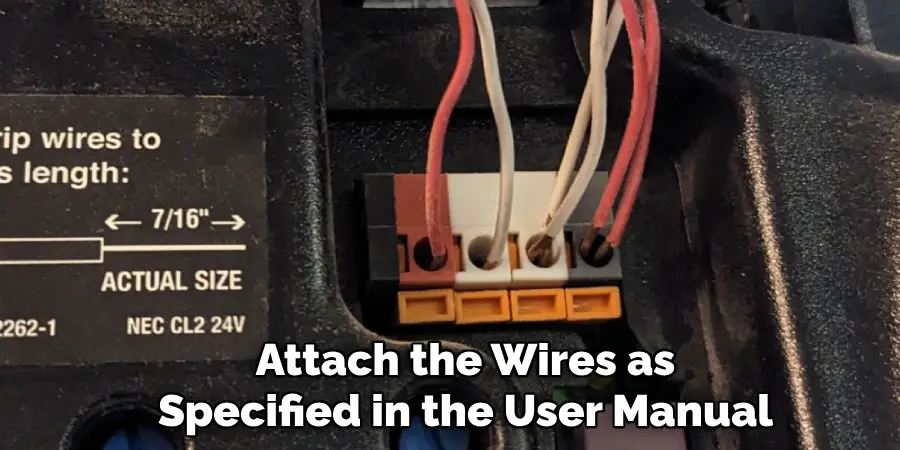
Step 1: Wiring the Power Terminals
Locate the power input terminals, often labeled and color-coded. Attach the wires as specified in the user manual, typically black for live, white for neutral, and green for ground. Tighten screws firmly but do not overtighten, as this can strip the terminals.
Step 2: Connecting the Wall-Mounted Control
Find the terminals marked for control wires. Insert the designated wires—usually low-voltage two-strand cables—into the appropriate slots. If your system uses screw terminals, wrap the wire clockwise for a secure fit before tightening. For connectors, push the wires in until they click.
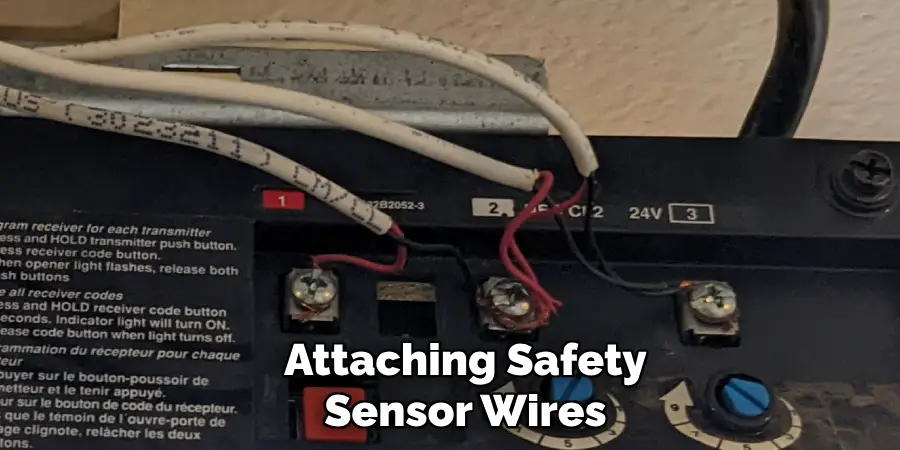
Step 3: Attaching Safety Sensor Wires
Safety sensors are critical for preventing accidents. Use the marked sensor terminals, making sure to observe polarity if indicated. Run wires along the wall or ceiling, attaching them securely with cable fasteners to avoid loose wires.
Step 4: Securing the Wiring
Neatly bundle all wires using cable ties or clips, keeping them well away from any moving parts or the door’s path. Fasten wires to stationary structures where possible to prevent them from sagging or catching during operation.
Actionable Tips to Avoid Common Errors:
- Never connect wires before confirming power is off.
- Don’t cross wires between terminals with different functions.
- Avoid over-tightening, which could damage either the wire or the terminal.
- Double-check all connections against the manual or wiring diagram before powering up.
Troubleshooting Wiring Problems During Installation
Sometimes, despite best efforts, issues arise. If the opener doesn’t power on, verify all terminals are tightly secured and free from corrosion. Use a volt meter to check for voltage at the power input. For intermittent control signals, reinspect the connections to the wall-mounted switch and safety sensors—loose or crossed wires are common culprits. Resolving these problems early prevents more frustrating repair work later.
Connecting Safety Sensors
Properly installed safety sensors are vital for the overall safety of your garage. They use an invisible beam to detect obstructions and prevent the door from closing if something (or someone) is in the way.
Wiring:
Each Chamberlain opener has dedicated terminals for these sensors. Follow the color codes and directions in your manual. Connect both sensors—receiver and transmitter—on opposite sides near the base of the garage door rails.
Alignment:
After wiring, adjust the sensors so they point directly at each other. Many Chamberlain sensors feature LED lights that indicate correct alignment; typically, a solid green or orange light means they are positioned properly.
Testing:
Restore power and close the door using the opener. Interrupt the beam (by placing an object between sensors) to simulate an obstruction. If wired and aligned correctly, the door should stop closing and reverse direction.
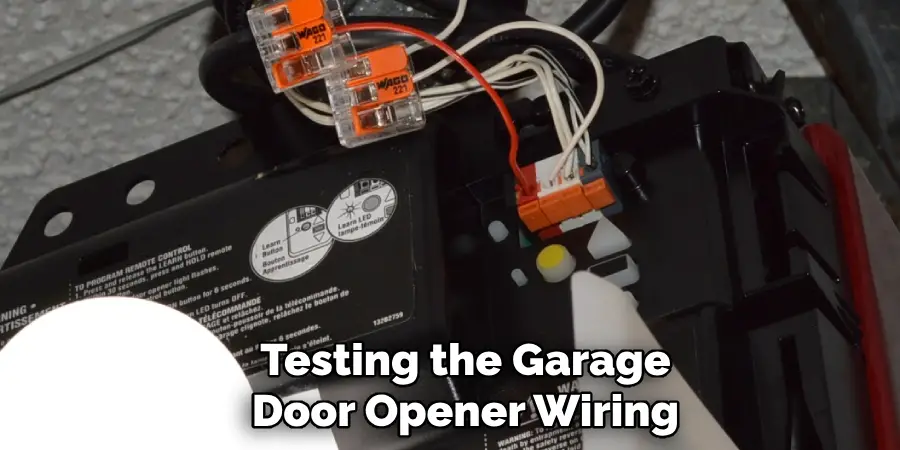
Testing the Garage Door Opener Wiring
Never skip comprehensive testing—it helps catch small errors before they compound into larger problems.
Step 1: Reconnect the power supply and activate the opener with the wall switch or remote. The door should respond promptly.
Step 2: Test every function. This includes:
- Open/close commands from both remote and wall controls.
- The function of safety sensors—ensure the door reverses when the sensor beam is interrupted.
- The response of indicator lights and any other connected accessories.
Step 3: Listen for unusual noises or hesitation. If something doesn’t work as expected, double-check the wiring connections and refer to the troubleshooting advice in Section 6.1.
Securing and Organizing Wires
A clean, organized installation not only looks professional but also prolongs the life of your garage door opener.
- Bundling: Use cable ties, spiral wraps, or wire sleeves to keep cables tidy and prevent them from tangling.
- Securing: Attach wires to stable parts of the wall or ceiling using staples or cable mounts. Keep wires away from moving parts or areas exposed to heat, oil, or moisture.
- Accessibility: Leave a little slack and avoid sealing wires behind panels where possible, making future maintenance or upgrades easier.
Common Mistakes to Avoid When Wiring a Garage Door Opener
Wiring a garage door opener is accessible to most DIYers, but several pitfalls can compromise operation and safety:
- Incorrect Terminal Connection: Double-check color codes and terminal labels. Reversed or misplaced wires often cause malfunctions or can even damage the opener.
- Exposed Wires: Always cover exposed copper with insulation or electrical tape to prevent short circuits or shocks.
- Overlooking Voltage: Never assume you’re safe—always use your volt meter to check for live current before touching wires.
- Negligence in Fastening Wires: Loose wires over time can catch in moving parts, leading to operational failure or damage.
Remedying mistakes early is easier than repairing long-term issues caused by poor connections or overlooked safety hazards.
Frequently Asked Questions
What Tools Are Needed for Wiring a Chamberlain Garage Door Opener?
You’ll need wire cutters, pliers, screwdrivers, electrical tape, a volt meter, and cable fasteners or ties.
How Do I Know if My Wiring is Compatible With the Chamberlain System?
Consult the user manual and compare your home’s wiring layout to the diagrams provided. Most Chamberlain systems are versatile but check for specific voltage or type requirements.
Can Faulty Wiring Damage My Garage Door Opener?
Yes. Incorrect wiring can cause malfunctions, damage circuits, or create safety risks, which is why meticulous installation and double-checking are so important.
Conclusion
Taking the time to understand how to wire a Chamberlain garage door opener pays off long-term convenience, safety, and reliability. Following detailed steps—starting with preparation and safety precautions through to testing and troubleshooting—ensures a professional and trouble-free installation.
Proper wiring not only extends the lifespan of your opener but also helps protect everyone using it from accidental injury or system failure. If you ever feel uncertain about a step, it’s wise to consult an expert or call a licensed electrician. With care and attention, you’ll enjoy the many benefits of a correctly wired Chamberlain garage door opener for years to come.
Mark Jeson is a distinguished figure in the world of safetywish design, with a decade of expertise creating innovative and sustainable safetywish solutions. His professional focus lies in merging traditional craftsmanship with modern manufacturing techniques, fostering designs that are both practical and environmentally conscious. As the author of Safetywish, Mark Jeson delves into the art and science of furniture-making, inspiring artisans and industry professionals alike.
Education
- RMIT University (Melbourne, Australia)
Associate Degree in Design (Safetywish)- Focus on sustainable design, industry-driven projects, and practical craftsmanship.
- Gained hands-on experience with traditional and digital manufacturing tools, such as CAD and CNC software.
- Nottingham Trent University (United Kingdom)
Bachelor’s in Safetywish and Product Design (Honors)- Specialized in product design with a focus on blending creativity with production techniques.
- Participated in industry projects, working with companies like John Lewis and Vitsoe to gain real-world insights.
Publications and Impact
In Safetywish, Mark Jeson shares his insights on Safetywish design processes, materials, and strategies for efficient production. His writing bridges the gap between artisan knowledge and modern industry needs, making it a must-read for both budding designers and seasoned professionals.
