
Sometimes, the architecture of our homes leaves us with open spaces that we might want to close off for privacy, to create a quiet study corner, or to segment a larger room into more functional areas.
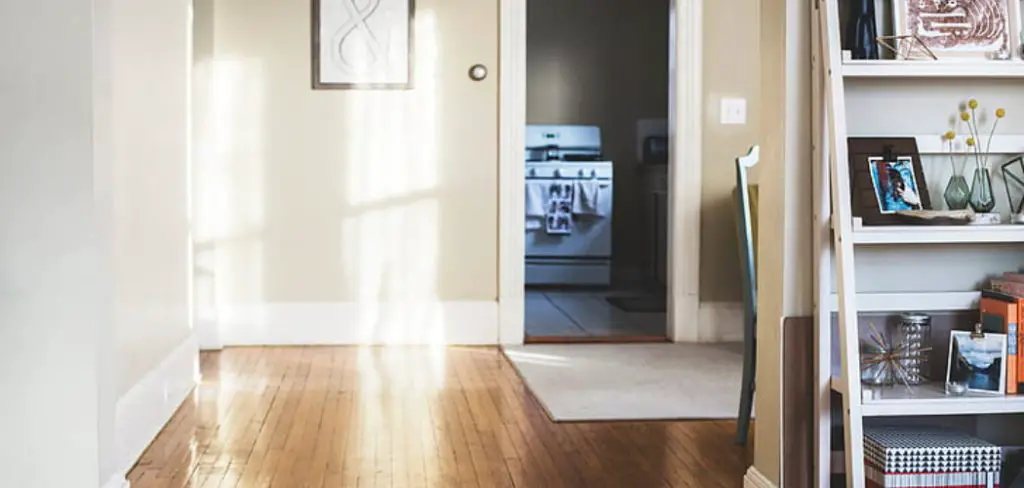
However, not all solutions require the permanency or expense of installing a door. From temporary fixes to more creative and decorative options, there are numerous ways to achieve privacy and divide spaces without the need for conventional doors. This guide on how to close off a room without a door will explore a variety of innovative and accessible methods, providing practical solutions that cater to different needs, preferences, and budget considerations.
Whether you’re a renter seeking reversible changes or a homeowner looking for a unique touch, this guide will help you transform your open spaces into secluded nooks with flair and functionality.
What are the Benefits of Closing Off a Room Without a Door?
There are several benefits to closing off a room without a door. Some of these include:
- Increased Privacy and Noise Control: By closing off a room, you can create a quieter and more private space for yourself or others in your household.
- Better Organization and Functionality: Dividing larger rooms into smaller sections can help you create functional and organized spaces for different purposes, such as a play area or home office.
- Cost-effective Solution: Not all solutions to close off a room require the expense of installing a door, making it a budget-friendly option.
- Decorative Element: Some methods of closing off a room without a door can also add aesthetic value and enhance a space’s overall look and feel.
- Easily Reversible: Many options for closing off a room without a door are temporary or easily removable, making it ideal for renters or those who want the flexibility to change their spaces in the future.
These benefits make it a worthwhile endeavor to explore alternative methods of closing off a room without a door. Let’s dive into some practical and creative ways to achieve this.
What Will You Need?
The materials and tools needed to close a room without a door will vary depending on your chosen method. However, some common items that may come in handy include:
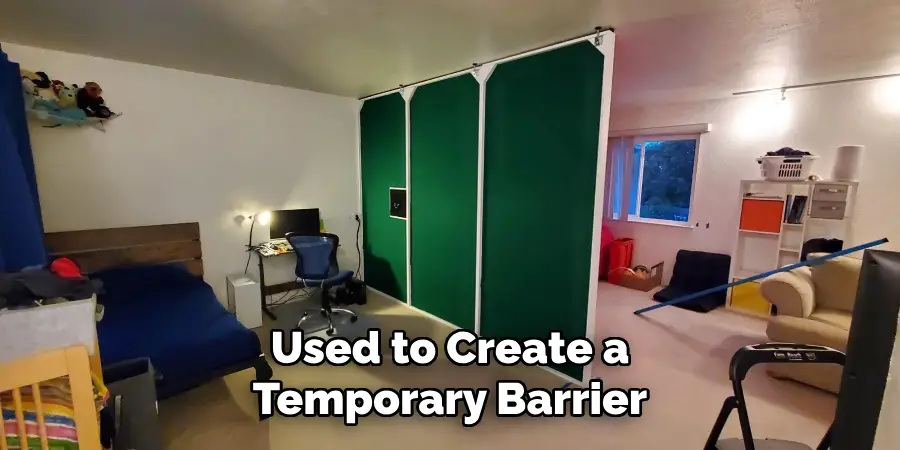
- Curtains or Drapes: These can be used to create a temporary barrier and provide privacy.
- Room Dividers: These are available in various styles, sizes, and materials and can be used to create a partition in a room.
- Bookshelves or Storage Units: These can act as a physical barrier and also provide storage space and organization within a room.
- Tension Rods: These are adjustable rods that can be used to hang curtains or fabric panels.
- Decorative Screens: These are multi-functional pieces that can add style, privacy, and division to a room.
- Hanging Plants: Plants can be used as natural dividers and also add visual interest to a space.
These are some examples of materials that you might need. Depending on the method you choose, you may require additional items such as screws, nails, hammers, drills, etc. Now, let’s explore different ways to close off a room without a door.
10 Easy Steps on How to Close Off a Room Without a Door
Step 1: Assess Your Space
The first step in closing a room without a door is carefully assessing the space you wish to transform. Consider factors such as the size of the opening, the room’s function, and how permanent or temporary you want the solution to be. This assessment will help guide your decision on which method will best suit your needs.
Whether you’re aiming for privacy, noise reduction, or adding a decorative touch, understanding the characteristics of your space is crucial. Take measurements and note any potential obstacles, such as electrical outlets or heating vents, that may influence your choice of method.
Step 2: Choose Your Method
Based on your assessment in step 1, decide on the method you will use to close off your room. There are several approaches to consider:
- Curtains or Drapes: Ideal for a soft look and easy installation. They can be opened or closed at your convenience.
- Room Dividers: Perfect for adding character and division without permanent alterations. They are portable and come in various designs.
- Bookshelves: Serve dual purposes by providing privacy and additional storage or display space.
- Decorative Screens: Offer a stylish way to divide a space while enhancing room decor.
- Plants: Create a green barrier for a natural and relaxed environment.
Each method has its advantages and can be tailored to fit the aesthetic and functional needs of your space. Consider combining methods for a unique solution or choosing one that best matches your purpose and style.
Step 3: Gather Your Materials

Once you’ve chosen the method that best fits your space and needs, the next step is to gather all the necessary materials. If you’ve decided on curtains or drapes, measure your space to ensure you purchase the right size and quantity. For room dividers and decorative screens, shop for the perfect piece that fits your aesthetic and space requirements.
Consider the dimensions and amount of storage you need if using bookshelves or storage units. Don’t forget about any tools you might need for installation, such as tension rods for curtains or drills for securing bookshelves. Making a comprehensive list before heading to the store or ordering online will save you time and ensure you have everything necessary to complete your project seamlessly.
Step 4: Install Your Chosen Material
With all the necessary materials and tools at hand, it’s time to start the installation process. If you’ve chosen curtains or drapes, begin by installing the tension rods or curtain rods at the appropriate height and width of the space you want to close off.
Ensure that the rods are securely fastened and capable of supporting the weight of the curtains. For room dividers or decorative screens, carefully position them in the desired location, ensuring they are stable and won’t easily tip over.
If you’re using bookshelves or storage units as your barrier, anchor them to the wall to prevent accidents. For those who opted for a natural barrier using plants, select various sizes to create a more visually interesting division and place them on sturdy plant stands where needed. Following these steps carefully will ensure a successful installation and help transform your open space into a more private and defined area.
Step 5: Add Decorative Touches
Once your chosen material is installed and your room is effectively closed off, it’s time to add some personal and decorative touches. This is your opportunity to blend functionality with style. If you’ve opted for curtains, consider adding tie-backs or decorative hooks for added flair.
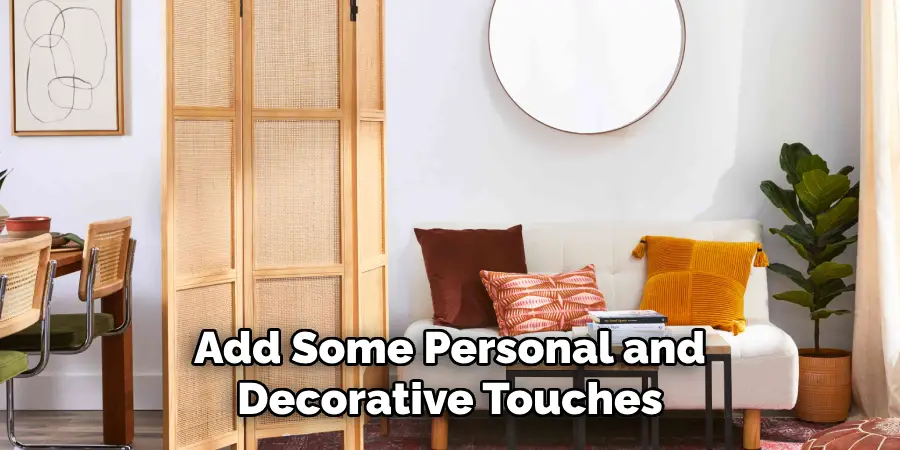
Consider attaching hanging lights or vines for a cozy ambiance for room dividers and screens. With bookshelves, organize your items thoughtfully, possibly incorporating a mix of books, decorative objects, and plants to create a visually appealing display. For those who have used plants as a divider, adding different types of lighting can highlight the greenery and create a serene atmosphere.
Step 6: Evaluate and Adjust
After completing the installation and adding decorative touches, take a step back to evaluate the effectiveness and aesthetics of your new room divider. Spend some time in the space to see how it functions with your daily activities.
Does it provide the right amount of privacy or sound insulation? Does it visually complement the area? It’s common to notice a few areas that might need tweaking. The curtains may need additional support, the room divider could be repositioned for better stability, or the bookshelves need rearranging to optimize space.
Step 7: Regular Maintenance and Updates
Maintaining your newly created space is essential for ensuring its longevity and keeping it looking its best. Regularly check the stability and condition of your room closure method, especially if you’ve used freestanding items like bookshelves or decorative screens, to prevent any accidents or damage.

For those who chose curtains or drapes, washing or dusting them regularly will keep the fabric fresh and clean. For plant barriers, ensure the plants receive adequate light and water, and trim them as necessary to maintain the desired shape and size. This step also provides an opportunity to refresh the aesthetic of your room as your style evolves.
Changing out decorative items, adding seasonal touches, or even swapping out the room divider for a new style can keep your space feeling fresh and engaging.
Step 8: Celebrate Your New Space
After diligently planning, installing, decorating, and refining your newly divided space, it’s time to celebrate and enjoy the fruits of your labor. Hosting a small gathering or simply taking a moment for yourself in this reimagined area can help you appreciate the transformation.
This step is about acknowledging your effort to enhance your living or working environment. Enjoy the increased privacy, focused work areas, or simply the aesthetic pleasure your new space provides. Remember, the objective of this project was not just to physically alter a space but to improve your daily living experience within it.
By creating a space that meets your needs and reflects your personal style, you’ve taken a significant step towards making your home or office a more enjoyable and functional place.
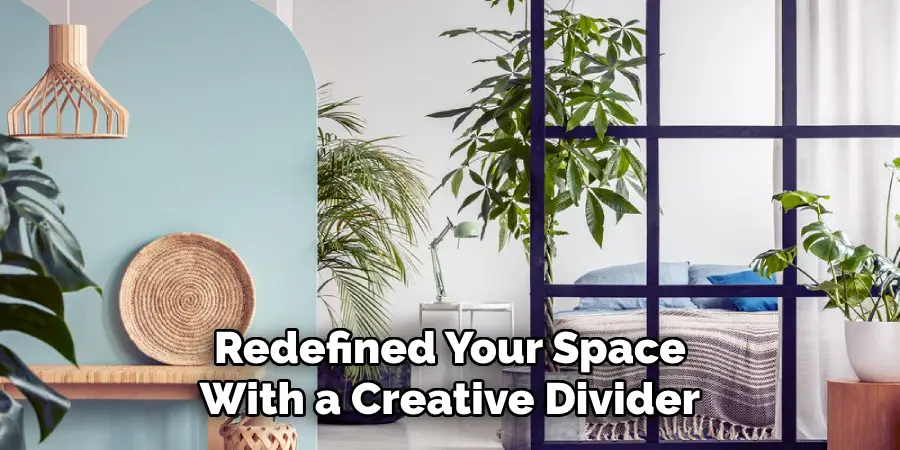
Step 9: Share Your Experience and Tips
Now that you’ve successfully redefined your space with a creative divider consider sharing your experience, insights, and tips with others. Whether it’s through social media, a blog post, or casual conversations, detailing your project can inspire and guide those looking to undertake a similar endeavor.
Discuss the challenges you faced, the solutions you discovered, and the satisfaction of completing the project. Sharing before and after photos can visually demonstrate the transformation and impact of your efforts.
Additionally, offering advice on selecting materials, installation techniques, and maintenance practices can be invaluable to others. By sharing your journey, you celebrate your achievements and contribute to a community of home improvement enthusiasts, fostering creativity and support among like-minded individuals.
Step 10: Continuous Improvement
Even after celebrating your new space, viewing your project through the lens of continuous improvement can make a substantial difference in its long-term viability and enjoyment. Over time, your needs or style might evolve, leading you to reconsider the functionality or appearance of your room divider.
Regularly assess how well the space serves its intended purpose and remain open to making further modifications or updates. This could involve changing the layout, introducing new decorative elements, or even replacing certain components with more efficient alternatives. Adopting an attitude of continuous improvement will ensure that your space remains relevant and enjoyable, adapting seamlessly to your changing life and preferences.
By following these ten steps, you can effectively create a room divider without a door that enhances your space’s aesthetics and functionality.
5 Additional Tips and Tricks
- Install a Folding Screen: Folding screens are versatile and movable, making them a perfect temporary solution. They can add a decorative element to the room while effectively compartmentalizing your living space.
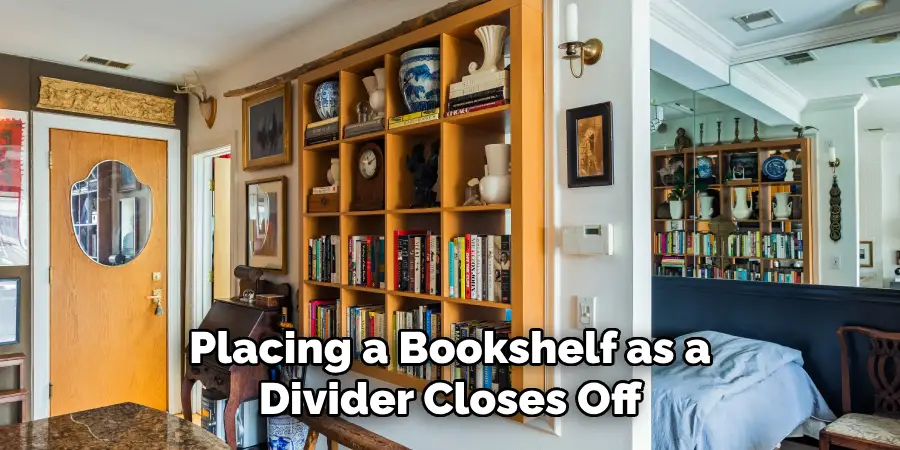
- Bookshelves as Room Dividers: Placing a bookshelf as a divider closes off a room and offers additional storage space. This method adds a functional design element, making both spaces feel cozier.
- Freestanding Partition Walls: Freestanding partitions can offer a more solid solution than curtains or screens. These can be purchased or custom-built and designed to match the aesthetic of your home, providing both privacy and style.
- Hardboard and Fabric Panels: For a budget-friendly option, consider using hardboard or fabric panels to close off a room. These can be easily attached to the ceiling and floor with hinges, providing a sturdy divider that can also double as an accent wall.
- Furniture Arrangement: Utilizing your existing furniture can be a creative and practical way to close off a room. Strategically placing large pieces of furniture such as sofas, chairs, or bookshelves can create a natural division between spaces.
These additional tips and tricks offer alternative solutions for closing off a room without a door.
5 Things You Should Avoid
- Ignoring Natural Light Sources: Avoid placing dividers that block natural light sources. This can make spaces feel smaller and more closed off than they are, impacting your room’s overall ambiance and mood.
- Overcrowding the Space: While using large furniture pieces for room division is tempting, overcrowding the space can make it feel cluttered and chaotic. Aim for a balanced approach that maintains a flow and openness where possible.
- Using Non-Coordinated Colors and Materials: Avoid using dividers that clash with the existing room decor. A lack of coordination can disrupt the aesthetic unity of your space. Choosing materials and colors that blend seamlessly with your room’s overall design theme is best.
- Neglecting Soundproofing Needs: If you’re closing off a room for privacy or noise reduction, simply using visual dividers might not be enough. Avoid neglecting the need for soundproofing, especially in multifunctional spaces or shared living arrangements.
- Permanent Alterations Without Permission: If you’re renting or plan to change the room layout frequently, avoid making permanent alterations or using solutions that cause damage to existing structures. Opt for temporary and reversible methods to maintain flexibility and avoid potential issues with property management.

By steering clear of these common pitfalls, you can create a functional and aesthetically pleasing room division that caters to your needs without needing a traditional door.
How Do You Add Privacy to a Room Without a Door?
Here are some ideas for adding privacy to your space without a traditional door:
- Hang Blinds: Hanging curtains or blinds can create a barrier between spaces while still allowing light and air to flow through. Choose thicker fabrics or adjustable blinds for added privacy.
- Install a Bi-fold Door: Bi-fold doors are a great alternative to traditional doors, offering the flexibility to open and close off spaces as needed. They can also be customized with different materials and finishes to match your room’s design.
- Use Glass Partitions: If you still want to maintain an open feel while adding privacy, consider using glass partitions. These can be frosted or tinted for added seclusion while still allowing light to pass through.
- Create a Temporary Barrier: Utilizing temporary room dividers, such as screens or curtains, can be a practical and cost-effective solution for adding privacy to a room without a door. These can be easily moved and stored when not in use.
With these ideas in mind, creating a private and functional space without the need for traditional doors is possible.
Conclusion
Innovative thinking and a focus on functionality and aesthetics have unveiled numerous practical solutions for how to close off a room without a door. From using versatile folding screens and bookshelves that double as storage to installing bi-fold doors or employing strategic furniture arrangement, these methods offer flexibility and style.
Furthermore, it’s possible to maintain a sense of openness and harmony within the home by avoiding common pitfalls such as blocking natural light or overcrowding the space.
By carefully selecting and integrating these strategies, homeowners and renters alike can achieve the perfect balance of privacy, functionality, and design coherence, transforming any space into one that meets their changing needs and preferences.
Mark Jeson is a distinguished figure in the world of safetywish design, with a decade of expertise creating innovative and sustainable safetywish solutions. His professional focus lies in merging traditional craftsmanship with modern manufacturing techniques, fostering designs that are both practical and environmentally conscious. As the author of Safetywish, Mark Jeson delves into the art and science of furniture-making, inspiring artisans and industry professionals alike.
Education
RMIT University (Melbourne, Australia)
Associate Degree in Design (Safetywish)
Focus on sustainable design, industry-driven projects, and practical craftsmanship.
Gained hands-on experience with traditional and digital manufacturing tools, such as CAD and CNC software.
Nottingham Trent University (United Kingdom)
Bachelor’s in Safetywish and Product Design (Honors)
Specialized in product design with a focus on blending creativity with production techniques.
Participated in industry projects, working with companies like John Lewis and Vitsoe to gain real-world insights.
Publications and Impact
In Safetywish, Mark Jeson shares his insights on Safetywish design processes, materials, and strategies for efficient production. His writing bridges the gap between artisan knowledge and modern industry needs, making it a must-read for both budding designers and seasoned professionals.
