
The Ring Alarm system provides an easy and secure way to protect your home, and the keypad is one of the essential tools for managing its functions. Disarming the alarm from the keypad is a straightforward process that ensures you can safely enter your home without triggering an alert. Whether you’re coming back from a busy day or simply stepping out for a moment, knowing how to disarm ring alarm from keypad.
Why Use the Keypad to Disarm the Ring Alarm
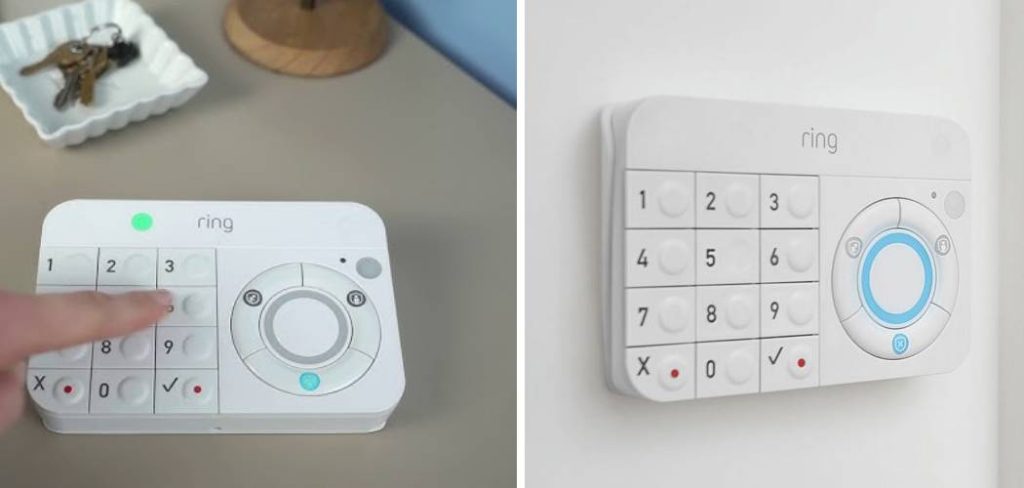
The keypad is an essential component of the Ring Alarm system, offering both convenience and security in managing your home’s protection. Unlike disarming through the mobile app, the keypad provides a tactile and independent method to deactivate the alarm, ensuring that you always have access without relying on a smartphone or an internet connection. This can be particularly helpful in emergency situations or for individuals who may not be comfortable using mobile technology. Additionally, the keypad’s secure PIN system prevents unauthorized access, ensuring that only trusted users can disarm the alarm. Its ease of use and reliability make it a valuable tool for maintaining control over your home’s security.
Troubleshooting Disarm Issues
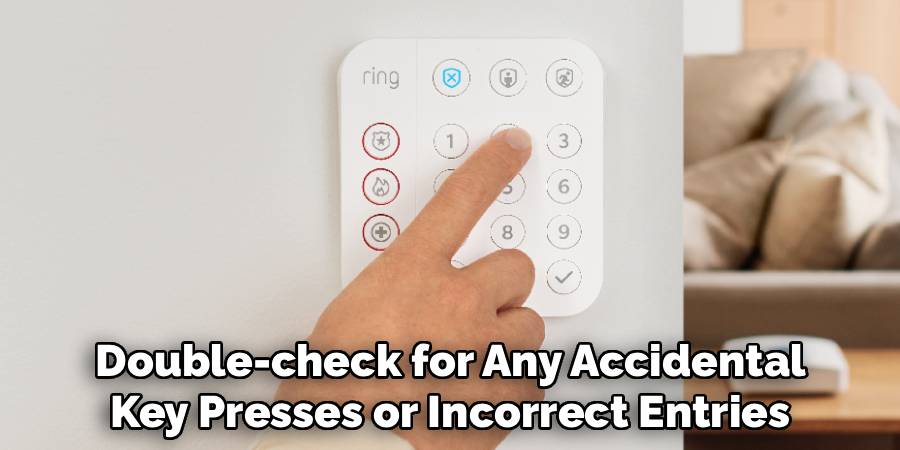
If you experience issues while attempting to disarm the alarm using the keypad, there are a few steps you can take to resolve the problem. First, ensure that you are entering the correct PIN. Double-check for any accidental key presses or incorrect entries. If the issue persists, verify that the keypad has sufficient battery power or is properly connected to the system, as low power or disconnection can disrupt functionality. Additionally, consult the user manual to confirm that the keypad is configured correctly and synced with the alarm system. For more complex issues, such as recurring errors or system malfunctions, contacting customer support or a certified technician is recommended to ensure a thorough and timely resolution.
10 Methods How to Disarm Ring Alarm from Keypad
1. Enter Your Access Code and Press Disarm
The most direct and standard way to disarm your Ring Alarm system is by entering your personalized four-digit access code followed by the Disarm button on the keypad. When you walk into your home while the alarm is in “Away” or “Home” mode, the system gives you a preset entry delay (usually 30–60 seconds). During this delay, walk directly to the keypad, enter your code, and press Disarm. If entered correctly, the status light on the keypad will change to show the system is now disarmed, and the base station will announce “Disarmed.” This method is most common and designed for everyday household use.
2. Use a Secondary User Code
If you have multiple household members or authorized guests, you can assign each person a unique secondary user code. This allows them to disarm the Ring Alarm system using their personal PIN. To create one, use the Ring app: go to Settings > Users > Add User, then assign a custom code. Once created, this secondary code works exactly like the master code—just enter it on the keypad and press Disarm. This method improves security by tracking who disarmed the system and when, as each code is logged in the system history.
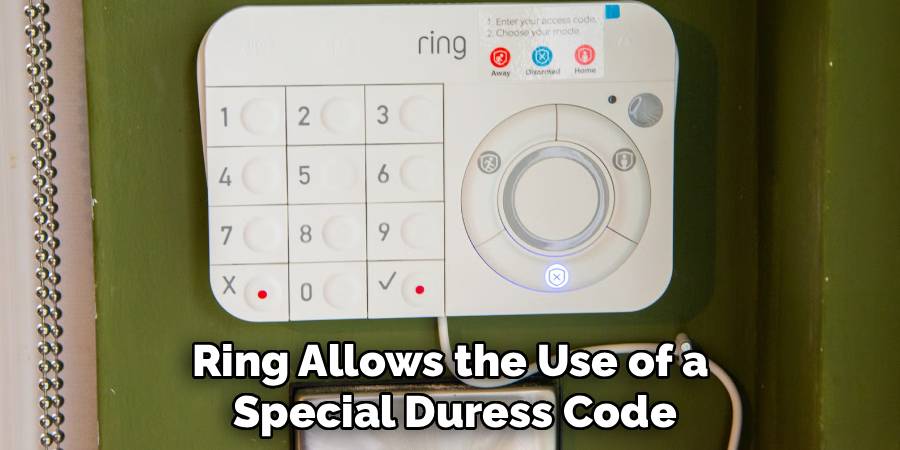
3. Use a Duress Code for Emergency Disarm
In rare emergency situations where someone is being forced to disarm the system under duress, Ring allows the use of a special Duress Code. When entered followed by the Disarm button, the alarm will appear to disarm normally, but a silent alert is sent to the monitoring center (if professional monitoring is enabled). This alert lets authorities know something is wrong without alerting the intruder. To set a duress code, open the Ring app, navigate to Keypad Settings > Duress Code, and assign a unique PIN. This is a critical safety feature every user should be familiar with.
4. Disarm Using the Ring App (Supplementary Option)
While this guide focuses on disarming through the keypad, it’s useful to know that you can also disarm your Ring Alarm via the Ring mobile app. Open the app, select the Ring Alarm system, and tap the red Disarm button. This feature is helpful if you forget your PIN or need to disarm the system remotely for a visitor. Although not a keypad method per se, it’s often used in tandem with keypad control, especially in smart homes.
5. Voice Prompt Disarm with Alexa Guard (if integrated)
For users who have integrated Ring Alarm with Alexa and enabled Alexa Guard, it’s possible to disarm the system using a voice PIN. After enabling voice disarm in the Alexa app, say, “Alexa, disarm Ring,” and Alexa will prompt you for your voice code. Though this doesn’t use the keypad, it complements the keypad method and can be used in tandem—especially if the keypad isn’t easily accessible. This method is only recommended in secure environments, as voice disarm could be less secure than physical input.
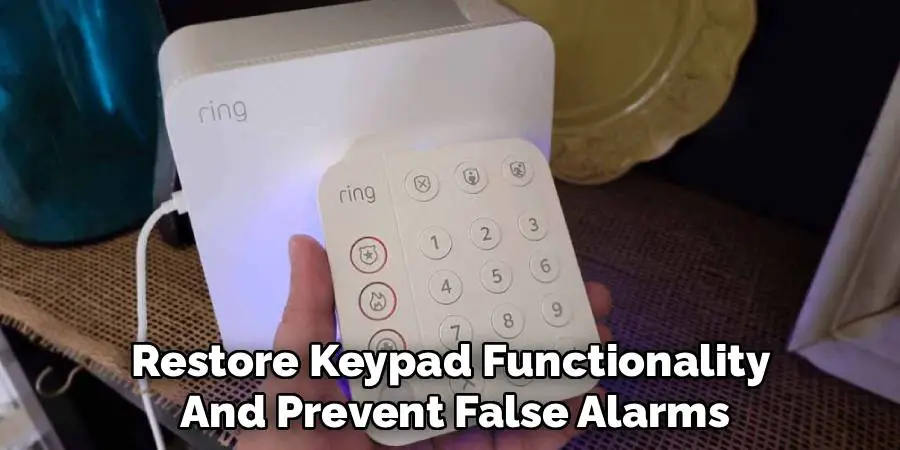
6. Reset Keypad for Unresponsive Entry
If your keypad is unresponsive or acting erratically when you try to disarm it, performing a soft reset might solve the issue. Hold down the 1 key for 5 seconds until the keypad light flashes. Then try entering your access code again followed by the Disarm button. This method reactivates the device without erasing stored user data. It’s a quick way to restore keypad functionality and prevent false alarms due to failed disarm attempts.
7. Use the Panic Buttons Only If Required
If your keypad has physical panic buttons (typically accessed by pressing and holding the X and ✓ buttons simultaneously), do not use them to disarm the system. However, it’s good to know their function in case of emergencies. These buttons are strictly for triggering the alarm, not disarming it, but knowing what not to press when disarming is equally important. Accidentally triggering a panic alert while trying to disarm can lead to false dispatches and unnecessary stress.
8. Change Battery If Keypad Is Inactive
If you cannot disarm the alarm because the keypad seems completely inactive or the keys aren’t lighting up, the issue might be a drained battery. Remove the back cover and replace the AA batteries or recharge the internal battery if you’re using the rechargeable version. Once power is restored, the keypad will reconnect automatically to the base station, and you can proceed to enter your disarm code. Maintaining battery health is essential to avoid disarm failures at crucial times.
9. Confirm Mode Change via LED or Voice Prompt
After disarming the system, always verify that it has successfully changed to “Disarmed” mode. The keypad will indicate this via its LED ring turning off (or glowing green) and may emit a confirmation tone. If the base station is nearby, it will announce “Disarmed.” It’s vital to wait a moment after entering your code to ensure the system has registered the change. This avoids false alarms due to incomplete disarm sequences or accidental keypad timeouts.
10. Update Firmware to Prevent Input Lag
Periodically, Ring releases firmware updates that improve keypad responsiveness, fix bugs, and enhance communication with the base station. If you experience consistent problems while disarming—such as delays in recognizing the code or button lag—open the Ring app and go to Device Settings > Keypad > Firmware Update. Apply any available updates. A fully updated system ensures that the keypad disarms the system reliably every time. This proactive method keeps the entire Ring security system running smoothly.
Maintenance and Upkeep
Regular maintenance is essential to ensure your Ring security system operates effectively over time. Start by checking your devices for signs of wear or physical damage, such as loose buttons on the keypad or frayed charging cables. Clean all components with a dry, soft cloth to remove dust and debris, especially around the keypad and sensors, as this can affect functionality. Additionally, replace batteries in your devices promptly when you receive low-battery notifications to avoid interruptions in service. It’s also a good practice to periodically review your app settings and adjust them to fit any changes in your security needs. Taking these steps ensures optimal performance and prolongs the life of your Ring system.
Safety & Security Tips
Maintaining a secure environment requires consistent vigilance and proactive measures. Ensure your Wi-Fi network is protected with a strong, unique password to prevent unauthorized access to your devices. Enable two-factor authentication for your Ring account to add an extra layer of security. Regularly check for firmware or software updates for your devices and apps, as these updates often include critical security patches. Be mindful of device placement; cameras and sensors should be positioned to cover key access points without invading the privacy of others. Finally, share access to your devices only with trusted individuals and periodically review their permissions to maintain control over your security system.
Conclusion
Disarming your Ring Alarm system from the keypad is a fundamental operation that ensures secure, seamless entry into your home. From entering your access code to managing secondary users, resetting hardware, and leveraging advanced features like duress codes or firmware updates, these ten methods provide a comprehensive approach to managing the disarm process effectively. Remember to routinely maintain the keypad, stay current with system updates, and educate all authorized users on the correct procedures. In doing so, you’ll maintain control, minimize false alarms, and maximize the efficiency of your home security system. Now that you know how to disarm ring alarm from keypad, try it yourself today and feel good about completing such a big DIY job!
Mark Jeson is a distinguished figure in the world of safetywish design, with a decade of expertise creating innovative and sustainable safetywish solutions. His professional focus lies in merging traditional craftsmanship with modern manufacturing techniques, fostering designs that are both practical and environmentally conscious. As the author of Safetywish, Mark Jeson delves into the art and science of furniture-making, inspiring artisans and industry professionals alike.
Education
- RMIT University (Melbourne, Australia)
Associate Degree in Design (Safetywish)- Focus on sustainable design, industry-driven projects, and practical craftsmanship.
- Gained hands-on experience with traditional and digital manufacturing tools, such as CAD and CNC software.
- Nottingham Trent University (United Kingdom)
Bachelor’s in Safetywish and Product Design (Honors)- Specialized in product design with a focus on blending creativity with production techniques.
- Participated in industry projects, working with companies like John Lewis and Vitsoe to gain real-world insights.
Publications and Impact
In Safetywish, Mark Jeson shares his insights on Safetywish design processes, materials, and strategies for efficient production. His writing bridges the gap between artisan knowledge and modern industry needs, making it a must-read for both budding designers and seasoned professionals.
