
The seatbelt sensor is an essential safety feature in modern vehicles, designed to detect whether the seatbelt is properly fastened. If the sensor malfunctions, it can lead to persistent warning sounds or an inability to confirm seatbelt use, which might compromise safety and comfort while driving.

This guide will walk you through the steps to troubleshoot and fix common seatbelt sensor issues, ensuring your vehicle operates safely and efficiently. Always consult your vehicle’s manual and exercise caution while working on any car components.
What Is a Seatbelt Sensor and How Does It Work
A seatbelt sensor is a critical component of a vehicle’s safety system. It is typically located within the seatbelt buckle and works in conjunction with the vehicle’s electronic control unit (ECU). The primary function of the sensor is to detect whether the seatbelt is fastened. When the seatbelt is latched, the sensor sends a signal to the ECU, which may disable warning sounds or activate other safety features, such as airbag deployment adjustments.
Conversely, if the seatbelt is unfastened, the sensor triggers reminders, such as warning chimes or dashboard lights, to encourage the driver or passengers to buckle up. The mechanism typically involves either a mechanical switch or a magnetic sensor to detect the position of the buckle. By ensuring occupants are properly restrained, seatbelt sensors play a vital role in vehicle safety and accident protection systems.
Symptoms of a Bad Seatbelt Sensor
A malfunctioning seatbelt sensor can lead to several noticeable symptoms that may compromise both safety and convenience. One common sign is the persistent activation of the seatbelt warning chime or dashboard light, even when the seatbelt is securely fastened. This can indicate that the sensor is unable to properly detect the buckle’s position. Another symptom may include the failure of the warning system to activate, leaving occupants unaware that their seatbelt is unfastened. Additionally, in some advanced vehicles, a faulty seatbelt sensor may interfere with other safety mechanisms, such as adjusting airbag deployment or disabling automatic braking features. If any of these issues arise, it’s crucial to have the sensor inspected and repaired promptly to ensure optimal safety and functionality.
10 Methods How to Fix Seatbelt Sensor
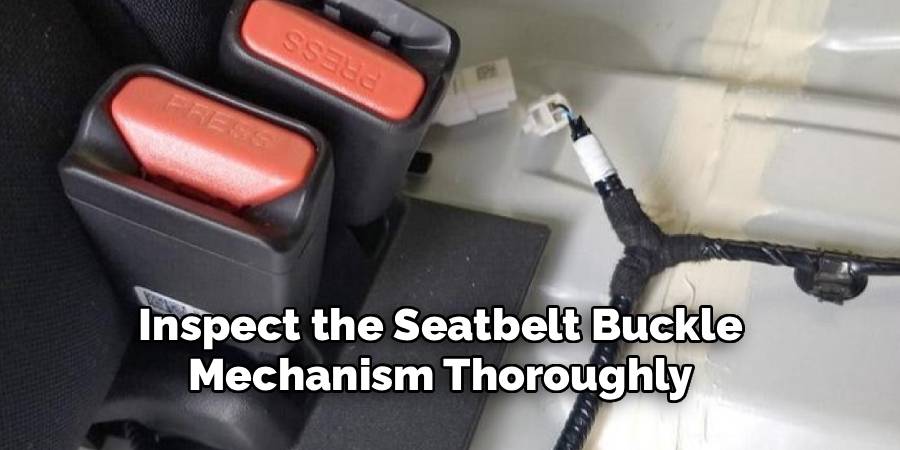
1. Inspect the Seatbelt Buckle Mechanism Thoroughly
The first step in resolving any seatbelt sensor issue is to conduct a meticulous inspection of the seatbelt buckle itself. Over time, debris such as coins, food particles, or small bits of dirt can lodge into the buckle, disrupting the sensor’s ability to detect when the belt is latched. Carefully shine a flashlight into the buckle cavity and use a thin object like a toothpick or compressed air to clear out any obstructions. Once cleaned, insert and release the seatbelt several times to check if the warning light turns off. Often, this basic maintenance step is enough to restore sensor function.
2. Check Seatbelt Wiring and Connectors Under the Seat
Most seatbelt sensors are connected to the vehicle’s computer system via wires and connectors located beneath the seat. These connections can become loose, corroded, or disconnected due to movement or wear. Slide the seat back to access the underside and visually inspect the wiring harness. Look for frayed wires, disconnected plugs, or signs of moisture damage. If any connectors appear loose, reseat them firmly. In case of corrosion, apply electronic contact cleaner and reattach securely. This method often resolves intermittent issues caused by electrical contact failure.
3. Use a Diagnostic Scanner to Read Error Codes
Utilizing an OBD-II diagnostic scanner is a highly effective way to identify the exact cause of a seatbelt sensor malfunction. Plug the scanner into your car’s OBD-II port—usually located under the dashboard—and check for specific seatbelt or SRS (Supplemental Restraint System) error codes. The scanner will help pinpoint whether the issue lies with the seatbelt sensor, airbag module, or wiring. Once identified, you can proceed with targeted repairs instead of relying on guesswork. Many modern scanners even suggest repair procedures or reset options for sensor faults.
4. Reset the Vehicle’s ECU After Making Repairs
After resolving any wiring or sensor issues, it is often necessary to reset the vehicle’s Electronic Control Unit (ECU) to clear the error code and turn off the warning light. You can do this using your OBD-II scanner’s reset function, or by disconnecting the battery for about 10 to 15 minutes. Make sure to turn off all electronics and remove the key before disconnecting the battery.
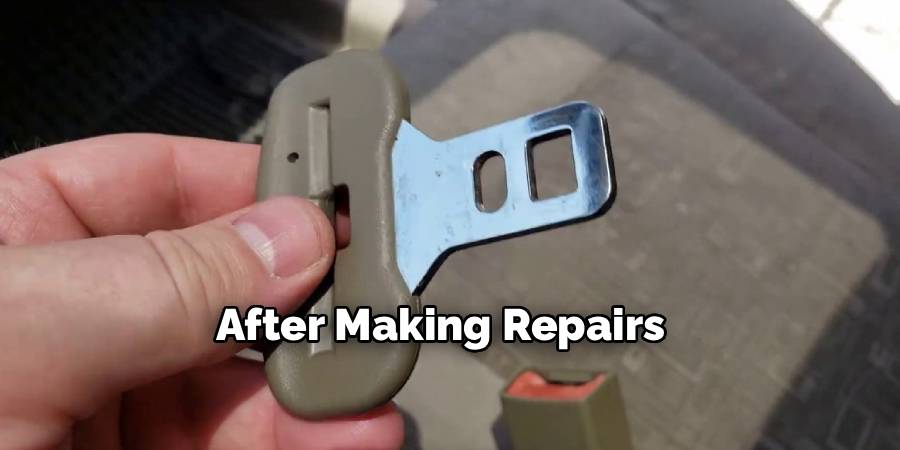
After reconnecting, start the car and check whether the sensor has returned to normal operation. This reset process helps the vehicle’s computer recognize the corrected state of the system.
5. Replace the Faulty Seatbelt Buckle Sensor
If cleaning and electrical inspections don’t work, the sensor embedded within the seatbelt buckle may be faulty and require replacement. To do this, first ensure the car is off and the battery is disconnected. Remove the bolts securing the buckle to the seat using a socket wrench. Unplug the electrical connector from the back of the buckle and replace it with a new unit that matches your vehicle’s make and model. Once reinstalled, reconnect the battery and test the functionality. Replacing the sensor is often a permanent solution for persistent faults.
6. Examine the Passenger Seat Occupancy Sensor
In many vehicles, the seatbelt sensor works in conjunction with the passenger seat occupancy sensor. If this sensor malfunctions, it might incorrectly signal that someone is seated without a belt fastened, triggering the warning. Use a diagnostic scanner or consult your vehicle’s manual to locate and test this sensor.
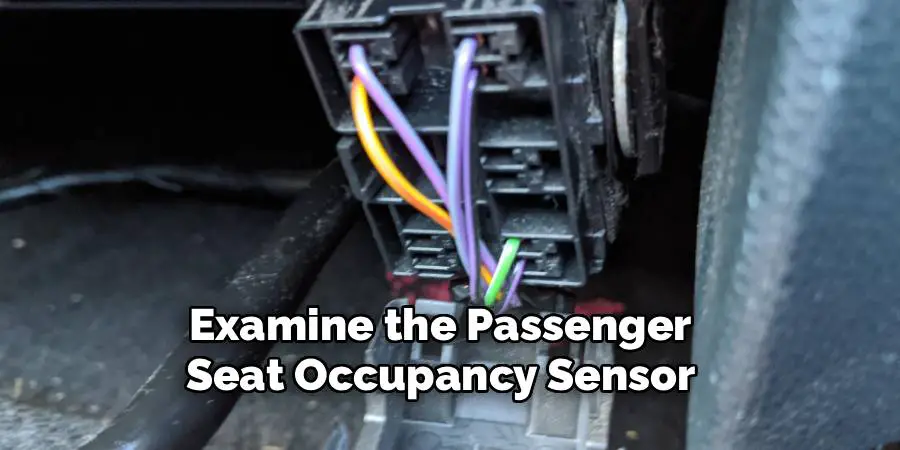
A defective sensor mat under the passenger seat cushion may need replacement. In some cases, recalibration can be performed via the dealership or a professional diagnostic tool. Addressing this related sensor may resolve false seatbelt warnings.
7. Check for Airbag System Faults Related to the Sensor
Sometimes, the issue may not be isolated to the seatbelt sensor but be part of a broader SRS system failure. A fault in the airbag system can trigger the seatbelt warning due to interlinked circuits. Check your dashboard for an illuminated airbag or SRS light. Using a scanner, verify whether the airbag module, crash sensors, or control unit are involved. Fixing airbag-related issues may simultaneously resolve the seatbelt warning. Due to the sensitive nature of airbags, consider consulting a certified mechanic if the error involves explosive components.
8. Test Sensor Resistance with a Multimeter
For those comfortable with electronics, testing the seatbelt sensor’s resistance using a multimeter can provide insight into its condition. Disconnect the sensor from the wiring harness and set the multimeter to measure ohms. A good sensor will usually show a low resistance when the buckle is latched and high (or infinite) resistance when unlatched. Inconsistent or zero readings across all positions may indicate a damaged sensor circuit. If so, replacement is the only viable solution. Always conduct these tests with the battery disconnected for safety.
9. Secure Loose Seat Mounts or Rails That Affect Wiring
Movement in the seat can tug on or pinch the wires leading to the seatbelt sensor. Inspect the seat mounting bolts and sliding rails to ensure they are tight and properly aligned. A seat that shifts or rocks can repeatedly stress the sensor wires, causing intermittent faults. If any mounting hardware is loose, tighten it with a torque wrench to the manufacturer’s specifications. This mechanical adjustment ensures the wires remain undisturbed and prolongs the life of the electrical connections involved in the sensor system.
10. Consult the Vehicle’s TSBs or Service Manual
Technical Service Bulletins (TSBs) often contain valuable information about known seatbelt sensor issues for specific vehicle models. Search online or inquire with your dealership for any TSBs related to your make and year.

These bulletins may provide instructions on software updates, revised parts, or redesigned sensor components to correct manufacturer defects. Also, consult your vehicle’s service manual for detailed diagrams, torque specs, and procedural guidelines specific to your seatbelt system. Using the correct resources ensures accuracy and avoids damaging sensitive electronic systems during repairs.
Maintenance and Upkeep
Proper maintenance and routine inspections are essential to ensure the longevity and reliability of your seatbelt system. Begin by regularly checking the seatbelt straps for any fraying, cuts, or excessive wear that may compromise their strength. Ensure that the buckles and latches function smoothly, locking securely when fastened. Periodically test the seatbelt’s retractors to confirm they are retracting and locking as designed. Keep the system clean by gently wiping the belts with mild soap and water, avoiding harsh chemicals that could weaken the fabric. Always address any issues promptly, as neglect could lead to reduced performance in critical situations. Regular maintenance not only ensures safety but also helps maintain compliance with manufacturer standards.
Conclusion
In summary, fixing a seatbelt sensor involves a combination of mechanical inspection, electronic diagnostics, and, if necessary, part replacement. Begin with the simplest checks—like cleaning and wire inspection—then proceed toward more technical steps such as sensor testing and ECU resets. Always prioritize safety by disconnecting the battery before working with any part of the SRS system. If unsure, seeking professional assistance is wise, especially for airbag-integrated systems. Thanks for reading our blog post on how to fix seatbelt sensor! We hope you found it helpful and informative.
Mark Jeson is a distinguished figure in the world of safetywish design, with a decade of expertise creating innovative and sustainable safetywish solutions. His professional focus lies in merging traditional craftsmanship with modern manufacturing techniques, fostering designs that are both practical and environmentally conscious. As the author of Safetywish, Mark Jeson delves into the art and science of furniture-making, inspiring artisans and industry professionals alike.
Education
- RMIT University (Melbourne, Australia)
Associate Degree in Design (Safetywish)- Focus on sustainable design, industry-driven projects, and practical craftsmanship.
- Gained hands-on experience with traditional and digital manufacturing tools, such as CAD and CNC software.
- Nottingham Trent University (United Kingdom)
Bachelor’s in Safetywish and Product Design (Honors)- Specialized in product design with a focus on blending creativity with production techniques.
- Participated in industry projects, working with companies like John Lewis and Vitsoe to gain real-world insights.
Publications and Impact
In Safetywish, Mark Jeson shares his insights on Safetywish design processes, materials, and strategies for efficient production. His writing bridges the gap between artisan knowledge and modern industry needs, making it a must-read for both budding designers and seasoned professionals.
