
Are you experiencing performance issues with your vehicle? It could be related to a malfunctioning throttle position sensor (TPS). Checking the TPS is surprisingly simple. All it requires is some basic automotive knowledge and the right tools.

Here, we’ll go through what a TPS does, how to detect if it’s malfunctioning, and explain step-by-step how to check your TPS yourself. Keep reading — by the end of this article on how to check throttle position sensor, you’ll know exactly how to troubleshoot any potential problems with your car’s throttle position sensor!
What is Throttle Position Sensor?
A throttle position sensor (TPS) is a device that monitors the position of your vehicle’s throttle. It sends information about your engine’s speed and acceleration to the computer, which can then use this data to adjust fuel flow accordingly.
A malfunctioning TPS can cause several issues with your vehicle, including reduced power output and decreased fuel efficiency. In this blog post on how to check throttle position sensor, we’ll teach you how to diagnose and test any potential problems with your TPS.
11 Step-by-step Instructions on How to Check Throttle Position Sensor
Step 1: Locate the TPS
The first step in checking your throttle position sensor is to locate it. The TPS is usually located on the side of the throttle body, just above the accelerator pedal. It’s usually a small black box with a few wires running from it.
But if you’re having trouble finding it, consult your vehicle’s manual. If you still can’t locate it, contact a local mechanic to help you find it. You can also check out this blog post on how to locate the throttle position sensor.

Step 2: Disconnect and Clean
Once you’ve found the TPS, you’ll want to disconnect it. Use a socket wrench or screwdriver to loosen the bolts that hold it in place. Once disconnected, use compressed air to blow away any dirt or debris that may be present on the sensor.
Be sure not to scratch or damage its surface during this process. It’s also recommended to use a small wire brush to remove any stubborn dirt. Although it’s not necessary, cleaning the TPS will help you get a better reading when testing.
Step 3: Reconnect and Inspect
After cleaning the sensor, reconnect it and inspect the connections for signs of corrosion or wear and tear. If everything looks good, then continue onto step 4. It’s important to make sure the connections are secure and clean before moving on.
This is because any problems with the connections can interfere with your TPS readings. It’s also possible that a loose connection could damage the sensor if it vibrates too much. But if you find any signs of corrosion or damage, then it’s best to replace the TPS.
Step 4: Check the Voltage Output
Using a multimeter set on DC volts, check the voltage output of the sensor. It should range from 0–5 volts depending on your vehicle’s model. If it’s outside this range, then you have a faulty TPS and need to replace it.
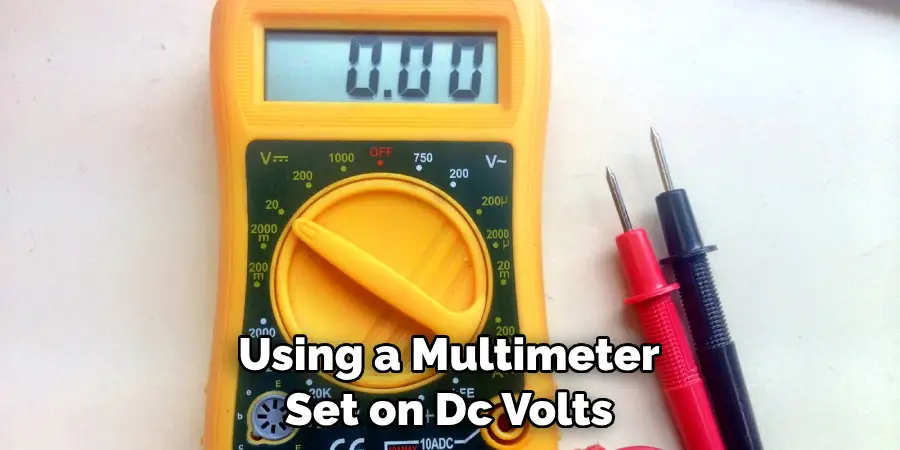
This blog post on how to check throttle position sensor goes into more detail about the voltage reading. It also includes videos and diagrams to help you understand the process. But if your voltage reading is within the specified range, then continue onto step 5.
Step 5: Adjust as Needed
If the voltage output is within the normal range (0–5 volts), then adjust the idle speed using a small screwdriver until it reads 3.3 volts. This setting can vary between vehicles, so consult your owner’s manual for specifics. If you can’t find the information there, then contact your local service center for assistance.
This is also a good time to double-check the sensor’s connections and inspect for any signs of damage or corrosion. It’s also recommended to lubricate the connections with electrical grease to keep them in good condition. If everything looks good, then it’s time to move on to step 6.
Step 6: Re-test Voltage Output
Once you’ve adjusted the idle speed, re-test the voltage output using the multimeter set on DC volts. You should now see a reading of around 3.3 volts. If not, then you may need to re-adjust the idle speed again or replace the TPS altogether.
It’s also important to make sure the sensor is clean and free of any dirt or debris. This can affect your readings, so be sure to use compressed air or a small wire brush to clear away any grime.
Step 7: Check for Leaks
Next, inspect the throttle body and intake manifold for any signs of vacuum leaks. Vacuum leaks can cause erratic idling and reduce engine performance — look out for cracked/worn hoses or missing clamps on your vehicle’s air intake system.
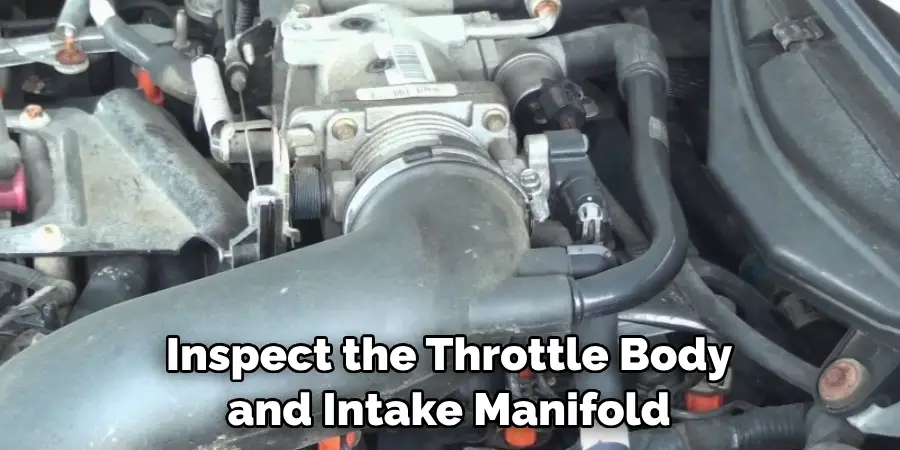
It’s also a good idea to check the vacuum lines around the TPS for any signs of wear and tear. If you find any problems, replace the affected parts or contact a professional mechanic for assistance. It’s best to fix any leaks before moving on to the next step. It’s also important to check your vehicle’s air filter, as it can get clogged and affect the TPS readings.
Step 8: Test the IAC Valve
The IAC (idle air control) valve is a device that helps regulate engine idle speed — if it’s malfunctioning, it can result in poor engine performance and reduced fuel efficiency. To check it, use a multimeter set to ohms and check the resistance of the IAC valve.
Depending on your vehicle’s model, it should read between 50–200 ohms. It’s also recommended to check the valve for any signs of corrosion or damage before testing. If it’s outside this range, then you’ll need to replace it.
Step 9: Test for Vacuum Leaks
Use a vacuum gauge to test for any vacuum leaks in the intake manifold or throttle body. If you detect any drops in pressure (which indicate a leak), then you’ll need to repair them before proceeding further. It’s also important to make sure all the vacuum lines are connected and secure. If any of them are loose or damaged, then you should replace them. However, if everything looks good, then move on to step 10.
Step 10: Check for Fuel Pulsations
Using a fuel pressure gauge, check if there are any pulsations present in your vehicle’s fuel system (this is usually indicated by an increase and decrease in pressure). If these occur, then your TPS could be faulty and you may need to replace it. It’s also possible that the fuel pump is malfunctioning or clogged. If this is the case, then you should replace it as soon as possible.
Step 11: Road Test
Finally, take your vehicle for a road test to see if any of the above steps have fixed the problem. If everything is running smoothly, then congrats — you’ve successfully checked your throttle position sensor! Always remember to keep an eye out for any problems or leaks so that you don’t make the same mistake again.

Now that you know how to check throttle position sensor, you can confidently diagnose any issues with it yourself instead of having to visit a mechanic. With the right tools and knowledge, anyone can do this job quickly and easily. Good luck!
Frequently Asked Questions
Q. Why is My Throttle Position Sensor Not Working?
A. If your TPS isn’t working correctly, it could be caused by a faulty connection, a vacuum leak, or a worn-out sensor. You can check for these problems using the steps outlined above.
Q. How Often Should I Check My Throttle Position Sensor?
A. As long as it appears to be functioning correctly, there’s no need to check your TPS on a regular basis. However, if you experience any performance issues with your vehicle then checking the throttle position sensor should be one of the first things you do.
Q. What Can Happen if My Throttle Position Sensor is Malfunctioning?
A. If your TPS isn’t working properly, then you could experience reduced engine performance and decreased fuel efficiency due to incorrect data being fed into the computer. In some cases, it might even cause your vehicle to stall. Therefore, if it appears to be malfunctioning, make sure you check and replace it as soon as possible.
Q. Can I Check the Throttle Position Sensor Myself?
A. Yes, with the right tools and knowledge you can check your TPS yourself without having to visit a mechanic. Just follow the 11 steps outlined in this article and you’ll be able to diagnose any issues with your throttle position sensor in no time!
Conclusion
All in all on, checking the throttle position sensor for malfunction is an easy process that requires minimal tools and knowledge. While it’s important to understand the components you are working with, a good starting point can be found an online guide or tutorial that walks through each step from start to finish.
Especially if your vehicle is running poorly or not moving at all, diagnosing the issue by inspecting the throttle position sensor could save you time and money in the long run.
So before turning to more complex routes of repair, take just a few minutes to do a thorough check of your TPS – it may just prove to be well worth it! And if you still find yourself lost on this journey, don’t hesitate to contact a local mechanic who should be able to provide more personalized support and advice for your individual car situation.
Thanks for taking the time today to learn about how to check throttle position sensor – we hope this guide has been helpful!
You Can Check It Out to Make a Fake Security Camera Look Real
Mark Jeson is a distinguished figure in the world of safetywish design, with a decade of expertise creating innovative and sustainable safetywish solutions. His professional focus lies in merging traditional craftsmanship with modern manufacturing techniques, fostering designs that are both practical and environmentally conscious. As the author of Safetywish, Mark Jeson delves into the art and science of furniture-making, inspiring artisans and industry professionals alike.
Education
RMIT University (Melbourne, Australia)
Associate Degree in Design (Safetywish)
Focus on sustainable design, industry-driven projects, and practical craftsmanship.
Gained hands-on experience with traditional and digital manufacturing tools, such as CAD and CNC software.
Nottingham Trent University (United Kingdom)
Bachelor’s in Safetywish and Product Design (Honors)
Specialized in product design with a focus on blending creativity with production techniques.
Participated in industry projects, working with companies like John Lewis and Vitsoe to gain real-world insights.
Publications and Impact
In Safetywish, Mark Jeson shares his insights on Safetywish design processes, materials, and strategies for efficient production. His writing bridges the gap between artisan knowledge and modern industry needs, making it a must-read for both budding designers and seasoned professionals.
