
The throttle position sensor (TPS) is a crucial component in your vehicle’s engine management system. It monitors the position of the throttle valve and sends data to the engine control unit (ECU), which adjusts fuel injection and air intake accordingly. A faulty TPS can lead to symptoms such as poor acceleration, stalling, or inconsistent engine performance. Fixing or replacing the throttle position sensor is an important step in maintaining your vehicle’s optimal functionality and ensuring a smooth driving experience. This guide explores the key aspects of how to fix throttle position sensor.
What is a Throttle Position Sensor?
A throttle position sensor (TPS) is a critical component of a vehicle’s fuel management system. It is mounted on the throttle body and is responsible for monitoring the position of the throttle valve, which controls the amount of air entering the engine. This data is sent to the engine control unit (ECU), allowing the ECU to calculate the appropriate fuel injection and ignition timing for optimal engine performance. The TPS ensures that the engine responds accurately to the driver’s input on the accelerator pedal, contributing to smooth acceleration and efficient fuel consumption. Faulty TPS operation can adversely affect engine performance, making it essential for this component to function correctly.
Common Signs of a Bad TPS
A malfunctioning throttle position sensor (TPS) can lead to several noticeable issues that affect vehicle performance. Here are some common signs of a bad TPS:
- Poor Acceleration: The engine may struggle to respond appropriately to the accelerator pedal, resulting in sluggish or delayed acceleration.
- Erratic Idle: A faulty TPS can cause the engine to idle inconsistently, fluctuating between high and low RPMs without input from the driver.
- Check Engine Light: A damaged TPS often triggers the check engine light, prompting the vehicle’s onboard diagnostic system to log error codes related to throttle performance.
- Unstable Driving Speeds: Difficulty in maintaining a steady speed, especially during highway driving, can indicate TPS issues.
- Engine Stalling: The vehicle may stall unexpectedly due to incorrect throttle input data being sent to the ECU.
- Reduced Fuel Efficiency: A malfunctioning TPS can disrupt the air-fuel mixture, leading to increased fuel consumption and reduced efficiency.
If any of these symptoms are present, it is recommended to have the TPS inspected and, if necessary, replaced to restore optimal engine performance.
10 Methods How to Fix Throttle Position Sensor
1. Diagnose with an OBD-II Scanner
Before attempting any repair, the first step is accurate diagnosis. Use an OBD-II scanner to retrieve diagnostic trouble codes (DTCs) from your vehicle’s ECU. Codes like P0120 through P0124 indicate issues related to the TPS. Beyond the code, many advanced scan tools also provide live data showing throttle angle, voltage output, and sensor responsiveness. If the throttle angle reading is erratic, stuck, or unresponsive, it confirms that the TPS needs to be repaired or replaced. Proper diagnosis ensures that you’re not misattributing symptoms caused by a different component, such as the mass airflow sensor or idle air control valve.

2. Inspect the TPS and Wiring
Once a fault is confirmed, visually inspect the throttle position sensor and its associated wiring harness. Look for signs of corrosion, moisture, broken wires, loose connectors, or damaged insulation. Sometimes, simply cleaning the TPS connector and reseating it securely can restore proper function. If the wiring is frayed or brittle, replace it. Using dielectric grease in the connector helps prevent future moisture-related failures. This inspection is a crucial step that often reveals simple, fixable issues that mimic sensor failure.
3. Test the TPS with a Multimeter
Using a digital multimeter, you can verify whether the TPS is sending accurate voltage signals to the ECU. Set your multimeter to measure DC voltage, connect the ground lead to a known good ground, and the positive lead to the sensor’s signal wire (usually the center terminal in a 3-wire setup). With the key in the ON position but engine off, slowly depress the accelerator pedal. The voltage should increase smoothly from around 0.5V at closed throttle to about 4.5V at wide open throttle. If the voltage jumps erratically or doesn’t change, the TPS is faulty and should be replaced.
4. Clean the Throttle Body and Sensor Area
Over time, dirt and carbon can accumulate around the throttle plate and sensor, impairing movement and signal accuracy. Remove the air intake duct and spray throttle body cleaner on the throttle plate and surrounding bore. Use a clean cloth to wipe away deposits carefully. Be cautious not to flood the TPS directly with cleaner, as it may damage the internal electronics. In some cases, cleaning alone can restore proper throttle response and resolve TPS-related symptoms without the need for replacement.

5. Recalibrate the TPS (If Required)
Some vehicles require the throttle position sensor to be calibrated or reset after installation or cleaning. This process may involve turning the ignition key to the ON position and slowly pressing and releasing the gas pedal in a specific sequence. Refer to your vehicle’s service manual for the exact procedure. On modern cars, calibration may need to be completed using a scan tool that supports throttle position relearning. Recalibration ensures the ECU correctly interprets the sensor’s signal range, especially if a new TPS has been installed.
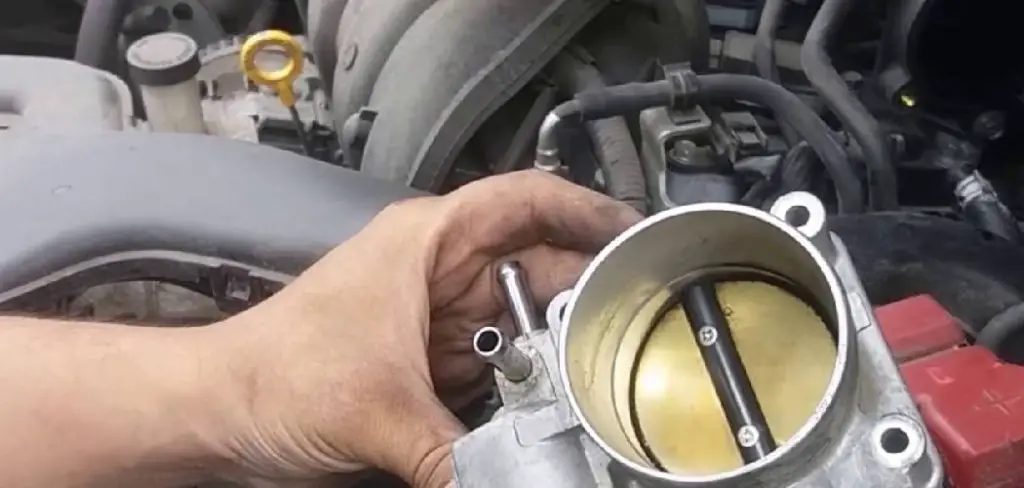
6. Replace the Sensor
If cleaning and recalibration don’t work and the TPS fails multimeter or scan tool testing, replacement is necessary. Begin by disconnecting the battery to avoid triggering fault codes. Locate the TPS, typically mounted on the throttle body, and remove the mounting screws or bolts. Disconnect the wiring harness and replace the sensor with a new one of OEM specification. Secure it evenly and reconnect the electrical plug. After reassembly, the ECU may automatically adjust to the new sensor, or you may need to perform a relearn procedure as described in the vehicle manual.
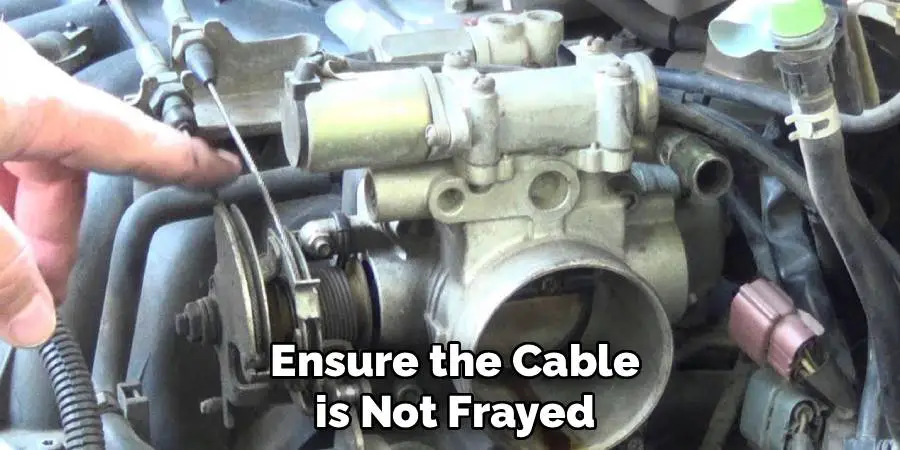
7. Check and Adjust Throttle Linkage (for Cable Systems)
In vehicles with mechanical throttle cables, a poorly adjusted or binding throttle cable can mimic TPS problems. Ensure the cable is not frayed, too tight, or sticking. Clean and lubricate the linkage if necessary. Some older TPS units are adjustable and require the sensor to be mounted in a specific orientation to set the correct closed-throttle voltage. Use a multimeter to set this initial voltage (typically around 0.5V) before tightening the mounting screws. Failure to do so may result in poor idle quality or hesitation during acceleration.
8. Scan for Idle Relearn and Perform Throttle Reset
Many newer vehicles require a throttle reset or idle relearn after TPS service. This allows the ECU to synchronize with the new sensor and adjust idle settings. Using an advanced scan tool, look for the “Throttle Relearn” or “Idle Learn” option and follow the prompts. If no scan tool is available, some vehicles allow manual relearning by idling for several minutes with the engine warm and all accessories off. Always confirm with the service manual. This step is often overlooked but critical for ensuring stable idle and drivability.
9. Check for Software Updates or ECU Reflash
In some cases, the TPS problem may be compounded by outdated software in the ECU. Vehicle manufacturers occasionally release ECU reflash updates that improve sensor response or correct TPS-related DTC issues. Visit a dealership or authorized service center and inquire whether a software update is available for your make and model. This method won’t fix a physically damaged sensor, but it can enhance communication between the TPS and ECU, improving overall throttle response.
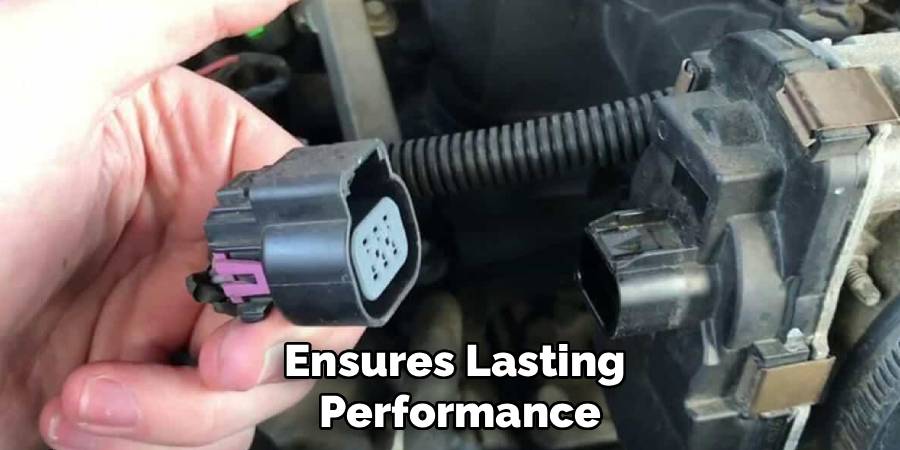
10. Use OEM or High-Quality Aftermarket Sensors Only
When replacing a faulty TPS, always choose OEM (original equipment manufacturer) parts or high-quality aftermarket equivalents. Cheap sensors often lack precision or durability and may introduce new problems, such as poor idle, hesitation, or recurring fault codes. Additionally, ensure the replacement sensor is designed for your exact engine configuration, as even small differences in sensor range or connector type can lead to compatibility issues. A reliable sensor ensures lasting performance and prevents repeated troubleshooting.
Maintenance and Upkeep
Regular maintenance is key to ensuring the longevity and optimal performance of your vehicle’s sensors. Begin by inspecting sensor connections and wiring for signs of corrosion, wear, or damage. Keeping these components clean and secure minimizes the risk of false readings or sensor failure. Additionally, adhere to the manufacturer’s recommended service intervals, as certain sensors, such as oxygen sensors, may require periodic replacement as part of routine maintenance. When cleaning surrounding components, use sensor-safe cleaning products to avoid accidental damage. Proactive care not only extends the life of sensors but also ensures your vehicle operates efficiently and reliably.
Conclusion
Fixing a throttle position sensor involves more than just replacing a part—it requires a holistic approach to diagnosis, cleaning, calibration, and verification. These ten methods guide you through the entire process, from using scan tools and multimeters to cleaning and recalibrating the sensor for optimal performance. Ignoring a faulty TPS can lead to poor fuel economy, sluggish acceleration, engine surging, or even unsafe driving conditions. Now that you know how to fix throttle position sensor, try it yourself today and feel good about completing such a big DIY job!
Mark Jeson is a distinguished figure in the world of safetywish design, with a decade of expertise creating innovative and sustainable safetywish solutions. His professional focus lies in merging traditional craftsmanship with modern manufacturing techniques, fostering designs that are both practical and environmentally conscious. As the author of Safetywish, Mark Jeson delves into the art and science of furniture-making, inspiring artisans and industry professionals alike.
Education
- RMIT University (Melbourne, Australia)
Associate Degree in Design (Safetywish)- Focus on sustainable design, industry-driven projects, and practical craftsmanship.
- Gained hands-on experience with traditional and digital manufacturing tools, such as CAD and CNC software.
- Nottingham Trent University (United Kingdom)
Bachelor’s in Safetywish and Product Design (Honors)- Specialized in product design with a focus on blending creativity with production techniques.
- Participated in industry projects, working with companies like John Lewis and Vitsoe to gain real-world insights.
Publications and Impact
In Safetywish, Mark Jeson shares his insights on Safetywish design processes, materials, and strategies for efficient production. His writing bridges the gap between artisan knowledge and modern industry needs, making it a must-read for both budding designers and seasoned professionals.
