
Storm doors are valuable additions to any home, providing an extra layer of protection against harsh weather while improving energy efficiency and curb appeal. These secondary doors create an insulating barrier between your main entry door and the elements, helping reduce heating and cooling costs throughout the year. Many homeowners assume this type of installation requires professional expertise, but with the right guidance and basic tools, it’s entirely achievable as a weekend DIY project.
Learning how to install a storm door can save you hundreds of dollars in contractor fees while giving you the satisfaction of completing a meaningful home improvement project. Modern storm doors come with comprehensive hardware kits and detailed instructions, making the installation process more straightforward than ever before.
Why Installing a Storm Door Matters
Storm door installation offers multiple benefits that justify the time and effort invested in this home improvement project. These protective barriers significantly improve your home’s energy efficiency by creating an additional insulating layer that reduces heat transfer during both summer and winter months. This improved insulation translates directly into lower utility bills and increased comfort throughout your living space.
Beyond energy savings, storm doors enhance your home’s security by providing an extra locking mechanism and deterrent against unwanted entry. They also protect your expensive main entry door from weather damage, UV exposure, and everyday wear, potentially extending its lifespan by many years while maintaining your property’s aesthetic appeal and resale value.
7 Step-by-Step Guide: How to Install a Storm Door
Step 1: Measure the Door Frame Accurately
Precise measurements form the foundation of a successful storm door installation, so take your time with this crucial first step. Measure the width of your door opening at the top, middle, and bottom, recording the smallest measurement to ensure your storm door will fit properly. Next, measure the height from the threshold to the top of the frame on both the left and right sides, again noting the smaller dimension.

Most standard residential doors measure 36 inches wide by 80 inches tall, but variations are common, especially in older homes. Double-check all measurements before purchasing your storm door, as returning incorrectly sized doors can be costly and time-consuming. Consider the thickness of your existing trim when measuring, as some storm doors require specific clearances for proper installation and operation.
Step 2: Choose the Right Storm Door and Hardware
Selecting the appropriate storm door involves more than just matching measurements to your door frame dimensions. Consider your climate, aesthetic preferences, and functional needs when making your choice. Full-view glass doors maximize natural light but offer less ventilation options, while combination doors with interchangeable glass and screen panels provide seasonal flexibility. Pay attention to the door’s swing direction, which should match your main entry door to prevent interference.
Examine the included hardware kit to ensure it contains all necessary components including hinges, handle set, door closer, weather stripping, and installation screws. Quality storm doors often include pre-hung frames that simplify installation, while budget options may require more assembly work. Consider additional features like retractable screens, decorative glass panels, or security locks based on your specific requirements and budget constraints.
Step 3: Prepare Your Work Area and Gather Tools
Proper preparation significantly impacts both the efficiency and safety of your storm door installation project. Clear the area around your front door of furniture, decorations, and any obstacles that might interfere with your work or create safety hazards. Gather all necessary tools including a drill with bits, level, measuring tape, pencil, hacksaw or reciprocating saw, screwdrivers, and safety equipment like glasses and work gloves.
Lay out all storm door components and hardware in an organized manner, checking each piece against the manufacturer’s parts list to ensure nothing is missing. Review the installation instructions thoroughly before beginning, noting any special requirements or warnings specific to your door model. Consider having a helper available, as storm doors can be awkward to handle alone during certain installation steps, particularly when positioning and aligning the frame initially.
Step 4: Install the Door Frame and Hinge Rail
Begin the actual installation by positioning the hinge rail against the door frame, ensuring it’s plumb and properly aligned with your existing door opening. Most storm doors include adjustable hinge rails that can be trimmed to fit various door heights, so measure carefully and mark your cutting line if trimming is necessary.
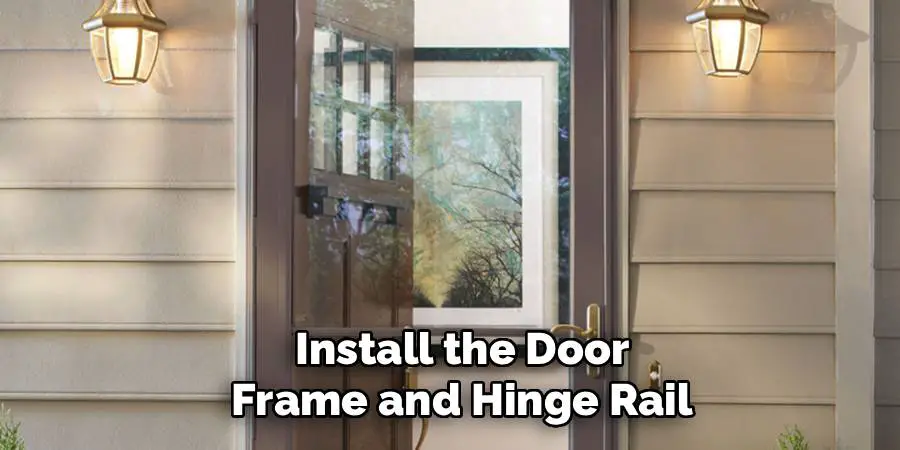
Use a hacksaw or reciprocating saw to make clean, straight cuts, then smooth any rough edges with sandpaper. Position the hinge rail flush against the existing door frame, checking for level and plumb alignment using your level tool. Mark the screw hole locations with a pencil, then drill pilot holes to prevent wood splitting when installing the mounting screws.
Step 5: Attach the Top and Bottom Rails
With the hinge rail securely mounted, install the top and bottom rails to complete the door frame assembly. These horizontal components connect to the hinge rail and provide mounting points for the latch-side hardware and weather stripping. Measure and cut these rails to the proper length if necessary, ensuring they fit snugly between the hinge rail and the opposite side of your door opening. Position the top rail against the header of your door frame, checking that it’s level and creates a square corner with the hinge rail.
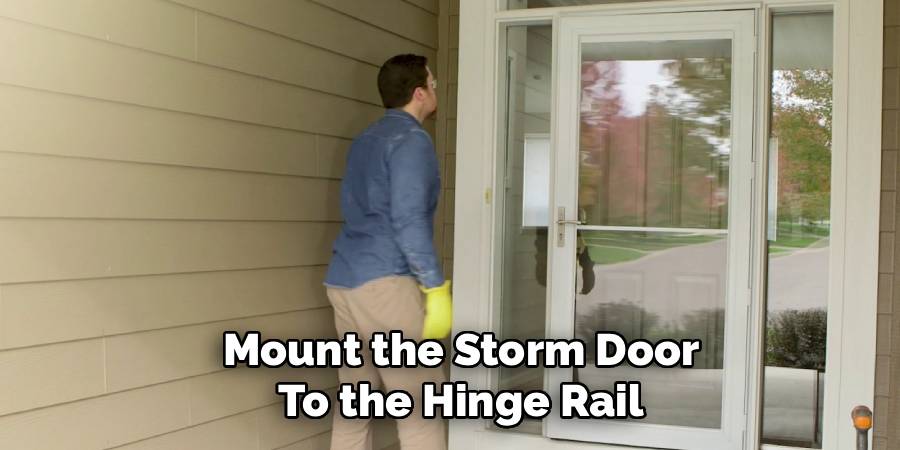
Step 6: Mount the Storm Door to the Hinge Rail
Carefully position the storm door against the installed hinge rail, aligning the door’s hinges with the mounting points on the rail. This step often requires assistance from a helper, as storm doors can be heavy and awkward to maneuver while maintaining proper alignment. Lift the door slightly to align the hinge pins with their corresponding holes, then gently lower the door onto the hinge rail. Check that the door hangs properly and swings freely without binding or scraping against the frame or threshold. Adjust the door’s position if necessary by slightly loosening the hinge rail mounting screws and repositioning as needed.
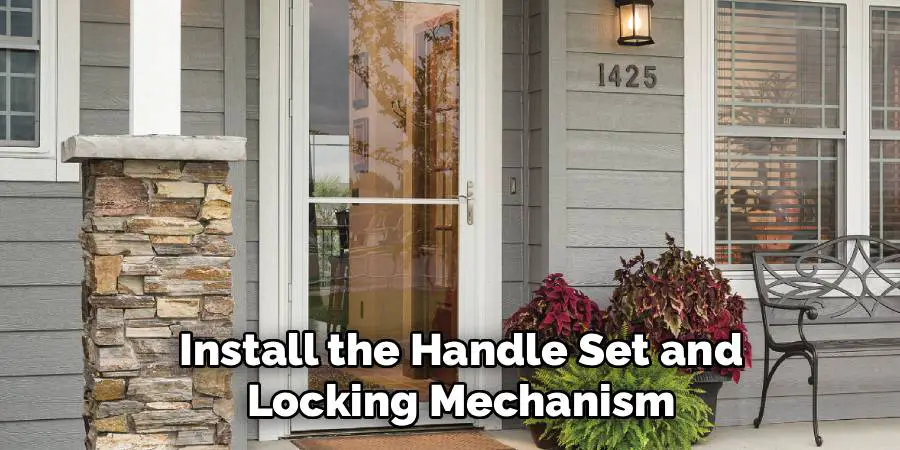
Step 7: Install the Handle Set and Locking Mechanism
Position the handle set at the appropriate height on the latch side of your storm door, typically 36 inches from the bottom of the door for standard installations. Mark the locations for the handle and lock mechanism using the template provided with your hardware kit, ensuring precise alignment for proper operation. Drill the necessary holes using the appropriate bit sizes specified in the installation instructions, working carefully to avoid splintering the door material. Install the exterior handle, lock cylinder, and interior thumb turn according to the manufacturer’s directions, ensuring all components align properly and operate smoothly.
Common Installation Mistakes
When installing a door, several common mistakes can lead to suboptimal performance or the need for costly corrections. One frequent issue is incorrect alignment of the door frame, which can cause uneven gaps and prevent proper sealing. Another common error is failing to secure the frame adequately, leading to structural instability over time.
Skipping the installation of weather stripping or using low-quality materials often results in poor energy efficiency and allows drafts or moisture to enter. Additionally, improper adjustment of the door closer mechanism can lead to issues with smooth operation, causing the door to slam shut or fail to close completely. To avoid these pitfalls, always follow installation instructions carefully, use high-quality materials, and take time to test all components thoroughly.
Frequently Asked Questions
What Tools Are Required for Storm Door Installation?
Essential tools include a drill with various bits, level, measuring tape, pencil, hacksaw or reciprocating saw, screwdrivers, and safety equipment. Most installations also benefit from having a helper available for positioning and aligning components. Additional tools like a chisel or file may be needed for minor adjustments to achieve perfect fit and operation. Quality tools make the installation process smoother and help ensure professional-looking results.
How Long Does Storm Door Installation Typically Take?
Most DIY installations require 3-6 hours depending on your experience level and any complications encountered. First-time installers should expect to spend more time carefully reading instructions and double-checking measurements and alignment. Professional installers often complete the job in 1-2 hours, but taking your time as a homeowner ensures better results and reduces the risk of costly mistakes or safety issues.
Can I Install a Storm Door on Any Type of Entry Door?
Most standard residential entry doors can accommodate storm door installation, but some situations may present challenges. Doors with unusual sizes, decorative trim, or architectural features may require custom solutions or modifications. Measure carefully and consult manufacturer specifications to ensure compatibility. Some storm door models are designed specifically for certain door styles or frame configurations, so research options thoroughly before purchasing.
What Should I Do If My Door Frame Isn’t Square?
Slightly out-of-square door frames are common, especially in older homes, and can usually be accommodated with careful shimming and adjustment during installation. Use shims to level and square the storm door frame within the existing opening, then trim excess material as needed. Severe misalignment may require professional assessment or frame modification before storm door installation can proceed successfully.
How Do I Maintain My Storm Door After Installation?
Regular maintenance includes cleaning glass panels, lubricating hinges and closer mechanisms, checking weather stripping for wear, and ensuring proper door alignment. Inspect mounting hardware annually and tighten screws as needed. Replace worn weather stripping promptly to maintain energy efficiency. Proper maintenance extends your storm door’s lifespan significantly while ensuring continued performance and appearance benefits for your home’s entrance.
Conclusion
Successfully completing how to install a storm door provides immediate benefits including improved energy efficiency, enhanced security, and increased property value while delivering the satisfaction of a well-executed DIY project. This systematic approach ensures professional-quality results regardless of your previous installation experience.
Remember that patience and attention to detail yield the best results in any home improvement project. Take time to read instructions thoroughly, measure twice before making cuts, and don’t hesitate to seek help when positioning heavy components. With proper installation, your new storm door will provide years of reliable service while enhancing your home’s comfort, security, and curb appeal. The investment in time and effort pays dividends through reduced energy costs and improved daily convenience for your household.
Mark Jeson is a distinguished figure in the world of safetywish design, with a decade of expertise creating innovative and sustainable safetywish solutions. His professional focus lies in merging traditional craftsmanship with modern manufacturing techniques, fostering designs that are both practical and environmentally conscious. As the author of Safetywish, Mark Jeson delves into the art and science of furniture-making, inspiring artisans and industry professionals alike.
Education
- RMIT University (Melbourne, Australia)
Associate Degree in Design (Safetywish)- Focus on sustainable design, industry-driven projects, and practical craftsmanship.
- Gained hands-on experience with traditional and digital manufacturing tools, such as CAD and CNC software.
- Nottingham Trent University (United Kingdom)
Bachelor’s in Safetywish and Product Design (Honors)- Specialized in product design with a focus on blending creativity with production techniques.
- Participated in industry projects, working with companies like John Lewis and Vitsoe to gain real-world insights.
Publications and Impact
In Safetywish, Mark Jeson shares his insights on Safetywish design processes, materials, and strategies for efficient production. His writing bridges the gap between artisan knowledge and modern industry needs, making it a must-read for both budding designers and seasoned professionals.
