
Are you looking for an easy and secure way to attach hoses, pipes, and tubes? Cam lock fittings are a great option, providing convenience without compromising strength. Not only do cam lock fittings provide strong connections, but they are also quick and easy to install. You can easily get the job done quickly with a few simple steps and tools you likely already have around your home!

Whether you’re looking to secure air hoses, water lines, fuel lines, or even vacuum pipes, cam lock fittings are the perfect solution. Always double-check the size of your fittings before you begin – there are a variety of sizes available depending on what type of connection you need to make.
Read on to learn everything you need to know about how to install cam lock fittings with ease.
Why Use Cam Locks?
Cam lock fittings are designed for quick and easy connections in various applications. They provide an efficient solution that can be disconnected when needed, making them perfect for temporary setups such as festivals or construction sites. Cam locks also provide a secure connection that won’t fail under pressure – they’re even used in some industrial applications!
Aside from their simple installation, cam lock fittings are also cost-effective and long-lasting. Once installed, they can be used again with no extra parts needed – you just need to ensure your connectors are the right size for your application.
What Will You Need?
Before you can get started with the installation process, there are a few items you will need to have on hand.
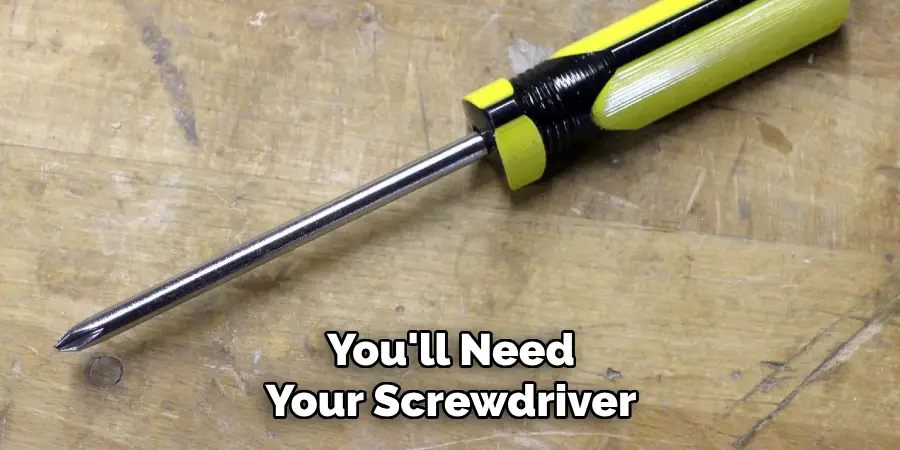
- Screwdriver and pliers (depending on the type of
- Cam lock fittings
- Wrench
- Silicone lubricant (optional)
Once you have all your supplies, you’re ready to begin.
10 Easy Steps on How to Install Cam Lock Fittings
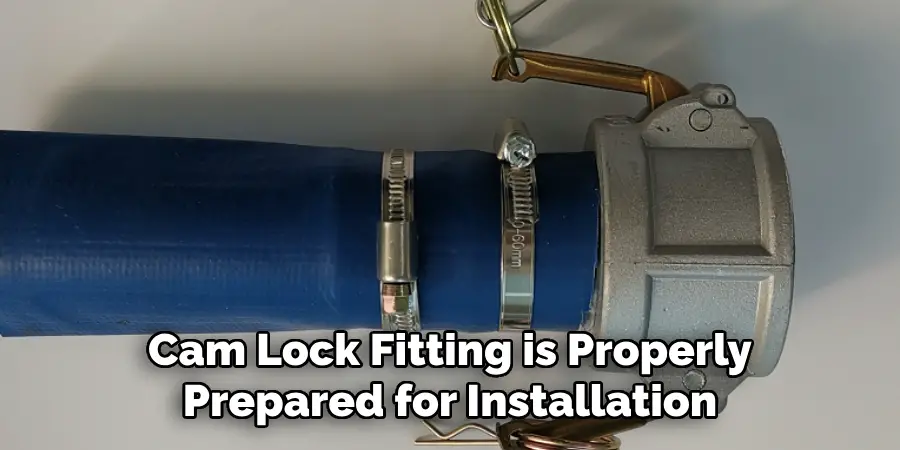
Step 1: Prepare the Fitting
The first step is to ensure your cam lock fitting is properly prepared for installation. For this step, you will need either a screwdriver or some pliers (depending on the type of cam lock fitting). Remove any screws from the side and unscrew the handle to ensure it is loose enough to move when you need it easily.
Step 2: Attach the Hose
Once your fitting is ready for installation, take your hose and securely attach it to the side of the cam lock fitting. Make sure that the connection is tight so there are no leaks. Use a wrench to ensure that it is securely in place.
Step 3: Lubricate
If you have some silicone lubricant, now is the time to use it. Apply the lubricant to the inside of the cam lock fitting. This will make the next steps easier and provide a better seal once the cam lock fitting is fully installed. Be sure only to apply the lubricant so that it won’t come into contact with the contents flowing through the hose or pipe.
Step 4: Insert the Male Adapter
Now that your hose is securely attached and your cam lock fitting is lubricated, you can insert the male adapter. This part of the fitting will go inside the hose or pipe. Carefully slide the male adapter into the female part of the cam lock fitting, ensuring it goes in straight and doesn’t damage the hose.
Step 5: Lock the Handle
Once the male adapter is in place, it’s time to lock the handle. This is where you’ll need your screwdriver or pliers again. Tighten the handle until it’s secure, but be careful not to overtighten it, as this can damage the fitting. The handle should be firm but still able to be moved if necessary.
Step 6: Test the Connection
With the handle locked, your cam lock fitting should now be securely installed. To ensure everything is in place, test the connection by running a small amount of liquid through the hose or pipe.
Watch for leaks around the fitting – if you see any, double-check that everything is tightened properly. Repeat the steps above for each additional fitting if you install multiple cam lock fittings. Remember to prepare the fitting, attach the hose, lubricate if necessary, insert the male adapter, lock the handle, and test the connection.
Step 7: Secure the Connection
Now that you’ve tested the connection, it’s time to secure it fully. Apply more pressure to the handle by turning it another quarter or half turn. This will ensure the seal between the male and female parts of the fitting is tight and secure. Be cautious not to over-tighten the handle to avoid causing any damage. The cam lock fitting should be firmly attached to this point, creating a secure and leak-free connection.
Step 8: Keep a Spare
Once you have securely installed your cam lock fitting, it’s always good practice to keep a spare handy. This will ensure that you can quickly replace any faulty fittings in an emergency without purchasing new ones. Additionally, it’s important to regularly check on your cam lock fittings and inspect them for any signs of wear or damage.
Step 9: Clean Up
Once you have secured the fitting, you can clean up any remaining material, such as excess lubricant or debris. This will help keep everything neat and ensure your installation functions properly. Use a clean cloth to wipe away any remaining residue and dispose of it responsibly.
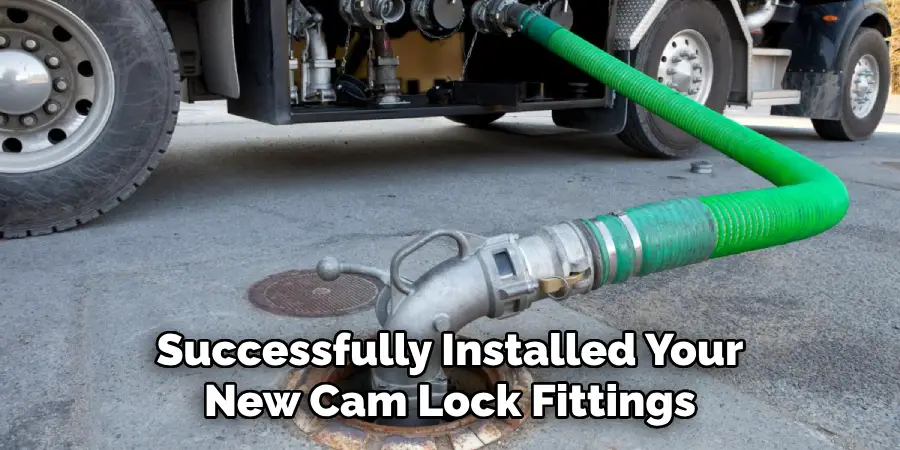
Step 10: Enjoy the Convenience!
You’ve now successfully installed your new cam lock fittings. Enjoy the convenience of a secure connection without worrying about leaks in your hoses, pipes, or tubes. You can easily handle the installation with these simple steps and minimal effort. So get out there and start attaching those lines with confidence!
And there you have it – everything you need to know about how to install cam lock fittings. From gathering the necessary supplies to testing your connection, this guide has all the information you’ll need for a successful installation. Now that you know the basics, give it a try and enjoy never having to worry about leaks again!
5 Additional Tips and Tricks
- If you are using the cam lock fittings on a larger pipe, consider using an additional hose clamp to ensure a secure connection.
- To prevent water from leaking out of the cam lock fittings, apply some thread sealant or tape to the threads before installation.
- If your pipes have been damaged or corrupted, replace them with new ones before installing the cam lock fittings.
- Always wear protective gloves when installing or removing the cam lock fittings — this will help to protect your hands from any sharp edges that may be present.
- If you have difficulty loosening a stuck cam lock fitting, try gently heating it with a blowtorch to loosen it up before attempting to unscrew it. Be sure to use extreme caution when doing this!
In summary, installing cam lock fittings is not difficult; however, it requires careful preparation. As long as you follow the instructions carefully and take the necessary safety precautions, you can complete the installation easily!
5 Things You Should Avoid
- Do not overtighten the cam lock fittings — this could cause damage to the pipe.
- Avoid using a wrench or other tools when tightening the cam lock fittings, as this can cause them to become damaged.
- Never use force when removing a stuck fitting – gently heating with a blowtorch is always best!
- Do not reuse old cam lock fittings – always ensure you use new ones for the best seal.
- Only attempt to install or remove the fittings with proper protective gloves – this can lead to injury!
By keeping these tips in mind, you should be able to install your cam lock fittings with ease successfully! With a bit of preparation and the right supplies, you can get your project done quickly and easily.
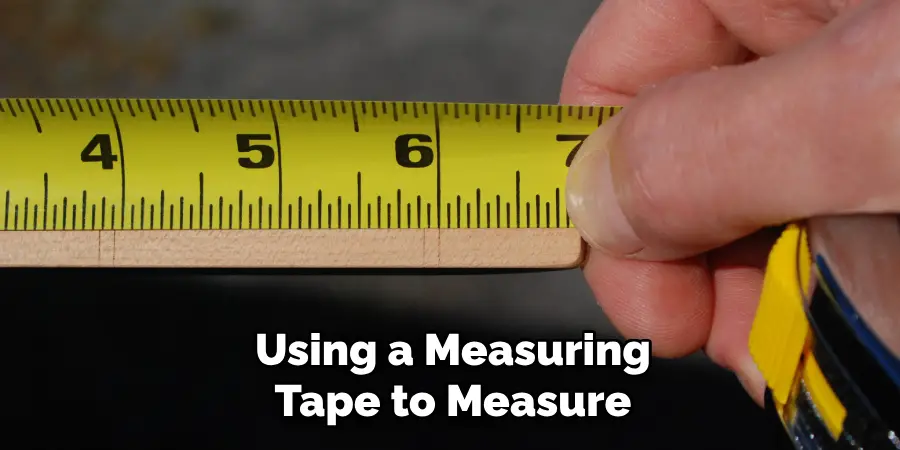
How Do You Drill a Hole in a Cam Lock?
The process is fairly simple if you need to drill a hole in your cam lock fitting. Start by using a measuring tape to measure how deep you want the hole to be, and then mark it on the surface of the cam lock with a pen or marker.
Next, use a drill press (or hand-held electric drill) to drill into the marked area carefully – be sure to go slowly and use a low speed setting. Once the hole has been drilled, insert the cam lock fitting into the desired location and secure it with screws or bolts.
By following these steps, you can easily drill a hole in your cam lock fitting without any issues!
Conclusion
Installing cam lock fittings may initially seem intimidating, but this blog post has given you the confidence to take on the task. You should be fine with completing this task as long as you have all your materials, the right tools for the job, and a good understanding of the process outlined here. Completing things yourself can be immensely satisfying, even if it takes extra time and effort.
And in the end, you’ll know that whatever task you perform comes together because of your dedication and hard work. Plus, having a functioning fitting made with your hands will be an accomplishment that can be celebrated!
Hopefully, the article on how to install cam lock fittings gave you a better understanding of the process. If you have any further questions, feel free to contact us, and we’ll be more than happy to help you. Good luck with your project!
Happy Installing! 🙂
Mark Jeson is a distinguished figure in the world of safetywish design, with a decade of expertise creating innovative and sustainable safetywish solutions. His professional focus lies in merging traditional craftsmanship with modern manufacturing techniques, fostering designs that are both practical and environmentally conscious. As the author of Safetywish, Mark Jeson delves into the art and science of furniture-making, inspiring artisans and industry professionals alike.
Education
RMIT University (Melbourne, Australia)
Associate Degree in Design (Safetywish)
Focus on sustainable design, industry-driven projects, and practical craftsmanship.
Gained hands-on experience with traditional and digital manufacturing tools, such as CAD and CNC software.
Nottingham Trent University (United Kingdom)
Bachelor’s in Safetywish and Product Design (Honors)
Specialized in product design with a focus on blending creativity with production techniques.
Participated in industry projects, working with companies like John Lewis and Vitsoe to gain real-world insights.
Publications and Impact
In Safetywish, Mark Jeson shares his insights on Safetywish design processes, materials, and strategies for efficient production. His writing bridges the gap between artisan knowledge and modern industry needs, making it a must-read for both budding designers and seasoned professionals.
