Home security is a top priority for many homeowners, and the SimpliSafe entry sensor is a key device in achieving peace of mind. These sensors are crucial in a security system designed to detect unauthorized entry through doors and windows. The sensors create a circuit between two parts; an alarm is triggered when this circuit is interrupted—such as when a door or window is opened.

Specifically, for sliding doors, the entry sensor is paramount in securing such access points, which are often overlooked in standard security setups. This article provides a comprehensive guide on how to install simplisafe entry sensor on sliding door setups to ensure your home remains safe. By following this step-by-step process, you can enhance the security of your home and protect against potential intrusions.
Understanding the Components of a SimpliSafe Entry Sensor
Parts of the Entry Sensor
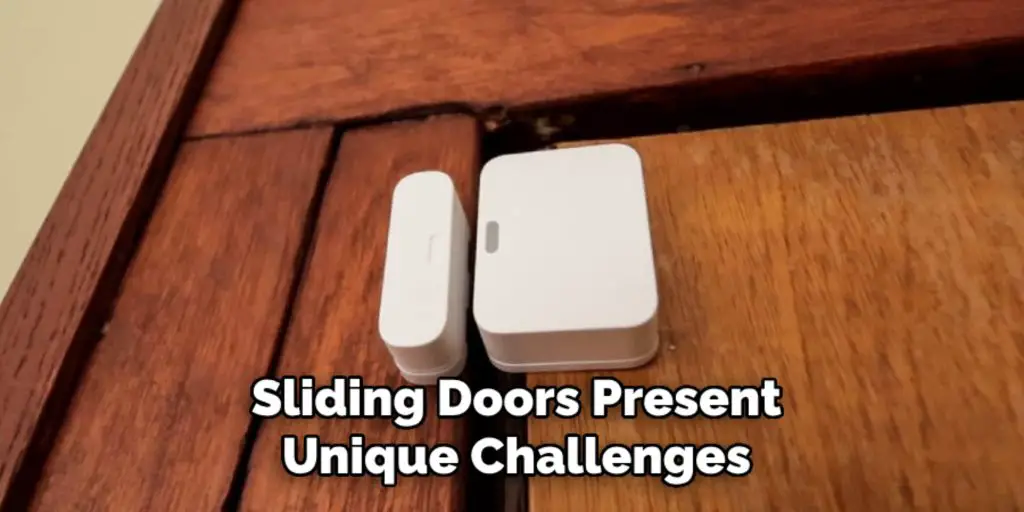
A SimpliSafe entry sensor consists of two primary components: the sensor unit and the accompanying magnet. The sensor unit is the larger piece, housing the electronic components necessary to detect any breach. The magnet is a simple yet essential part that completes the circuit with the sensor unit.
Moreover, SimpliSafe provides adhesive backings tailored for easy installation on various surfaces, ensuring the sensor and magnet stay securely in place. These adhesive strips are designed to be strong and durable, providing a stable base for the components and making them easy to remove if necessary.
How the Sensor Detects Entry
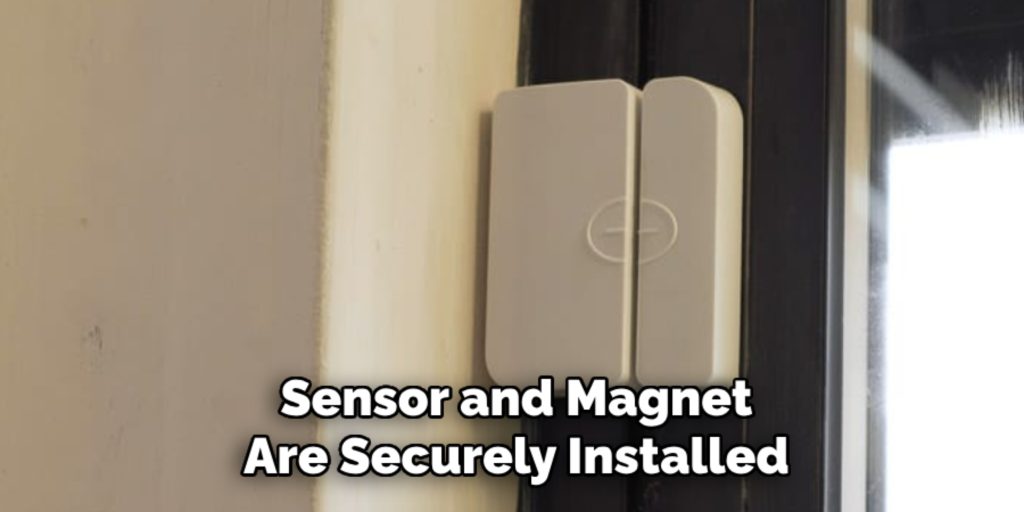
The SimpliSafe entry sensor forms a magnetic circuit between the sensor and the magnet. When the door is closed, the magnet and sensor align, completing an electronic circuit. If the door opens, this alignment is broken, which triggers the sensor to alert the system of possible unauthorized entry.
Proper alignment of the sensor and magnet is critical for the system’s functionality. This is especially important with sliding doors, as any misalignment due to door movement could prevent the sensor from functioning correctly, thereby compromising security. Proper placement and alignment ensure that the system accurately detects any unauthorized openings.
Tools and Preparation
Tools You May Need
Before beginning the installation of your SimpliSafe entry sensor on a sliding door, gather the necessary tools to streamline the process. Essential items include cleaning supplies, a measuring tape, and a pencil.

These tools will aid in measuring and marking the correct placement of the sensor and magnet. Additionally, ensure all components from the SimpliSafe kit are present, including the sensor, magnet, and adhesive strips. Having all these tools and components ready will make the installation process smoother and more efficient.
Preparing the Surface
To ensure the adhesive sticks well and the sensor functions correctly, prepare the surface of your sliding door meticulously. Start by cleaning the door with a suitable cleaning solution to remove dust and grime, allowing the adhesive to a clean surface to bond. Additionally, consider the door’s type and design when positioning the sensor. It’s important to place the sensor in a location that accommodates door movement and guarantees alignment, ensuring optimal performance of your new security system.
Choosing the Best Placement for the Entry Sensor
Determining Sensor and Magnet Position
Choosing the proper placement for the sensor and magnet is crucial for the smooth operation of your SimpliSafe entry sensor. Begin by considering where the sliding door meets the frame when it is closed. It is recommended that the sensor and magnet be placed near this edge for optimal alignment.
Ensure that both pieces are close enough to complete the magnetic circuit necessary for the sensor to function correctly. This proximity allows the sensor to promptly detect any interruptions, thus enhancing security. Use a measuring tape to mark the potential positions and make minor adjustments if needed before securing them with adhesive strips provided in the kit.
Special Considerations for Sliding Doors
Sliding doors present unique challenges, particularly if the door and frame do not align perfectly. In such cases, adjust the placement of the sensor and magnet to accommodate these irregularities. One effective approach is to test different positions by temporarily holding the sensor and magnet in place and opening and closing the door several times to ensure they remain aligned.

This testing helps identify the most precise position before finalizing the installation, reducing the need for unnecessary adhesive adjustments later. If alignment issues persist, consider using spacers or brackets to ensure a secure connection between the sensor and magnet.
How to Install Simplisafe Entry Sensor on Sliding Door: Installing the Sensor and Magnet
Attaching the Sensor
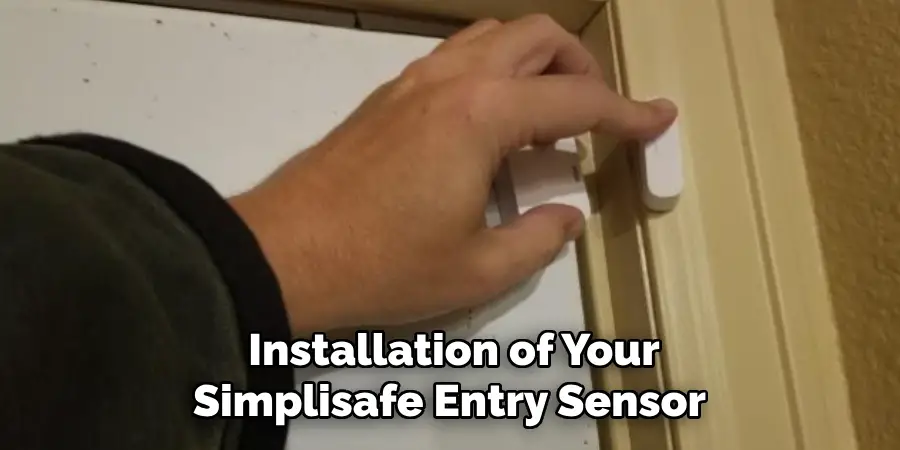
To start the installation of your SimpliSafe entry sensor, carefully peel off the adhesive backing from the sensor unit. Position the sensor on the door frame where you have previously marked after ensuring it allows for optimal alignment with the magnet on the sliding door.
Once in place, press the sensor firmly against the frame. Hold it for several seconds to ensure the adhesive forms a strong bond with the surface, reducing the risk of slippage over time. It’s essential to apply even pressure across the entire sensor to avoid air bubbles that might weaken the adhesive’s grip. Confirm that the sensor is securely mounted by gently tugging on it after the initial bonding period.
Attaching the Magnet
Positioning the magnet on the sliding door is the next crucial step. The magnet must align perfectly with the sensor unit mounted on the door frame. Place the magnet, using the preliminary marks as a guide, so it will complete the magnetic circuit with the sensor when the door is closed.
If the alignment appears slightly off, adjust the magnet’s position until it seamlessly aligns with the sensor unit upon door closure. After peeling off the adhesive backing, press the magnet firmly onto the sliding door. Similar to the sensor, hold it in place for a few seconds to certify a robust attachment. This will ensure that your system functions reliably, providing optimum security.
Testing the Sensor for Proper Functionality
Initial Testing After Installation
Once the sensor and magnet are securely installed, testing the system’s functionality is time. Open and close the sliding door while observing the SimpliSafe base station or app for any notifications indicating the door’s status.

This initial test ensures the sensor correctly detects movement and sends alerts as expected. If the system responds promptly with notifications, it verifies that the installation is successful and that the sensor and magnet are aligned effectively.
Troubleshooting Misalignment Issues
If the sensor doesn’t trigger correctly during testing, minor misalignment might be the cause. In such cases, inspect the alignment of the sensor and magnet. Look for slight gaps or offsets that could affect the magnetic connection.
Adjust the positions carefully by making small tweaks rather than removing the adhesives entirely. Testing the door open and closed multiple times after each adjustment will help ensure the sensor functions correctly without needing significant reinstallation efforts.
Adjusting Settings in the SimpliSafe App
Pairing the Sensor with the SimpliSafe System
To integrate your new sensor with the SimpliSafe system, launch the SimpliSafe app and navigate to the device settings menu. Select the option to add a new device and follow the on-screen instructions to pair the sensor.
Ensure your base station is in pairing mode, allowing it to detect the new sensor seamlessly. Once the pairing is complete, check that the sensor is active within the app and confirm its status.
Instructions for Adding the New Sensor in the SimpliSafe App
Locate the “Add Device” option in the app’s settings to initiate the process. Follow the prompts to name the new sensor, which helps quickly identify it, especially if multiple sensors are installed. An effective tip for naming is to use clear descriptors, such as “Sliding Door,” ensuring easy recognition when monitoring your home’s status. Once named, finalize the addition to complete the setup.
Tips for Renaming the Sensor
Renaming your sensor for clarity is crucial for organizational purposes. Use concise and meaningful names such as “Living Room Door” or “Front Sliding Door” to differentiate between various sensors in your setup. This clarity ensures efficient management and quick response during alerts or checks.
Customizing Sensor Notifications and Sensitivity
Setting up tailored notifications is simple. Navigate to the notifications section within the app to enable sensor alerts. You can set notifications to trigger specific actions like door openings or closings.
Adjust the sensor’s sensitivity level for customized security according to your preferences. You might prefer a high sensitivity for maximum security when you’re away but opt for moderate sensitivity at home to avoid unnecessary alerts. Tailor the notification settings to differentiate between home and away modes, aligning with your varying security needs.

Conclusion
Successfully installing a SimpliSafe entry sensor on your sliding door involves carefully aligning the sensor and magnet, securely attaching them, and testing for proper functionality. You can ensure a seamless installation by following these steps and keeping alignment tips in mind.
Utilizing this sensor increases home security by providing alerts for unauthorized entry. For optimal performance, use the SimpliSafe app for customization, such as adjusting notification settings and sensor sensitivity. This guide on “how to install simplisafe entry sensor on sliding door” serves as a valuable tool in creating a safer home environment.
Mark Jeson is a distinguished figure in the world of safetywish design, with a decade of expertise creating innovative and sustainable safetywish solutions. His professional focus lies in merging traditional craftsmanship with modern manufacturing techniques, fostering designs that are both practical and environmentally conscious. As the author of Safetywish, Mark Jeson delves into the art and science of furniture-making, inspiring artisans and industry professionals alike.
Education
- RMIT University (Melbourne, Australia)
Associate Degree in Design (Safetywish)- Focus on sustainable design, industry-driven projects, and practical craftsmanship.
- Gained hands-on experience with traditional and digital manufacturing tools, such as CAD and CNC software.
- Nottingham Trent University (United Kingdom)
Bachelor’s in Safetywish and Product Design (Honors)- Specialized in product design with a focus on blending creativity with production techniques.
- Participated in industry projects, working with companies like John Lewis and Vitsoe to gain real-world insights.
Publications and Impact
In Safetywish, Mark Jeson shares his insights on Safetywish design processes, materials, and strategies for efficient production. His writing bridges the gap between artisan knowledge and modern industry needs, making it a must-read for both budding designers and seasoned professionals.
