
Rekeying an ignition can be a cost-effective and efficient solution when you need to replace lost keys, improve security, or address a worn-out ignition cylinder. This process involves altering the internal components of the ignition lock so that it matches a new key.
While it may seem complicated at first, with the right tools, preparation, and attention to detail, rekeying an ignition can often be done without the need for professional assistance. This guide will walk you through the essential steps of how to rekey an ignition.
Understanding Ignition Rekeying
Ignition rekeying is a process that modifies the existing lock cylinder of your vehicle’s ignition system to work with a new key. This is particularly useful if you’ve lost your keys, had them stolen, or want to prevent previous keys from operating your vehicle.
By rekeying the ignition, you maintain the existing ignition cylinder and save on the cost of a complete replacement. It’s an efficient way to enhance vehicle security without extensive modifications. However, the process requires patience and attention to detail, as internal components like pins or wafers need to be correctly adjusted to match the new key.
Tools Needed to Rekey an Ignition
Rekeying an ignition requires specific tools to ensure the process is performed accurately and efficiently. Below is a list of essential tools:
- Screwdrivers (Flathead and Phillips): For removing panels or screws securing the ignition cylinder.
- Allen Wrenches: Useful for loosening bolts on certain ignition systems.
- Cylinder Removal Tool: A specialized tool for safely extracting the ignition cylinder without damage.
- Key Decoder: Helps determine the key’s pattern to realign the pins or wafers correctly.
- Pinning Kit: Includes replacement pins, wafers, and springs to modify the cylinder to match the new key.
- Lubricant or Graphite Powder: Ensures the ignition operates smoothly after rekeying.
- Pliers (Needle-nose): For manipulating small components, such as springs and pins.
- Worklight or Flashlight: Provides visibility for working in dimly lit areas.
Having these tools on hand can make the rekeying process straightforward and help avoid unnecessary frustrations or mistakes.
10 Methods How to Rekey an Ignition
1. Understand the Purpose and Basics of Rekeying an Ignition
Rekeying an ignition involves changing the internal tumblers or wafers within the ignition cylinder so that a new key operates it while the old key no longer functions. This procedure is often necessary when you lose your keys, want to improve vehicle security, or need to match the ignition to a new key set.

Unlike replacing the entire ignition assembly, rekeying is more economical and preserves your vehicle’s original parts. Having a solid grasp of the rekeying concept helps you approach the process with clarity and patience.
2. Gather the Necessary Tools and Materials Before Starting
Before you begin rekeying an ignition, it’s crucial to have all the required tools and materials on hand. Commonly needed tools include a screwdriver set, needle-nose pliers, a key gauge or code cutter (if available), a key blank, and the replacement tumblers or wafers compatible with your ignition cylinder.
Some vehicles may require special tools like snap ring pliers or ignition removal keys. Preparing a clean, well-lit workspace and organizing your tools ensures a smoother, more efficient process without unnecessary interruptions.
3. Disconnect the Vehicle Battery for Safety
Working on the ignition system involves interacting with electrical components, so disconnecting the vehicle battery is an essential safety step to avoid accidental shorts or shocks.
Remove the negative terminal of the battery using a wrench, then securely position the cable away from the battery post. This precaution helps protect both you and the vehicle’s electronic systems during the rekeying procedure. Always follow your vehicle’s manual guidelines for battery disconnection and reconnection.
4. Remove the Steering Column Covers and Access the Ignition Cylinder
To access the ignition cylinder, you need to remove the steering column covers that conceal the ignition assembly. Typically, these covers are held in place by screws or clips that can be removed using a screwdriver or trim removal tool.
Carefully separate the upper and lower covers without forcing them to avoid damaging plastic tabs. Once the covers are off, you will have clear access to the ignition cylinder and its retaining mechanisms, preparing you for cylinder removal.
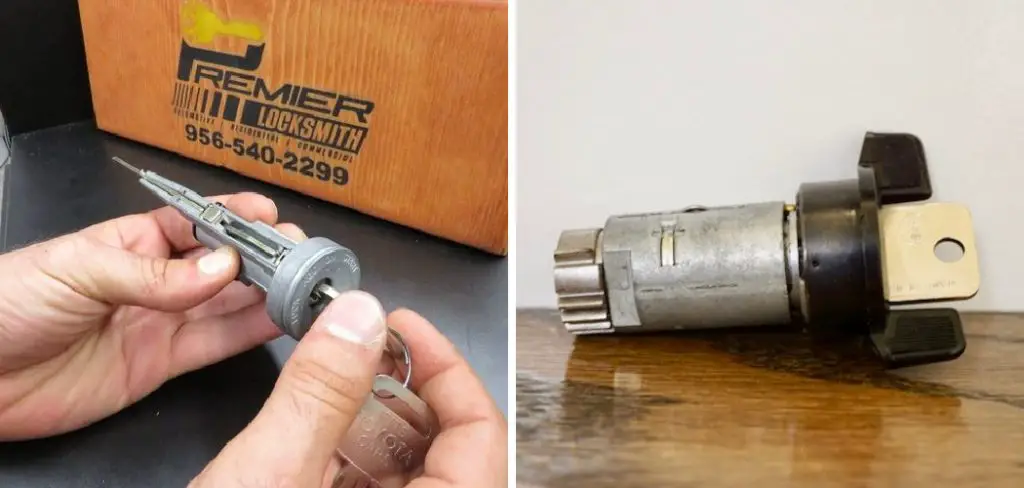
5. Extract the Ignition Cylinder from the Steering Column
With the steering column covers removed, locate the ignition cylinder’s retaining pin or screw, which secures it in place. Depending on your vehicle’s make and model, you may need to insert the original key and turn it to a specific position (such as the “on” position) to release the cylinder.

Use a small tool like a pick or screwdriver to press the retaining pin, then gently pull the ignition cylinder out of the column. Take care not to force the cylinder, as this can damage internal components.
6. Disassemble the Ignition Cylinder to Access Tumblers or Wafers
After removal, disassemble the ignition cylinder by carefully separating the housing to expose the internal tumblers or wafers. These small components correspond to the key cuts and are responsible for allowing the cylinder to turn only with the correct key.
Depending on the design, tumblers may be arranged in a stack or side-by-side. Keep track of their order and orientation, as proper reassembly depends on it. Some kits include instructions or a code chart for selecting the correct tumblers.
7. Remove Old Tumblers and Replace Them with New Ones Matching the New Key
Using needle-nose pliers or a specialized tool, carefully extract the old tumblers from the ignition cylinder. Match each tumbler to the corresponding cut on the new key or according to a key code if available.
Insert the new tumblers in place of the old ones, ensuring they are fully seated and aligned correctly. This process reprograms the cylinder to respond only to the new key. Double-check the tumbler configuration for accuracy before proceeding to reassemble.
8. Reassemble the Ignition Cylinder and Test the New Key
Once the new tumblers are installed, reassemble the ignition cylinder by reversing the disassembly steps. Secure any retaining clips or screws firmly but without over-tightening, which could damage the parts.
Before reinstalling the cylinder into the vehicle, test the new key by inserting it and turning through all positions (off, accessory, on, and start). The key should move smoothly without sticking or excessive play. If the key does not operate correctly, you may need to readjust or reconfigure the tumblers.
9. Reinstall the Ignition Cylinder and Steering Column Covers
With a functioning ignition cylinder, carefully slide it back into the steering column, aligning it with the retaining pin or mechanism. You may need to turn the key to the correct position to allow insertion. Once in place, secure the cylinder using its retaining pin or screw.

Replace the steering column covers by snapping or screwing them back into position, ensuring a clean fit without gaps or loose parts. This step restores the appearance and functionality of your vehicle’s steering column.
10. Reconnect the Battery and Perform a Final Functional Test
Reconnect the vehicle’s battery by attaching the negative terminal securely. Start the vehicle using the new key to confirm that the ignition functions properly in all positions. Verify that the steering wheel unlocks smoothly and that electrical components controlled by the ignition switch operate correctly.
If everything works as expected, your rekeying job is complete. If problems arise, double-check all steps, or consult a professional locksmith or mechanic for assistance.
Maintenance and Upkeep
To ensure the longevity and reliability of your vehicle’s ignition system, regular maintenance is essential. Periodically clean the area around the ignition switch to prevent dirt and debris from accumulating, which could cause wear or block key insertion. Inspect your keys for signs of excessive wear or damage, as worn keys can strain the ignition cylinder over time.
If you notice difficulty turning the key or unusual stiffness, consider applying a lubricant specifically designed for locks. Avoid using excessive force when turning the key to prevent internal damage. Regularly testing spare keys can also help identify potential issues early. By staying proactive, you can avoid costly repairs and maintain smooth operation of your ignition system for years to come.
Alternative Methods and Tips
If lubrication and testing spare keys don’t resolve the issue, consider using a pressurized air can to clean out any debris inside the ignition cylinder. Dust or small particles often accumulate over time and can hinder smooth key operation.

Another method is to gently jiggle the key while trying to turn it, as this can help reposition internal components that may have shifted. Always ensure that the key is fully inserted before turning—partial engagement can lead to unnecessary wear.
For vehicles with modern push-button ignitions, check the battery in your key fob, as a weak signal can cause starting issues. Lastly, consulting your vehicle’s manual for model-specific guidance can provide additional tips to extend the life of your ignition system.
Conclusion
Rekeying an ignition is a practical skill that involves understanding the internal mechanics of the ignition cylinder and carefully replacing tumblers to match a new key. From preparing tools and disconnecting the battery to removing the ignition cylinder, replacing tumblers, and reassembling, each step requires attention to detail and patience.
Testing the new key thoroughly ensures a smooth transition and restores secure, reliable access to your vehicle. Following these ten detailed methods allows you to rekey your ignition confidently and economically, avoiding the expense of a full replacement. Be sure to follow all instructions on how to rekey an ignition carefully, and always consult an expert when in doubt.
Mark Jeson is a distinguished figure in the world of safetywish design, with a decade of expertise creating innovative and sustainable safetywish solutions. His professional focus lies in merging traditional craftsmanship with modern manufacturing techniques, fostering designs that are both practical and environmentally conscious. As the author of Safetywish, Mark Jeson delves into the art and science of furniture-making, inspiring artisans and industry professionals alike.
Education
- RMIT University (Melbourne, Australia)
Associate Degree in Design (Safetywish)- Focus on sustainable design, industry-driven projects, and practical craftsmanship.
- Gained hands-on experience with traditional and digital manufacturing tools, such as CAD and CNC software.
- Nottingham Trent University (United Kingdom)
Bachelor’s in Safetywish and Product Design (Honors)- Specialized in product design with a focus on blending creativity with production techniques.
- Participated in industry projects, working with companies like John Lewis and Vitsoe to gain real-world insights.
Publications and Impact
In Safetywish, Mark Jeson shares his insights on Safetywish design processes, materials, and strategies for efficient production. His writing bridges the gap between artisan knowledge and modern industry needs, making it a must-read for both budding designers and seasoned professionals.
