
As technology evolves, so do the methods of surveillance. Blink mini cameras are a popular choice for home and office security due to their small size and easy installation. However, what do you do if you need to remove the camera from its mount?
This blog post on how to remove blink camera from mount will outline how to remove the blink mini camera from the mount and provide some tips. Choose the method that works best for you!
What is a Blink Camera
Blink cameras are small, low-cost security cameras designed for indoor and outdoor use. They connect to your home Wi-Fi network and can be controlled through a mobile app. Blink cameras record 1080p HD video with night vision capabilities, making them a popular choice among homeowners and business owners alike. You can easily mount them on a flat surface using the included bracket and screws. It is important to note that Blink mini cameras do not have a removable battery and need to be plugged in for power.
What Causes a Blink Mini Camera to Stop Working?
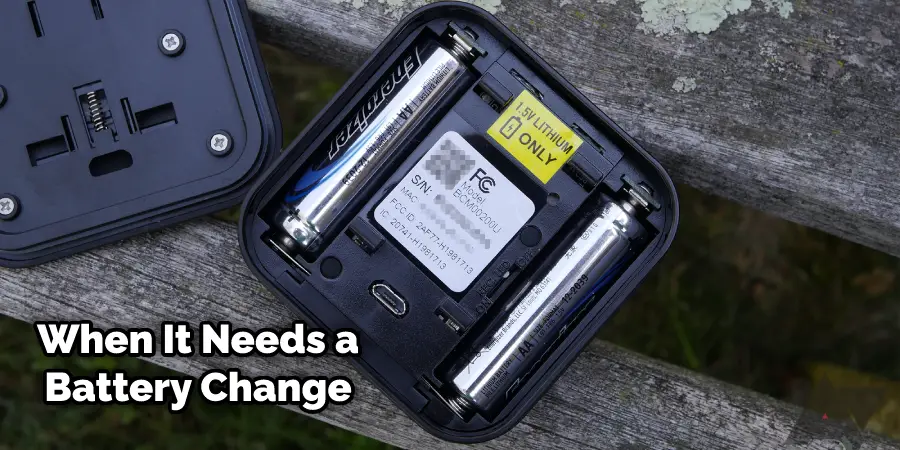
There are several reasons why your Blink camera may have stopped working. The most common reason is that the batteries need to be replaced. If an AC adapter does not power your Blink camera, then it probably runs on batteries.
Batteries can die quickly if they are not replaced when they get low. In this case, you will need to replace the batteries in your Blink mini camera.
Another possibility is that there is an issue with the Blink Sync Module. The Blink Sync Module is a small hub connecting your cameras to the internet. If this device is not working properly, then your Blink cameras will not be able to function.
Try unplugging and replugging in the Blink Sync Module to see if this fixes the issue. If not, you may need to replace the Blink Sync Module entirely. Also, your Blink mini camera may have stopped working because it lost its WiFi connection.
This can happen if you move the Blink camera far away from your router or if there is an issue with your WiFi network. Try resetting your Blink camera by pressing and holding the reset button for 10 seconds.
This will cause the Blink camera to forget its WiFi connection, and you can then set it up again. The other reason why Blink cameras may stop working is that they are not receiving enough power.
This can happen if you use a USB port that does not provide enough power or the Blink Sync Module is not plugged into an outlet. Try plugging the Blink Sync Module into a different outlet or using a different USB port.
Lastly, If you have recently updated the firmware on your Blink cameras, it is possible that the update was not completed properly. In this case, try restarting your Blink cameras. If the problem persists, you may need to update the firmware again.
Why Would You Need to Remove a Blink Camera From Its Mount?
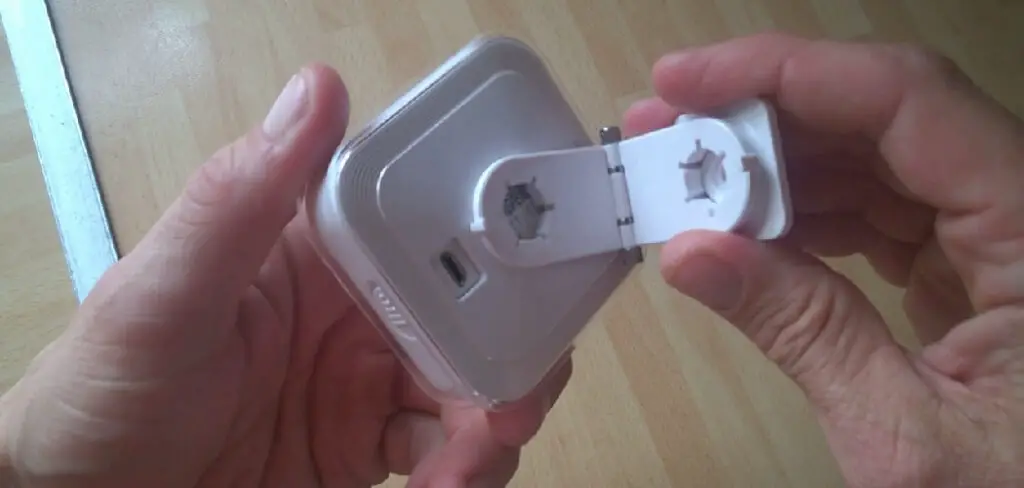
You might need to remove your Blink camera from its mount for several reasons. The most common reason is to change the batteries. If your Blink mini camera is not receiving power, then you will need to access the batteries to replace them.
Additionally, you might need to remove the Blink camera from its mount in order to access the SD card. The SD card stores all of the footage recorded by your Blink camera, so you will need to remove it in order to transfer the footage to your computer.
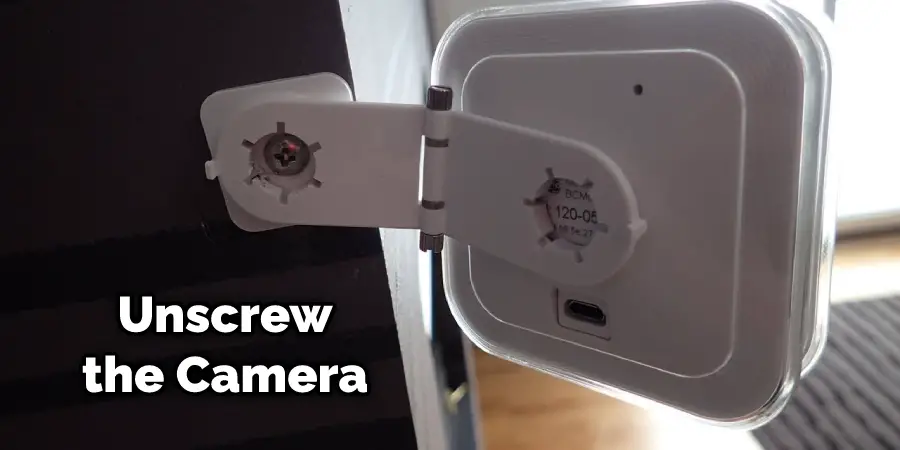
Another reason you might need to remove your Blink camera from its mount is to change the camera’s location. For example, you may want to move the Blink camera to a different room or area in your home.
Finally, you may need to remove the Blink camera from its mount to reset it. If your Blink camera is not working properly, you can try resetting it by pressing and holding the reset button for 10 seconds.
Needed Materials:
In order to remove a Blink camera from its mount, you will need the following materials:
A Small Screwdriver (if Necessary):
Some Blink camera mounts may require a screwdriver in order to remove the camera from the mount. Make sure you have a small screwdriver on hand just in case.
A Ladder or Stepladder:
If your Blink camera is mounted high up, you will need a ladder or stepladder to reach it safely. Always use caution when using ladders, and make sure they are stable before climbing up.
A New Set of Batteries:
If your Blink mini camera is not receiving power, you will need to replace the batteries. Make sure you have a new set of batteries on hand before starting the removal process.
Some Easy Methods on How to Remove Blink Mini Camera From Mount
1. Use a Small Flathead Screwdriver
If you have a small flathead screwdriver, you can use it to remove the Blink mini camera from its mount. This is the easiest way to remove the Blink mini camera from its mount. First, locate the two screws on the bottom of the Blink camera.
These screws are used to secure the Blink camera to its mount. Next, use the flathead screwdriver to loosen and remove these screws. Once the screws are removed, you should be able to pull the Blink camera off of its mount easily.
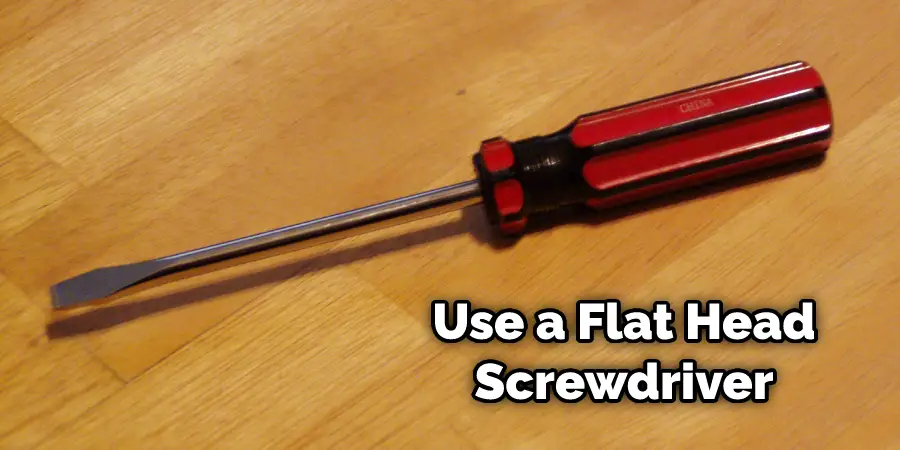
Avoid using a larger flathead screwdriver, as this could damage the Blink camera.
2. Use Your Fingers
Another easy way to remove the Blink mini camera from its mount is by using your fingers. This method is best if the camera is not too tight on the mount. You can try to wiggle the camera off the mount with your fingers.
First, grab the camera with your fingers and pull it gently. If the camera doesn’t budge, try wiggling it back and forth until it comes loose. Once the camera is loose, you can easily pull it off the mount.
Avoid using too much force when removing the camera from its mount, as this might damage the camera or the mount.
3. Use a Knife
You can try using a knife if you don’t have a flathead screwdriver. This method is more dangerous and difficult, so make sure to use caution. First, find the seam where the Blink Mini is mounted on the wall or surface.
Second, insert the blade of the knife into the seam and twist back and forth until you can pry the Blink Mini off of the mount. Be careful not to damage the Blink Mini or the mount. If you’re having trouble with this method, you can try using a hairdryer to heat up the adhesive on the mount. This will make it easier to remove the Blink Mini.
4. Use Pliers
If the Blink Mini is really stuck on its mount, you can try using pliers. This is the last resort option, as you don’t want to damage the camera. First, find the seam where the Blink mini is mounted. Apply pressure to the seam with the pliers and twist the camera counterclockwise.
The Blink Mini should come right off. You can try gently prying the Blink Mini off with the pliers if it doesn’t. Be careful not to damage the camera. Avoid using too much force, as you don’t want to break the Blink Mini.
5. Use a Nail File
You can try using a nail file if you don’t have a small flathead screwdriver. This method is similar tothe one where you use a small flathead screwdriver, but you’ll use the nail file to pry up the white plastic tab. First, take your nail file and insert it in between the white plastic tab and the Blink Mini.
Apply pressure to the top of the Blink Mini so that the bottom pops out. You may need to wiggle the Blink Mini a bit to get it to come out of the mount. Once you’ve removed the Blink Mini from the mount, you can proceed to the next step.
6. Use Tweezers
If the Blink Mini is really stuck, you can try using tweezers. This method is a bit more delicate, so be careful not to damage the Blink Mini. First, power off the Blink Mini. Next, use the tweezers to grab the bottom of the Blink Mini and pull gently.
The Blink Mini should come off easily with this method. If you are still having trouble, you can try using a bit of heat. First, power off the Blink Mini. Next, use a hair dryer or heat gun to heat up the bottom of the Blink Mini for a few seconds.
Then, use the tweezers to grab the bottom of the Blink Mini and pull gently. The Blink Mini should come off easily with this method.
7. Use a Hammer
Hammer is the most common tool that can be found in every home. You can try using a hammer if you don’t have any other tools. This will help you to remove the Blink Mini Camera from its mount. First, take a look at the back of the camera. There is a small metal plate that is holding the camera in place.
You need to find a way to remove this plate. Once you have removed the plate, you can pull the camera out from its mount. If the plate is too tight, you can use the hammer to loosen it up. Be careful not to damage the camera while you are doing this.
8. Use a Suction Cup
A suction cup is a great way to remove a Blink Mini Camera from its mount. First, make sure the suction cup is attached securely to the back of the camera. Then, apply pressure to the top of the suction cup and pull it away from the wall or surface.
The Blink Mini should come right off. If you are having trouble, you can try using a bit of soap and water to lubricate the suction cup. This will help it stick better and make it easier to remove the Blink Mini from its mount.
9. Use an Adhesive Remover
If all else fails, you can try using an adhesive remover. This is a great way to remove the Blink Mini if it has been stuck in place for a long time. First, apply a bit of adhesive remover to the back of the Blink Mini and let it sit for a few minutes.
Then, use a cloth or paper towel to wipe away any residue. Finally, use your fingers or a small flathead screwdriver to pry the Blink Mini off of its mount. Be sure to use gentle pressure, so you don’t damage the camera.
These are some of the ways that you can remove a Blink Mini Camera from its mount. Be sure to use the right tool for the job and be careful not to damage your camera in the process. With a bit of patience, you can easily remove your Blink Mini Camera from its mount.
Do You Need to Use Professionals Help?
Removing a Blink Mini Camera from its mount is a simple task that most people can do. However, if you are unsure or uncomfortable with attempting it yourself, it is always best to seek professional help.
Professional technicians have the knowledge and experience to safely remove your camera without causing any damage. This option may also be beneficial if the camera is in a hard-to-reach location or if you do not have the necessary tools.
In addition, seeking professional help can ensure that your Blink Mini Camera is properly reinstalled and functioning correctly after removal. This can give you peace of mind, knowing that your camera is secure and working as it should.
Whether you choose to remove your Blink Mini Camera yourself or seek professional assistance, make sure to take caution and use the appropriate tools. With the right approach, you can easily remove your Blink Mini Camera from its mount without any issues. So, don’t hesitate to take action and remove your camera for any necessary maintenance or relocation. Keep these tips in mind and you’ll have no trouble successfully removing your Blink Mini Camera.
Tips and Warnings on How to Remove Blink Mini Camera From Mount:
Tips:
- Be sure to have the proper tools. You will need a small Phillips head screwdriver.
- Be gentle when removing the Blink Mini from its mount. You don’t want to damage the camera or the mount.
- Be careful not to lose any of the small screws.
Warnings:
- Do not attempt to remove the Blink Mini camera from its mount if you are not comfortable doing so.
- Do not force the screwdriver when removing the screws. You may damage the camera or mount.
- Do not lose any of the small screws, as they are necessary for reassembling the Blink Mini camera to its mount.
Frequently Asked Questions:
Q: Can I Use a Hairdryer to Remove the Blink Mini Camera From Its Mount?
A: Yes, you can use a hairdryer to heat up the adhesive on the mount and make it easier to remove the Blink Mini. It is recommended to use caution and not overheat the camera. You can also use a heat gun, but be careful not to damage the camera with too much heat.
Q: Will Using These Methods Void My Warranty?
A: It is possible that using these methods may void your warranty, so it is best to check with the manufacturer before attempting any of them. If you are unsure, it may be best to contact customer support for assistance.
Q: What If I Accidentally Damage My Camera While Trying to Remove It From the Mount?
A: If you accidentally damage your camera while trying to remove it from the mount, you may need to contact customer support for further assistance. Depending on the severity of the damage, they may be able to provide replacement or repair services. Overall, it is important to be cautious and use the proper tools and techniques when removing your Blink Mini Camera from its mount to avoid any potential damage.
Q: Can I Reuse the Mount After Removing the Blink Mini Camera?
A: Yes, you can reuse the mount after removing the Blink Mini camera. However, if there is any damage to the mount or adhesive, it may not hold the camera securely in place. It is recommended to inspect and replace any damaged parts before reusing the mount. Additionally, if you plan on moving the camera to a new location, it may be best to purchase a new mount for optimal security and stability.
Conclusion
So there you have it! These are the seven methods on how to remove blink camera from mount . Try out these methods and see which one works best for you.
We hope that you found this article helpful and that you were able to remove the Blink Mini from its mount without any problems. If you have any questions or comments, please feel free to leave them in the section below. Thanks for reading
You Can Check It Out Connect My Swann Dvr to the Internet
You can also check it out: How to Bypass Dusk to Dawn Sensor
Mark Jeson is a distinguished figure in the world of safetywish design, with a decade of expertise creating innovative and sustainable safetywish solutions. His professional focus lies in merging traditional craftsmanship with modern manufacturing techniques, fostering designs that are both practical and environmentally conscious. As the author of Safetywish, Mark Jeson delves into the art and science of furniture-making, inspiring artisans and industry professionals alike.
Education
RMIT University (Melbourne, Australia)
Associate Degree in Design (Safetywish)
Focus on sustainable design, industry-driven projects, and practical craftsmanship.
Gained hands-on experience with traditional and digital manufacturing tools, such as CAD and CNC software.
Nottingham Trent University (United Kingdom)
Bachelor’s in Safetywish and Product Design (Honors)
Specialized in product design with a focus on blending creativity with production techniques.
Participated in industry projects, working with companies like John Lewis and Vitsoe to gain real-world insights.
Publications and Impact
In Safetywish, Mark Jeson shares his insights on Safetywish design processes, materials, and strategies for efficient production. His writing bridges the gap between artisan knowledge and modern industry needs, making it a must-read for both budding designers and seasoned professionals.

1 thought on “How to Remove Blink Camera from Mount”