
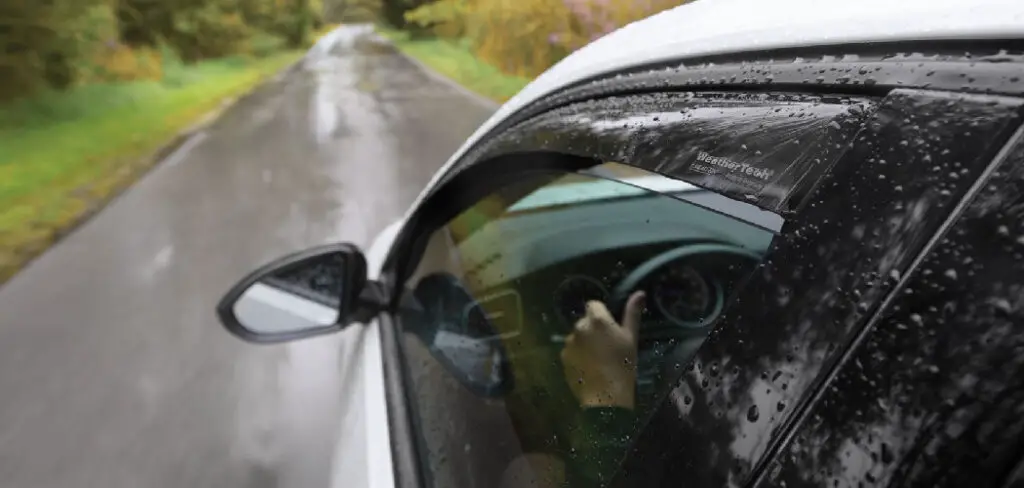
Window visors are a popular aftermarket accessory for cars. They’re attached to the top of the window and help keep rain and other debris from getting inside. While they’re not necessary, they can be a helpful addition to your car. If you decide to remove them, here’s how to remove window visors.
What Is a Window Visor?
At its simplest, a window visor is an accessory that helps to keep the sun and rain out of your vehicle’s interior. However, visors can also provide much-needed ventilation on hot days, and they can even help reduce glare.
In addition, many visors come equipped with built-in storage pockets, making them a convenient way to keep small items within easy reach. Window visors are typically made from durable acrylic or polycarbonate, and they can be installed in minutes using double-sided tape or screws.
Whether you’re looking for protection from the elements or want to improve the look of your vehicle, a window visor is an affordable and easy-to-install option.
Why Should You Remove Window Visors?
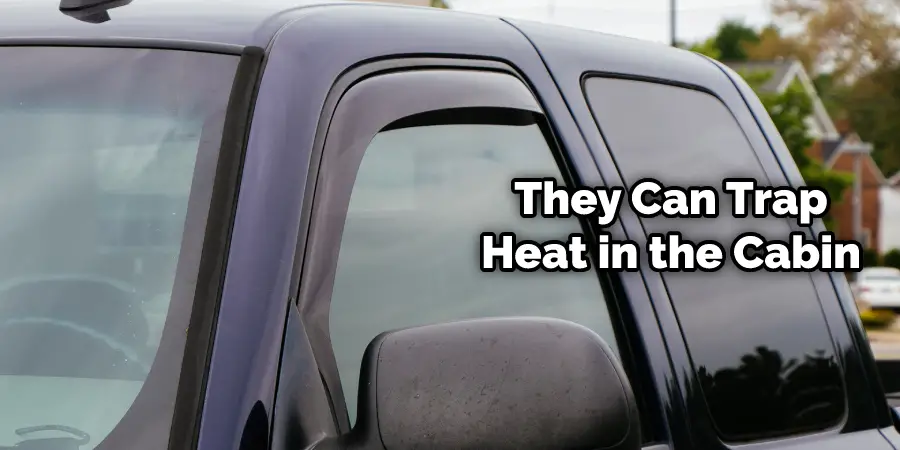
Window visors are a common aftermarket car accessory, but there are several good reasons to remove them. First, they can impede your visibility, especially when driving at night. Second, they can cause wind noise, both annoying and dangerous.
Third, they can trap heat in the cabin, making it more difficult to keep cool in warm weather. Finally, they can be difficult to clean and maintain. For all these reasons, it’s generally best to remove window visors when they’re not necessary.
Of course, this isn’t always possible or practical, but it’s something to keep in mind the next time you’re thinking about adding a set of window visors to your car.
Things You’ll Need
Phillips Head Screwdriver:
If your window visors are attached with screws, you’ll need a Phillips head screwdriver to remove them.
Adhesive Remover:
If your window visors are attached with double-sided tape, you’ll need an adhesive remover to loosen the tape.
Clean Cloth:
To clean off any residue left behind by the adhesive remover, you’ll need a clean cloth.
Razor Blade:
If you’re having trouble removing any leftover tape or adhesive, a razor blade can come in handy for scraping it off.
How to Remove Window Visors 9 Step-by-Step Guide
Step 1: Remove Screws from Window Visor
There are usually two screws located at the top of the window visor. Remove these screws using a Phillips head screwdriver. You may need to hold onto the visor as you remove the screws to prevent it from falling. It’s also a good idea to have someone help you hold the visor in place while you work. You can also use a small piece of tape to hold the visor in place while you remove the screws. The tape will help prevent the visor from falling and potentially causing damage to your car’s paint.
Step 2: Release the Window Visor from the Clip
Now that you have located the clips, you can release the window visor from the clip. Reach up and press down on the small tab near the top of the window visor. This will release it from the clip. Be careful not to pull too hard on the visor, as it may still be attached to the window. If it is still attached, you will need to pull on the visor until it releases from the window. Make sure to hold onto the visor tightly as you do this to avoid any potential damage. Otherwise, the visor might fall and break.
Step 3: Slide the Window Visor Off the Car Window
Once the screws are removed, gently slide the window visor off the car window. There may be some resistance, so you may need to wiggle it. If it’s stuck, try using a little pressure to loosen it up. Be careful not to damage the car window in the process. Once the window visor is off, you can store it in a safe place until you’re ready to use it again. If you plan on selling the visors, make sure to clean them thoroughly before putting them up for sale.
Step 4: Remove Adhesive from Window Visor
Once you have the window visor removed, you will need to remove the adhesive from the window. Use a heat gun or hair dryer to heat the adhesive to do this. Once it is hot, use a razor blade or scraper to remove the adhesive. Again, be careful not to damage the paint on your car. You can also use an adhesive remover to speed up the process. Be sure to follow the instructions on the product carefully. It’s essential to remove all the adhesive, as any leftover residue can cause issues when you reinstall the window visor.
Step 5: Clean Adhesive Residue with Goo Gone or Similar Product
After the visors have been removed, clean any adhesive residue that may be left behind with a product like Goo Gone. This will help to ensure that the area is clean and free of any sticky residue. Simply apply the product to a clean cloth and gently rub it onto the affected area until all of the residue has been removed. Once you’re done, wipe away any excess product with a clean cloth. If you don’t have Goo Gone, you can use rubbing alcohol or soap and water to clean off the residue.
Step 6: Reinstall Window Visor (If Necessary)
Once you have completed the previous steps, it is time to reinstall your window visors, if necessary. To do this, follow the same steps in reverse order. In addition, ensure that you tighten all screws and bolts securely to ensure a snug fit. You should also test the window visors for proper operation before finalizing your installation. If you notice any issues, make sure to address them before hitting the road. It’s always better to be safe than sorry when it comes to car maintenance and upgrades.
Step 7: Clean and Maintain Window Visors Regularly
To prevent any issues with your window visors in the future, it is essential to clean and maintain them regularly. This will help keep them looking new and functioning properly. Use a mild soap and water solution to clean your window visors and avoid harsh chemicals that can damage the material. You can also use a protectant spray specifically designed for plastic or rubber to keep them looking shiny and new. Additionally, make sure to check for any cracks or damage and address them promptly to avoid any potential safety hazards.
Step 8: Remove Window Visors in Extreme Weather Conditions
It’s best to remove your window visors during extreme weather conditions, such as heavy rain, snow, or extreme heat. This will help prevent any damage to the visors and your car, as well as maintaining maximum visibility while driving in these conditions. If you live in an area with harsh weather, consider investing in a set of all-weather window visors that are designed to withstand these conditions. This will help prolong the life and effectiveness of your window visors.
Step 9: Consult a Professional
If you are unsure about how to remove or install window visors on your particular vehicle, it’s always best to consult a professional. They can provide guidance and ensure that the process is done correctly and safely. They can also assist with any specific instructions or tools needed for your specific car model. This is especially important if you are dealing with electrical wiring or other complicated components that may be attached to the window visors.
Now that you know how to remove window visors, you can take them off when they are not necessary. This can improve your visibility and reduce wind noise. It can also help to keep the cabin cooler in warm weather.
Window visors can also be difficult to clean and maintain, so removing them when they are not needed is a good idea. If you need to reinstall them, follow the same steps in reverse order.
Be sure to tighten all screws and bolts securely for a snug fit. Test the window visors for proper operation before finalizing your installation. Enjoy your new view!
How to Install New Window Visors After Removing the Old One
After removing the old window visors, it is time to install the new ones.
- First, measure the area around the window frame where the visor will be installed and make sure that it corresponds with your new visor’s measurements.
- Next, check if there are any screws or bolts holding your old visor in place and remove them.
- Once the old visor is removed, take a moment to clean the area around the window frame so that it’s free of any dirt or dust that may have accumulated over time.
- Now, line up your new window visor with the holes where you removed the screws and bolts from the old visor.
- Secure the new window visor in place with the screws or bolts that you removed from the old one.
- Finally, make sure your new window visor is firmly in place and test it by opening and closing your window a few times.
Congratulations! You have successfully installed your new window visor. Enjoy the fresh look and improved privacy of your vehicle.
Some Consideration Things
Window visors are designed to keep the sun and rain out of your car and improve your visibility while driving. They can also improve the appearance of your car. However, there may come a time when you want to remove them. Here are some things to consider before removing window visors:
- Removing window visors can be a challenge. They are often attached with strong adhesive or clips.
- If you remove the window visors incorrectly, you may damage your car or the visors themselves.
- Window visors can block your view and limit airflow.
How to Clean Window Visors?
Window visors are essential for any car, truck, or SUV. They provide shade and privacy, but they also help to deflect road debris and keep the cabin cool. However, visors can quickly become dirty, making it difficult to see out of the window.
In order to keep your window visors looking their best, it is important to clean them regularly. The most effective way to clean window visors is to remove them from the vehicle and wash them by hand using a mild soap and water solution.
Once thoroughly rinsed, the visors can be dried with a soft cloth or left to air dry. If there are stubborn stains that refuse to come out, a small amount of vinegar can be used to help remove them.
Window visors should be reinstalled once they are completely dry. Failure to do so may result in water damage and decreased visibility while driving.
Removing window visors is a fairly easy task, but it is important to take your time and follow the proper steps to avoid damaging them.
How Do You Remove Old or Broken Window Visors?
Over time, your window visors may become old or broken, and you’ll need to remove them. The best way to do this is to use a putty knife. First, insert the blade of the putty knife under the lip of the visor. Then, twist the blade to break the sealant that holds the visor in place.
Once the sealant is broken, you should be able to pull the visor away from the window. If the visor is still attached in some places, you can use the putty knife to pry it loose carefully. With a little patience, you should be able to remove the old or broken visor without damaging your window. Keep reading for more information about how to remove window visors.
How Do You Remove the Double-Sided Tape From Visors
Window visors are a great way to keep the sun out of your eyes while driving, and they can also help keep the car cooler in the summer. Many people choose to install window visors using double-sided tape. However, getting the tape off can be a challenge if you ever want to remove the visors. Here is how to do it:
- Start by heating the tape with a hairdryer. This will help make it softer and easier to remove.
- Next, use a sharp object like a razor blade or scissors to cut the tape off of the visor. Be careful not to cut the visor itself.
- Finally, use a rag or some other soft cloth to wipe away any remaining adhesive.
If you follow these steps, you should be able to remove the double-sided tape from your window visors without any trouble.
Can You Remove the Window Visors?
The window visors are a great addition to your car, but what happens when you want to remove them? Can you remove the window visors without damaging your car?
Removing the window visors is a very simple process. All you need is a screwdriver and a few minutes of your time. First, locate the screws that hold the visors in place. These screws are usually located on the top and bottom of the visor. Once you have located the screws, use the screwdriver to remove them.
Once the screws are removed, gently pull on the visor until it pops out of the car. Be careful not to damage the car window while removing the visor.
If you want to reinstall the window visor, reverse the process. Replace the screws and gently push the visor back into place.
Removing window visors is a simple process that only takes a few minutes. If you ever need to remove them for any reason, follow these easy steps.
Frequently Asked Question
Q1: Can You Reuse the Window Visors?
A1: Window visors can be reused if they are in good condition. However, if the window visors are not in good condition, they should be replaced.
Q2: What Is the Best Way to Remove Window Visors?
Q2: There are a few different ways to remove window visors, but the best way to do it is by using a hairdryer. First, start by heating the window visor until it is soft. Then, use a hairdryer to blow hot air onto the window visor until it pops off. This will help prevent any damage to the window or visor.
Q3: How Can You Tell If Window Visors Have Gone Bad?
A3: There are a few signs that your window visors may have gone bad. These include:
- Cracks or breaks in the material
- Faded color
- Warped shape
If you notice any of these signs, it may be time to replace your window visors.
Conclusion
It is easy to remove window visors. You will need a screwdriver and a few minutes of your time. You have to remove the screws that hold the visor in place and then pull it off. Be careful not to damage the car’s paint job when removing the visor. Thanks for reading our post about how to remove window visors.
You may also read it: How to Remove Window Deflectors
