
How to replace ignition switch without key can be a challenging task, but it is often necessary when the key is lost, broken, or the ignition switch itself is malfunctioning.
This guide provides a straightforward approach for removing the old ignition switch and installing a new one. Before embarking on this task, it’s essential to have a basic understanding of the vehicle’s electrical system and the tools required for the job, such as screwdrivers, wrench sets, and possibly a drill, depending on the specific make and model of the car. Safety should always be a priority, so ensure the vehicle’s battery is disconnected to prevent electrical hazards.
By following the detailed steps outlined in this guide, you will be able to successfully replace your ignition switch and restore your vehicle’s functionality.
What Will You Need?
Before starting the ignition switch replacement process, having all the necessary tools and equipment is crucial. This will save you time and prevent frustration during the repair process. Some of the essential items include:
- Screwdrivers (Phillips head and flathead)
- Wrench set
- Drill (if required for your specific vehicle)
- Replacement ignition switch
- Owner’s manual or wiring diagram for your car
- Rubber mallet (optional)
It is also recommended that you wear protective gear, such as gloves and safety glasses, while performing vehicle repairs.
10 Easy Steps on How to Replace Ignition Switch Without Key
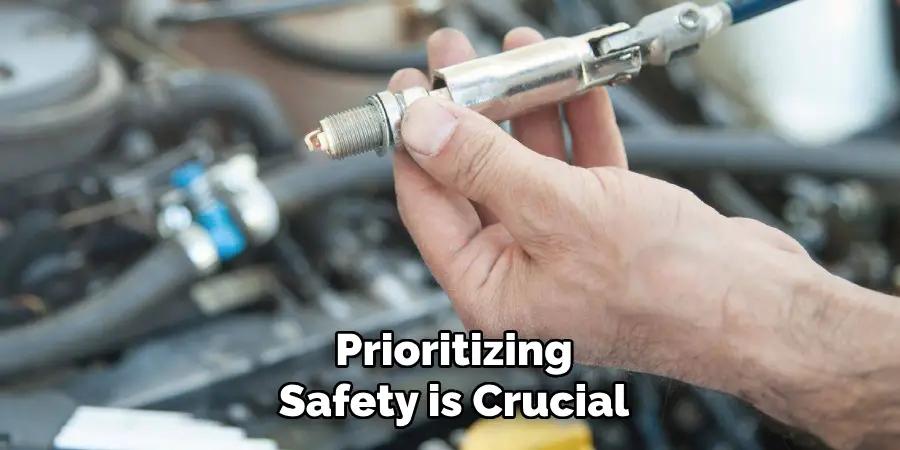
Step 1. Ensure Safety First
Before diving into the replacement procedure, prioritizing safety is crucial. Start by ensuring that the vehicle is in a secure position—this usually means parking on a level surface and engaging the parking brake to prevent any accidental movement. Disconnect the vehicle’s battery to eliminate any risk of electrical shock or short circuits.
This step is vital if working near or handling electrical components. Remember to keep the key away from the ignition to avoid inadvertent starting of the vehicle while you’re working on it. Additionally, wearing durable gloves to protect your hands from sharp edges or hot components under the hood is a good idea. Safety glasses are equally essential to shield your eyes from potential debris or sparks when dealing with metal parts.
Preparing your workspace with all tools and equipment ready and within reach will ensure a smooth and efficient replacement process without compromising safety.
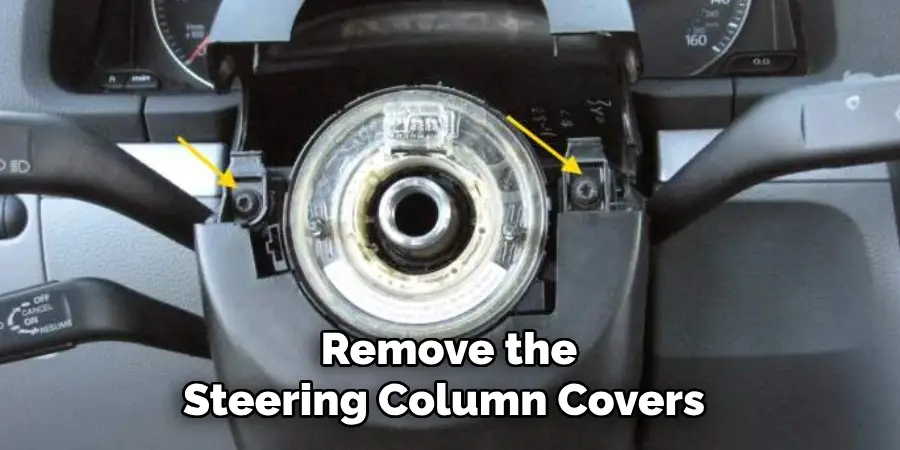
Step 2. Remove Steering Column Covers
To access the ignition switch, you’ll need to remove the steering column covers. These are usually held in place by screws, so use a Phillips head screwdriver to unscrew and detach these covers carefully. Start from the underside of the column and progress upwards, ensuring you keep track of all screws removed to simplify reassembly later.
Be gentle while prying the covers apart to avoid damaging any plastic components. Once the covers are removed, you should have a clear view of the ignition switch and its associated components, allowing you to proceed with the replacement process.
Step 3. Disconnect the Ignition Switch Wiring
Once you have the steering column covers removed and transparent access to the ignition switch, it’s time to disconnect the switch from the vehicle’s wiring harness. This can typically be done by locating the connector attached to the ignition switch and releasing it. Most connectors can be disengaged by pressing a tab or lever while gently pulling the connector away from the switch.
Be sure to handle the wiring carefully to avoid damaging the insulation or any of the pins within the connector. Taking a photo of the wiring setup before disconnecting can serve as a helpful reference when connecting the new ignition switch later.
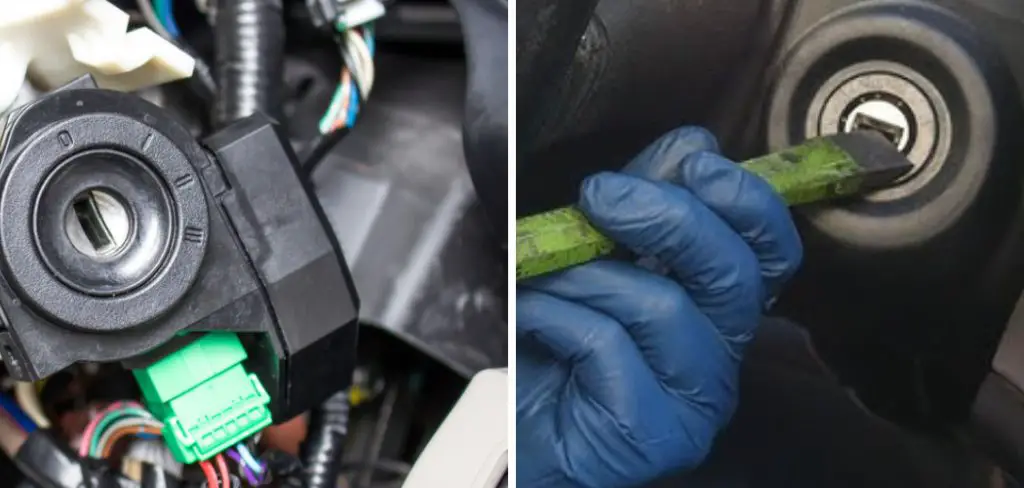
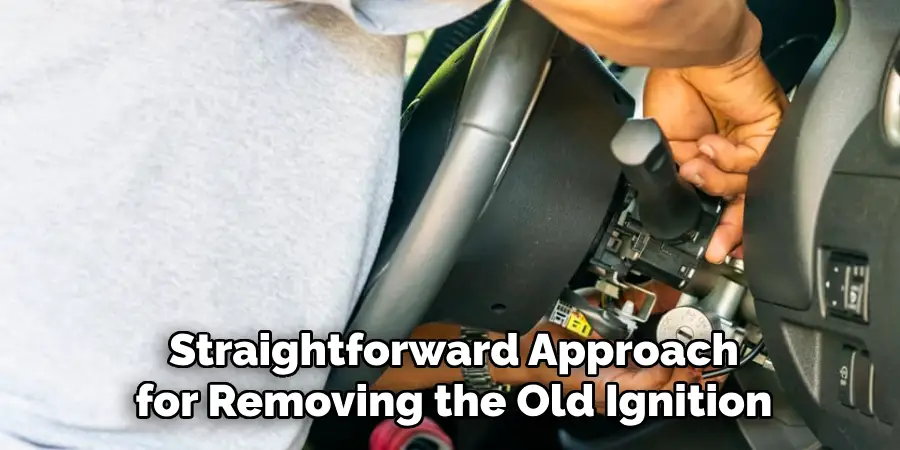
Step 4. Remove the Old Ignition Switch
With the wiring disconnected, you can proceed to remove the old ignition switch. Depending on your vehicle’s make and model, the switch may be held in place by screws or plastic clips. If screws are present, use an appropriate screwdriver to unscrew them and set them aside for later use carefully. If your ignition switch is secured with clips, gently press the clips to release the switch.
Once the fasteners are removed or clips released, the ignition switch should come free with some careful maneuvering. Be sure to note the position and orientation of the old switch, as this will help you install the new one correctly. If any difficulty arises in taking the switch out, consult the owner’s manual or vehicle repair guide for specific instructions related to your car.
Step 5. Install the New Ignition Switch
Begin by positioning the new ignition switch in the same orientation as the old one, ensuring it aligns correctly with the mounting points. Secure the switch in place using the screws or clips that you removed earlier. If screws are required, tighten them carefully with a screwdriver to avoid stripping the threads or damaging the switch. Make sure the switch is firmly mounted, but be careful not to overtighten it, as it could crack the switch housing or the mounting brackets. After securing the ignition switch, double-check that it sits flush against the steering column and that there are no loose parts.
Step 6. Reconnect the Ignition Switch Wiring
With the new ignition switch securely installed, it’s time to reconnect the wiring harness. Retrieve the connector you previously removed, ensuring it aligns correctly with the new switch. Gently push it into place until you hear or feel a click, indicating it is securely connected. Don’t force the connector, which could damage the pins or wiring.

If you took a photo of the wiring setup earlier, use it as a reference to ensure everything is reconnected accurately. Verifying proper connection is crucial to ensure the ignition system functions correctly, preventing potential electrical issues. Once connected, inspect the wiring for any signs of wear or damage and address any concerns before proceeding.
Step 7. Test the New Ignition Switch
Before reassembling the steering column covers, it’s crucial to test the new ignition switch to ensure it functions correctly. Reconnect the vehicle’s battery and insert the key into the ignition. Turn the key to the “on” position to check for any easy steering wheel movement and instrument panel lights activation, indicators of a successful installation.
Attempt to start the vehicle to confirm that the engine cranks without any issues. If the ignition switch or other electronic functions do not operate as expected, double-check the wiring connections and the installation of the switch. Address any identified issues before proceeding further. Once the switch is confirmed to be working properly, you can move on to the final reassembly steps.
Step 8. Reassemble the Steering Column Covers
You can reassemble the steering column covers with the new ignition switch tested and confirmed to be working correctly. Begin by carefully positioning the bottom cover back into place, ensuring all screw holes align correctly. Once aligned, gently press the top cover onto the bottom one. Use the Phillips head screwdriver to reinstall the screws you removed earlier, tightening them securely to hold the covers in position.
Be cautious not to overtighten the screws, as this could damage the plastic components. Ensure that both the top and bottom covers fit snugly with no gaps. After securing the covers, inspect the area for loose parts or tools before concluding the process.
Step 9. Final Inspection and Clean Up
After reassembling the steering column covers, it’s crucial to perform a final inspection to ensure everything is properly installed and secure. Double-check that there are no gaps between the covers and that all screws are tightened adequately yet gently to avoid damage. Confirm that there is no shaking or looseness when handling the steering column area.
Next, clean any fingerprints, dust, or debris that might have accumulated on the steering column and surrounding areas during installation. Verify all necessary tools are removed from inside the vehicle and that no leftover parts are overlooked. Once satisfied with the inspection and cleanup, take the car for a short test drive. This will confirm that the ignition switch functions smoothly and that all components are in perfect working order, ensuring a job well done.
Step 10. Maintain the New Ignition Switch
Once you have confirmed that the new ignition switch is working correctly, it’s essential to maintain it to ensure its longevity. Regularly inspect the ignition switch area for any signs of wear, such as unusual resistance when turning the key or intermittent starting issues. Ensure to keep the key clean and free from debris, as dirt or grime can transfer to the ignition cylinder and lead to malfunctions.
Avoid adding heavy keychains to your ignition key, as the extra weight can wear out the switch prematurely. Additionally, consider periodically applying a small amount of graphite-based lubricant to the key and ignition switch to keep them operating smoothly. Regular maintenance will help ensure your new ignition switch functions effectively for many years.
By following these steps, you should now have a solid understanding of how to replace an ignition switch in your vehicle.
Conclusion
How to replace ignition switch without key can be a challenging task, but with the right tools and instructions, it’s entirely doable.
This guide provides a comprehensive step-by-step approach to help you navigate the process. By following these steps carefully—from preparing the necessary tools to conducting a thorough final inspection—you can successfully replace your ignition switch even without a key. Remember to observe all safety precautions, such as disconnecting the battery before beginning the work. If you encounter any difficulties or are unsure about any part of the process, consulting a professional mechanic is always wise.
With patience and attention to detail, you can maintain your vehicle’s functionality and ensure safe, reliable operation with a new ignition switch.
Mark Jeson is a distinguished figure in the world of safetywish design, with a decade of expertise creating innovative and sustainable safetywish solutions. His professional focus lies in merging traditional craftsmanship with modern manufacturing techniques, fostering designs that are both practical and environmentally conscious. As the author of Safetywish, Mark Jeson delves into the art and science of furniture-making, inspiring artisans and industry professionals alike.
Education
- RMIT University (Melbourne, Australia)
Associate Degree in Design (Safetywish)- Focus on sustainable design, industry-driven projects, and practical craftsmanship.
- Gained hands-on experience with traditional and digital manufacturing tools, such as CAD and CNC software.
- Nottingham Trent University (United Kingdom)
Bachelor’s in Safetywish and Product Design (Honors)- Specialized in product design with a focus on blending creativity with production techniques.
- Participated in industry projects, working with companies like John Lewis and Vitsoe to gain real-world insights.
Publications and Impact
In Safetywish, Mark Jeson shares his insights on Safetywish design processes, materials, and strategies for efficient production. His writing bridges the gap between artisan knowledge and modern industry needs, making it a must-read for both budding designers and seasoned professionals.
