
Imagine a light that turns on when you approach and switches off automatically after you leave. This convenience, combined with improved energy efficiency and security, is why many homeowners are turning to motion sensor lights. These lights are perfect for outdoor porches, driveways, pathways, and even indoor spaces like basements or storage rooms. Learning how to set sensor light is essential to optimizing its functionality for your specific needs, whether it’s adjusting the sensitivity, setting the duration of illumination, or customizing the light’s detection range. By the end of this guide, you’ll be equipped to install or adjust your sensor light with confidence, even if you’re a complete beginner.

Before beginning the installation, make sure to gather all the necessary tools and equipment, such as a screwdriver, drill, and any mounting hardware provided with the sensor light. Start by selecting an appropriate location for the light, ensuring it is positioned to effectively cover the desired area while avoiding obstructions that may interfere with the sensor’s detection range. Follow the manufacturer’s instructions for wiring and mounting, and take proper safety precautions, such as turning off the power supply before handling any electrical components. Once installed, test the light’s functionality and make any necessary adjustments to settings like sensitivity and timer duration to ensure optimal performance.
Why Setting Your Sensor Light Matters
Properly setting your sensor light ensures that it functions as intended—saving energy, boosting security, and providing convenience. When poorly configured, motion sensor lights may activate at the wrong time, fail to turn off, or miss activity within their range. For example, a light that stays on unnecessarily can quickly increase your electricity bills, while one that doesn’t detect movement defeats its purpose entirely. Setting the correct detection range, sensitivity, and timer ensures that your light only activates when needed, improving its efficiency and longevity. Whether you’re enhancing your home’s safety or avoiding fumbling in the dark, fine-tuning your sensor light is a crucial step.
10 Step-by-Step Guide on How to Set Sensor Light
Getting your sensor light to work as intended involves several steps, from installation to fine-tuning settings. Follow these steps to learn how to set sensor light to match your specific requirements.
Step 1: Choose the Right Location
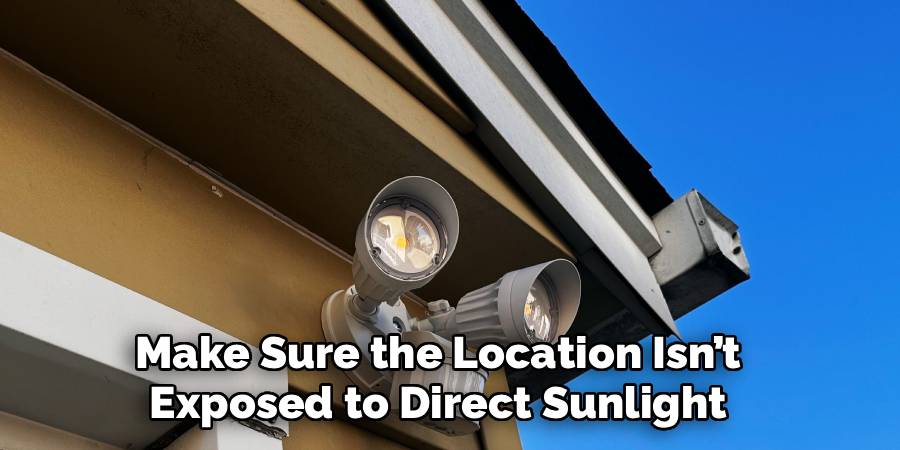
To achieve optimal performance, the sensor light should be installed in a location where it can detect motion effectively. Place the light at a height of 6–10 feet to ensure the sensor covers a broad area. Avoid areas where trees, plants, or outdoor fixtures may obstruct the sensor, as these can interfere with its operation. When setting it outdoors, make sure the location isn’t exposed to direct sunlight, as it might disrupt the sensor’s sensitivity.
Step 2: Mount the Sensor Light
Once you’ve identified the perfect spot, securely mount the sensor light. Follow the manufacturer’s instructions to ensure proper installation, using screws or brackets as needed. It’s critical to angle the sensor toward the direction where motion detection is most needed, such as facing a driveway, pathway, or entry point. Incorrect positioning could result in the light failing to detect movement or activating unnecessarily.
Step 3: Connect the Power Supply
Once the sensor light is mounted, connect it to a power source. For lights that plug into an outlet, ensure you’re using a secure, weather-protected outlet for outdoor spaces. If the light is hardwired, turn off the power supply at the circuit breaker before handling any wiring. Connect the wires according to the color-coded instructions provided in the manual, and ensure the connections are insulated for safety.
Step 4: Adjust the Detection Range
The detection range represents the area within which the light senses motion. To set this, locate the range adjustment knob or switch on the sensor light, often labeled as “Range” or “Sensitivity.” Experiment by increasing or reducing the range while testing its response to motion. A wider range is suitable for large, open spaces, while a narrower range works well in tight or controlled areas.
Step 5: Set the Motion Sensitivity
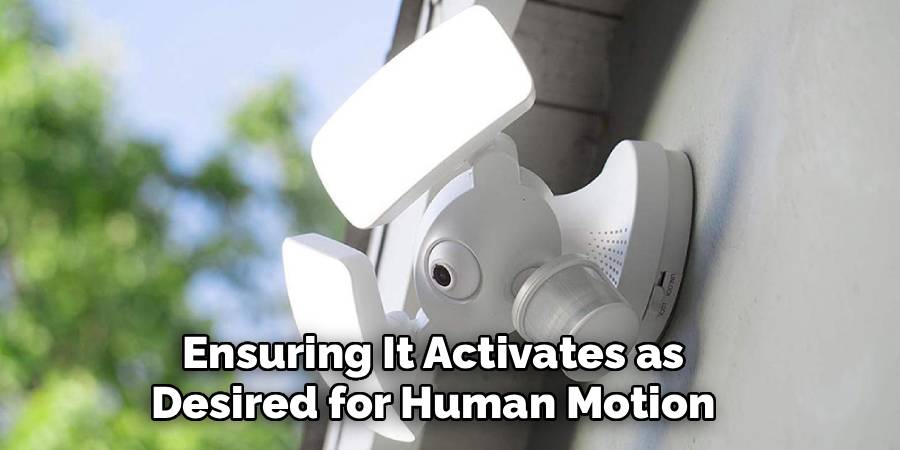
Motion sensitivity determines how easily the sensor detects movements. If set too high, it may trigger the light unnecessarily, such as when leaves blow or small animals pass by. On the other hand, a low sensitivity setting might prevent it from detecting legitimate movement. Using the adjustment settings, calibrate the sensitivity by testing it under different conditions, ensuring it activates as desired for human motion but disregards minor movements.
Step 6: Configure the Timer
The timer controls how long the light stays on after detecting motion. Most sensor lights have adjustable timers, typically ranging from a few seconds to several minutes. Turn the timer knob to your preferred duration. A shorter timer conserves energy, while a longer setting might be beneficial for spaces where prolonged illumination is necessary, such as driveways or backyards.
Step 7: Test the Light Settings
After configuring the range, sensitivity, and timer, thoroughly test the light. Walk through the area to see if the light activates at the desired distance. Make adjustments if necessary and test under varying conditions, such as during the day and at night. Pay attention to whether the light stays on longer than expected or fails to sense your movement.
Step 8: Adjust for Night Mode
Many sensor lights come with a “Day/Night” feature, allowing them to activate only in low light conditions. Use this setting to prevent the light from turning on during daylight. Locate the mode adjustment control on your sensor light and set it to ensure nighttime activation only. This step enhances energy efficiency and ensures the light remains inactive when unnecessary.
Step 9: Secure Any Covers or Lenses
Some motion sensor lights have protective covers or lenses that shield them from weather conditions. Once all settings are configured, double-check that these covers are securely fastened. This ensures optimal functionality and protects the sensor from potential damage caused by rain, dirt, or debris.
Step 10: Perform Routine Maintenance
Sensor lights require periodic maintenance to continue performing well. Regularly clean the sensor and light fixture to remove dust or dirt that may interfere with its operation. Check for any loose wires or screws that may need tightening. Keeping the sensor light in good condition will extend its lifespan and avoid unnecessary issues.

Common Troubleshooting Tips
Even with proper installation and maintenance, sensor lights can occasionally encounter issues. Here are some common troubleshooting tips to address potential problems:
Sensor Not Detecting Motion
- Ensure the sensor lens is clean and free of obstructions. Dirt or debris can block motion detection.
- Check the sensor’s range settings and adjust them if needed. Verify that the device is positioned to cover the desired area effectively.
Light Staying On Constantly
- Confirm that the sensor is not set to “manual override” mode. Switch it back to “auto” if necessary.
- Inspect for moving objects, such as tree branches or pets, that might trigger the sensor unintentionally.
Light Not Turning On
- Verify the power supply and ensure the fixture is receiving electricity. Reset circuit breakers if tripped.
- Check the bulb to see if it needs replacing, and ensure it is installed correctly.
Intermittent Operation
- Test for interference from other devices, such as nearby security systems or wireless signals, which might impact the sensor.
- Tighten any loose wiring connections and confirm all components are securely installed.
These tips should help resolve common issues and restore the proper functioning of your sensor light. If problems persist, consulting the manufacturer’s guide or seeking professional assistance is recommended.
Frequently Asked Questions Section
1. How do I reset my sensor light?
To reset your sensor light, locate the reset button or switch, often found near the motion sensor or power controls. Turn it off for 30 seconds to one minute, then turn it back on. If your light is hardwired, you can reset it by turning off the circuit breaker controlling the light, waiting for a minute, and switching the breaker back on. Always consult your manufacturer’s manual for specific reset instructions tailored to your model.

2. Why won’t my sensor light turn off?
If your sensor light stays on constantly, it could be due to several reasons. Check if the sensor is stuck in manual override mode, which often happens if the light switch was toggled too quickly. Another possibility is that the timer duration is set too long, or environmental factors like strong winds or nearby branches consistently trigger the sensor. Resetting the light and adjusting the sensitivity or timer can often resolve the issue.
3. What if my sensor light doesn’t detect motion?
When a sensor light fails to detect motion, ensure that it is installed at the correct height and angle. Check the sensitivity settings and increase them if necessary. Obstructions like plants or debris in the sensor’s path may also be blocking its detection. Clean the sensor lens and test its response from varying distances to troubleshoot the issue effectively.
4. Can I use a sensor light indoors?
Yes, sensor lights are highly effective indoors for spaces such as basements, stairwells, or closets. Indoor lights can improve convenience and safety, especially in low-traffic areas where manual switches are inconvenient. Choose a sensor light with a narrower range and sensitivity for indoor use, as smaller spaces often don’t require broad detection.
5. Does weather affect a motion sensor light?
Yes, weather conditions such as heavy rain, strong winds, or snow can interfere with a sensor light’s performance. For instance, rain can create false triggers if water droplets pass in front of the sensor. Ensuring the light is weather-resistant and installed with protective covers can mitigate these issues. Using materials designed for outdoor use will extend the life of your sensor light in all weather conditions.

Conclusion
Properly setting your sensor light not only saves energy but also enhances security and convenience in your home. This guide has walked you through everything from installation to customizing essential settings like detection range and timer duration. Now that you know how to set sensor light, you can confidently optimize its performance for your unique needs. Don’t wait—adjust your sensor light today and enjoy the perfect blend of functionality, efficiency, and safety in your space!
Additionally, regular maintenance of your sensor light ensures its longevity and consistent performance. Periodically cleaning the light and checking for any loose connections or obstructions can prevent malfunctions. By taking a few minutes to inspect your sensor light every few months, you can ensure it continues to operate effectively, providing peace of mind and enhancing the comfort of your home.
Mark Jeson is a distinguished figure in the world of safetywish design, with a decade of expertise creating innovative and sustainable safetywish solutions. His professional focus lies in merging traditional craftsmanship with modern manufacturing techniques, fostering designs that are both practical and environmentally conscious. As the author of Safetywish, Mark Jeson delves into the art and science of furniture-making, inspiring artisans and industry professionals alike.
Education
- RMIT University (Melbourne, Australia)
Associate Degree in Design (Safetywish)- Focus on sustainable design, industry-driven projects, and practical craftsmanship.
- Gained hands-on experience with traditional and digital manufacturing tools, such as CAD and CNC software.
- Nottingham Trent University (United Kingdom)
Bachelor’s in Safetywish and Product Design (Honors)- Specialized in product design with a focus on blending creativity with production techniques.
- Participated in industry projects, working with companies like John Lewis and Vitsoe to gain real-world insights.
Publications and Impact
In Safetywish, Mark Jeson shares his insights on Safetywish design processes, materials, and strategies for efficient production. His writing bridges the gap between artisan knowledge and modern industry needs, making it a must-read for both budding designers and seasoned professionals.
