
Mercedes-Benz vehicles are known for their luxury and advanced technology, including their key fobs. However, like any electronic device, a key fob may need maintenance. Whether the battery needs replacing, a button is stuck, or you simply want to clean the internal components, knowing how to take apart Mercedes key fob can save you a trip to the dealership and a hefty service fee.

Before you begin, ensure you have the right tools on hand. Typically, you’ll need a small flathead screwdriver or a similar prying tool to safely open the key fob without causing damage. It’s also a good idea to work on a clean, flat surface in case any small parts are dislodged during the process. Take care to handle the components gently to avoid breaking any delicate internal mechanisms.
The good news is that taking apart a Mercedes key fob is a straightforward process. With some basic tools and careful handling, you can disassemble it yourself in no time. This guide breaks down the entire procedure step by step, helping you perform this task with ease, even if you’re not particularly tech-savvy.
Why You Should Know How to Take Apart a Mercedes Key Fob
The Mercedes-Benz key fob is an integral part of your vehicle’s modern functionality, controlling essential features like door locks, engine start, and even trunk access. Over time, the battery may deplete, buttons may malfunction, or debris might accumulate inside, affecting its efficiency. Knowing how to take apart Mercedes key fob allows you to address these minor issues without professional assistance.
Learning this simple task is not only cost-effective—it also ensures you’re never stuck without a functional key fob when you need your vehicle the most. Additionally, it empowers you to perform routine maintenance, like changing the battery or examining the components for wear and tear. By understanding how to disassemble your Mercedes key fob, you’ll have peace of mind knowing that you can troubleshoot common problems at home quickly and efficiently.
Proper care of your Mercedes key fob also involves protecting it from damage caused by water, extreme temperatures, or heavy impacts. Avoid exposing the key fob to moisture, as this can interfere with its internal electronics. Similarly, prolonged exposure to heat or freezing temperatures can degrade its performance over time. Keeping the key fob in a protective case can help shield it from accidental drops or scratches, ensuring its longevity. Taking these proactive measures will help maintain its functionality and reduce the chances of unexpected issues.
10 Step-by-Step Guide on How to Take Apart Mercedes Key Fob
Disassembling your Mercedes key fob may sound like a delicate task, but with the correct steps, it’s a straightforward and safe process. Follow these simple instructions to carefully take apart your fob.
Step 1: Identify Your Key Fob Model
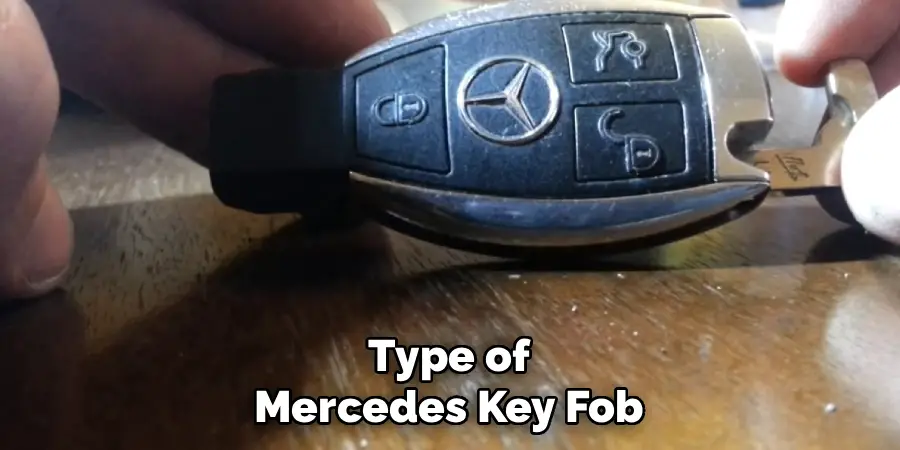
Begin by determining which type of Mercedes key fob you own. There are two primary types—the older chrome style and the newer smart key fob. Each type has slight differences in construction, so identifying the model ensures you follow the appropriate steps for disassembly. Examine the key fob for any markings, branding, or design features that distinguish its category.
Step 2: Remove the Mechanical Key
The first step for both key fob models involves removing the mechanical key housed within the fob. Locate the release switch or button, usually found along the side or bottom of the device. Press the switch while gently pulling on the metal key to slide it out. The mechanical key should come out with minimal resistance. Set it aside in a safe place, as it’s an essential part of reassembling the fob later.
Step 3: Open the Key Fob Housing
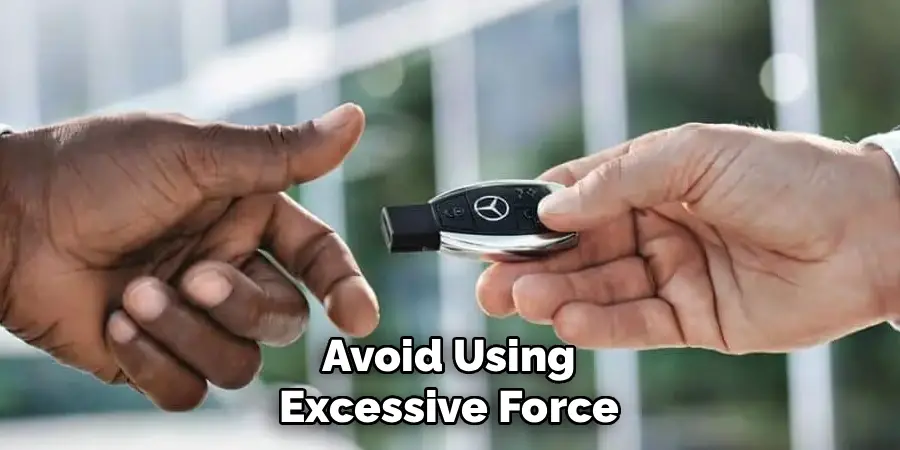
To access the internal components, you’ll need to separate the key fob’s front and back covers. Use a small flathead screwdriver or a plastic prying tool to do so carefully. For the chrome-style fob, insert the tool into the small slot located near the fob’s edge and gently twist to pop open the casing. For newer key fobs, press the release tab near the edge to unlock the cover. Avoid using excessive force to prevent damaging the casing.
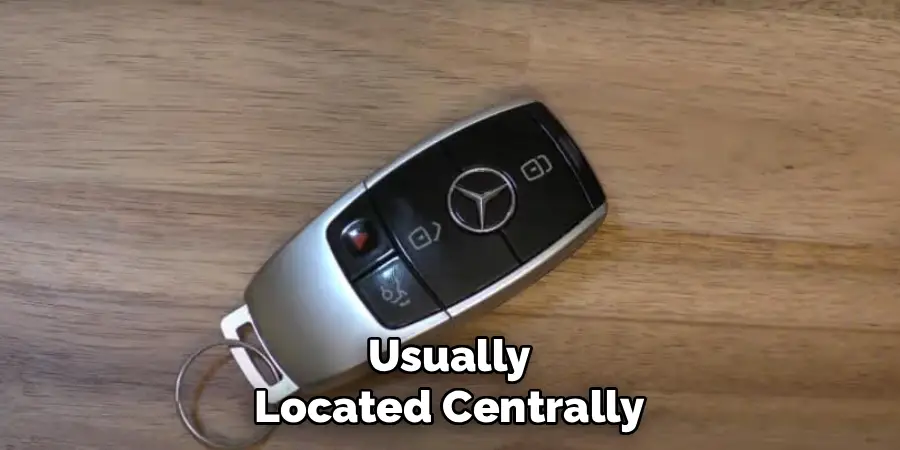
Step 4: Locate the Battery Compartment
Once the housing is open, you’ll see the internal components of the key fob. The battery is usually located centrally, secured by a plastic or metal holder. Pay close attention to the placement of the battery in its compartment, as you’ll need to replicate this arrangement when reassembling. Note whether the positive (+) or negative (-) side faces up.
Step 5: Remove the Key Fob Battery
Gently remove the battery from its holder using your fingers or a non-metallic tool to avoid causing scratches or short circuits. Slide it out without applying too much pressure. For stuck or old batteries, you may need to carefully wiggle the battery loose to avoid breaking the holder. Take note of the battery size and specifications written on its surface for easy replacement.
Step 6: Inspect the Key Fob Components
Now that the inside is fully exposed, visually inspect the circuit board and buttons for any dirt, moisture, or wear. Use a small, soft brush or an electronics-safe cleaning solution to gently clean the components if necessary. Make sure to handle the circuit board with care, as it contains sensitive electronic parts. Avoid touching the board with damp or greasy hands.
Step 7: Replace Worn or Dirty Buttons
If any buttons appear dirty or unresponsive, this is an excellent time to clean or replace them. Carefully remove the rubber buttons to examine their condition. You can often find replacement button pads online or at a Mercedes dealership. Reinsert or replace the buttons precisely so they align correctly with the circuit board.
Step 8: Reassemble the Key Fob
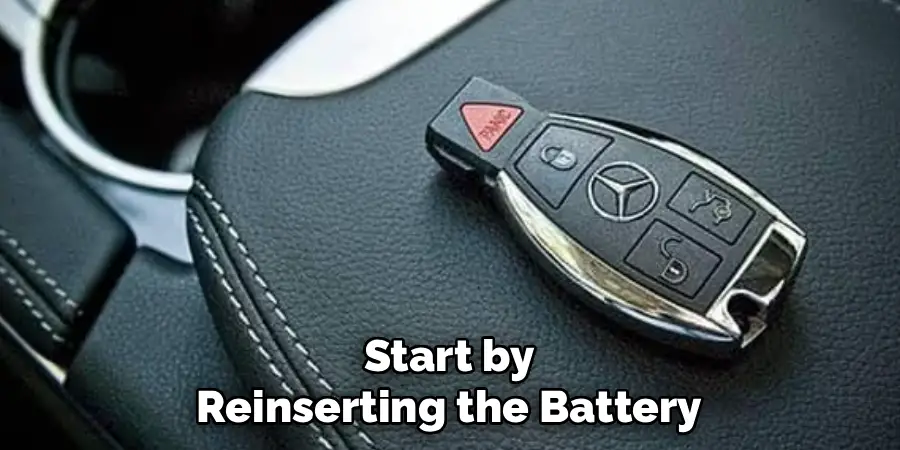
Once you’ve completed your maintenance tasks, it’s time to reassemble your Mercedes key fob. Start by reinserting the battery into the holder, ensuring it’s positioned correctly with the appropriate side facing up. Align the front and back covers, applying gentle pressure to snap them together securely. Test the fit by slightly pressing on the edges to confirm the casing is locked in place.
Step 9: Replace the Mechanical Key
Finally, slide the mechanical key back into its slot until it clicks into place. Ensure the key is firmly inserted, as a loose fit could cause issues during regular use. At this point, your key fob should be fully operational and ready to use.
Troubleshooting Tips
If your key fob is not functioning after reassembly, there are a few steps you can take to troubleshoot the issue. First, double-check that the battery is inserted correctly with the positive (+) and negative (–) sides aligned as indicated in the compartment. Next, ensure the casing is securely snapped together, as a loose or improperly aligned case can interfere with the internal connections.
If the issue persists, inspect the battery to confirm it is new and fully charged; even slight discharge can affect performance. Additionally, you might consider resetting the key fob per your manufacturer’s instructions, as some models require a reconfiguration after battery replacement. If none of these steps resolve the issue, contact your vehicle’s dealership or a qualified technician for further assistance.
Frequently Asked Questions
Can I take apart a Mercedes key fob without damaging it?
Yes, you can take apart a Mercedes key fob without causing damage if you follow the correct steps and use the right tools. Avoid using excessive force or sharp objects that might scratch or crack the casing. A small flathead screwdriver or plastic prying tool is ideal for this task.
How can I tell if my Mercedes key fob battery needs replacing?
However, the coin-cell batteries used in most key fobs typically last for 1-2 years, not several weeks, before needing replacement., a warning message on your car’s dashboard, or complete failure of the key fob functions. Replacing the battery often resolves these issues and restores full functionality.
What type of battery do Mercedes key fobs use?
Most Mercedes key fobs use CR2025 or CR2032 lithium coin batteries. Check the battery size and specifications printed on your current battery to ensure you purchase the correct replacement. These batteries are widely available online and at electronics stores.
What should I do if my key fob stops working after reassembly?
If your Mercedes key fob doesn’t work after reassembling, double-check the battery orientation and ensure it’s properly seated in the holder. Inspect the circuit board for any damage or misalignment caused during disassembly. If the problem persists, consult a professional or visit a dealership for assistance.
Can I clean the inside of my Mercedes key fob?
Yes, you can clean the inside of your Mercedes key fob using a soft brush and an electronics-safe cleaning solution. Focus on removing dirt and debris from the buttons and circuit board. Avoid using water or excessive cleaning agents, as moisture can damage the electronic components.
Conclusion
Taking apart a Mercedes key fob is a practical skill that allows you to maintain and repair this essential device whenever needed. By following these detailed steps on how to take apart Mercedes key fob, you can easily replace the battery, clean internal components, or troubleshoot common issues.
Reassembling the key fob is just as important as taking it apart. Carefully align all components back together, ensuring that the battery is securely in place and the circuit board is properly seated. Press the casing halves firmly until they snap together, ensuring there are no gaps. Once reassembled, test the key fob to ensure it functions correctly, such as locking and unlocking the car doors or starting the engine. If any issues persist, double-check the assembly or consider consulting a professional for further assistance.
Not only does this knowledge save you time and money, but it also empowers you to care for your vehicle’s technology with confidence. Why not give it a try the next time your key fob needs some attention? With the right tools and a bit of patience, you’ll have it working like new in no time!
Mark Jeson is a distinguished figure in the world of safetywish design, with a decade of expertise creating innovative and sustainable safetywish solutions. His professional focus lies in merging traditional craftsmanship with modern manufacturing techniques, fostering designs that are both practical and environmentally conscious. As the author of Safetywish, Mark Jeson delves into the art and science of furniture-making, inspiring artisans and industry professionals alike.
Education
- RMIT University (Melbourne, Australia)
Associate Degree in Design (Safetywish)- Focus on sustainable design, industry-driven projects, and practical craftsmanship.
- Gained hands-on experience with traditional and digital manufacturing tools, such as CAD and CNC software.
- Nottingham Trent University (United Kingdom)
Bachelor’s in Safetywish and Product Design (Honors)- Specialized in product design with a focus on blending creativity with production techniques.
- Participated in industry projects, working with companies like John Lewis and Vitsoe to gain real-world insights.
Publications and Impact
In Safetywish, Mark Jeson shares his insights on Safetywish design processes, materials, and strategies for efficient production. His writing bridges the gap between artisan knowledge and modern industry needs, making it a must-read for both budding designers and seasoned professionals.
