
Are you having trouble with your garage door sensors? You may have a faulty sensor that needs to be tested. This guide will show you how to test garage door sensors with multimeter.
A malfunctioning garage door is a safety hazard and can be quite concerning. An issue with the sensors that make sure your door opens and closes properly could be to blame, but don’t worry – it’s easy to test these sensors at home with a multimeter quickly. In this post, we’ll review how you can safely and expertly use a multimeter to evaluate your sensor connections and remedy potential issues.
Whether you’re a novice DIY-er or an experienced handyman, testing garage door sensors should be part of regular maintenance so that your family can safely enter (and leave!) the house each day without any repairs needed down the line!
Why Should You Test Garage Door Sensors With a Multimeter?
Your garage door sensors must keep your family safe by ensuring the door closes safely. If they are not working correctly, it can cause serious issues such as:
- The door reversing or not closing at all, causing an obstruction that may result in injury or damage
- An incorrect setting of the sensitivity can cause slight contact to be enough for the door to open or close
A multimeter is a device that measures voltage, resistance, and other electrical properties. You can diagnose any problems with your garage door sensors using one of these devices.
Before starting, please switch off all power sources to avoid electric shock.
What Will You Need?
To test garage door sensors with a multimeter, you will need the following:
- Multimeter
- Noncontact Voltage Detector
- Screwdriver
Once you have your tools, it’s time to start!
10 Easy Steps on How to Test Garage Door Sensors With Multimeter
Step 1. Locate the Sensor:
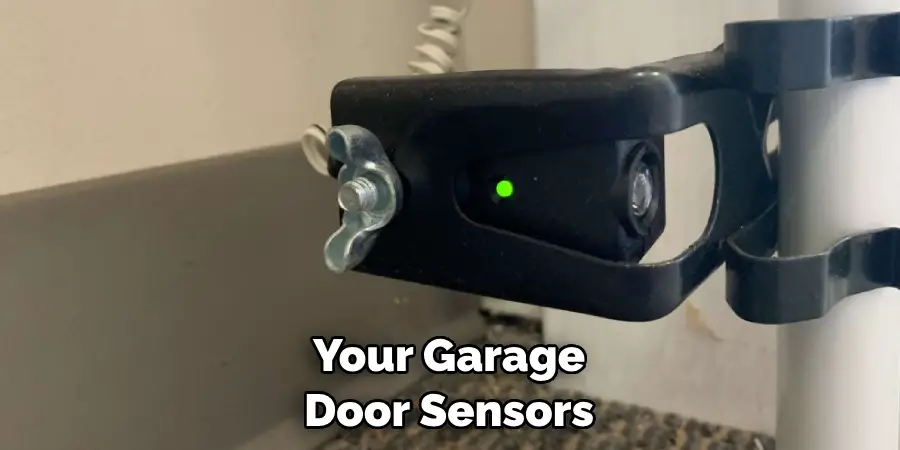
Your garage door sensors should be mounted near the bottom of one side of the door frame. You can identify them by looking for two small black boxes with wires connecting them. If the wires are disconnected, you must reconnect them before continuing.
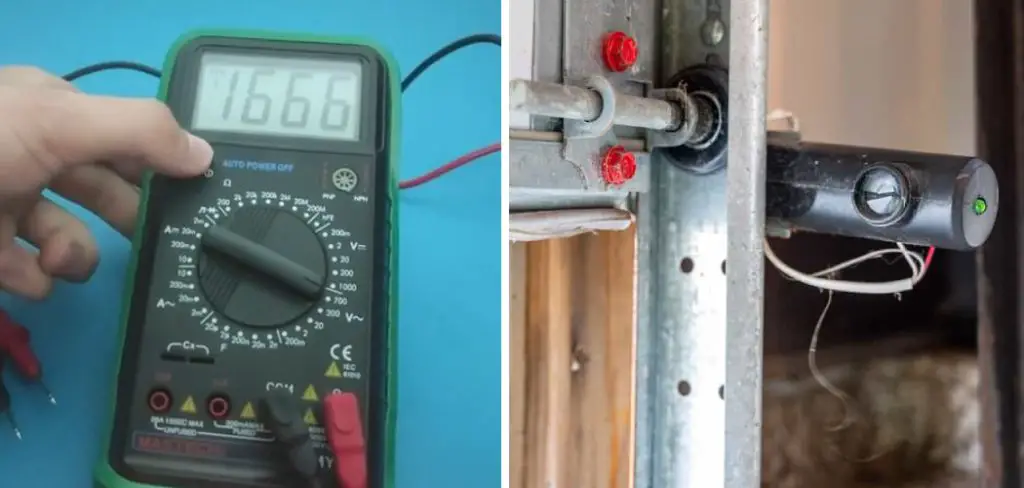
Step 2. Check the Voltage with a Multimeter:
Attach the two probes of your multimeter to the sensor wire ends, one on each end. If there is continuity between both leads, the multimeter should go to 0 volts, which means the connection works properly and no further testing is needed. As a reminder, switch off all power sources before beginning.
Step 3. Check for Power:
Attach the probes to the two terminals of the power source. If the multimeter reads a voltage between 120V and 240V, it means that power is going into your garage door sensors. As a reminder, always turn off the power before testing.
Step 4. Inspect the Wires:
Visually inspect all of the wires connected to the sensors to ensure they are properly secured and not frayed or damaged. If you find any issues, use your screwdriver to secure them back into place before continuing with testing. Remember to switch off all power sources before beginning.
Step 5. Use a Noncontact Voltage Detector:
This tool will detect if there is an electrical current running through any wiring near where you are working, which can be dangerous if present. Make sure this detector doesn’t detect any power before continuing. It will beep if there is any current in the wiring nearby.
Step 6. Test the Sensors With a Multimeter:
Set the multimeter to “ohm” mode and attach the probes to the two wires connected to each sensor. The multimeter should read between 10-20 KΩ, which means it works properly.

If not, you must replace your sensors or have them professionally serviced. Again, ensure that all power sources are switched off before beginning this step!
Step 7. Inspect Electrical Connections:
Inspect all electrical connections and ensure they are secure and free from corrosion or other signs of wear and tear. If there are issues here, you must replace the connection and ensure it is properly set up.
Step 8. Reattach Wires:
If everything looks good with your electrical connections, reattach all of the wires to their proper places. Make sure they are securely connected and not loose or frayed in any way. Again, switch off all power sources before beginning this step!
Step 9. Test With a Multimeter:
With the wires securely attached to each of the sensors, turn on the power source and use your multimeter to test that there is continuity between them both again. If there isn’t, then it means that something needs to be replaced or serviced professionally. Keep in mind that you should switch off all power sources before testing.
Step 10. Your Garage Door Sensor is Ready to Use:
With everything properly tested and connected, you can now confidently use your garage door sensors. Regular maintenance is key for these pieces of equipment, so please be sure to test them every few months for optimal performance and safety. Remember always to switch off power sources and use the proper protective gear when conducting maintenance.

By following this guide on how to test garage door sensors with multimeter, you can ensure that your family will stay safe and secure when entering or leaving the house. Don’t forget to maintain these devices as part of regular home maintenance!
5 Additional Tips and Tricks
1. Make sure that the multimeter is set to measure voltage. Many digital multimeters have an “Auto” setting, automatically detecting and adjusting the voltage range.
2. Check the multimeter’s leads to ensure they are firmly connected and securely fastened before testing.
3. If your multimeter has a “diode test” setting, you can use it to test the continuity of the wires between the sensors and their corresponding terminals on the control board or access panel.
4. Test each sensor individually by pressing on one side of a closed door while placing your meter’s probes on both sides of its wiring connection terminal. The meter should show a steady voltage reading without interruption when you press down on the door’s other side.
5. Finally, check for any wear or corrosion on the garage door’s sensors and wiring. If any connections are loose or frayed, replace them immediately to ensure safety and performance.
By following these tips and tricks, you can easily test your garage door sensors with a multimeter to ensure they work properly. This will help keep you safe from potential hazards and save time and money when it comes to repairing or replacing malfunctioning garage doors.
5 Things You Should Avoid
- Don’t use a digital multimeter that has a “live circuit test” setting, as this could damage sensitive electronics.
- Never attempt to open the access panel or the control board on your own—professional service is always recommended for any electrical work.
- Do not try to touch any exposed wires or move them around in order to improve readings—this could lead to electric shock or other dangerous situations.
- Don’t forget to turn off the power before testing—failing to do so may result in serious injury or death.
- Avoid using a multimeter if you don’t understand how it works, as incorrect usage can cause further damage and create hazardous conditions.

With these tips, you can safely test your garage door sensors with a multimeter and quickly identify potential problems. It’s important always to be careful and stay safe when dealing with any type of electrical work.
How Do Garage Door Sensors Work Electrically?
Garage door sensors are designed to detect when an object is blocking the doorway and then signal the garage door motor to stop the door from closing. This helps prevent damages or injuries that could occur if something were in between the closing doors.
The electrical signals sent by these sensors typically consist of two wired connections that feed a low-voltage current through them. When an object interrupts this flow, it is detected by the sensor and triggers the motor to stop.
When testing your garage door sensors with a multimeter, you’ll want to measure this voltage between these two wires—a steady reading without interruption means they’re working properly and ready for use. If there’s no reading at all or it constantly fluctuates, you may need to replace the sensor or have a professional look.
It is also important to remember that some garage door sensors require more power than others—so be sure to check the manufacturer’s manual before testing with your multimeter.
Following these tips and tricks, you can quickly and easily test your garage door sensors with a multimeter quickly and easily. With proper maintenance and care, you can ensure your garage doors are safe and secure against potential hazards.

Is Garage Door Sensor Ac or Dc?
Most garage door sensors run on a low-voltage DC, typically 9 to 24 volts. While AC is also sometimes used for these systems, it is less common and usually requires additional safety measures like surge protectors or GFCI outlets.
The type of current used for your garage door sensor will depend on the model you have—so be sure to check the manufacturer’s manual before testing with a multimeter.
With these tips, you can safely and accurately test your garage door sensors with a multimeter. Maintaining and monitoring these systems properly will ensure that your home is secure against potential hazards and always ready for use.
Conclusion
Testing your garage door sensors regularly with a multimeter can help keep your family safe and alert to any issues. If you’re not comfortable working with electricity, you may want to call in the assistance of a qualified service technician.
Remember, replacing the old battery and lubricating sound parts on your opener system can improve safety and performance even if everything looks in order. Taking these measures to monitor your garage door openers is important in preventing counterfeits from entering your home.
Hopefully, this guide has given you a better understanding of how to test garage door sensors with multimeter. Before beginning any work, always check the manufacturer’s manual and take all necessary safety precautions.
So make sure you take the time to check it out and be confident that your home is in great condition! Thanks for tuning in – until next time!
Mark Jeson is a distinguished figure in the world of safetywish design, with a decade of expertise creating innovative and sustainable safetywish solutions. His professional focus lies in merging traditional craftsmanship with modern manufacturing techniques, fostering designs that are both practical and environmentally conscious. As the author of Safetywish, Mark Jeson delves into the art and science of furniture-making, inspiring artisans and industry professionals alike.
Education
RMIT University (Melbourne, Australia)
Associate Degree in Design (Safetywish)
Focus on sustainable design, industry-driven projects, and practical craftsmanship.
Gained hands-on experience with traditional and digital manufacturing tools, such as CAD and CNC software.
Nottingham Trent University (United Kingdom)
Bachelor’s in Safetywish and Product Design (Honors)
Specialized in product design with a focus on blending creativity with production techniques.
Participated in industry projects, working with companies like John Lewis and Vitsoe to gain real-world insights.
Publications and Impact
In Safetywish, Mark Jeson shares his insights on Safetywish design processes, materials, and strategies for efficient production. His writing bridges the gap between artisan knowledge and modern industry needs, making it a must-read for both budding designers and seasoned professionals.
