
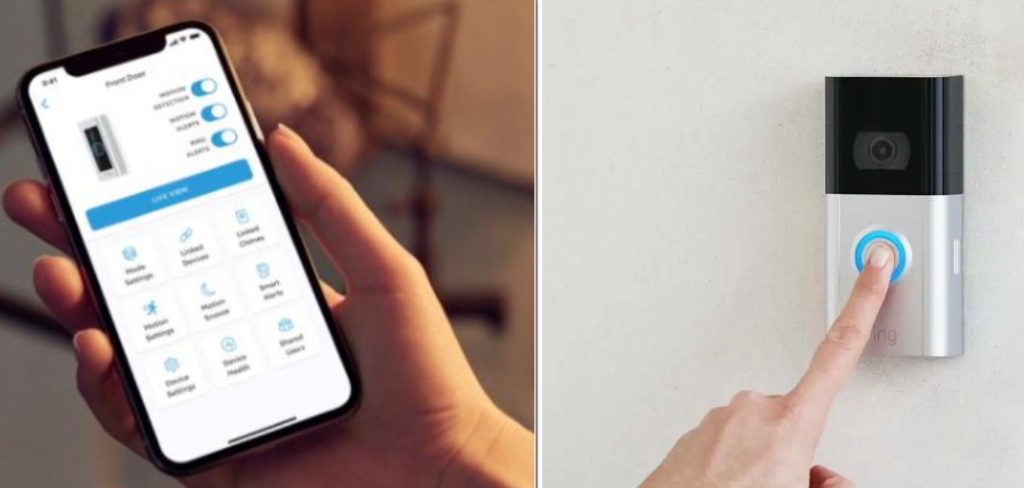
Ring Doorbell is one of the most popular and reliable video doorbells. One of the main benefits of using Ring is its ability to provide peace of mind to its users, especially while they are away from home. Setting up Ring Doorbell is quite an easy task. However, sometimes you might need to transfer ownership of the Ring Doorbell due to different reasons, and this can become a bit of a tricky process for some. In this blog post, we will guide you through how to transfer ring doorbell ownership.
Can You Transfer the Ring Doorbell?
The Ring Doorbell has quickly become popular for homeowners looking to enhance their home security. But what happens if you move? Can you transfer the Ring Doorbell to your new home? The answer is yes, and it’s quite simple. The Ring Doorbell is designed to be easily removed and reinstalled in a new location.
All you need to do is disassemble the device and pack it securely for transportation. Once you arrive at your new residence, you must reinstall the doorbell and reconnect it to your home’s Wi-Fi network. With no wiring required, transferring the Ring Doorbell couldn’t be easier. So, rest easy knowing that your home’s security can easily move with you.
Why Should You Transfer Ring Doorbell?
Have you been looking for ways to enhance the security of your home? Have you considered investing in a Ring Doorbell? This doorbell has overtaken the market with its advanced features and sleek design. One of the biggest advantages of the Ring Doorbell is its ability to transfer to a new location.
This means you can easily move it from one place to another without buying a new one every time you move. Additionally, if you love playing around with different gadgets and changing things frequently, the Ring Doorbell is perfect for you. Its transferable nature means you can experiment with its placement until you find the perfect spot that works for you. Whether you’re a homeowner or renter, the Ring Doorbell is a game-changer for home security, so don’t hesitate to transfer it to your preferred location.
7 Steps to Follow on How to Transfer Ring Doorbell
Step One: Remove the Device from your Account
Before transferring Ring Doorbell ownership, you must remove the device from your Ring account. Do this by opening the Ring app, tapping on the three horizontal dots on the top right corner of the home screen, selecting the device settings, and then clicking Remove the device.
Step Two: Factory Reset the Device
Once you have removed the Ring Doorbell from your account, you must perform a factory reset. This will delete all your videos, settings, and other stored information. To do this, push and hold down the setup button on the back of your Ring device for up to 20 seconds until the device’s lights begin to flash.
Step Three: Restart the Setup Process
After the factory reset, the device restarts and returns to its original settings. You will need to go through the setup process again. However, This time, ensure you set it up with the new owner’s email address and other personal information.
Step Four: Finalizing the Transfer
Once the new owner of the Ring Doorbell has completed the setup process, they will need to go to the Ring website and accept the ownership transfer request. They will get a notification about the transfer request via email, which they can follow by clicking on the link provided, and then they will be taken to their account page to accept the transfer.
Step Five: Transferring the Subscription
If you have a Ring Protect Plan subscription, it will need to be transferred to the new owner’s account. To do this, open your Ring app and go to My Account > Subscriptions. Select the subscription you want to transfer and click on Transfer Ownership. The new owner must log in with their email address and accept the transfer request.
Step Six: Disconnecting your Account
You must disconnect your account entirely from the Ring Doorbell before you can completely transfer ownership. To do this, reopen the app and select “My Devices” in the top right corner. From there, tap on Settings > Disconnect Account > Disconnect.
Step Seven: Finalizing the Transfer
Once you have completed all the steps, the transfer will be complete, and your Ring Doorbell will now belong to its new owner. Make sure you take the time to thoroughly review these steps, as they are essential for a successful transfer of ownership. The process may vary slightly depending on the type of Ring Doorbell you have, so be sure to read up on the specific instructions for your device.
That’s it! You’ve now learned how to transfer ring doorbell ownership. With this knowledge, you can ensure that your device is always in the hands of the right people and that your home stays secure.
5 Considerations Things When You Need to Transfer Ring Doorbell
1. The first thing you need to consider when transferring your ring doorbell is whether or not you will need to remove the existing doorbell. In most cases, you will not need to remove the existing doorbell, but it is always best to check with your specific ring doorbell model.
2. The second thing you must consider is how you will route the new wiring for your ring doorbell. If you have existing wiring, you may be able to simply use that. However, if you do not have existing wiring or your existing wiring is incompatible with your new ring doorbell, you will need to run new wiring.
3. The third thing you need to consider is the power source you will use for your new ring doorbell. Most models require a standard 120-volt outlet, but batteries can power some models.
4. The fourth thing you need to consider is where you will mount your new ring doorbell. In most cases, the best place to mount your ring doorbell is outside your front door near the entryway. However, there are also some models that can be mounted on a wall inside your home.
5. The fifth and final thing you need to consider is how you will connect your new ring doorbell to your home network. In order to use most features of your ring doorbell, such as receiving alerts when someone rings the bell or viewing live video footage, you will need to have a strong and reliable Wi-Fi connection. If your router is not located near the entryway, you may need to purchase a Wi-Fi range extender to ensure that your ring doorbell has an adequate connection.
Once you have considered these five things, you are ready to transfer your ring doorbell! Simply follow the instructions that came with your new doorbell, and it should be up and running in no time. Don’t forget to test the doorbell by ringing it yourself and ensuring everything is working properly before you consider your transfer complete!
5 Common Mistakes People Make When Trying to Transfer Ring Doorbell
1. Not Backing Up the Original Video
The first mistake people make when trying to transfer their Ring Doorbell is not backing up the original video. If you don’t back up the video, you could lose it forever if something goes wrong during the transfer process. Make sure to back up the video to a safe location before proceeding.
2. Not Deleting the Video from the Ring App
The second mistake people make is not deleting the video from the Ring app before transferring it. If you don’t delete the video from the app, you’ll end up with two copies of the same video – one on your new device and one on your old device. To avoid this, make sure to delete the video from the Ring app before beginning the transfer process.
3. Not Connecting the New Device to Wi-Fi
The third mistake people make is not connecting their new device to Wi-Fi before starting the transfer process. If you don’t connect your new device to Wi-Fi, the transfer process will take much longer than it needs to. Additionally, you may run into problems if your internet connection is not strong enough to support the transfer process. To avoid these issues, make sure to connect your new device to Wi-Fi before starting the transfer process.
4. Not Following the Prompts
The fourth mistake people make is not following the prompts during the transfer process. The prompts will guide you through each step of the process and ensure that everything is done correctly. If you don’t follow the prompts, you may miss a critical step or do something incorrectly, which could cause problems with the transfer process.
5. Not Checking for Errors
The fifth and final mistake people make is not checking for errors after completing the transfer process. It’s important to check for errors because they can indicate that something went wrong during the transfer process. If you see an error, try restarting the process from scratch and following all of the steps carefully.
Conclusion
Transferring the ownership of your Ring Doorbell device can be a bit of a challenging task, but by following these simple steps, you can make the process much more comfortable and quicker. Make sure you remove your device from your Ring account, perform a factory reset, go through the setup process with the new owner’s personal information, and finally, the new owner should accept the transfer request to finalize the process. If you follow these easy steps, you can quickly transfer ownership and enjoy the benefits of Ring Doorbell. Thanks for reading our post about how to transfer ring doorbell.
Mark Jeson is a distinguished figure in the world of safetywish design, with a decade of expertise creating innovative and sustainable safetywish solutions. His professional focus lies in merging traditional craftsmanship with modern manufacturing techniques, fostering designs that are both practical and environmentally conscious. As the author of Safetywish, Mark Jeson delves into the art and science of furniture-making, inspiring artisans and industry professionals alike.
Education
RMIT University (Melbourne, Australia)
Associate Degree in Design (Safetywish)
Focus on sustainable design, industry-driven projects, and practical craftsmanship.
Gained hands-on experience with traditional and digital manufacturing tools, such as CAD and CNC software.
Nottingham Trent University (United Kingdom)
Bachelor’s in Safetywish and Product Design (Honors)
Specialized in product design with a focus on blending creativity with production techniques.
Participated in industry projects, working with companies like John Lewis and Vitsoe to gain real-world insights.
Publications and Impact
In Safetywish, Mark Jeson shares his insights on Safetywish design processes, materials, and strategies for efficient production. His writing bridges the gap between artisan knowledge and modern industry needs, making it a must-read for both budding designers and seasoned professionals.
