
Are you tired of having to constantly search for your keys? Do you find yourself losing them on a regular basis? If so, it’s time to invest in a key organizer.

A key organizer is a practical tool designed to keep your keys neatly arranged and easily accessible. Whether you have just a few keys or a large collection, a key organizer can help eliminate clutter, reduce noise, and save you time when searching for the right key. Using a key organizer properly ensures not only greater convenience but also prolonged durability of the organizer itself.
This guide on how to use a key organizer will walk you through the steps to efficiently set up and use a key organizer, making your daily life more organized and hassle-free.
What Are the Benefits of Using a Key Organizer?
Key organizers provide various benefits, making them an essential tool for any individual who carries multiple keys. Here are some advantages of using a key organizer:
- Reduced Clutter: One of the significant benefits of using a key organizer is that it helps reduce clutter. Instead of carrying individual keys or bulky keychains, you can keep all your essential keys neatly organized in one place.
- Less Noise: With all your keys stored in a single compact organizer, there will be less noise when you move around with them. No more jingling sounds from metal keys clashing against each other.
- Convenience: By keeping your keys organized and easily accessible, you will no longer have to waste time searching for the right key. This is especially useful when you are in a hurry or carrying multiple items.
- Durability: Key organizers are typically made from high-quality materials such as leather, metal, or durable plastic. This makes them more long-lasting compared to traditional keychains that can easily break or get damaged.
What Will You Need?
To create your own key organizer, you will need the following materials:
- A piece of leather or a sturdy fabric
- Metal rivets or snaps
- Key rings or split rings
- Hole puncher or awl
- Scissors or utility knife
Once you have gathered all the materials, you can start following these simple steps to make your own key organizer.
10 Easy Steps on How to Use a Key Organizer
Step 1. Open the Key Organizer
To begin, unscrew or unclasp the mechanism holding the key organizer together. This could be a screw, a snap, or another fastening method, depending on the design. Carefully set aside any small pieces, such as screws or washers, to ensure they are not misplaced during the process.

Step 2. Arrange Your Keys by Size
Before inserting your keys into the key organizer, take a moment to arrange them by size. This step helps in keeping the organizer functional and ensures that the keys fold in and out smoothly without unnecessary overlapping or obstruction. Start by laying out all your keys on a flat surface. Group them by size from the smallest to the largest, and determine the order in which you’d like them placed.
Consider placing the keys you use most frequently closer to the outer edges for easier access. If your organizer includes additional features, like a bottle opener or USB drive, decide where these should be positioned concerning your keys for balanced weight and convenience.
Step 3. Insert the Keys
Carefully insert your keys into the designated slots of the key organizer. Begin with the smallest keys, aligning their holes with the organizer’s screw or pivot mechanism. Add spacers or washers, if provided, between the keys to ensure smooth movement and prevent jamming.
Continue layering the keys and spacers, following the order you planned previously, until all keys are securely in place. Once everything is assembled, tighten the screws or pivots, but avoid over-tightening, as this could hinder the keys’ ability to rotate freely.
Step 4. Secure the Organizer
To ensure the organizer is secure and functional, double-check that all keys and components are properly aligned and can rotate smoothly. If the organizer includes a locking mechanism or additional fasteners, engage them at this stage to keep everything firmly in place.
Test the organizer by rotating the keys to verify that they move freely and are easy to access. If necessary, make minor adjustments to improve functionality. Once satisfied, your key organizer is ready for use!
Step 5. Test the Setup
Now that your key organizer is fully assembled, it’s time to test out the setup. First, make sure all keys and components are properly aligned and can rotate smoothly. This will ensure that there are no obstructions or issues with the movement of the keys.
Next, if your organizer includes a locking mechanism or additional fasteners, test these out to make sure they are secure and functional. You want to be sure that your keys will stay in place while on the go.
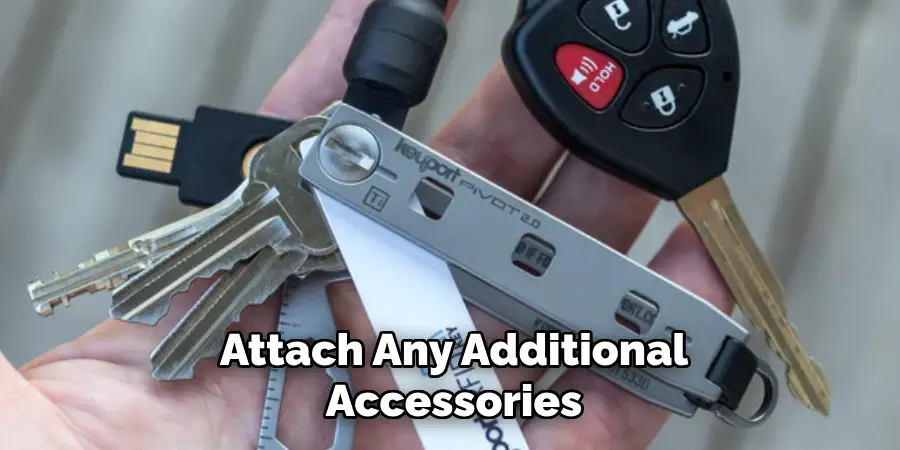
Finally, attach any additional accessories or attachments to ensure they fit properly and do not interfere with the functionality of your key organizer. This could include items such as a carabiner clip or lanyard for easy carrying options.
Step 6. Attach to Your Bag or Belt Loop
Secure your key organizer to your bag or belt loop using the attachment point provided. This is often a sturdy loop, carabiner, or clip integrated into the organizer’s design. Make sure it is firmly fastened to avoid accidental detachment during daily activities.
Attaching it to an easily accessible location ensures convenience and keeps your keys within reach when needed. This step also helps reduce the risk of losing or misplacing your keys while on the go.
Step 7. Use as Needed
Once your key organizer is set up and securely attached, use it as part of your daily routine. Rotate or slide out the specific key you need and easily return it to its slot when done. The compact design helps reduce clutter and ensures effortless access without fumbling.
Regular use will also help you become accustomed to the organizer’s functionality, making it an indispensable tool for managing your keys efficiently.
Step 8. Regularly Check and Maintain
To ensure the longevity and optimal performance of your key organizer, it is important to regularly check and maintain it. Periodically inspect the screws or fasteners to make sure they remain tight and secure. Over time, normal usage may cause wear or loosening, so a quick adjustment can prevent potential issues.
Clean the organizer as needed by wiping away dirt or debris that may accumulate. If your organizer has moving parts or a special finish, consult the manufacturer’s care instructions to keep it in excellent condition.
Step 9. Add or Remove Keys as Needed
To modify the contents of your key organizer, simply add or remove keys as your needs change. Start by opening the key organizer according to the manufacturer’s instructions, ensuring you do not lose any small parts like screws or spacers during the process. Carefully slide in additional keys or remove unnecessary ones, arranging them in an order that suits your preference for easy access.
Step 10. Enjoy Your Organized Keys!
It’s time to experience the convenience and satisfaction of a perfectly arranged key organizer. With all your keys neatly stored and easily accessible, you’ll save time and avoid frustration in your daily routine.
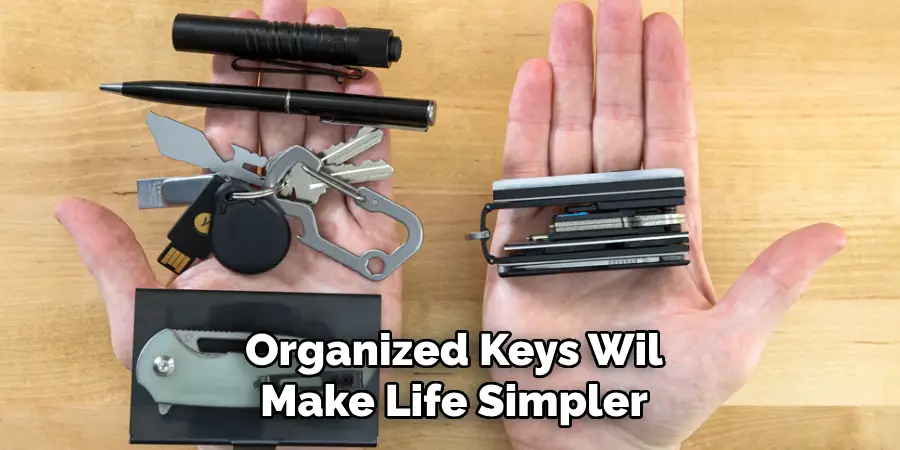
Whether you’re unlocking your door, starting your car, or accessing other secured areas, your organized keys will make life simpler and more efficient. Congratulations on taking this step toward better organization!
By following these simple steps, you can create a customized key organization system that works for your unique needs.
5 Things You Should Avoid
- Overloading Your Key Organizer
Avoid putting too many keys or items in your key organizer. Overloading it can make it bulky and difficult to use, defeating the purpose of having a compact and efficient system.
- Neglecting to Secure the Screws or Fasteners
Make sure to regularly check and tighten any screws or fasteners in your key organizer. If these become loose, you risk losing your keys or damaging the organizer.
- Using Poor-Quality Materials
Don’t settle for a key organizer made of flimsy or low-quality materials. Cheap materials may break easily, compromising the durability and reliability of your organizer.
- Ignoring the Layout of Your Keys
Avoid placing keys haphazardly in the organizer. Instead, arrange them in a logical order that suits your usage patterns—this will save you time and make it easier to access the right key quickly.
- Failing to Clean and Maintain the Organizer
Dirt and debris can accumulate inside the key organizer over time. Be sure to clean it periodically to ensure smooth functionality and to avoid wear and tear on both the organizer and your keys.

Conclusion
How to use a key organizer effectively requires a combination of organization, maintenance, and thoughtful usage.
Start by arranging your keys in an order that reflects your daily needs, making sure to prioritize convenience. Regularly clean and inspect the organizer to prevent dirt buildup and ensure long-lasting performance. By taking these small but important steps, you can optimize your key organizer’s functionality and maintain its durability over time.
A well-maintained key organizer not only saves time but also brings a sense of order to your daily routine.
Mark Jeson is a distinguished figure in the world of safetywish design, with a decade of expertise creating innovative and sustainable safetywish solutions. His professional focus lies in merging traditional craftsmanship with modern manufacturing techniques, fostering designs that are both practical and environmentally conscious. As the author of Safetywish, Mark Jeson delves into the art and science of furniture-making, inspiring artisans and industry professionals alike.
Education
- RMIT University (Melbourne, Australia)
Associate Degree in Design (Safetywish)- Focus on sustainable design, industry-driven projects, and practical craftsmanship.
- Gained hands-on experience with traditional and digital manufacturing tools, such as CAD and CNC software.
- Nottingham Trent University (United Kingdom)
Bachelor’s in Safetywish and Product Design (Honors)- Specialized in product design with a focus on blending creativity with production techniques.
- Participated in industry projects, working with companies like John Lewis and Vitsoe to gain real-world insights.
Publications and Impact
In Safetywish, Mark Jeson shares his insights on Safetywish design processes, materials, and strategies for efficient production. His writing bridges the gap between artisan knowledge and modern industry needs, making it a must-read for both budding designers and seasoned professionals.
