
Knowing how to use stud sensor Zircon can make all your DIY or home improvement projects more accurate and stress-free. A stud sensor like the Zircon is a handy tool that helps you locate the structural supports hidden behind your walls. These supports, or studs, are essential for securely mounting heavy items like shelves, TVs, or picture frames. With Zircon sensors standing out as user-friendly and precise devices, they make stud detection simple, even for beginners.
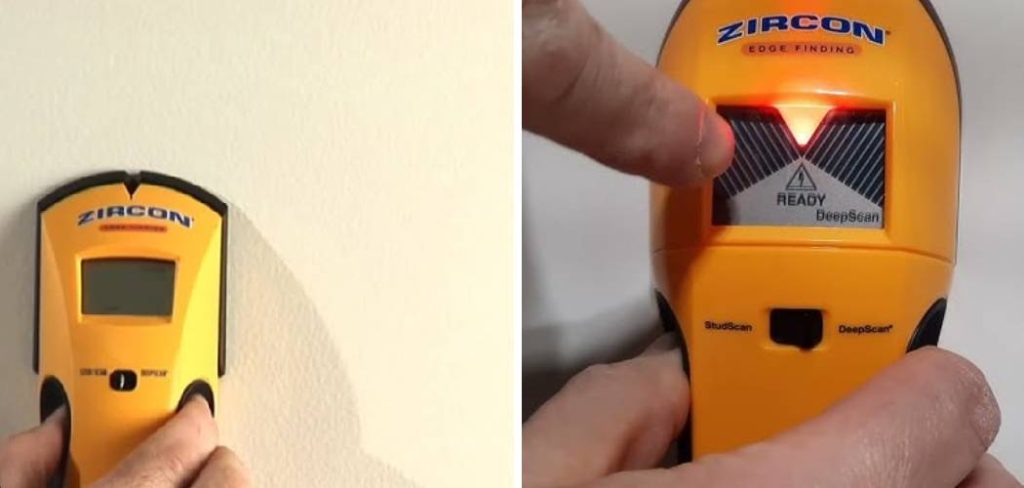
To use a Zircon stud sensor, start by placing it flat against the wall and powering it on. Calibrate the device by holding it in place until the calibration process completes—this usually takes just a few seconds. Slowly slide the sensor across the wall, keeping it steady and maintaining contact. As the sensor detects the edge of a stud, it will emit a signal, such as a light or a sound. Mark the location with a pencil to outline the stud’s position. For greater accuracy, consider running the sensor over the area multiple times from different directions.
Without a stud sensor, mounting projects may result in shaky installations, unintended damage, or even accidents. The Zircon sensor eliminates the guesswork, allowing you to detect studs, electrical wiring, and other hidden obstacles in drywall or plaster. Whether you’re getting started on a new renovation or just putting up some family photos, this guide will walk you through how to use your stud sensor Zircon effectively to achieve flawless results.
Why Stud Sensor Zircon is an Essential Tool
Stud sensors like those from Zircon are important because they simplify the process of finding hidden studs, which is something everyone from homeowners to professionals encounters. Without a reliable stud sensor, locating supports can involve trial-and-error methods like knocking or drilling pilot holes, which often lead to inaccuracies or wall damage.
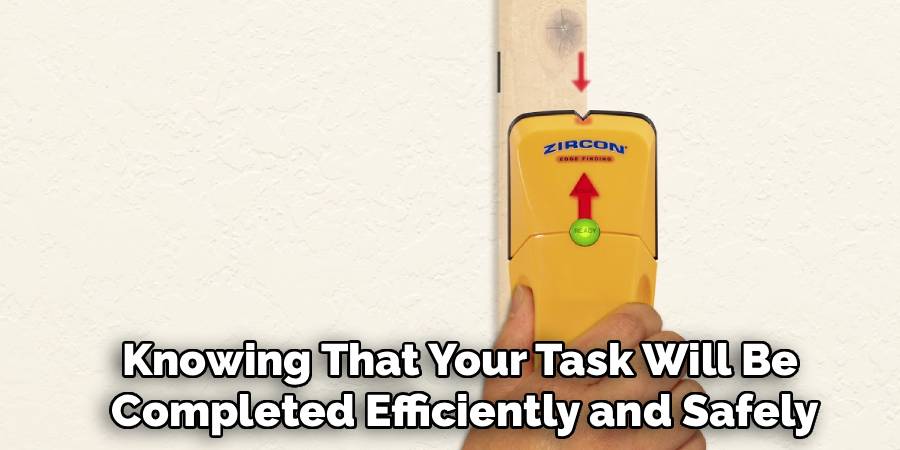
Zircon stud sensors not only pinpoint studs but can also detect electrical wiring, metal pipes, and other hidden elements. This functionality ensures safer installations, as it helps you avoid drilling into live wires or damaging plumbing. Having such a precise tool enables you to work confidently, knowing that your task will be completed efficiently and safely.
Another reason the Zircon sensor stands out is its accessibility. Many sensors are designed with features like easy-to-read displays and calibration systems, making wall scanning straightforward even for first-timers. These features eliminate frustration and allow beginners to feel like experts in no time.
9 Step-by-Step Guide: How to Use Stud Sensor Zircon
Step 1: Prepare the Wall
Begin by preparing the surface you plan to scan. Walls often accumulate dust, dirt, and even grease, which can interfere with the sensor’s ability to detect studs accurately. Use a clean cloth to wipe down the surface, ensuring it’s free of obstructions. If the wall has wallpaper, make sure no loose edges or bubbles disrupt the sensor from lying flat against the surface.
While preparing the wall, take a closer look for visual indicators of where studs might be located. Electrical outlets and switches are often mounted on studs, which can give you clues about where to begin scanning. Creating a clean and even working surface enhances the accuracy of your Zircon sensor and sets up a successful detection process.
Step 2: Calibrate the Sensor
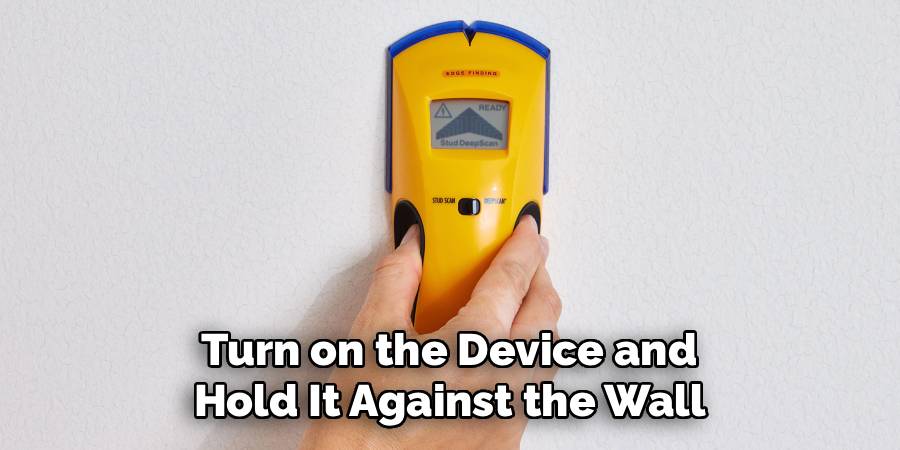
Calibrating your stud sensor is a crucial step to ensure accurate readings. Turn on the device and hold it against the wall, ensuring it lies flat. Most Zircon models feature a calibration button; press and hold this button as the device adjusts to the density and composition of the wall. Wait for any lights or audible signals to indicate that calibration is complete.
If you’re working with textured or thicker walls, such as plaster or wood paneling, the calibration process may take slightly longer. Be patient and do not move the sensor during this process, as movement can disrupt the calibration. Proper calibration allows the sensor to distinguish studs and reduces false readings, saving time and effort.
Step 3: Begin Scanning
Start scanning the wall by slowly moving the Zircon sensor horizontally across the surface. Begin at one side of the wall, gliding the sensor smoothly toward the other side without stopping or pulling away. The sensor will detect changes in density beneath the drywall, which typically signifies the presence of a stud.
Some Zircon models come with visual or audible indicators, such as LED lights or beeps, to signal when studs are located. Pay attention to these alerts and pause briefly to refine the sensor’s position. Moving at a consistent speed improves the accuracy of the readings, helping you pinpoint the edges and center of the stud efficiently.
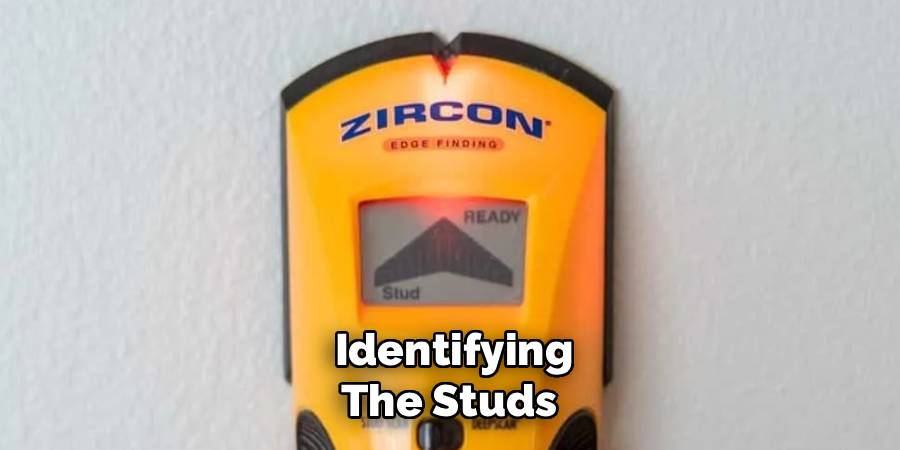
Step 4: Mark the Studs
Once the sensor identifies a stud, carefully mark its location using a pencil or painter’s tape. Begin by identifying the edges of the stud first, as this allows you to measure its width. Most studs are approximately 1.5 inches wide, and marking both edges helps you identify the stud’s precise center for mounting.
Repeat the scanning and marking process across the wall until you locate all the studs in the area. These markings serve as a guide for spacing items like shelves evenly and securely. By following this step, you set yourself up for safe and professional-level installations.
Step 5: Check for Electrical Wiring
Many Zircon models are equipped to detect electrical wiring behind the walls in addition to studs. After identifying the studs, activate the wire-detection mode on your sensor and glide it over the scanning area. Like stud detection, the sensor will produce visual or audible signals if wiring is present.
Not all wires are positioned vertically, so scan both horizontally and diagonally near stud locations to ensure thorough detection. Avoid drilling or hammering in areas where wires are found to prevent accidents. This step is critical for creating a safe environment, free from electrical hazards.
Step 6: Confirm Measurements and Spacing
Before proceeding further, confirm your stud and wiring measurements to avoid mistakes. Hold the Zircon sensor over specific marked points again to verify their accuracy. Double-check distances between studs, as most are spaced 16 or 24 inches apart.
If discrepancies arise during confirmation, repeat the scanning steps to verify the sensor’s functionality. Taking time to confirm your markings ensures error-free installations and gives you confidence in the placement of heavy items. This extra step contributes to professional-quality results every time.
Step 7: Use the Stud Center Detection Feature
Most advanced Zircon models include a stud center detection mode, which identifies the middle of the stud rather than just the edges. Switch to this mode to refine your results after marking the initial edges. Move the sensor over previously marked areas to verify the center’s placement, marking it again if necessary.
Centering allows you to drill or anchor screws directly into the stud’s strongest area, providing maximum support. This feature makes it easier to mount heavy items securely on the first attempt, without worrying about alignment issues or uneven weight distribution.
Step 8: Scan a Larger Area If Needed
If you’re working on a larger project, repeat the above scanning process multiple times to cover the entire wall. Mark all studs within the specific area to ensure adequate mounting options, especially for items wider than the typical stud spacing.

For walls that connect at angles or contain irregularities, adjusting scanning techniques to fit the unique dimensions may be necessary. Following this step carefully ensures consistent results, regardless of the complexity or size of the project.
Maintenance Tips
Proper maintenance ensures your tools and equipment remain functional and accurate over time. Regularly clean your stud finder with a soft cloth to remove any dust or debris that may interfere with its sensors. Check the batteries frequently and replace them as needed to prevent power disruptions during critical tasks. For digital or electronic models, store the device in a dry, cool place to protect it from moisture or extreme temperatures. Periodically test the accuracy of your stud finder on a known stud location to verify its performance. By following these maintenance practices, you can extend the longevity and reliability of your tools, ensuring successful results with every use.
Additional Tips for Using a Stud Finder
Here are some additional tips to keep in mind when using a stud finder:
- Always calibrate your stud finder before use. This ensures accurate readings and prevents false positives.
- If possible, use the stud finder on bare walls without any wallpaper or paneling. These can interfere with the sensor’s signals and lead to incorrect readings.
- When marking a stud, make sure to leave enough space around it for nails or screws. You don’t want to accidentally hit the edge of the stud while trying to secure something onto it.
- Pay attention to any warnings or alerts from your stud finder. Some models have indicator lights or sounds that alert you when you’re close to an electrical wire or pipe. Always proceed with caution and double check before drilling or nailing into a marked area.
- If using a magnetic stud finder, be aware that it may not work on walls made of metal studs. In this case, opt for an electronic stud finder instead.
- Experiment with different scanning depths if your stud finder allows it. Depending on the thickness of your wall and the type of studs used, you may need to adjust the depth settings for accurate readings.
Frequently Asked Question
What is the main purpose of a stud sensor like Zircon?
A Zircon stud sensor is designed to locate wall studs, which are necessary for securely mounting items in drywall. Many models can also detect electrical wiring or pipes, providing an additional safety measure.
Do I need to calibrate a Zircon stud sensor before each use?
Yes, calibrating the sensor every time you switch walls or surfaces ensures accurate readings. Calibration adjusts the sensor to the varying densities of walls and minimizes false detections.
How do I avoid false readings when using the sensor?
Hold the sensor flat against the wall, move it at a steady pace, and calibrate properly before scanning. Avoid using it on overly textured or damp walls, as these conditions can interfere with detection.
Can a Zircon sensor detect both vertical and horizontal studs?
Yes, although most wall studs are vertical, Zircon sensors can also detect horizontal supports in certain wall designs or in ceilings where applicable.
Is it safe to drill into walls after scanning with a Zircon sensor?
Yes, provided you’ve confirmed the locations of studs and avoided areas with electrical wiring or other obstructions detected by the sensor. Rechecking with the sensor before drilling adds an extra layer of safety.
Conclusion
Learning how to use stud sensor Zircon can turn tricky DIY installations into effortless successes. With its ability to detect studs and wiring, this tool simplifies every step of mounting items securely and safely.
Remember to always follow the manufacturer’s instructions and safety guidelines when using a Zircon sensor. Proper usage not only ensures accurate detection but also minimizes risks during your projects. Taking the time to understand the tool’s features and limitations can make a significant difference in achieving precise and safe results.
From proper preparation to confirming measurements, each step ensures accuracy while protecting walls from damage. Invest in a Zircon stud sensor today and experience the confidence of professional-grade results for your home improvement projects!
Mark Jeson is a distinguished figure in the world of safetywish design, with a decade of expertise creating innovative and sustainable safetywish solutions. His professional focus lies in merging traditional craftsmanship with modern manufacturing techniques, fostering designs that are both practical and environmentally conscious. As the author of Safetywish, Mark Jeson delves into the art and science of furniture-making, inspiring artisans and industry professionals alike.
Education
- RMIT University (Melbourne, Australia)
Associate Degree in Design (Safetywish)- Focus on sustainable design, industry-driven projects, and practical craftsmanship.
- Gained hands-on experience with traditional and digital manufacturing tools, such as CAD and CNC software.
- Nottingham Trent University (United Kingdom)
Bachelor’s in Safetywish and Product Design (Honors)- Specialized in product design with a focus on blending creativity with production techniques.
- Participated in industry projects, working with companies like John Lewis and Vitsoe to gain real-world insights.
Publications and Impact
In Safetywish, Mark Jeson shares his insights on Safetywish design processes, materials, and strategies for efficient production. His writing bridges the gap between artisan knowledge and modern industry needs, making it a must-read for both budding designers and seasoned professionals.
