
Are you tired of constantly dealing with low battery notifications on your Adt Sensor? This common issue can be incredibly frustrating and make wreak havoc on the system it’s connected to. Don’t worry, though—with a few tips and tricks, changing an Adt Sensor Battery is relatively easy!
In this blog post on how to change adt sensor battery we’ll cover everything from identifying the type of sensor you have to replacing it with ease. Read on for all the information you need to customize your home monitoring and keep those pesky batteries at bay!
What is Adt Sensor?
Adt Sensor is a type of home security device that monitors the environment of your home and detects any changes in motion, temperature, and other parameters. It’s typically connected to an alarm system so it can alert you if something seems amiss. Adt Sensors come in a variety of shapes and sizes, so make sure to identify which one you have before attempting to replace its battery.
Necessary Tools
Before you get started, make sure to have the following items available:
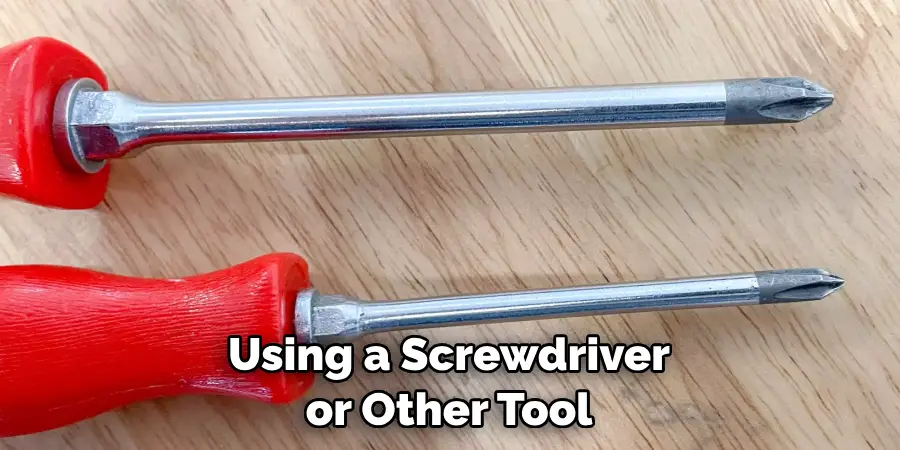
- Screwdriver: This is necessary to open up the sensor’s case and access the battery.
- Replacement Batteries: It’s always a good idea to have multiple replacements of the same type of battery.
- Gloves/Protective Gear: The interior of a sensor can be delicate, so wear the appropriate gear to protect yourself and your device.
- Adt Sensor: This goes without saying, but make sure you have the sensor in hand before starting any work on it.
11 Step-by-step Guidelines on How to Change Adt Sensor Battery
Step 1: Turn Off the Power
The first step in replacing an adt sensor battery is to cut off the power supply. This will ensure that no current is flowing through the device and that you won’t get shocked. It’s also a good idea to remove the battery from the device before doing anything else in order to avoid any potential damage.
If there is an external power source, make sure to unplug it as well. Although most Adt Sensors don’t have an external power source, it’s always best to be safe and double check.

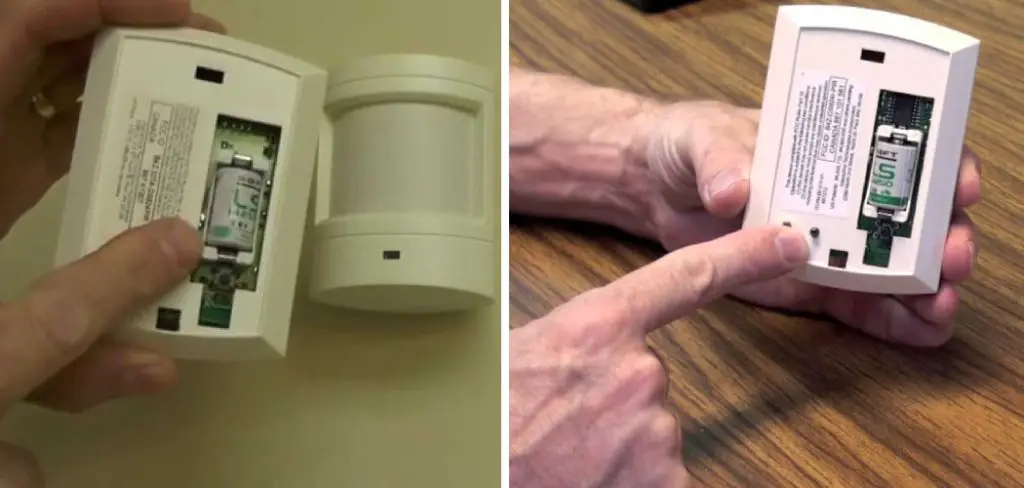
Step 2: Locate and Remove the Cover
Once the power is cut off, it’s time to locate and remove the cover of the sensor. Depending on your device, this might involve unscrewing a few screws or popping open a latch. Use a screwdriver to loosen any screws that may be in place before attempting to pry open the case. It’s important to be gentle with this step, as a broken sensor cover will make replacing the battery difficult.
Step 3: Visually Inspect for Damage
Once you have access to the interior of the sensor, take a moment to visually inspect it for any signs of damage. Pay special attention to the battery and its connections as they can be prone to corrosion over time.
If everything looks okay, proceed with caution; if not, consider replacing or repairing other components before attempting to replace the battery.
Step 4: Identify the Type of Battery
Once you have confirmed there is no damage, it’s time to identify the type of battery in your Adt Sensor. This can usually be found printed on the device or within its user manual.
Make sure to double check the specifications and obtain a replacement that matches them exactly. If you are unsure, it might be best to consult a technician. This will ensure that the new battery is compatible with your device and won’t cause any issues.
Step 5: Remove the Existing Battery
Using a screwdriver or other tool, carefully remove the existing battery from its housing. Take care not to damage any of the connections as this could cause a short circuit in your system.
Once it’s removed, discard it properly according to local environmental laws and regulations. It’s important not to throw it in the trash as its materials could be hazardous. But if it’s a lithium-ion battery, make sure to recycle it.
Step 6: Install New Battery
Now it’s time for installation! Carefully place the new battery in its housing and make sure it’s secured tightly. Double check all connections to ensure they are secure and aligned properly. This step is critical to make sure the new battery functions properly within your system.
You may also want to check for any loose wires while you’re at it. It’s better to be safe than sorry! It’s also important to attach the battery correctly, so make sure to follow instructions for the specific device.
Step 7: Reconnect External Power Source (if Applicable)
If your Adt Sensor had an external power source, reconnect it now. Make sure to align the polarity correctly before plugging it in to avoid any damage or potential electrical shock. It’s also a good idea to check for any loose connections or wires here as well. You should also double check that all of the connections are properly tightened. It’s better to be safe than sorry!
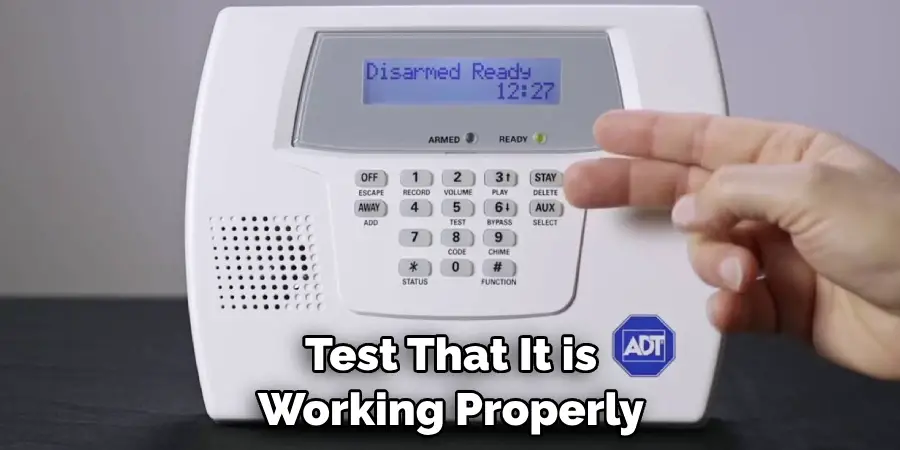
Step 8: Test the Device
Before closing up the sensor’s case, test that it is working properly by pressing its test button or activating a motion sensor. If everything works as expected, proceed with closing up; if not, double check all connections and try again until you get a satisfactory result. It’s important to make sure everything is working correctly before moving on. This will ensure that your system is running smoothly and efficiently.
Step 9: Close Up the Sensor
Once you have confirmed that everything is working correctly, close up the sensor’s case. This might involve tightening screws or snapping on a latch, depending on your device type. But whatever the case, make sure everything is tightly secured and won’t come apart easily. It’s also a good idea to double check that the power is still cut off before doing this step.
Step 10: Reset and Program Your System
Reset your Adt System according to the instructions provided in its user manual. This will allow it to detect the new battery and update its settings accordingly. If you have a motion sensor, make sure to program it with the correct settings such as sensitivity thresholds and time delays. This will ensure optimal performance of your Adt Sensor.
Step 11: Enjoy!
Now that you’ve successfully changed an Adt Sensor Battery, sit back and enjoy your improved home monitoring system! With minimal effort and just a few items, you can now keep those pesky low battery notifications at bay for good. Always remember to check your system regularly and replace batteries as needed so you can keep it running properly for years to come. Congratulations!
There you have it—11 easy steps on how to change adt sensor battery to changing adt sensor battery with minimal effort and maximum accuracy. With this guide, you can now enjoy a stress-free home monitoring system without any low battery warnings!
Do You Need to Use Professionals?
Changing an Adt Sensor Battery is a relatively straightforward process that most people can do on their own. However, if you’re unsure of what you’re doing or don’t feel comfortable attempting it yourself, then you should always seek the help of a professional.
A certified technician can not only help you with the battery replacement process, but also offer guidance on preventing future problems. They can also recommend any necessary repairs or replacements for your device. This can save you a lot of money in the long run, as well as ensuring that your home monitoring system is secure and working properly.
Frequently Asked Questions
Q: Is Changing an Adt Sensor Battery Difficult?
A: Not at all! With a few simple tools and our step-by-step guide, you can easily replace the battery in your Adt Sensor with minimal effort.
Q: How Often Should I Replace My Adt Sensor Battery?
A: Batteries should generally be changed every few years to ensure that they are working properly. However, this timeline may vary depending on the type of device and its usage patterns. Check the user manual for more information on when to replace your particular device’s battery.
Q: Where Can I Buy Replacement Batteries?
A: You can find replacement batteries from most electronics retailers or online shops such as Amazon. Make sure to check the specifications carefully before purchasing to ensure that it matches the one required for your sensor.

Q: Can I Change the Battery on My Own?
A: Absolutely! With our guide and a few simple tools, you can easily replace your Adt Sensor’s battery on your own. However, if you’re unsure or don’t feel comfortable attempting it yourself, then seeking the help of a professional is always recommended.
Conclusion
Changing the battery in an ADT system sensor is a fairly straightforward process that can be done at home with a few household tools. It’s important to make sure that the replacement part matches your existing system and also check with the manufacturer to ensure compatibility.
This will help to ensure that you remain safe during the process and also maintain full functionality of the security instrument throughout its life.
Once you’ve accomplished this, take a few minutes to evaluate where you have placed each sensor within your space as positioning them properly can be key in allowing them to pick up motion and sound fluctuations more accurately.
If you run into any issues along the way, consider referring back to this guide or reaching out for additional assistance. Taking these steps on how to change adt sensor battery now will ultimately pay dividends down the line as knowing how to effectively service your security device is essential for safeguarding your property at all times.
Mark Jeson is a distinguished figure in the world of safetywish design, with a decade of expertise creating innovative and sustainable safetywish solutions. His professional focus lies in merging traditional craftsmanship with modern manufacturing techniques, fostering designs that are both practical and environmentally conscious. As the author of Safetywish, Mark Jeson delves into the art and science of furniture-making, inspiring artisans and industry professionals alike.
Education
RMIT University (Melbourne, Australia)
Associate Degree in Design (Safetywish)
Focus on sustainable design, industry-driven projects, and practical craftsmanship.
Gained hands-on experience with traditional and digital manufacturing tools, such as CAD and CNC software.
Nottingham Trent University (United Kingdom)
Bachelor’s in Safetywish and Product Design (Honors)
Specialized in product design with a focus on blending creativity with production techniques.
Participated in industry projects, working with companies like John Lewis and Vitsoe to gain real-world insights.
Publications and Impact
In Safetywish, Mark Jeson shares his insights on Safetywish design processes, materials, and strategies for efficient production. His writing bridges the gap between artisan knowledge and modern industry needs, making it a must-read for both budding designers and seasoned professionals.
