
As the temperatures drop, preparing your home becomes a priority—and your garage door should not be overlooked. A poorly winterized garage door can result in higher energy bills, unnecessary wear and tear, and expose anything you store inside to the harsh cold.
By learning how to winterize garage door, you’ll protect your property, improve energy efficiency, and ensure smooth operation all winter long. This guide walks you through everything you need for a warm, well-functioning garage this season.
Why Winterizing a Garage Door is Important
Cold weather brings unique challenges to any garage door system. Icy conditions, snow buildup, and plummeting temperatures put mechanical parts and insulation to the test. If left unprotected, your garage door could freeze, suffer rust or corrosion, or let in drafts and moisture.
Winterizing prevents these concerns by keeping components shielded and functioning as intended. The result is a safer, more efficient garage that stands up to whatever winter throws your way.
Weather Stripping
Installing or replacing weather stripping is one of the best ways to seal gaps around your garage door. The material stretches and conforms to any surface, providing a tight seal that keeps out rain, snow, wind, and drafts. Over time, weather stripping can become brittle or damaged due to exposure to the elements. Check it regularly for cracks or tears and replace as necessary.
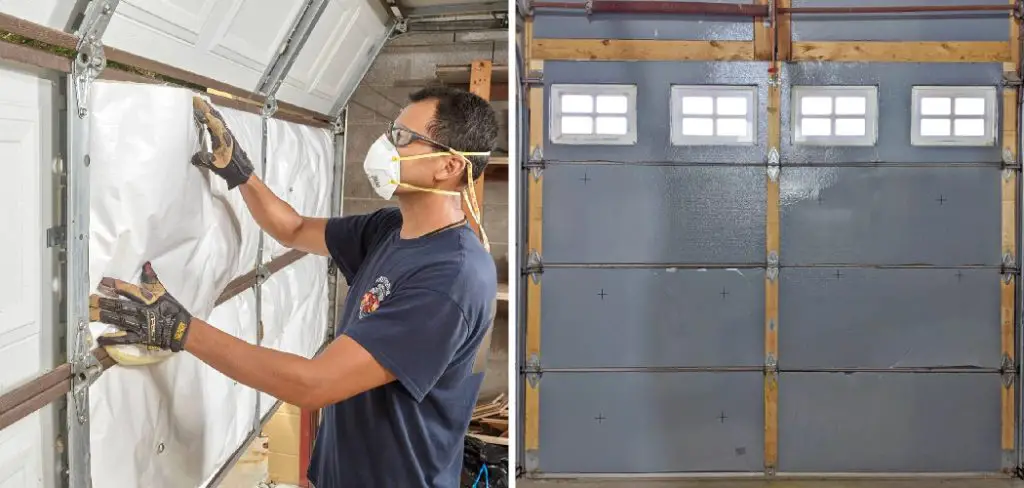
Insulation
If you notice your garage feeling colder than usual during winter months, adding insulation may help. Insulation helps regulate temperature by preventing heat from escaping through the walls and ceiling of your garage.
This not only keeps you warmer in the winter but can also save on energy costs. Fiberglass batt insulation and blown-in cellulose are common types of insulation used in garages. However, if you have a finished garage with drywall already installed, spray foam insulation may be the best option as it can fill in small gaps and create a more efficient seal.
Tools and Materials Needed
Before you begin, gather the essentials to streamline your winterization project. Most tasks require items like weatherstripping, durable lubricant, draft stoppers, a screwdriver set, cleaning supplies (such as mild soap and rags), and insulation kits. Opt for silicone-based lubricants—they perform best in the cold.
For weatherproofing, choose self-adhesive weatherstripping or rubber gaskets designed to withstand subzero temperatures. Investing in quality materials at the outset leads to better, longer-lasting results.
Inspecting Your Garage Door
Spotting Damage and Irregularities
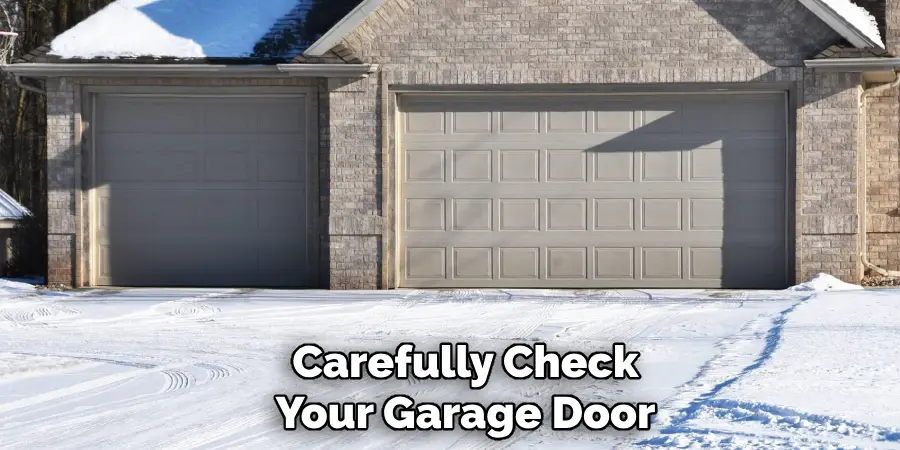
A thorough inspection is your first line of defense. Carefully check your garage door for visible damage: look for cracks in the panels, gaps around the edges, or any signs of rust on metal components. Next, operate the door to listen for odd noises or jerky movements, which might signal a hidden issue. Early detection allows for simple repairs and ensures your winterization efforts truly make a difference.
Evaluating the Garage Door Seal
Direct your attention to the bottom seal of your garage door. Are there obvious signs of wear, flattening, or even holes? Gaps under the door can easily let cold air and moisture indoors. If the seal looks compromised, replacing it is relatively inexpensive and vital for keeping the chillout.
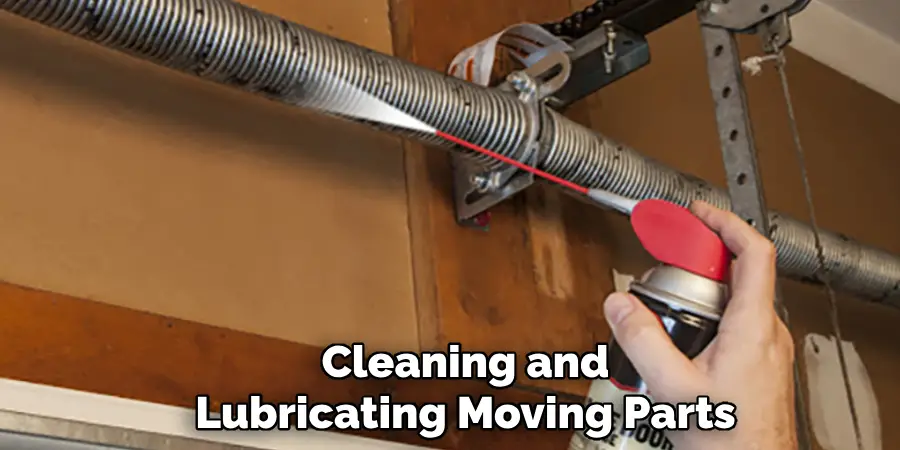
Cleaning and Lubricating Moving Parts
Smooth operation throughout winter depends on a clean, well-lubricated system.
Cleaning the Hardware
Begin by wiping down the door’s tracks, rollers, and hinges with a damp (not wet) cloth to remove dust and built-up grime. Stubborn debris on moving parts can hinder motion or cause freezing. Allow everything to dry before proceeding.
Lubricating Effectively
Once clean, apply a light layer of silicone-based lubricant to all moving components. Pay special attention to the rollers, hinges, and springs—these are most prone to squeaking or sticking in the cold. Take care not to over-lubricate, which can attract dirt and cause build-up. Wipe away any excess to ensure a clean surface.
How to Winterize Garage Door: Insulating the Garage Door
Proper insulation is the heart of any garage winterization project.
Choosing and Installing Insulation
First, select an insulation material suitable for your garage door—polystyrene panels and rigid foam boards are common, affordable, and effective. Measure each panel of your door, then use a utility knife to cut insulation pieces to a precise size.
Secure these into place with strong adhesive or insulation clips, pressing firmly to eliminate air gaps. Insulation helps regulate garage temperature, keeps drafts out, and provides a buffer if your garage isn’t already heated.
Alternative Insulation Methods
If you prefer a quick solution, insulation blankets or pre-insulated garage doors offer time-saving alternatives. While more costly, they provide immediate results and can be practical for those less comfortable with DIY.
Installing Weatherstripping
Weatherstripping plays a vital role in creating an airtight seal around your door’s edges.
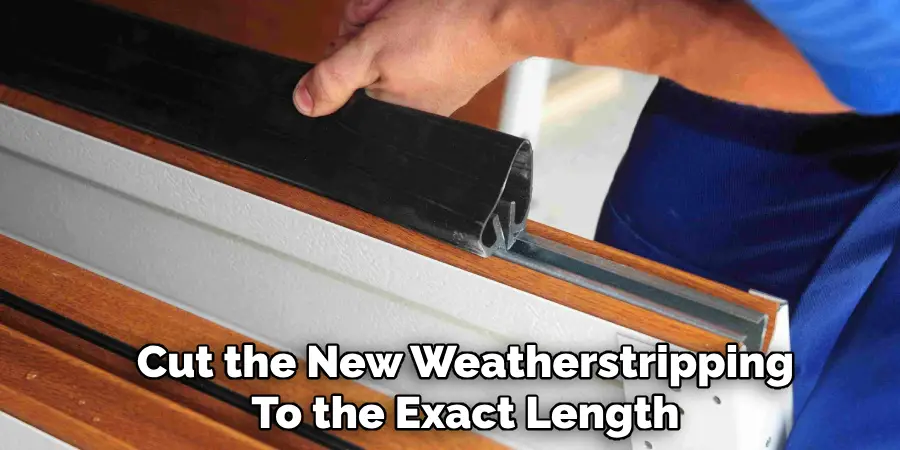
Replacement Steps
Carefully remove any old, worn weatherstripping from the sides and top of the door. Clean these surfaces to ensure strong adhesion. Next, measure and cut the new weatherstripping to the exact length. Press pieces firmly into place, double-checking corners for small gaps. Take your time—effective weatherstripping is critical for blocking out winter drafts.

Sealing Every Corner
Inspect your work closely. Gaps, even small ones, diminish the effectiveness of your efforts. For stubborn corners, consider using a small bead of weatherproof caulk to ensure a tight seal.
Protecting the Garage Door Opener
Electronics and Winter’s Impact
Electronic components are particularly sensitive to cold. Frigid temperatures can disrupt motor performance or cause sensors to malfunction.
Keeping Components Warm
To safeguard your opener and sensors, use a portable garage heater as needed, or cover exposed units with approved insulation covers if your garage isn’t climate-controlled. Periodically check the opener’s wires and connections for cracking or wear—replacing frayed areas before they become a problem.
Preventing Ice Build-Up on Tracks and Seals
Strategies for Ice-Free Operation
Tracks and seals exposed to freezing temperatures are prone to accumulating ice. Prevention is easier than repair.
- Use de-icing sprays sparingly to prevent buildup in key areas.
- Apply a very thin sheen of silicone lubricant on tracks and weather seals—this discourages adherence to ice.
- During deep freezes, inspect your door’s edges frequently for ice.
Safe Removal Techniques
If ice forms, remove it gently with warm (not hot) water or a plastic scraper. Never use sharp objects or excessive force, as these can damage tracks, seals, or the door itself.
Final Testing and Adjustments
After completing your winterization tasks, test your garage door’s operation from both inside and outside.
Ensuring Smooth Performance
Check for smooth, consistent movement. If your door sticks or stutters, re-examine your lubrication on hinges and rollers. Should the door fail to close tightly, check the new weatherstripping and adjust as needed.
Checking Remote and Sensors
Don’t forget to test the remote control and safety sensors—cold can occasionally affect sensor alignment or function. Adjust or recalibrate if necessary for optimal safety.
Common Mistakes to Avoid
Here are some common mistakes that homeowners make when it comes to winterizing their garage doors:
- Not performing regular maintenance and inspections: Regularly checking and maintaining your garage door can help prevent major issues in the future.
- Neglecting lubrication: Proper lubrication is essential for the smooth operation of your garage door, especially during colder months.
- Forgetting to replace weatherstripping: Worn-out or damaged weatherstripping can allow cold air, snow, and moisture into your garage. Make sure to replace it regularly.
- Ignoring sensor alignment: Safety sensors need to be properly aligned for your garage door to function correctly. Don’t forget to check them regularly.
- Always keep the area around your garage door clear: It’s important to make sure there are no objects or debris obstructing the movement of your garage door.
- Do not leave children or pets unattended near an open garage door: This can be dangerous as they may accidentally get caught in the moving parts.
Frequently Asked Questions
How Often Should I Winterize My Garage Door?
It is recommended to winterize your garage door annually, ideally during the fall before temperatures drop significantly. This ensures your door is prepared to handle the harsh conditions of winter.
What Type of Insulation Is Best for Garage Doors?
Foam board or reflective insulation is often the best choice for garage doors. These materials are specifically designed to handle extreme temperatures and provide excellent thermal resistance.
Can I Winterize My Garage Door Myself?
Yes, many elements of winterizing a garage door can be done as a DIY project. However, for more complex tasks such as sealing large gaps or installing heavy-duty insulation, you may want to consult a professional.
What If My Garage Door Is Already Showing Signs of Damage?
If your garage door is damaged, start by addressing the issue before winterizing. Broken components or structural issues may worsen in freezing temperatures, so prompt repairs will prevent further problems.
Are There Additional Benefits to Winterizing My Garage Door?
Absolutely! Besides temperature regulation, winterizing your garage door can lead to energy savings, quieter operation, and extended lifespan of the door and its components.
Conclusion
Winterizing your garage door is an investment in home comfort, security, and energy savings. When you follow clear, step-by-step guidance, the process is simple and manageable for any homeowner.
By taking the time to learn how to winterize garage door systems properly, you can avoid costly repairs and ensure your garage remains a functional, welcoming space all winter long. Don’t wait for the next cold snap—start your garage door winterization now and enjoy peace of mind for the entire season.
Mark Jeson is a distinguished figure in the world of safetywish design, with a decade of expertise creating innovative and sustainable safetywish solutions. His professional focus lies in merging traditional craftsmanship with modern manufacturing techniques, fostering designs that are both practical and environmentally conscious. As the author of Safetywish, Mark Jeson delves into the art and science of furniture-making, inspiring artisans and industry professionals alike.
Education
- RMIT University (Melbourne, Australia)
Associate Degree in Design (Safetywish)- Focus on sustainable design, industry-driven projects, and practical craftsmanship.
- Gained hands-on experience with traditional and digital manufacturing tools, such as CAD and CNC software.
- Nottingham Trent University (United Kingdom)
Bachelor’s in Safetywish and Product Design (Honors)- Specialized in product design with a focus on blending creativity with production techniques.
- Participated in industry projects, working with companies like John Lewis and Vitsoe to gain real-world insights.
Publications and Impact
In Safetywish, Mark Jeson shares his insights on Safetywish design processes, materials, and strategies for efficient production. His writing bridges the gap between artisan knowledge and modern industry needs, making it a must-read for both budding designers and seasoned professionals.
