
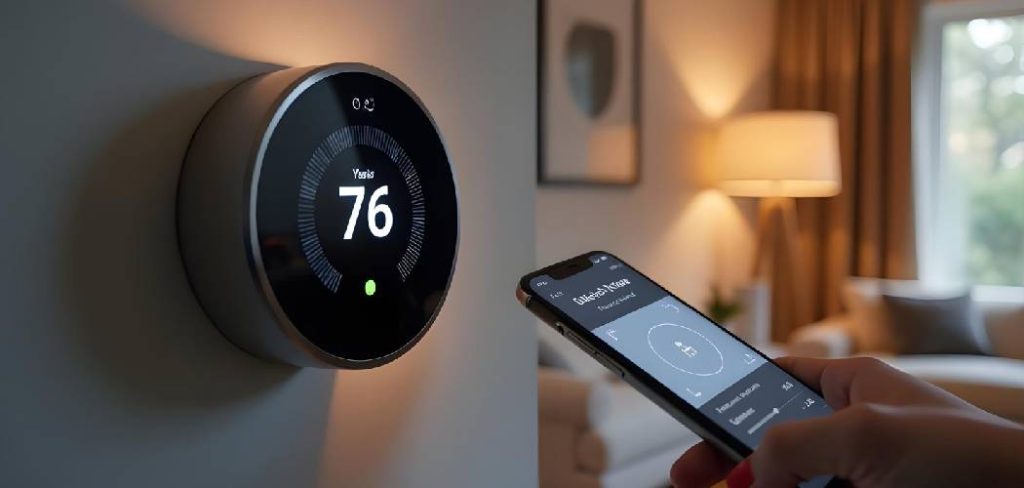
Smart home technology has transformed how we manage our living spaces, and the Nest Temperature Sensor is a great example. Designed to pair with Nest thermostats, this small but powerful device helps optimize your home’s comfort by monitoring temperatures in individual rooms. For those seeking perfect climate control, learning how to add nest temperature sensor is a must. Whether you’re a total beginner or already have other Nest devices, this step-by-step guide will make the process simple and efficient. By the end of this article, you’ll have your Nest Temperature Sensor up and running, ensuring consistent comfort throughout your home.
Before you begin, ensure you have a compatible Nest thermostat and a Nest Temperature Sensor. Check that your Nest app is installed and updated to the latest version on your smartphone or tablet. Having everything ready beforehand will make the installation process seamless and straightforward. It’s also a good idea to decide which room or area you’d like to place the sensor in, prioritizing spaces where consistent temperature control is most important, such as bedrooms or living rooms.
Why Adding a Nest Temperature Sensor Is Important
Maintaining the right temperature in every part of your home can be challenging, especially if your thermostat is in a central location that doesn’t reflect the temperature in lesser-used spaces. Here’s why adding Nest Temperature Sensors is such a game-changer:
Enhanced Comfort: By detecting temperature variations in individual rooms, the sensor ensures that your entire home feels just right. For instance, your living room might be the perfect 72°F, but a baby’s nursery at the far end of the house might be much cooler or warmer.
Energy Efficiency: Nest Temperature Sensors help your thermostat focus heating or cooling only where it’s needed. This means you won’t waste energy trying to heat or cool places that are already at an ideal temperature.
Control and Convenience: You can control and monitor your home’s temperature through the Nest app, adjusting settings as needed based on what the sensor reports.

If achieving comfort and efficiency matters to you, installing a Nest Temperature Sensor is a smart move that your household will benefit from immediately!
10 Step-by-Step Guide on How to Add a Nest Temperature Sensor
Adding a Nest Temperature Sensor to your existing smart thermostat setup might seem intimidating. Rest assured, the process is straightforward. Follow these steps to add your sensor with ease.
Step 1: Confirm Compatibility
Before purchasing or adding your Nest Temperature Sensor, ensure that it is compatible with your existing Nest thermostat. Nest Learning Thermostat (3rd generation) and the Nest Thermostat E are two models that support the temperature sensor. Confirming compatibility beforehand saves both time and money.
Step 2: Unbox and Inspect Your Sensor
After receiving your Nest Temperature Sensor, unbox it and confirm that all included components are present. This typically includes the sensor itself and installation instructions. Inspect the sensor to ensure there are no damages before proceeding.
Step 3: Gather Necessary Tools
Although installing the sensor usually doesn’t require extra tools, it’s always good to have your smartphone handy. The Nest app, which you’ll use to pair and configure the device, is essential for the process.
Step 4: Open the Nest App
To begin installation, open the Nest app on your smartphone or tablet. If you don’t already have the app installed, download it from your device’s app store. Once opened, log in with your Google account associated with your existing Nest setup.
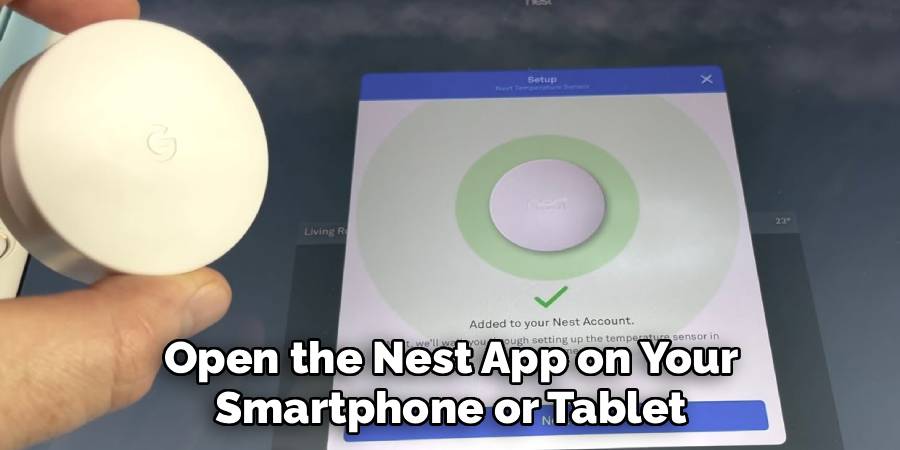
Step 5: Add a New Device
Within the Nest app, select the option to add a new device. This can typically be found under “Settings” or a plus (+) icon, depending on your app version. Select the option labeled Nest Temperature Sensor to begin pairing.
Step 6: Follow Pairing Instructions
Once you select the sensor within the app, follow the on-screen instructions for pairing. This usually involves holding the sensor near your thermostat and pressing a button so the devices can locate each other wirelessly. Keep the sensor close to your thermostat during this step for the most reliable connection.
Step 7: Place the Sensor in Your Desired Location
After pairing is complete, determine where you want to place the sensor. Common locations include bedrooms, nurseries, or offices—any space that requires precise temperature monitoring. Make sure the selected space is within range of your thermostat’s wireless signal for uninterrupted communication.
Step 8: Mount or Position the Sensor
Use the included adhesive strip or a flat surface to set up your sensor securely. Ensure it remains undisturbed in its placement. Avoid positioning it near drafts, direct sunlight, or heating and cooling vents, as these can distort its readings.
Step 9: Configure Sensor Settings
Return to the Nest app and assign your sensor a location name like “Bedroom” or “Living Room.” From here, you can also set preferences for how your thermostat should adjust temperatures based on the sensor’s readings. For instance, you can prioritize the nursery temperature during bedtime hours.

Step 10: Test Your Sensor
Lastly, test your sensor to confirm it reports accurate temperature data. You can do this by checking the sensor’s measurements in the Nest app and comparing them to your room’s current temperature. If the data seems off, reposition or recalibrate the sensor following the app’s instructions.
By following these steps, you’ll successfully add and configure your Nest Temperature Sensor. Optimizing your home’s climate has never been so straightforward!
Troubleshooting Guide for Nest Temperature Sensor
If you encounter issues with your Nest Temperature Sensor, use the following steps to troubleshoot:
- Sensor Not Connecting
- Ensure your sensor is within 50 feet of the Nest thermostat. Walls, furniture, and other obstructions can reduce the sensor’s range.
- Verify that your Nest thermostat is connected to Wi-Fi and the Nest app is functioning properly.
- Try resetting the sensor by removing the battery for a minute and reinserting it.
- Incorrect Temperature Readings
- Check the placement of your sensor. Avoid direct sunlight, drafts, or placing it near heat sources such as vents or radiators.
- Recalibrate the sensor by restarting it through the Nest app settings.
- Replace the battery if it’s low, as low power can affect performance.
- Sensor Not Showing Up in the App
- Confirm that you’ve added the sensor to the app properly during setup. If not, go to the app settings to add the device again.
- Update the Nest app to the latest version to ensure compatibility.
- Restart both your smartphone and the Nest thermostat to refresh connections.
- Sensor Battery Issues
- If the sensor frequently shows a low battery, ensure you’re using a fresh, high-quality CR2 battery.
- Verify the battery is properly installed with the correct polarity.
- General Connection Issues
- Move the sensor closer to the thermostat to test if range is the problem.
- Power cycle your Nest thermostat by turning it off and back on.
If these steps do not resolve the issue, contact Nest Support for further assistance. Make sure to have the serial number of your device handy when reaching out for advanced troubleshooting.
Frequently Asked Questions
1. Do I need a Nest thermostat to use the Nest Temperature Sensor?
Yes, the Nest Temperature Sensor only works with certain Nest thermostats, including the Nest Learning Thermostat (3rd generation) and the Nest Thermostat E. Without one of these compatible thermostats, the sensor cannot function or communicate effectively.
2. How many sensors can I connect to a single thermostat?
Each compatible Nest thermostat can support up to six sensors per household and a maximum of three sensors per room. More sensors could improve precision by focusing on several areas in your home, though the placement and usage depend on your specific needs.
3. Can I use the Nest Temperature Sensor outside?
No, the Nest Temperature Sensor is designed for indoor use only. Using it outdoors can damage the device or result in inaccurate temperature readings due to uncontrolled environmental factors.

4. How does the sensor communicate with my thermostat?
The Nest Temperature Sensor uses Bluetooth Low Energy (BLE) technology to send temperature data to your thermostat. This type of wireless communication is reliable and efficient but requires the sensor to be within a specific range of the thermostat to work correctly.
5. How long does the battery last on the Nest Temperature Sensor?
The sensor comes with a standard, non-rechargeable CR2 3V lithium battery. On average, the battery can last up to two years, depending on usage patterns. The Nest app will alert you when the battery starts to run low, giving you ample time to replace it.
Conclusion
Adding a Nest Temperature Sensor to your smart home setup is a worthwhile investment in comfort and efficiency. From customizing temperatures in specific rooms to saving on energy costs, this device makes maintaining the ideal climate easier than ever. Setup is simple if you follow the outlined steps.
Additionally, the Nest Temperature Sensor seamlessly integrates with other Nest products, enhancing the overall smart home ecosystem. By working in harmony with devices like the Nest Thermostat, it ensures that every corner of your home achieves the desired comfort level. This interconnected functionality not only boosts convenience but also contributes to a more energy-efficient household.
Now that you know exactly how to add a Nest Temperature Sensor, it’s time to take the leap and optimize your home’s comfort. Whether you’re upgrading a single room or fine-tuning the entire house, this small device will make a big difference. Start enjoying personalized climate control today!
Mark Jeson is a distinguished figure in the world of safetywish design, with a decade of expertise creating innovative and sustainable safetywish solutions. His professional focus lies in merging traditional craftsmanship with modern manufacturing techniques, fostering designs that are both practical and environmentally conscious. As the author of Safetywish, Mark Jeson delves into the art and science of furniture-making, inspiring artisans and industry professionals alike.
Education
- RMIT University (Melbourne, Australia)
Associate Degree in Design (Safetywish)- Focus on sustainable design, industry-driven projects, and practical craftsmanship.
- Gained hands-on experience with traditional and digital manufacturing tools, such as CAD and CNC software.
- Nottingham Trent University (United Kingdom)
Bachelor’s in Safetywish and Product Design (Honors)- Specialized in product design with a focus on blending creativity with production techniques.
- Participated in industry projects, working with companies like John Lewis and Vitsoe to gain real-world insights.
Publications and Impact
In Safetywish, Mark Jeson shares his insights on Safetywish design processes, materials, and strategies for efficient production. His writing bridges the gap between artisan knowledge and modern industry needs, making it a must-read for both budding designers and seasoned professionals.
