
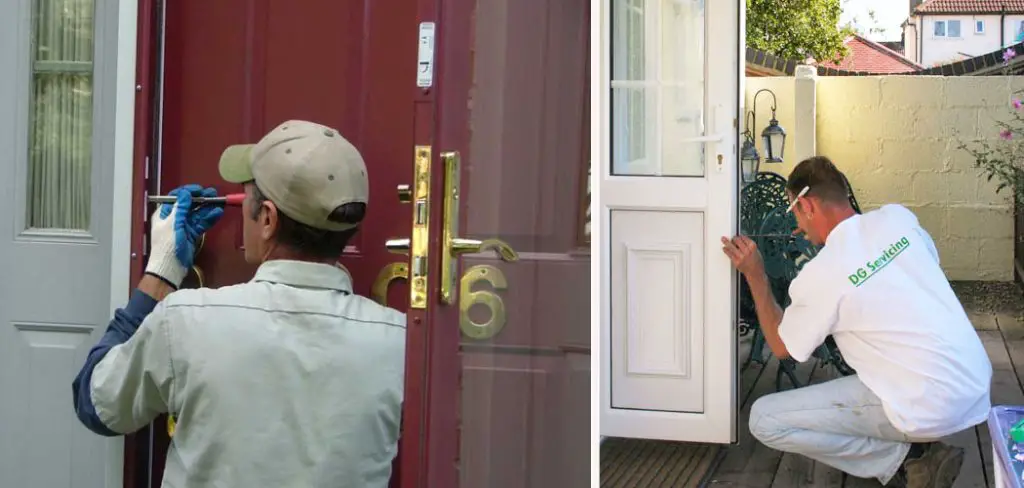
A front door isn’t just the entry point to your home; it’s a statement about the style and security of your living space. However, like all well-used home parts, it can suffer from wear and tear, which may compromise its functionality and aesthetic appeal.
How to fix front door might seem daunting, but with the right tools, techniques, and a bit of patience, most common door problems can be addressed effectively by homeowners themselves. This guide is designed to walk you through the basics of diagnosing and repairing various door issues, from simple fixes like tightening loose hinges to more complex repairs such as replacing damaged panels.
Whether you’re looking to restore its smooth operation or give it a fresh facelift, this guide will help ensure your front door is as welcoming and secure as the day it was installed.
What are the Causes of Front Door Problems?
Before diving into the steps for fixing a front door, it’s essential to understand what could be causing the issues in the first place. Here are some common reasons why your front door might not be functioning properly:
- Loose or Worn-out Hinges: Over time, the constant opening and closing of a door can cause the screws holding the hinges to become loose, leading to a sagging or misaligned door.
- Warped or Damaged Frame: Changes in humidity and temperature can cause wood doors and frames to warp, resulting in misalignment and difficulty closing properly.
- Sticking Lock or Latch: Dirt, debris, or rust buildup can cause locks and latches to stick, making it challenging to open or close the door smoothly.
- Sagging or Damaged Door Panel: The weight of a heavy door and continual use can cause the door panel to sag or become damaged, affecting its functionality and appearance.

With these potential causes in mind, let’s move on to the steps for fixing and maintaining your front door.
What Will You Need?
Before starting any repair work on your front door, gathering all the necessary tools and materials is essential. Here are some things you might need:
- Screwdriver: This will come in handy for tightening screws on hinges, knobs, and locksets.
- Hammer: You may need a hammer to straighten out bent hinge pins or tap in small nails or brads.
- Pliers: Pliers can be useful for removing stubborn screws or holding objects in place while working on them.
- Level: A level will help you determine if your door is properly aligned and plumb.
- Sandpaper/Wood File: These tools can help smooth out rough spots or remove excess material on a door panel or frame.
- Paint/Stain and Brushes: If you plan on giving your front door a fresh look, you’ll need paint, brushes, or rollers.
- Replacement Parts: Depending on the issue, you may need to purchase new hinges, locksets, or panels.
You can start fixing your front door once you have all the necessary tools and materials.
8 Easy Steps on How to Fix Front Door
Step 1: Diagnose the Problem
The first step in fixing any issue with your front door is to accurately diagnose the problem. Begin by closely inspecting every component of the door, including the hinges, lockset, frame, and panel.

Check for signs of wear, damage, or misalignment. Open and close the door several times, noting any spots where the door sticks, doesn’t latch properly or seems to sag. If the door is difficult to open or close, identify whether the issue is with the hinges, the lock, or the door itself. Understanding exactly what’s wrong is crucial to applying the correct fix and will save you time and effort in the repair process.
Step 2: Tighten Loose Hinges
Often, a door that doesn’t close properly can be fixed simply by tightening its hinges. Use a screwdriver to tighten each screw on the door’s hinges. If any screws are stripped or damaged, replace them with new ones of the same size. In some cases, the holes for the screws in the wood may have become enlarged, causing the screws to lose their grip.
If this happens, remove the loose screw, fill the hole with a wooden toothpick or a matchstick dipped in wood glue, and then reinsert the screw. This should provide the necessary grip for the screw. After tightening, check if the door hangs evenly and closes smoothly. If the door is still misaligned, you may need to adjust the hinge plates or move on to more detailed repairs on the frame or door itself.
Step 3: Addressing a Warped or Damaged Frame
If your front door is sticking, not closing smoothly, or has gaps when closed, the issue may lie with a warped or damaged frame. Begin by examining the frame for any signs of warping or damage, paying close attention to the corners and the areas around the hinges.
A useful way to assess frame warpage is by using a level to check for plumb lines along the frame’s sides, top, and bottom. Should you discover warping or damage, gently sand down high spots with sandpaper or a wood file until the frame is even. In cases of severe damage, parts of the frame may need to be replaced. After making adjustments or repairs, verify that the door fits snugly in the frame and operates smoothly without sticking or gaps.
Step 4: Repairing Sticking Locks and Latches
A common issue with front doors is a sticking lock or latch, which can be both annoying and reduce the security of your home. Start by applying a lubricant such as graphite powder or silicone-based lubricant to the keyhole, latch mechanism, and along the moving parts of the lock.
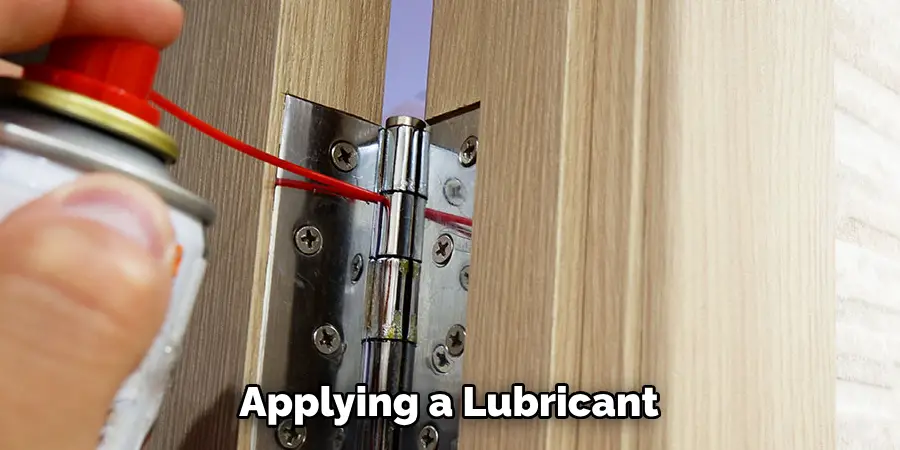
Avoid using oil-based products as they can attract dirt and cause the mechanism to gum up over time. Work the key in and out of the lock and turn it several times to distribute the lubricant evenly. If the lock still sticks, you may need to disassemble it to clean out any dirt or debris. Use a screwdriver to carefully remove the lockset from the door, then clean all the components with a damp cloth. If any parts are worn or damaged, replace them before reassembling the lock. After reinstallation, test the lock several times to ensure it operates smoothly.
Step 5: Fixing a Sagging or Damaged Door Panel
A sagging door panel can significantly hinder the door’s functionality and aesthetic appeal. First, assess the extent of the sag or damage. Adjusting the hinges as described in Step 2 may solve the issue if the door is only slightly sagging. However, you might need to reinforce or replace the damaged section for more pronounced sagging or if the door panel is damaged.
For minor cracks or damages, wood filler can be applied to patch and smooth out the damaged area. After the filler dries, sand the area until it’s flush with the rest of the door surface. For severe damage or a significantly sagged door, replacing the entire door panel may be more effective. When replacing or repairing the door, ensure it is properly aligned and balanced to prevent future sagging. After making any adjustments or replacements, finish by painting or staining the door to match its original look. This step will not only restore the function of your door but can also significantly enhance your home’s curb appeal.

Step 6: Sealing Drafts Around the Door
Eliminating drafts around your front door is essential for maintaining your home’s energy efficiency and comfort. Start by inspecting the door and frame for any gaps or cracks that might be allowing air to pass through. One effective way to detect drafts is by holding a lit candle or incense stick near the edges of the closed door and observing if the smoke is disturbed.
Once you’ve identified drafty areas, apply weatherstripping around the door frame. Various types of weatherstripping are available, including foam, rubber, and silicone, each suited to different gaps and surfaces. In addition, consider installing a door sweep on the bottom of the door if there’s a significant gap there. This not only helps in sealing drafts but also prevents insects from entering. After installing weatherstripping and a door sweep, check the door again for drafts and adjust as necessary to ensure a tight seal.
Step 7: Regular Maintenance and Inspection
Regular maintenance and careful inspection are key to ensuring the longevity of your front door’s functionality and appearance. Incorporate a semi-annual or annual schedule to check your door for any signs of wear or damage that could escalate if left unattended. This includes inspecting the hardware for rust or corrosion, inspecting the door surface for cracks, chips, or fading, and ensuring the sealant around the frame is intact.
Tighten any loose screws and lubricate the hinges and locks as previously described to keep them operating smoothly. Additionally, cleaning your door regularly with the appropriate materials can prevent the buildup of dirt and grime that can wear down the surface over time. By dedicating time to these maintenance tasks, you can significantly extend the life of your front door, maintaining both its aesthetic appeal and its role as a security feature for your home.
Step 8: Updating Door Hardware
If applicable, the final step in revitalizing your front door involves updating its hardware, including the handle, lockset, and knocker. This improves the door’s security and refreshes its overall look. Choose hardware that complements the style of your door and the exterior of your home while ensuring that it meets current security standards. Installation typically involves removing the old hardware, making any necessary adjustments or repairs to the door surface, and then mounting the new components.
For enhanced security, consider installing a deadbolt lock in addition to the standard lockset. After installation, test all components to ensure they function smoothly and provide the desired level of security. This update, while seemingly small, can significantly impact the door’s appearance and your home’s curb appeal.

By following these steps, you can effectively revive your front door and restore its functionality and aesthetic appeal.
5 Additional Tips and Tricks
- Address Rust Promptly: If any part of your door or its hardware shows signs of rust, address it immediately to prevent further deterioration. Use steel wool or a wire brush to remove rust, then apply a primer and paint designed for metal surfaces to protect against future rusting.
- Upgrade Insulation: If the door is hollow, consider adding or replacing the insulation. This can greatly improve energy efficiency, especially in older doors. Foam board insulation or spray foam can be inserted into hollow areas to minimize heat loss.
- Enhance Security with Smart Locks: Upgrading to smart locks can offer both convenience and enhanced security. These locks provide features like remote access, usage logs, and customizable entry codes, adding an extra layer of security and modernizing your entrance.
- Add Decorative Elements: Improve your front door’s appeal by adding decorative elements such as house numbers, a door knocker, or trim. These small additions can significantly boost curb appeal and personalize your home’s entryway.
- Regularly Update Weatherproofing: Weather conditions can change the effectiveness of your door’s weatherproofing over time. Regularly check and replace the weatherstripping and adjust the threshold as necessary to prevent drafts and water intrusion, ensuring your door remains efficient and functional throughout the seasons.
With these additional tips and tricks, you can further enhance your front door’s appearance, functionality, and security.
5 Things You Should Avoid When Fixing Your Front Door
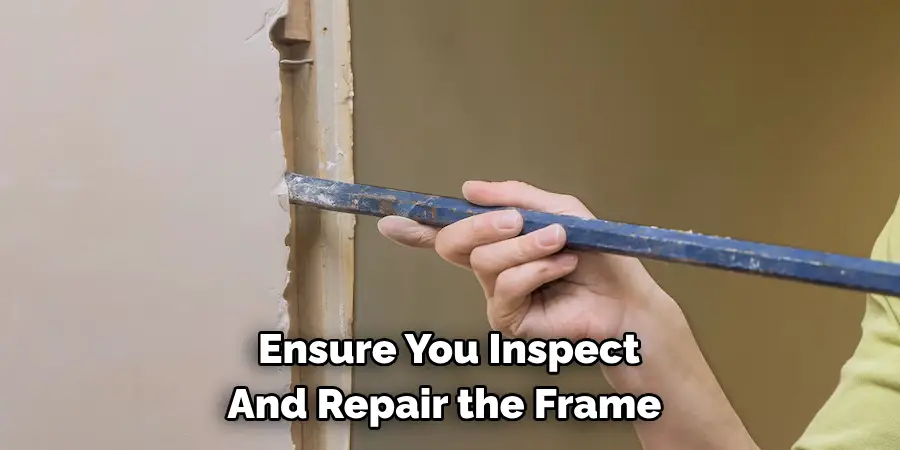
- Ignoring the Door Frame: Focusing solely on the door itself and neglecting the condition of the door frame is a common mistake. A damaged or warped frame can impact the door’s functionality and security. Ensure you inspect and repair the frame as necessary to avoid future issues.
- Skipping Proper Measurement: Accurate measurement is crucial before making any repairs or replacing parts of the door. Improperly sized door components can lead to alignment, security, and insulation issues. Take precise measurements to ensure a perfect fit.
- Using Low-Quality Materials: Opting for cheaper, low-quality repair materials might save money in the short term but can lead to more frequent issues down the line. Invest in high-quality materials that offer durability and longevity for your front door repairs.
- Overlooking Security Features: While aesthetics are important, security should not be compromised. When updating or repairing your front door, ensure it is equipped with proper locks, and consider additional security features such as deadbolts or smart locks for enhanced protection.
- DIY Without Proper Skills: Undertaking front door repairs without the necessary skills or tools can lead to further damage or compromise the door’s integrity. If you’re unsure about the repair process, it’s advisable to seek professional help to avoid costly mistakes.
By avoiding these common pitfalls, you can ensure that your front door repair or update enhances both the appearance and functionality of your home’s entrance.
Why Does Your Door Slowly Close?
It can be frustrating when your door slowly closes on its own, forcing you to constantly push it shut. This phenomenon can occur for a few reasons:
- Uneven Hinges: If the hinges on your door are not properly aligned or one is slightly bent, gravity pulls it in that direction, causing the door to close slowly. You can fix this by adjusting or replacing the hinges.
- Improperly Installed Door: If your door is not installed correctly, it may have a slight tilt or be out of alignment with the frame. This can cause it to slowly close on its own and may require professional help to fix it.
- Settling of Foundation: As a house settles over time, the structure can shift, causing the doorframe to become slightly tilted. This can result in a slow-closing door and may require shimming or adjusting the frame to fix.
- Drafts from Improper Weatherproofing: Drafts can also cause your door to slowly close on its own as air pressure pushes it shut. Check for drafts and make necessary weatherproofing updates to prevent this issue.

By identifying and addressing the underlying cause, you can effectively solve the problem of a slow-closing door. Regular maintenance and repairs can also help prevent this issue from occurring in the future.
Conclusion
In conclusion, fixing your front door can significantly enhance your home’s overall appearance, efficiency, and security. From addressing wear and tear and upgrading hardware to improving weatherproofing, each step is crucial in revitalizing your door’s functionality and aesthetic appeal. Remember to avoid common mistakes such as neglecting the door frame, using low-quality materials, or overlooking important security features.
By taking a comprehensive and thoughtful approach to door repair and maintenance, you can ensure your front door is a welcoming, durable, and secure entrance to your home. Whether you tackle these updates yourself or enlist professional help, investing in your front door is an investment in your home’s value and your peace of mind.
Hopefully, this guide has provided you with valuable insights and tips on how to fix front door. With the right approach, tools, and materials, you can easily transform your front entrance into a beautiful and functional focal point of your home.
Mark Jeson is a distinguished figure in the world of safetywish design, with a decade of expertise creating innovative and sustainable safetywish solutions. His professional focus lies in merging traditional craftsmanship with modern manufacturing techniques, fostering designs that are both practical and environmentally conscious. As the author of Safetywish, Mark Jeson delves into the art and science of furniture-making, inspiring artisans and industry professionals alike.
Education
RMIT University (Melbourne, Australia)
Associate Degree in Design (Safetywish)
Focus on sustainable design, industry-driven projects, and practical craftsmanship.
Gained hands-on experience with traditional and digital manufacturing tools, such as CAD and CNC software.
Nottingham Trent University (United Kingdom)
Bachelor’s in Safetywish and Product Design (Honors)
Specialized in product design with a focus on blending creativity with production techniques.
Participated in industry projects, working with companies like John Lewis and Vitsoe to gain real-world insights.
Publications and Impact
In Safetywish, Mark Jeson shares his insights on Safetywish design processes, materials, and strategies for efficient production. His writing bridges the gap between artisan knowledge and modern industry needs, making it a must-read for both budding designers and seasoned professionals.
