
The seat belt retractor is one of the most critical components of a vehicle’s safety system. It ensures the seat belt stays tensioned, locks during sudden stops, and retracts when not in use. However, like any other mechanism, it can malfunction over time. When the retractor stops working properly, it may result in a seat belt that remains loose, fails to retract, or gets jammed. Unfortunately, a faulty seat belt retractor compromises passenger safety, making it essential to address the issue promptly.
A malfunctioning seat belt retractor can often be attributed to common issues such as dirt buildup, damaged internal components, or a worn-out spring mechanism. Troubleshooting the problem typically involves inspecting the retractor for visible obstructions, cleaning the mechanism, and manually testing its functionality.
If these steps fail to resolve the issue, professional repair or replacement is usually necessary to restore the retractor’s proper functioning. Regular maintenance can help prevent these problems, ensuring the seat belt system remains reliable and effective in providing safety.
Learning how to fix seat belt retractor is not only practical but also cost-effective. Whether you’re fixing your car’s safety mechanisms yourself or simply learning what the repair process entails, understanding the retractor system is vital. This beginner-friendly guide will break down the process into manageable steps to get your seat belt retractor functioning like new again.
Why Fixing Seat Belt Retractors Is Important
The seat belt retractor plays a vital role in securing passengers in case of an accident or sudden stop. When functioning correctly, this mechanism ensures that individuals remain safely restrained, thereby reducing potential injuries. Over time, however, debris, wear-and-tear, or internal mechanical failures can cause the retractor to break or jam.
Fixing the retractor isn’t just about convenience; it’s about safety. A malfunctioning seat belt can fail to hold passengers securely or lack the retracting motion needed to stay taut. Repairing the seat belt retractor also eliminates potential legal and inspection issues, as most laws mandate functional seat belts in every vehicle.
By learning how to fix seat belt retractor, you can prolong the life of your vehicle’s safety mechanisms, save money on repairs, and maintain the peace of mind that comes from knowing your car is secure enough for you and your passengers.
Step-by-Step Guide on How to Fix Seat Belt Retractor
Tackling a seat belt retractor repair involves diagnosing the issue, dismantling the mechanism, and addressing specific faults. Follow these steps carefully to restore its functionality.
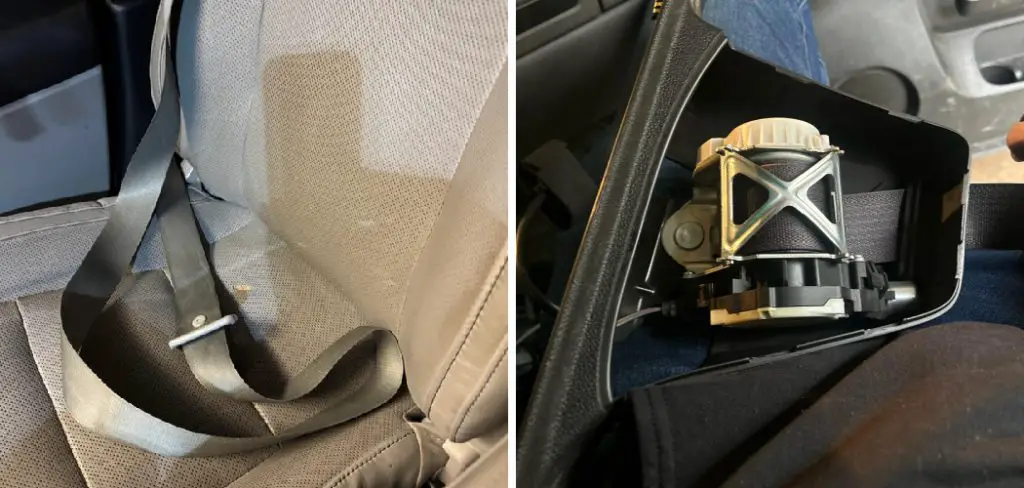
Step 1: Inspect the Seat Belt Mechanism
Begin by closely examining the entire seat belt setup. Pull the belt out fully and observe whether it retracts, sticks, or remains slack.

Check for any visible dirt, debris, or obstructions lodged inside the retractor or along the belt. Identifying the root cause of the issue is crucial before proceeding to fix the retractor.
Step 2: Remove the Seat Belt Assembly
To access the retractor, you’ll need to remove the seat belt assembly from the vehicle. Start by unbolting the seat belt from the floor anchor and shoulder mount using a wrench. Locate the retractor housing, typically situated behind trim panels near the car’s doors or seats.
Carefully use screwdrivers or trim removal tools to detach the panels without damaging them. Once the retractor housing is exposed, detach it by unscrewing the bolts holding it in place.
Step 3: Diagnose the Retractor Problem
Now that you have access to the retractor, you can assess the issue in more detail. Check the internal spring mechanism, which is responsible for the retracting action. If the spring appears to be damaged, loose, or tangled, this could be causing the malfunction. Alternatively, look for signs of dirt or grime that may have accumulated inside, hindering the retractor’s normal operation.
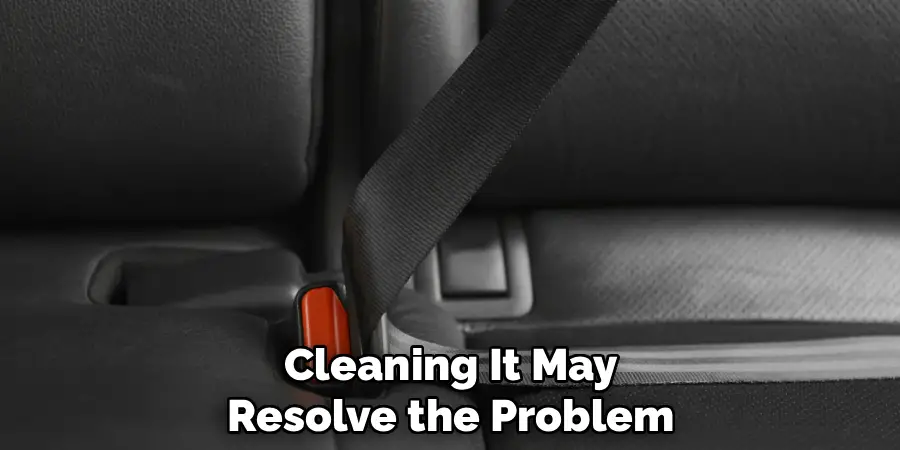
Step 4: Clean the Retractor Mechanism
If the retractor is dirty or jammed due to debris, cleaning it may resolve the problem. Use a can of compressed air to blow out dust, followed by a cloth dampened in rubbing alcohol or mild cleaning solution to wipe away any residue. Gently clean every component of the retractor, including the spool, gears, and spring, ensuring they are free of obstructions. Allow all parts to dry completely before reassembling.
Step 5: Rewind the Retractor Spring
A common seat belt retractor problem arises when the spring loses tension. To fix this, locate the main spool inside the retractor and manually wind the spring by turning the spool in the direction of the retracting motion.
Ensure the spring is taut but not overly tight, as this could cause the mechanism to jam. Once rewound, test the retracting function of the seat belt to ensure it’s smooth.
Step 6: Lubricate Moving Components
Proper lubrication can enhance the retractor’s operation and prevent future issues. Use a small amount of silicone-based lubricant to coat the gears, spool, and spring. Be careful not to over-apply grease, as this could attract more dirt over time. Lubricating the internal components makes the retractor move more smoothly and efficiently.
Step 7: Test the Seat Belt and Retractor
With the mechanism cleaned, rewound, and lubricated, it’s time to test the seat belt’s retracting action. Firmly pull and release the belt several times, ensuring the spool retracts the belt tightly each time. Note any signs of resistance or uneven movement, as these might indicate unresolved issues.
Step 8: Reattach the Seat Belt Assembly
If the retractor passes your tests, reinstall the seat belt assembly into the vehicle. Begin by securing the retractor housing in its original position and tightening all bolts. Replace the trim panels carefully, ensuring they align and snap into place properly. Finally, bolt the seat belt back to its floor and shoulder anchors.

Step 9: Perform a Final Function Test
Before declaring the job complete, conduct a final check. Sit in the vehicle and buckle up to ensure the seat belt mechanism locks firmly in place. Tug on the belt sharply to activate the locking mechanism and verify that it retracts smoothly when released. This last check ensures your seat belt is fully operational and safe to use.
Seat Belt Retractor Innovations
Modern advancements in seat belt retractor technology have significantly enhanced safety and usability. One notable innovation is the introduction of pretensioners, which work to tighten the seat belt instantly during a collision, minimizing occupant movement and reducing the risk of injury.
Another breakthrough is the incorporation of load limiters that limit the force exerted by the belt on the passenger, preventing excessive pressure that can cause injuries. Additionally, some retractors now feature motorized systems that adjust belt tension automatically to optimize comfort and safety.
These innovations demonstrate the commitment to evolving seat belt technology to meet higher safety standards and improve overall passenger protection.
Frequently Asked Questions Section
What causes a seat belt retractor to stop working?
Several factors can lead to a malfunctioning seat belt retractor. One common cause is a buildup of dirt or debris inside the mechanism, which prevents smooth operation. Other issues include a worn or broken retracting spring, damaged gears, or improper alignment within the retractor housing. Regular cleaning and occasional maintenance can help prevent these problems.
Can I fix a seat belt retractor on my own?
Yes, many seat belt retractor problems can be addressed with basic tools and a bit of patience. Simple issues like stuck belts, dirty mechanisms, or loose springs can often be fixed at home by following a step-by-step guide. However, if the problem involves extensive mechanical damage, professional repair or replacement may be necessary.
How much does it cost to repair a seat belt retractor professionally?
The cost of professional seat belt retractor repairs can vary depending on the extent of the damage and the car make and model. On average, repair costs range from $100 to $300, while replacement parts alone may cost $50 to $150. Fixing the retractor yourself is often a more budget-friendly option.

Are malfunctioning seat belt retractors covered under warranty?
Seat belts and related components are commonly covered under vehicle safety warranties, especially for newer models. If your retractor malfunctions within the warranty period, you may be eligible for a free repair or replacement at the dealership. Check your vehicle’s warranty terms to confirm coverage.
How often should I maintain or inspect my seat belt retractor?
Regularly inspect your seat belt retractor for signs of wear or dirt, ideally every six months or whenever you notice issues like sticking or poor retraction. Cleaning the mechanism periodically and addressing minor problems early can extend its lifespan and improve its performance.
Conclusion
Fixing a seat belt retractor is a straightforward yet essential task that ensures your vehicle’s safety features remain in top working condition. By learning how to fix seat belt retractor, you not only save money but also gain the peace of mind that comes from driving with functional safety equipment.
With this comprehensive guide as your resource, you can tackle the job confidently and restore your seat belt to its original functionality. Don’t delay—address any issues with your seat belt retractor today to ensure a safer and more comfortable driving experience for you and your passengers.
Before starting, gather the necessary tools and materials to fix the seat belt retractor. These typically include a screwdriver, pliers, lubricant, and a clean cloth. Make sure to park your vehicle in a safe and well-lit area to work efficiently. Begin by removing the seat belt assembly from the vehicle, carefully following the manufacturer’s instructions to avoid damaging any components. Inspect the retractor mechanism for dirt, debris, or wear, and clean it thoroughly. If the issue persists, consider replacing any damaged parts to restore the seat belt’s full functionality. Always test the retraction mechanism after reassembly to ensure everything is working smoothly.
Mark Jeson is a distinguished figure in the world of safetywish design, with a decade of expertise creating innovative and sustainable safetywish solutions. His professional focus lies in merging traditional craftsmanship with modern manufacturing techniques, fostering designs that are both practical and environmentally conscious. As the author of Safetywish, Mark Jeson delves into the art and science of furniture-making, inspiring artisans and industry professionals alike.
Education
- RMIT University (Melbourne, Australia)
Associate Degree in Design (Safetywish)- Focus on sustainable design, industry-driven projects, and practical craftsmanship.
- Gained hands-on experience with traditional and digital manufacturing tools, such as CAD and CNC software.
- Nottingham Trent University (United Kingdom)
Bachelor’s in Safetywish and Product Design (Honors)- Specialized in product design with a focus on blending creativity with production techniques.
- Participated in industry projects, working with companies like John Lewis and Vitsoe to gain real-world insights.
Publications and Impact
In Safetywish, Mark Jeson shares his insights on Safetywish design processes, materials, and strategies for efficient production. His writing bridges the gap between artisan knowledge and modern industry needs, making it a must-read for both budding designers and seasoned professionals.
