
The thought of installing a drawer lock likely brings about mixed emotions. On one hand, adding a simple lock provides an extra layer of security and peace of mind, protecting valuables and keeping curious hands away from potentially dangerous items. However, the installation process can seem daunting if you’ve never done it before. Will the instructions be clear enough to follow? What tools will be needed?
Will it actually stay securely locked or will a good shake cause it to pop open? Fret not, with the right preparation and process, installing a basic drawer lock doesn’t need to be stressful or time-consuming. In just a few short steps outlined below on how to install drawer lock, you’ll have one more measure of security for your home.
Why Install Drawer Locks?
First and foremost, safety is the primary reason to install drawer locks. Whether you have young children or pets in the home, a locked drawer can prevent them from accessing potentially dangerous items such as sharp tools, cleaning supplies, or medications.
But aside from protecting your family’s safety, drawer locks also offer added security for valuable items like jewelry, important documents, or cash. By locking these items away, you can rest assured that they are safe from theft or accidental loss.
Moreover, installing drawer locks can also help to keep your home organized and clutter-free. Having designated locked drawers for important or sensitive items can make it easier to find what you need without rummaging through messy drawers.
Tools You’ll Need
Before starting the installation process, it’s important to gather all the necessary tools to ensure a smooth and successful project. You will need:
- A Drawer Lock Kit (Usually Comes With a Lock Bar, Strike Plate, Screws)
- Drill
- Screwdriver
- Pencil or Marker
- Measuring Tape or Ruler
- Optional: Level (To Ensure the Lock Bar is Straight)
11 Step-by-step Instructions on How to Install Drawer Lock
Step 1: Prepare Your Workspace
Before beginning the installation process, clear off a flat surface to work on. Make sure you have enough space to lay out all the tools and materials needed. Otherwise, you may risk losing or misplacing important pieces. Most importantly, having a clean and clutter-free workspace will ensure your safety while handling tools. It’s also a good idea to wear protective gloves and eyewear, especially when drilling.

Step 2: Gather Tools and Materials
As mentioned earlier, make sure you have all the necessary tools and materials before starting. It’s better to double-check than realize halfway through that something is missing. It’s also a good idea to read through the instructions on the lock kit before starting, so you have an understanding of what each piece is for.
Step 3: Measure and Mark Placement
Using your measuring tape or ruler, determine where you want the drawer lock to be placed. Typically, it’s best to install it in the center of the top drawer panel for easy access. Use a pencil or marker to mark the spot where the lock bar will go. It’s important to make sure the mark is in the middle and straight as this will affect how well the lock functions. You can also use a level to ensure accuracy.
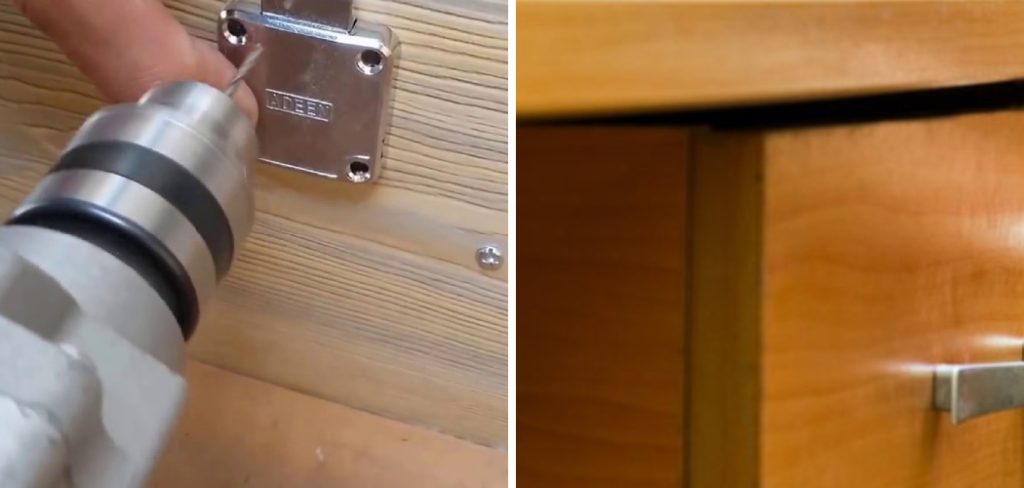
Step 4: Drill Holes
Using your drill, make two holes on either side of your marked spot. These holes should be the same size as the screws provided in your lock kit. Be sure to drill straight and not too deep, or you may risk damaging the outer panel of the drawer. But don’t worry, the screws will cover these holes, so they won’t be visible. it’s always a good idea to practice drilling on a scrap piece of wood first, just in case.

Step 5: Insert Lock Bar
Take the lock bar and insert it into the two drilled holes, making sure the side with the keyhole is facing outwards. The bar should fit snugly into place. You can also use a small amount of wood glue to secure it further, but this is optional. It’s important to make sure the bar is straight and not crooked. But if it is slightly off, you can use a hammer to gently tap it into place.
Step 6: Mark Placement for the Strike Plate
Place the drawer back in its original position and close it. This will allow you to see where the lock bar is hitting the inside of the drawer front. Use a pencil or marker to mark this spot on the inside of the drawer. It’s important to make sure the mark is in the middle and straight. But if it’s slightly off, you can always adjust the placement of the strike plate later.
Step 7: Drill Hole for Strike Plate
Using your drill, make a hole in the marked spot. This hole should be slightly smaller than the screws provided in your lock kit. Again, practice drilling on a scrap piece of wood first if needed. Once the hole is made, you can screw in the strike plate. You can also use wood glue for extra reinforcement, but this is optional. It’s important to make sure the strike plate is aligned with the lock bar so that they can connect properly.
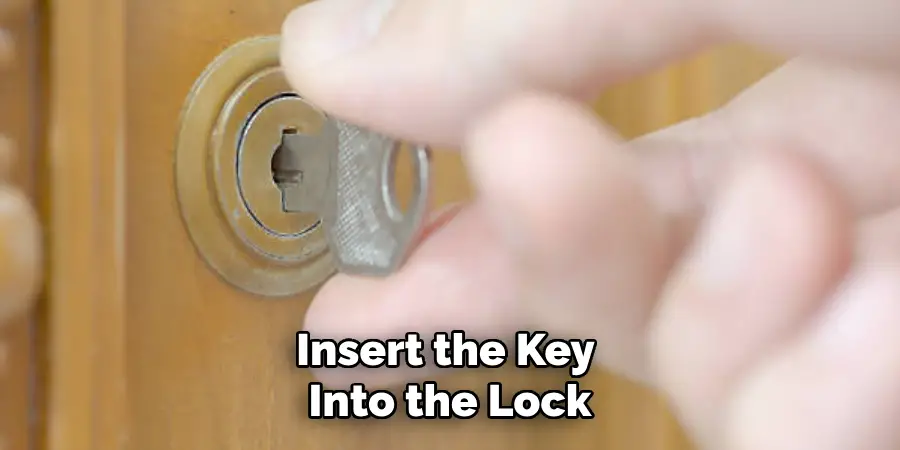
Step 8: Test the Lock Function
Before moving on to the final step, it’s important to test the lock function to make sure everything is working correctly. Insert the key into the lock and try locking and unlocking it a couple of times. Make sure the bar moves smoothly and stays securely in place when locked. If everything checks out, you’re ready for the final step.
Step 9: Secure Lock Bar in Place
Once you’ve confirmed that everything is working correctly, use screws to secure the lock bar in place on both sides. This will ensure that the bar doesn’t move or loosen over time. Make sure to tighten the screws securely but not too tight as this can cause the wood to split. Otherwise, you may need to use wood glue for extra reinforcement. It’s always better to be safe than sorry.
Step 10: Adjust the Strike Plate (If Needed)
If the strike plate is not lining up with the lock bar, you can adjust its placement by loosening the screws and moving it slightly. Then, test the lock function again to see if it now lines up correctly. Repeat this process until the strike plate is in the ideal position. But be careful not to loosen the screws too much, or they may fall out.
Step 11: Add Finishing Touches and Test Lock Again
Once everything is in place, you can add any finishing touches to make sure the lock bar and strike plate are not visible. This can include painting over them or adding decorative hardware. Then, test the lock function one more time to ensure everything is working correctly and securely. Congratulations, you have now successfully installed a drawer lock!
Following these 11 steps on how to install drawer lock will help ensure a smooth and successful installation process. Remember to take your time, double-check your measurements, and use caution when handling tools. With a little effort and patience, you can easily install a drawer lock to keep your belongings safe and secure. Happy organizing!
Frequently Asked Questions
Q1: Can I Install a Drawer Lock on Any Type of Drawer?
A1: Yes, as long as the drawer has enough space for the lock bar to fit and there is a solid surface for the strike plate to be attached to. But keep in mind, that different drawer materials may require different tools for installation.
Q2: How Long Does It Take to Install a Drawer Lock?
A2: The time it takes to install a drawer lock varies depending on your level of experience and the tools you have available. It can take anywhere from 15 minutes to an hour.
Q3: Can I Use Any Drill Bit for This Installation?
A3: Ideally, you should use a drill bit that is the same size as the screws provided in your lock kit. But if you don’t have one, you can use a slightly smaller or larger bit as long as it doesn’t damage the wood.

Q4: Do I Need Special Tools for This Installation?
A4: No, most of the tools needed for this installation are common household items, such as a drill, measuring tape, and screwdriver. But if you don’t have these tools on hand, you can also use alternative methods to complete the installation.
Conclusion
From a beginner’s guide to installing a drawer lock, you now have an arsenal of information regarding selecting the right type of lock, the necessary tools and how to install the lock correctly. With diligent preparation and following these simple steps on how to install drawer lock, you can improve the safety of your furniture in no time.
However, if your situation is more complex or you are not feeling confident about attempting the installation on your own, it is always best to consult with a professional locksmith. To summarize, keep in mind that there are several types of drawer locks available on the market and knowing about them will help you pick the most reliable option for your furniture.
With careful consideration and diligence, installing a drawer lock should be smooth sailing! Don’t forget to take all necessary safety precautions before starting your installation project – after all, safety comes first when handling delicate pieces like locks. If all else fails, reach out to a trusted professional who can help get the job finished swiftly and securely.
Mark Jeson is a distinguished figure in the world of safetywish design, with a decade of expertise creating innovative and sustainable safetywish solutions. His professional focus lies in merging traditional craftsmanship with modern manufacturing techniques, fostering designs that are both practical and environmentally conscious. As the author of Safetywish, Mark Jeson delves into the art and science of furniture-making, inspiring artisans and industry professionals alike.
Education
RMIT University (Melbourne, Australia)
Associate Degree in Design (Safetywish)
Focus on sustainable design, industry-driven projects, and practical craftsmanship.
Gained hands-on experience with traditional and digital manufacturing tools, such as CAD and CNC software.
Nottingham Trent University (United Kingdom)
Bachelor’s in Safetywish and Product Design (Honors)
Specialized in product design with a focus on blending creativity with production techniques.
Participated in industry projects, working with companies like John Lewis and Vitsoe to gain real-world insights.
Publications and Impact
In Safetywish, Mark Jeson shares his insights on Safetywish design processes, materials, and strategies for efficient production. His writing bridges the gap between artisan knowledge and modern industry needs, making it a must-read for both budding designers and seasoned professionals.
