
Do you want to learn how to install a strike plate on your metal door frame? Sorting out security for the entrance and exits of any home is no small task – but it doesn’t have to be intimidating! If you follow the steps below, you’ll be well on your way to a secure door frame.
This blog post will guide you through the installation process from start to finish so that you can ensure strength and longevity with just a few steps. You can feel secure in only minutes, knowing that every corner of your property has been properly fitted with the most reliable metals. Read on for tips and tricks tailored specifically to how to install strike plate on metal door frame!
What Will You Need?
- Strike Plate
- Screws
- Drill and bits (depending on the type of screws)
- Pencil or marker to mark where you will make your holes
- Level (optional)
Once you have all the necessary materials, you can begin!
9 Easy Steps on How to Install Strike Plate on Metal Door Frame
Step 1: Measure for the Strike Plate
Start by closing the door and marking the height of the latch bolt on the door frame with your pencil or marker. Then, open the door and align the strike plate to these marks, ensuring that the hole in the strike plate lines up with the latch bolt.
Take your time with this step, as an accurate measurement is key to a well-fitted strike plate. If you have a level, check that the strike plate is straight once aligned. This is the initial step in learning how to install a strike plate on a metal door frame.
Step 2: Mark the Screw Holes
Next, with the strike plate in position, mark the spots where the screw holes are on the door frame. These marks will be the guide for the drilling points. It’s crucial to be precise to ensure a tight fit for the strike plate.
Keep your hand steady and make clear, noticeable marks with your pencil or marker. It’s all part of mastering installing a strike plate on a metal door frame.
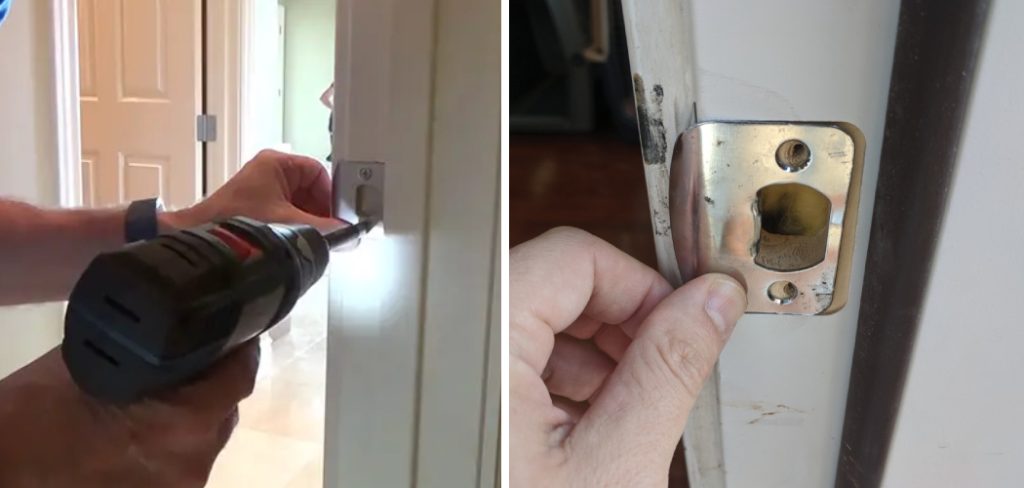
Step 3: Drill the Screw Holes
Carefully drill into the marked spots on the door frame with your drill and the appropriate bit. Ensure you don’t drill too deep; just enough to allow the screws to fit snugly.

Remember, it’s always better to drill less initially and make adjustments later if necessary. This is a critical step in the process of how to install a strike plate on a metal door frame. Proceed with caution to avoid damaging the door frame.
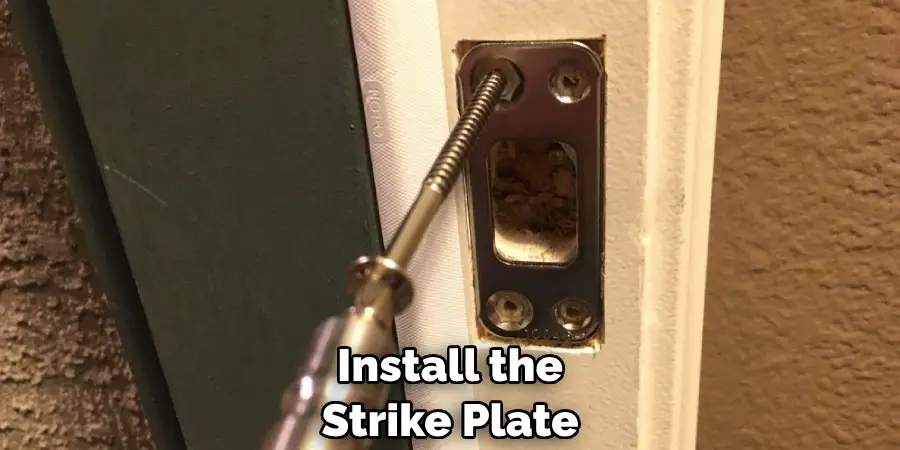
Step 4: Install the Strike Plate
It’s time to secure the strike plate to the door frame. Align the strike plate holes with the drilled holes on the door frame. Start inserting the screws into the holes one at a time, using the drill to secure them.
Ensure the screws are tight, but be careful not to over-tighten, as this could strip the screw holes or deform the strike plate. This step is crucial in understanding how to install a strike plate on a metal door frame.
Step 5: Test the Door
After securing the strike plate, close the door to test whether the latch engages correctly with the strike plate. Turn the door handle and observe if the latch slides into the hole in the strike plate smoothly. If it doesn’t, you may need to adjust the position of the strike plate slightly.
Repeat the test several times to ensure consistent operation. This step is crucial in the process of installing a strike plate on a metal door frame, as it verifies the functionality of your installation.
Step 6: Make Adjustments if Necessary
Adjustments may be required if the latch does not engage with the strike plate smoothly. To adjust the strike plate, remove the screws and reposition the plate slightly higher or lower as needed.
After repositioning, drill new holes if necessary, and then reinstall the plate. Test the door again to ensure the latch and strike plate are aligned correctly. This is a crucial step in how to install a strike plate on a metal door frame, as it ensures optimal functionality and security of your door.
Step 7: Final Tightening
Once you are sure that the strike plate is well-aligned and the door is functioning smoothly, it’s time to give the screws a final tightening. This ensures the strike plate is firmly held in place and will not move over time or under the impact of repeated door use.
Be careful not to over-tighten the screws, which could strip the holes or warp the strike plate. This step finalizes the secure fit of your strike plate onto the metal door frame.
Step 8: Clean Up and Finish
After the final tightening, take a moment to clean up. Remove any metal shavings or debris from the installation, being careful not to scratch the door or frame. You can use a soft cloth for this purpose. If your strike plate has a protective film, it is time to peel it off.
Double-check the strike plate and the door’s operation to ensure everything works smoothly. This is the final step in learning how to install a strike plate on a metal door frame, leaving you with a secure and well-functioning door.
Step 9: Regular Maintenance
Make a habit of regularly checking the strike plate and screws for any signs of wear or loosening. If you notice any such issues, tighten the screws or replace the strike plate if necessary. Regular maintenance prolongs your strike plate’s lifespan and ensures your door’s ongoing security.
This step completes installing a strike plate on a metal door frame, but remember, installation is only the beginning – proper maintenance is key to long-term functionality and security.
By following these nine easy steps, you now have a secure strike plate on your metal door frame! Not only will it keep your home safe and sound, but it also offers a neat, polished look. Installing a strike plate is an effective way to enhance the security of your door while adding a stylish touch to its design.
5 Additional Tips and Tricks
- Use the Right Tools: Always ensure you have the proper tools before starting the installation. An electric drill, a chisel, a screwdriver, a hammer, and safety goggles are essential.
- Measure Carefully: Before you begin, measure where the strike plate will be installed. It’s crucial to ensure the latch and the strike plate align correctly for the door to close properly.
- Pre-drill the Holes: To prevent the metal from splitting, it is a good idea to pre-drill the holes for the screws. Use a drill bit slightly smaller than the diameter of the screws you’re going to use.
- Smooth the Edges: After installing the strike plate on a metal door frame, use a file to smooth any sharp edges that might have been created during the installation process.
- Check the Door’s Operation: After the strike plate has been installed, be sure to check the door’s operation. The door should close and lock easily. If not, you may need to adjust the position of the strike plate.

With these practical tips and tricks, installing a strike plate on a metal door frame should be a simpler and safer task.
5 Things You Should Avoid
- Avoid Rushing the Process: Proper strike plate installation requires patience and precision. Take your time with the process, which may lead to inaccurate measurements or improper alignment.
- Avoid Using Inappropriate Tools: Always use the right tools for the task. Using inappropriate tools can not only compromise the integrity of the installation but also risk personal injury.
- Avoid Skipping Safety Measures: Never overlook safety precautions. Always wear safety goggles to protect your eyes from metal shards that may be produced while drilling or chiseling.
- Avoid Forcing the Door Closed: Do not force it if the door doesn’t close smoothly after the strike plate installation. This could damage both the door and frame. Instead, recheck the alignment and make necessary adjustments.
- Avoid Ignoring the Instructions: Each door and strike plate may have specific installation instructions. Avoid disregarding these as they are designed to guide you for that particular product.
You can ensure your strike plate is installed correctly and securely by avoiding these mistakes.

Conclusion
In conclusion, how to install strike plate on metal door frame is relatively easy. But before you start, make sure tools and materials are prepared. Understanding the strike plate’s purpose is also critical, as it ensures the door knob latch can close tightly when engaged. Taking time to plan your project step by step will help mitigate mistakes.
Remember to check measurements and inspect works regularly for any damages or lapses in security. When everything is done, you should have reinstalled your secure strike plate correctly and improved the overall level of security on your home’s metal door frame. So why take some time now to give this project a go?
With these steps above guiding you through the installation process, you can easily turn your ordinary home hardware into an additional layer of protection against uninvited visitors. Go ahead and make your house safer today!
Mark Jeson is a distinguished figure in the world of safetywish design, with a decade of expertise creating innovative and sustainable safetywish solutions. His professional focus lies in merging traditional craftsmanship with modern manufacturing techniques, fostering designs that are both practical and environmentally conscious. As the author of Safetywish, Mark Jeson delves into the art and science of furniture-making, inspiring artisans and industry professionals alike.
Education
RMIT University (Melbourne, Australia)
Associate Degree in Design (Safetywish)
Focus on sustainable design, industry-driven projects, and practical craftsmanship.
Gained hands-on experience with traditional and digital manufacturing tools, such as CAD and CNC software.
Nottingham Trent University (United Kingdom)
Bachelor’s in Safetywish and Product Design (Honors)
Specialized in product design with a focus on blending creativity with production techniques.
Participated in industry projects, working with companies like John Lewis and Vitsoe to gain real-world insights.
Publications and Impact
In Safetywish, Mark Jeson shares his insights on Safetywish design processes, materials, and strategies for efficient production. His writing bridges the gap between artisan knowledge and modern industry needs, making it a must-read for both budding designers and seasoned professionals.
