
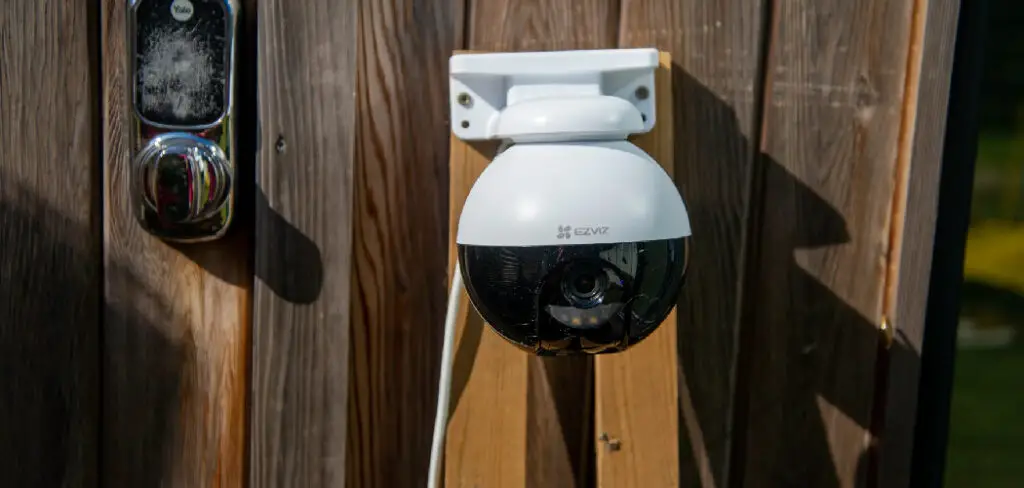
Ring cameras are a great way to keep an eye on what’s happening at home, but mounting them can be challenging. If you don’t have screws handy, don’t worry – there are a few other ways to mount your Ring camera without them. This article will show you how to mount ring camera without screws. Let’s get started!
What Causes Ring Cameras to Fall?
There are a few reasons why your Ring camera might fall. The most common cause is that the camera needs to be mounted correctly. If the camera isn’t screwed into place, it can easily fall off. Another reason Ring cameras might fall is because of the camera’s weight. If the camera is too heavy, it can fall off of the mount.
Additionally, if the camera is mounted in a high-traffic area, it can be bumped or knocked off the mount. Cameras also fall because of their quality. If the camera is well-made, it might be able to stay on the mount. Lastly, if the camera is mounted in an area with bad lighting, it can be challenging to see, and this can cause the camera to fall.
Why Should You Mount Ring Camera Without Screws?
There are a few reasons why you might want to mount your Ring camera without screws. The most common cause is that you don’t have screws handy. If you’re mounting the camera in a hurry, you might not have time to find screws. Additionally, if you’re mounting the camera in an area where it’s difficult to find screws, such as on a brick wall, you might not be able to use screws. Another reason you might want to mount the camera without screws is because you don’t want to damage the wall. For example, if you’re mounting the camera on drywall, you might not want to use screws because they can damage the wall.

Additionally, if you’re mounting the camera on a brick wall, you might not want to use screws because they can damage the brick. Finally, you might want to mount the camera without screws because you’re using a temporary mount. Again, if you’re only going to be using the mount for a short period, you might not want to use screws.
Needed Materials:
Mounting Tape or Adhesive:
Mounting tape or adhesive can be a great alternative to screws when mounting your Ring camera. These options are solid and durable, perfect for holding up the camera’s weight. When using mounting tape or adhesive, make sure to choose a high-quality option that is specifically designed for outdoor use.
Magnetic Mount:
You can use a magnetic mount for your Ring camera if you have a magnetic surface available, such as a metal door or window frame. These mounts have a strong magnet that will securely hold your camera in place without the need for any screws.
Suction Cup Mount:
Similarly to a magnetic mount, if you have smooth surfaces available such as glass or tile, you can use a suction cup mount to attach your Ring camera. When pressed onto the surface, these mounts create a vacuum seal, making them an excellent option for temporary mounting. However, check the suction cup’s strength and durability before using it for your camera.
11 Some Effective Ways How to Mount Ring Camera Without Screws:
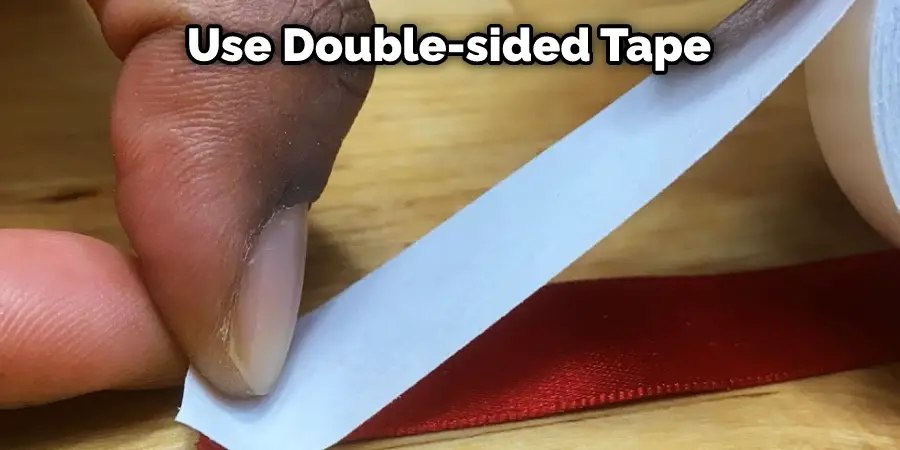
1. Use Double-sided Tape
One of the easiest ways to mount your Ring camera without screws is to use double-sided tape. This type of tape is strong and will hold the camera in place. Additionally, it’s easy to use and won’t damage the wall. First, clean the area where you’re going to mount the camera. Then, apply the double-sided tape to the back of the camera. Next, pressure is applied to the camera so the tape sticks to the wall. Finally, wait a few minutes for the tape to set before attaching the camera. Avoid using too much tape, which can make removing the camera rugged.
2. Use Command Strips
Another easy way to mount your Ring camera without screws is to use command strips. These strips are strong and will hold the camera in place. Additionally, they’re easy to use and won’t damage the wall. First, clean the wall where you’ll be mounting the camera. Then, peel off the backing on the command strips and attach them to the back of the camera.
Finally, press the camera into place on the wall. If you’re using command strips, checking that they’re secure before you leave the house is essential. Test the connection by giving the camera a gentle tug. If it feels like it will come off the wall, add another command strip or two. You can also use this method to mount the camera on a door or window.
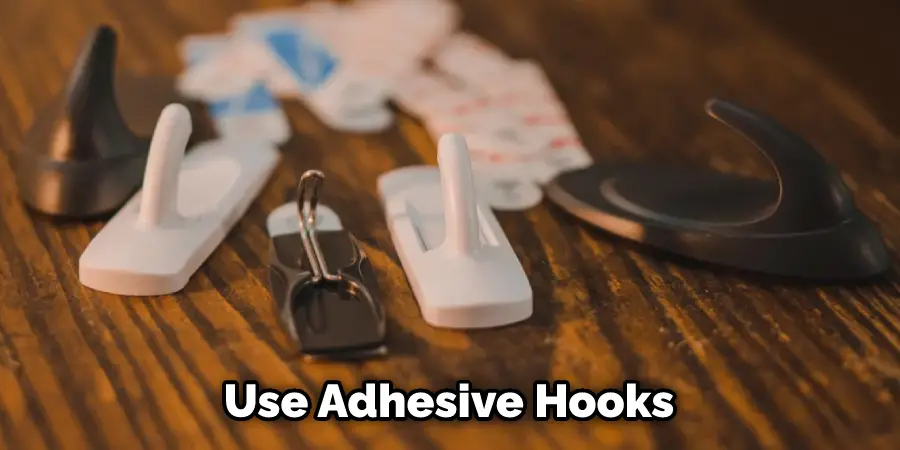
3. Use Adhesive Hooks
You can use adhesive hooks if you don’t have double-sided tape or command strips. These hooks are strong and can hold your camera in place. Just make sure to clean the surface where you’ll be attaching the hooks. First, remove the battery cover and insert the batteries. Next, peel off the adhesive backing on the hook and attach it to the bottom of the camera. Finally, peel off the other adhesive backing and attach the camera to the desired surface. If you need to remove the camera, peel off the adhesive hook.
4. Use a Suction Cup
If you want a temporary mount, you can use a suction cup. This is a good option if you’re going to be moving the camera around a lot or if you want to test it out before permanently mounting it. You can find suction cups at most hardware stores. First, clean the area where you’ll be mounting the camera. Then, wet the suction cup and place it on the camera. Press it firmly into place.
Once the suction cup is secure, twist the camera into place. Make sure it’s tight so it doesn’t fall off. You can also use command strips or double-sided tape in place of the suction cup. Just be sure that whatever you use can hold the camera’s weight.
5. Use Magnetic Tape
If you want a temporary mount, you can use magnetic tape. This is a good option if you’re going to be moving the camera around a lot. Just make sure that the surface you’re attaching the tape to is clean and smooth. Apply the tape to both the camera and the surface, then press the camera firmly in place. To remove the camera, peel off the tape. You may need to use a bit of force to get the camera to release from the tape. Avoid using this method on painted or varnished surfaces, as the tape may damage the finish.
6. Use Hot Glue
Hot glue is a good option if you need a temporary mount. Just be careful not to get the hot glue on your fingers. First, apply a small amount of glue to the bottom of the mount. Next, press the mount onto the surface where you want to place your camera. The hot glue will hold the mount in place temporarily. You can also use double-sided tape if you don’t have hot glue. Just be sure to use strong tape so that the mount doesn’t fall off. If you need a more permanent solution, you can use screws or nails.

7. Use Push Pins
You can use push pins if you’re looking for a temporary mount. Just be careful not to put the pins in too far, as they can fall out and damage your camera. First, find a level spot on your wall or door. Next, use a tape measure to find the center of the area where you’re mounting the camera. Once you’ve found the center, hold the camera up to the wall and mark the four mounting holes with a pencil. Now, insert your push pins into the four mounting holes.
Be careful not to push them in too far, as they can fall out and damage your camera. Once the pins are in place, you can adjust the camera to get the perfect view. When you’re happy with the position, push the pins until they flush with the wall.
8. Hang It on a Nail
If you’re looking for a more permanent solution, you can use screws or nails. Just be sure to use the appropriate type of screw or nail for the surface you’re working with. For example, use drywall screws for drywall and masonry nails for bricks or mortar. To attach your Ring Camera to a wall using screws or nails, first, use the mounting bracket as a template to mark the appropriate holes.
Then, remove the bracket and drill pilot holes. Finally, screw or nail the bracket into place. Make sure the bracket is secure before hanging the camera. You may need someone to hold the camera in place while you attach it to the bracket.
9. Use a Mounting Bracket
Another option for mounting your Ring Camera is to use a specific mounting bracket designed for this purpose. These brackets are usually made of metal and have holes that line up perfectly with the camera’s mount. First, use the bracket as a template to mark the appropriate holes on your wall. Then, drill pilot holes and screw the bracket into place using screws or drywall anchors. Finally, attach the camera to the bracket using the provided screws. This method ensures a secure and stable mount for your camera.
10. Consider Security Accessories
In addition to mounting options, there are also security accessories you can use with your Ring Camera to further ensure its safety and stability. These include wire covers, which can protect the camera’s cords from being tampered with or cut, and security cages, which provide an extra layer of protection against theft or vandalism. You can also use weatherproof casing if you plan on mounting the camera outdoors. These accessories are worth considering for added peace of mind when using your Ring Camera.
11. Regularly Check and Adjust Your Mount
Once you have mounted your Ring Camera, it is important to regularly check and adjust the mount if necessary. Over time, the adhesive on hooks or command strips may weaken, screws or nails can become loose, and other factors may affect the stability of your camera’s mount. Make sure to inspect it periodically and make any adjustments as needed to ensure your camera remains securely in place. This will also help to prevent any accidents or damage caused by a loose or unstable mount.
Following these tips and methods on how to mount ring camera without screws for mounting your Ring Camera can help to ensure a safe and sturdy mount for your camera. Whether you are looking for a temporary or permanent solution, there are various options available to suit your needs. It is always important to carefully follow the instructions provided with your camera and any accessories to ensure proper installation and maximum security.
Do You Need to Use Professionals?
In most cases, you do not need to hire professionals to install your Ring Camera. The methods outlined above are simple and can be easily done by anyone with basic DIY skills. However, if you are unsure or uncomfortable with installing the camera yourself, it may be beneficial to seek professional help. This will ensure that the camera is properly mounted and secure, giving you peace of mind knowing your home is being monitored effectively.
Additionally, professionals may be able to offer further suggestions or solutions for mounting your Ring Camera in unique situations. Ultimately, the decision to use professionals is up to personal preference and comfort level. So, choose the option that works best for you and enjoy the added security and peace of mind that comes with mounting your Ring Camera.
Tips and Warnings on How to Mount Ring Camera Without Screws:
Tips:
1. Be sure to clean the surface before mounting the camera.
2. If you’re using a suction cup, ensure it’s wet before attaching it to the camera.
3. Use strong tape if you’re using double-sided tape to mount the camera.
4. Be careful not to get hot glue on your fingers.
5. Push pins can fall out, so be careful not to push them in too far.
Warnings:
1. Don’t use hot glue on painted or varnished surfaces.
2. Be sure to use the appropriate type of screw or nail for your working surface.
3. Ring cameras are not weatherproof, so don’t mount them outdoors.
4. Don’t mount your camera in a place where it could be easily damaged.
5. Be sure to read the instructions that come with your camera before mounting it.
6. Don’t mount your camera in a place where it could fall and hurt someone.
Frequently Asked Questions:
Q: Can I Mount My Ring Camera on a Window?
A: Yes, you can use any of the methods mentioned above to mount your Ring camera on a window. You can also use a suction cup or magnetic tape for a temporary mount. It’s important to make sure the surface is clean and smooth before attaching the camera.
Q: Can I Mount My Ring Camera Outside?
A: No, Ring cameras are not weatherproof and should not be mounted outside. They are designed for indoor use only. The camera may malfunction or get damaged if exposed to outdoor elements. You can use them in a covered area, but make sure to protect them from rain or extreme temperatures.
Q: Can I Use Command Strips to Mount My Ring Camera?
A: Yes, you can use command strips as an alternative to screws or nails. Make sure to use strong command strips that can hold the weight of your camera. It’s also important to clean the surface before attaching the camera with command strips.
Q: Can I Move My Ring Camera After Mounting It?
A: Yes, you can move your camera after mounting it using any of the methods mentioned above. However, make sure to clean the surface and remove any adhesive residue before attaching it to a new location. It’s also important to follow Ring’s instructions for the safe removal and relocation of the camera.
Q: Can I Mount My Ring Camera on a Ceiling?
A: Yes, you can mount your Ring camera on a ceiling using any of the methods mentioned above, such as screws or nails. Just make sure to use appropriate hardware for the type of ceiling you have, and ensure that the camera is securely attached. You can also use command strips or hot glue to temporarily mount a ceiling.
Conclusion
So there you have it – now you know how to mount ring camera without screws. Just be sure to choose the right method for your needs, and be careful not to damage your camera or the surface you’re mounting it on. We hope this article has been helpful. Thanks for reading!
Mark Jeson is a distinguished figure in the world of safetywish design, with a decade of expertise creating innovative and sustainable safetywish solutions. His professional focus lies in merging traditional craftsmanship with modern manufacturing techniques, fostering designs that are both practical and environmentally conscious. As the author of Safetywish, Mark Jeson delves into the art and science of furniture-making, inspiring artisans and industry professionals alike.
Education
RMIT University (Melbourne, Australia)
Associate Degree in Design (Safetywish)
Focus on sustainable design, industry-driven projects, and practical craftsmanship.
Gained hands-on experience with traditional and digital manufacturing tools, such as CAD and CNC software.
Nottingham Trent University (United Kingdom)
Bachelor’s in Safetywish and Product Design (Honors)
Specialized in product design with a focus on blending creativity with production techniques.
Participated in industry projects, working with companies like John Lewis and Vitsoe to gain real-world insights.
Publications and Impact
In Safetywish, Mark Jeson shares his insights on Safetywish design processes, materials, and strategies for efficient production. His writing bridges the gap between artisan knowledge and modern industry needs, making it a must-read for both budding designers and seasoned professionals.
