
Whether you’re upgrading to a new smart thermostat, painting a wall, or troubleshooting a wiring issue, there will come a time when you need to remove your existing thermostat. The task might seem a bit technical, especially with wires involved, but Honeywell Home thermostats are designed for straightforward installation and removal. With the right steps and a focus on safety, anyone can handle this DIY project confidently.
This guide will provide a simple, safe, and effective process for detaching your device from the wall. We’ll show you exactly how to remove a Honeywell Home thermostat without causing damage to your HVAC system, the wall, or yourself, ensuring a smooth transition to whatever comes next.
Why Proper Removal Is Important
Removing a thermostat might look as simple as pulling it off the wall, but doing it incorrectly can lead to significant problems. The primary concern is HVAC system safety. The low-voltage wires connected to your thermostat control your entire heating and cooling system. If you fail to turn off the power at the circuit breaker, you risk an electrical short that can blow a fuse in your HVAC control board or, in a worst-case scenario, damage the transformer. This can turn a simple DIY task into a costly repair call.
Beyond electrical safety, proper removal protects your home and equipment. Simply yanking the unit off the wall can damage the delicate thermostat wiring or cause the wires to fall back into the wall cavity, making installation of a new device much more difficult. It can also damage the drywall. Following a careful, step-by-step process ensures the safety of your HVAC system, preserves the wiring for future use, and leaves your wall intact.
7 Step-by-Step Guide: How to Remove Honeywell Home Thermostat
Step 1: Turn Off Power at the Circuit Breaker
This is the most critical step for your safety and the protection of your HVAC system. Before you touch the thermostat, go to your home’s main electrical panel. Locate the circuit breaker that supplies power to your heating and air conditioning system and switch it to the “Off” position. Some homes may have separate breakers for heating and cooling, so be sure to turn off both. This eliminates the risk of electrical shock and prevents the low-voltage thermostat wires from shorting out, which could damage your HVAC control board.
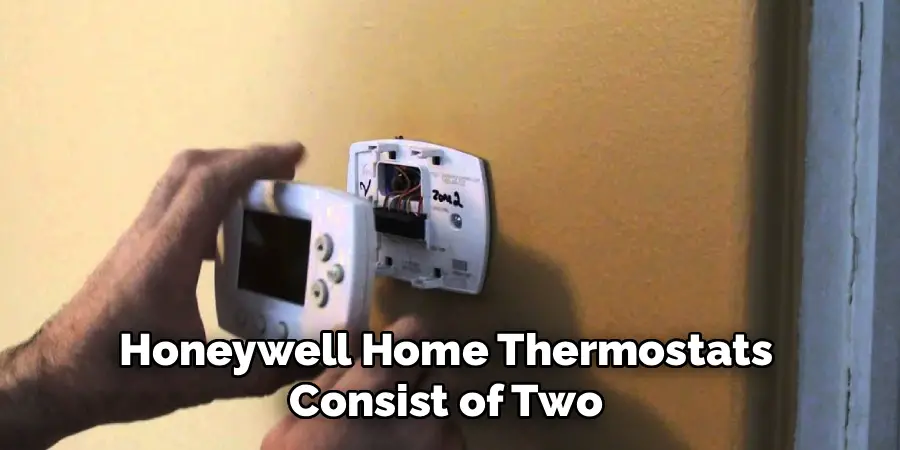
Step 2: Gently Remove the Thermostat Faceplate
Most Honeywell Home thermostats consist of two main parts: the faceplate (the front cover with the screen and buttons) and the backplate (the base that mounts to the wall and holds the wiring). The faceplate removal is usually a tool-free process. Grip the sides of the thermostat firmly and pull it straight toward you. It should snap off the backplate with a gentle tug. If it feels stuck, check for a small release button or tab on the top or bottom of the unit that you may need to press.
Step 3: Take a Photo of the Thermostat Wiring
Before you disconnect a single wire, take a clear photo of the current wiring setup with your smartphone. This is an invaluable backup reference. Make sure the lighting is good and that the letters next to each terminal (like R, C, W, Y, and G) are clearly visible in your picture. This photo will be your best friend if any labels fall off or if you get confused during the installation of your new thermostat. It’s a simple action that can save you from a major headache later.
Step 4: Label Each Wire Before Disconnecting
Your thermostat’s backplate has terminals labeled with letters that correspond to each wire’s function. While your photo is a good backup, physically labeling the wires is the most reliable method. Most new thermostats come with a small sheet of sticker labels for this purpose. If you don’t have those, you can use small pieces of masking tape. Carefully wrap a label around each wire and write down the letter of the terminal it’s connected to. For example, label the wire in the “R” terminal as “R.” Do this for every single wire.
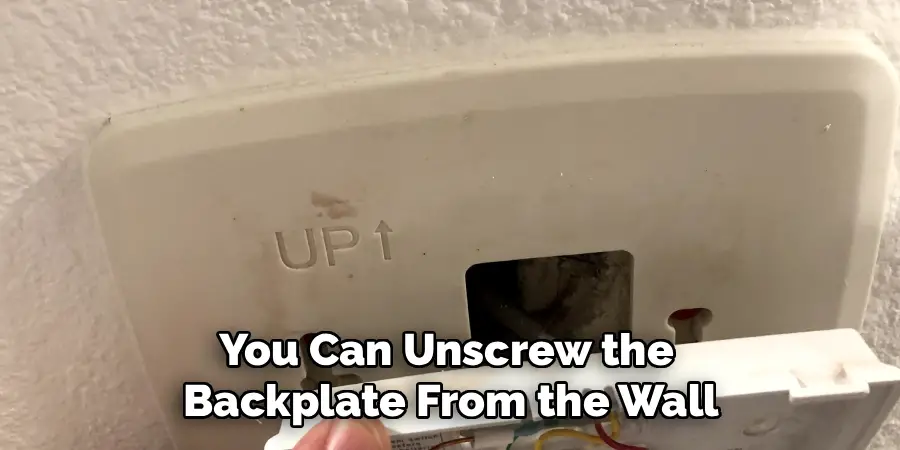
Step 5: Disconnect the Wires and Unscrew the Backplate
Once every wire is labeled, you can begin disconnecting them. Most terminals have a small push-button or a screw that holds the wire in place. Use a small screwdriver to loosen the screws or press the buttons to release the wires. After all the wires are disconnected, you can unscrew the backplate from the wall. Use a Phillips head screwdriver to remove the mounting screws. As you pull the backplate away, carefully guide the bundle of thermostat wiring through the opening to prevent any damage.
Step 6: Secure the Wires to Prevent Loss
With the backplate removed, you will have a bundle of wires sticking out of the wall. It is very easy for these wires to slip back into the wall cavity, which would create a much bigger problem. To prevent this, secure them immediately. You can wrap the bundle of wires around a pencil or pen and lay it across the hole, or you can simply use a piece of tape to secure the wires to the wall next to the opening. This ensures they will be right where you need them for the next step of your project.
Step 7: Remove Wall Anchors and Patch the Wall (Optional)
If you are upgrading to a new thermostat, you will likely see the old plastic wall anchors left in the drywall. If the new thermostat’s backplate doesn’t cover the old holes, you should remove them. You can usually pull them out with a pair of pliers or back them out with a screwdriver. Once the anchors are gone, you can fill the small holes with a bit of spackle. After the spackle dries, a light sanding will make the wall smooth and ready for a fresh coat of paint or the installation of your new device.
Common Removal Mistakes
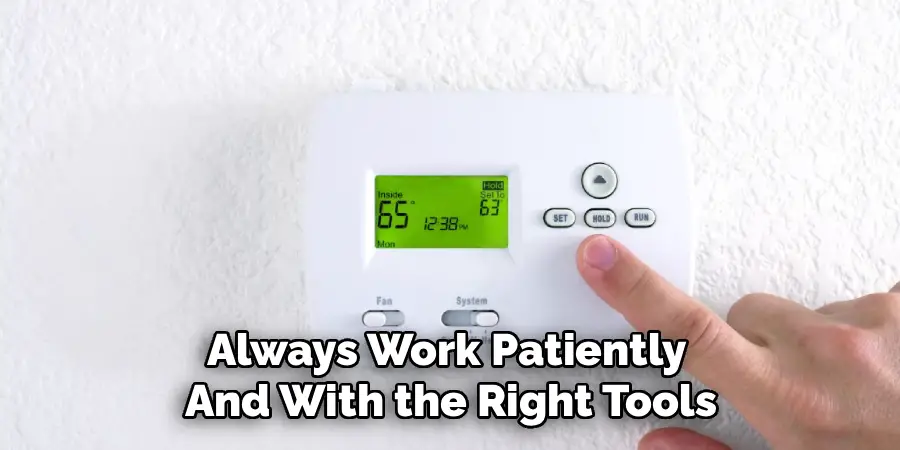
One common mistake when removing old wall anchors is using excessive force, which can damage the drywall around the hole. If you pull too hard or use improper tools, the anchor may tear a larger section of drywall, creating a more complicated repair. Another frequent error is not backing out the anchor carefully with a screwdriver if it is a threaded type.
Twisting it out without control can strip the drywall or leave remnants behind. Additionally, skipping the step of cleaning out debris or dust from the hole before applying spackle can affect how well the patch adheres, leading to a less smooth and durable repair. Always work patiently and with the right tools to minimize damage during removal.
Frequently Asked Questions
Do I absolutely have to turn off the power to remove my thermostat?
Yes, this step is non-negotiable. While thermostat wires are low-voltage (typically 24V), they can still cause a short circuit if they touch. This can blow a fuse or damage the control board in your HVAC unit, leading to an expensive repair. Turning off the power at the circuit breaker is the most important safety measure for both you and your equipment.
How do I know if my Honeywell thermostat uses batteries or is hardwired?
Most Honeywell thermostats, especially modern digital and smart models, use both. They are hardwired to the HVAC system for primary power (via a C-wire) and also have batteries as a backup to maintain settings during a power outage. When you remove the faceplate, you will likely see batteries inside. The presence of a wire in the “C” terminal on the backplate indicates it is also hardwired.
Can I reuse the old wires with my new thermostat?
Yes, in almost all cases, you can reuse the existing thermostat wiring, provided it is in good condition and has enough conductors for your new thermostat. Smart thermostats often require a C-wire (common wire) for continuous power. If your old setup doesn’t have one, you may need to check if an unused wire is available in the wall or consider using a C-wire adapter.
What tools do I need to remove a Honeywell Home thermostat?
The job requires very few tools. At a minimum, you will need:
- A Phillips head screwdriver (for the mounting screws).
- A small flathead screwdriver (sometimes needed for wire terminals).
- Labels or masking tape and a pen (for labeling wires).
- A smartphone (to take a photo of the wiring).
- Optionally, a non-contact voltage tester to confirm the power is off.
My thermostat has a mercury switch. How do I dispose of it?
If you have a very old, non-digital Honeywell thermostat, it may contain a small glass vial with mercury. Mercury is a hazardous substance and must be disposed of properly. Do not throw it in the regular trash. Many local municipalities and hardware stores have recycling programs for mercury-containing devices. Check with your local waste management authority for safe disposal options.
Conclusion
Removing a Honeywell Home thermostat is a manageable DIY task that opens the door to upgrades, repairs, and home improvements. The key to success lies in a methodical approach that prioritizes safety. By turning off the power, documenting your wiring with photos and labels, and carefully detaching the unit, you can prevent damage to your expensive HVAC system and ensure a hassle-free process.
Don’t be intimidated by the web of colorful wires. Armed with the knowledge from this guide, you can confidently take on this project. Now that you know how to remove Honeywell Home thermostat the right way, you are ready to tackle your next home climate project with skill and precision.
Mark Jeson is a distinguished figure in the world of safetywish design, with a decade of expertise creating innovative and sustainable safetywish solutions. His professional focus lies in merging traditional craftsmanship with modern manufacturing techniques, fostering designs that are both practical and environmentally conscious. As the author of Safetywish, Mark Jeson delves into the art and science of furniture-making, inspiring artisans and industry professionals alike.
Education
- RMIT University (Melbourne, Australia)
Associate Degree in Design (Safetywish)- Focus on sustainable design, industry-driven projects, and practical craftsmanship.
- Gained hands-on experience with traditional and digital manufacturing tools, such as CAD and CNC software.
- Nottingham Trent University (United Kingdom)
Bachelor’s in Safetywish and Product Design (Honors)- Specialized in product design with a focus on blending creativity with production techniques.
- Participated in industry projects, working with companies like John Lewis and Vitsoe to gain real-world insights.
Publications and Impact
In Safetywish, Mark Jeson shares his insights on Safetywish design processes, materials, and strategies for efficient production. His writing bridges the gap between artisan knowledge and modern industry needs, making it a must-read for both budding designers and seasoned professionals.
